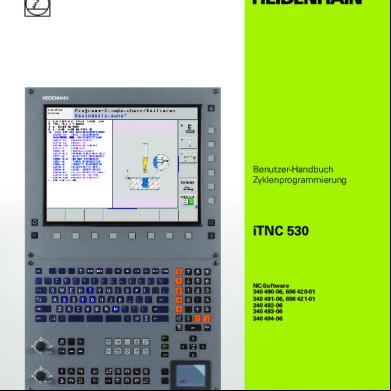
Heidenhain 2500b Hand Book 47644m
This document was ed by and they confirmed that they have the permission to share it. If you are author or own the copyright of this book, please report to us by using this report form. Report 3b7i
Overview 3e4r5l
& View Heidenhain 2500b Hand Book as PDF for free.
More details w3441
- Words: 46,813
- Pages: 208
Screen displays
PROGRAMMING 1
ELK
2
BLK
3
TOOL
4
TOOL
RND FDRM Y+0 FORM y+100 IIEF
Operating
EDITING
0.1
1 1 s
--------------------------------
x .., Y z etc. *: D: M: ROT: SCL: cc:
Block after next E
YN c + + F
Status display
37,580 82,600 37,000 0,7§0000 MS/9
Type of position display, switchable with MOD (further displays: NOML, DIST., LAG - see index “General Position coordinates t “control is started” display Datum shift, shown as an index on the shifted axis. Mirror image, shown as an index on the mirrored axis. Basic rotation of the coordinate system Scaling Circle center or pole
T . ... z: s:
Called tool Spindle axis Spindle speed
F: M:
Feed rate Spindle status (M03,
M04,
block
Next block
Status display: ACTL. :
t
block
1000
ROT SCL 2
Current
2
98,354 32,000
Tl
Preceding
x+0 z-20 x+100 z+0 L+l R+l
2
0.2
CRLL
mode
/ Error messages
M05, M13, M14)
Information”)
Guideline for procedure from preliminary operations to workpiece machining Sequence
Action
Iielect
Cross
Operating mode
tools
reference
Page I
I-
I
machining
Workpiece
drawing
Workpiece
coordrnates
2
Set datum
for workpiece
3
Determine
speeds
4
Switch
5
Traverse reference points (homing the machine)
Switch
6
Clamp workpiece
Clamping
Spindle speed, feed rate diagrams
and feed rates
on machine
Machine manual
I
Al5
A20
operating
on
I Ml
instructions
I
-
datum setting and compensation of workpiece misalignment or Manual operation
Ml3
Machine handbook: Tool change
in or from external
10
Graphic (without
storage
Back fold-out page, program example; Programming and editing
PI
Program
M20
program simulation axis movements) run
12
Opttmize
program
run
prnming
if necessary
and
~ P3
Programming and editing 13
Insert tool and machine workpiece automatic program run
Program Program run, Full sequence
run
M20
~
Operating
Machine
TNC 2500B
Operating Manual
Giii!
Entering
operation
@ a
Electronic
Dq
Positioning
3 Dl
Program Program
El
Programming
Modes
the Workpiece Straight
handwheel
Contour
line
Circle with known
center
run, Single block
Circle with known
radius
run, Full sequence
Circle with tangential
with manual
data input
Round corners/ Tangential contour
Programming
Define/Call
Modes Programming
El
approach
and departure
a tool
Specify mode tool radius compensation
and editing
Test run with graphic
Q
transition
Define/Call
simulation
a cycle
Label/Call a subprogram and program section repeats Program
Programmed
Management Naming/selecting
FE!
program
Touch probe functions
a program
Clear program
Ia
Programmable
wil
External
Ed
qII
program
program
Supplementary
call
input and output operating
modes
Entering
and Editing
Number
uP
Graphics II
Graphic
•!lI m
operating
point, sign change
Key for polar coordinates Key for Incremental
modes
dimensions
Enter parameter instead Define parameter
Magnify
Transfer actual posttron to memory
detail simulation
Q
Q
a
Feed rate override
WA F’/a Spindle
speed overnde
of a number,
Cursor keys, Jump to a certain block or cycle No entry, Enter data, Terminate block entry
Override 0 Q ns~/~
keys
Define blank form, reset blank form
Start graphic
El
Values
q m Axis keys q ...m Decimal
m
stop/Terminate
Delete block
Contents
General Information
Machine Operating Modes
Programming Modes
Introduction MOD Functions Coordinates Linear and Angle Cutting Data
Encoders
Switch-On Manual Operation 30 Touch Probe Datum Setting Electronic Handwheel Positioning with Manual Program Run
Al A8 Al 85 Al 8 A20
Ml M2
M21 Data Input
Conversational Programming Program Selection Tool Definition Cutter Path Compensation Tools Feed Rate F/Spindle Speed S/Miscellaneous Functions M Programmable Stop/Dwell Time Path Movements Linear Movement/Cartesian Circular Movement/Cartesian Polar Coordinates Contour Approach and Departure Predetermined M Functions Program Jumps Program Calls Standard Cycles Coordinate Transformations Other Cycles Cycle 13: Oriented spindle stop Parameter Programming Programmed Probing Digitizing 3D Contours Transferring Actual Positions to Program Test Run Test Graphics External Data Transfer
Ml3 Ml5 Ml7 Ml9
PI P6 PI 0 PI 5 PI8 P20 P2 ‘I P22 P26 P3 ‘I P42 P49 P52 P56 P65 P66 P95 PI 04 PI 06 PI 07 PI 22 PI 25 PI 34 PI 36 PI 37 PI 40
Manufacturer’s Certificate: This device is noise-suppressed in accordance with the Federal German regulations 1046/1984. The Federal German postal authorities have been notified of the market introduction of this unit and have been granted permission to test the series for compliance with the regulations. If the incorporates the device into a larger system then the entire system must comply with said regulations.
I General
I
Information
(A)
Introduction
I Brief description Machine
of TNC 25008
operating
Programming Accessories:
3
modes
and editing
4 operating
modes
3D Touch Probe Systems FE 401 Floppy Disk Unit HR 130/HR 330 Electronic
MOD Functions
Handwheels
8 Position
displays
9
Traverse range limits
10
parameters
1I
Coordinate
15
Coordinates system
Datum Absolute
16 and incremental
coordinates
Linear and angle encoders
1 ;7
18
Cutting Data Feed rate diagram
20
Spindle
2’1
speed diagram
Feed rate diagram
HEIDENHAIN TNC 2500B
for tapping
General Information
22
Introduction
Description
The TNC 2500B from HEIDENHAIN is a shop-floor programmable contouring control with up to 4 axes for milling and boring machines as well as for machining centers. It is conceived for the “man at the machine”, featuring conversational programming and graphic simulation of workpiece machining. Fixed cycles, coordinate transformations and parameter programming are available, as vvell as functions for 3D touch probes. Its “parallel operation” feature permits a new program to be created (or a program located in the control memory to be edited) while another program is being executed. Programs can be output to peripheral devices and read into the control via the RS-232-C allowing programs to be created and stored externally.
Conversational or IS0 programming
Inaddition to programs written in conversational the snap-on keyboard or via the data interface. reside in memory at the same time.
Compatibility
This control can execute programs from other HEIDENHAIN functions described in this manual.
Structure of manual
This manual addresses the skilled machine controlled boring and milling. TNC beginners already worked
format, IS0 programs can also b’e entered, either via Both interactive format and IS0 format programs can
operator
controls,
and requires
provided
appropriate
are advised to work through this manual and the examples with a HEIDENHAIN TNC, you can skip familiar topics.
they contain
knowledge
The sequence of chapters in this operating manual is according functions, as well as according to the logical working order: - manual
is described
modes
setup - set display
value - machine
The following
workpiece.
- test program.
symbols
are used in this manual:
Empty square:
keys for numerical
input on the TNC operatilig
cl Square with symbol, e.g. Circle with symbol, e.g.
L
HEIDENHAIN TNC 2500B
Program
L?l keys on the machine
operating
0
The pages of this manual
Typeface for screen displays
other keys on the TNC operating
are distinctly
blocks and TNC screen dialogs
marked
with the relevant
are printed
General Information
key symbols.
in this SPECIAL TYPE
I
in
and key
Programming modes: Enter program
Symbols for keys
operatir?g
If you have
Mechine operating modes: Switch-on
l
to control
only the
of non-NC-
systematically.
This manual deals with programming in HEIDENHAIN format. IS0 programming detail in a separate operating manual for the TNC 25OOB.
l
data interface,
Page Al
+
Introduction
Program Examples
The example programs in this manual are based on a uniform blank size and can be displayed on the screen by adding the following blank definition (see index “Programming Modes”, Program Selection):
BLK FORM 0.1 Z X+0 Y+O Z-40 BLK FORM 0.2 X+100 Y+lOO Z+O The examples can be executed on machine tools with tool axis Z and machining plane XY. If your machine uses a different axis as the tool axis, this axis must be programmed instead of Z and likewise the corresponding axes for the machining plane. Beware
Buffer batteries in the control
of collisions
Buffer batteries interruption. When
when
protect
executing
the stored
the example
programs
and machine
parameters
against
loss due to power
the message Battery type: 3 M-size batteries, leak-proof IEC designation “LR6”
EXCHANGE BUFFER BATTERY appears,
you must change
The batteries
Changing the battery
programs!
should
Battery replacement
the batteries.
be replaced
is described
once a year.
in the manual
of the machine
manufacturer.
Error messages The TNC checks
input data and status of the control
Cause and reaction
of the control:
/
Input range exceeded
The permitted range of values is exceeded: e.g. feed rate too high. The value is not accepted and an error message appears.
Incompatible/ contradictory inputs
E.g. L X+50 X+100
Malfunction of the machine or control
During “TEST” or during program execution, the TNC stops with an error message before executir the corresponding block and displays the block number in which an error was found. Malfunctions that affect operating blinking error messages. Note down
safety cause
and machine Remedy: Clear the value with the “CE” key, enter and confirm the correct value.
‘cl 1
Change to the “Programming” operating mode. The error can normally be found either in the block with the displayed block number or in a previously executed block. Then: correct the error. Operating mode “Full sequence” and restart. Switch
Remove Attempt
the error message!
off the machine
or the control
the fault if possible. to restart.
If the program then runs correctly, was only a spurious malfunction.
the problem
If the same error message comes up again, the customer serbrice of the machine manufacturer.
Page
A2
General
Information
HEIDENHAIN TNC 2500B
TNC 2500B Brief description Control type
Contouring
Traversing possibilities
Straight lines in 3 axes Circles in 2 axes Helix
Parallel operation
Programming
Graphics
Test graphics in the “Program
Program
input
control
for 4 axes
and program
In HEIDENHAIN
format
Max. 0.001 mm or 0.0001
Program
For 32 programs,
Tools
simultaneously
run” operating
or according
Input resolution memory
execution
modes
to IS0
inch or 0.001”
battery buffered:
4000
program
blocks
Up to 254 tool definitions in a program Up to 99 tools in the central tool file
Programmable Contour
functions
Straight line, chamfer Circle (input: center and end point of the arc or radius and end point of the arc), circle connected tially to the contour (input: arc end point) Corner rounding (input: radius) Tangential approach and departure from a contour
Program jumps
Subprograms,
Fixed cycles
Drilling cycles for pecking, tapping Milling cycles for rectangular pocket, circular pocket, slot “Subcontour List” cycles for milling pockets and islands with irregular
program
section
repeats, call of other programs
Coordinate transformations
Move and rotate the coordinate
Probing functions
For 3-D touch trigger
Digitizing
With TS 120 and software expansion Optional evaluation software for PC
Parameter programming
Mathematical 6 / m);
Traversing range
Max. + 30000
Cutting data
Traversing speed: max. 30 m/min Spindle speed: max. 99999 rpm
system, mirror
contours
image, scaling
probe option
functions (= / + / - / x / t / sin / cos / angle a from axis sections parameter comparison (= / =k / > / <)
f
mm or 1181 inches or 1181 inches/min
Hardware Component units
Logic unit, control
Block processing time
1500 blocks/min
Control loop cycle time
6 ms
Data interface
RS-232-C/V.24 Data transfer speed:
Ambient temperature
HEIDENHAIN TNC 2500B
and monochrome
screen
(40 ms)
max. 19200
baud
Operation: O” C to 45” C (32O F to 113O F) Storage: -30” C to 70° C (-22O F to 158O F)
General Information
Page A3
tangen-
Machine modes
Manual
operation
operating
The axes can be moved via the external axis direction buttons. Workpiece datum can be set as desired. The TNC functions as a conventional numerical position readout (DRO).
MRNURL p-
OPERATION
RCTL.
x
49,258 23,254 15,321
+
Y + Ea +
Electronic Handwheel
The axes can be moved either via an electronic handwheel or via the external axis direction buttons. It is also possible to position by defined jog increments.
INTERPOLRTION
ACTL.
FACTOR:
x
Fz
The axes are positioned according to the data keyed in. These data are not stored.
+
+
POSITIONING
ACTL.
49,258 23,254 15,321
+
Y El
Positioning with manual data input (MW
S
MANURL
El
DRTR
49,258 23,254 15,321
+
z+ v
INPUT
+
0 Program
run
Full sequence
Single
block
A part program in the memory executed by the machine.
of the control
is PROGRRM
After starting via the machine START button, the program is automatically executed until the end or a STOP is reached. Each block is started separately START button.
RUN/FULL
0
BEGIN
1
BLK
2
BLK
PGH FORH Y-70 FORM Y+70
with the machine RCTL.
I z
+ +
SEQUENCE
666 0.1
tln Z
X-85 Z-30 X+85 z+0
0.2
49,258 15,321
Y
Id0
Page A4
General
MS/9
Information
+
23,254
MS/9
Programming and editing operating modes Programming and editing
Part programs can be entered, looked over and altered in the “Programming and editing” operating mode.
PROGRRMflING
RNO
EDITING
.S
In addition, programs can be read in and output via the RS-232-C data interface.
18
L
19
CYCL
OEF
6.0
20
CYCL
DEF.
6.1
300
2+2 m F15998 ROUGH-OUT SET DEPTH
UP-2 -20
-----_-_-----------------------ACTL.
Lp 2
+ +
49,258 15,321
Y
I Test run
In the “Test run” operating mode, machining programs are analyzed for logical programming errors, e.g. exceeding the traversing range of the machine, redundant programming of axes, certain geometrical incompatibilities etc.
t103
+
23,254
MS/9
Id0
TEST
0
BEGIN
1
8LK
2
8LK
RCTL.
1
RUN
PGM FORH Y-70 FORH Y+70
x 2
+ +
666 0.1
MM 2
X-85 2-30 X+85 2+0
0.2
49,258 15,321
Y
+
q +
23,254 84,000
q 0
MS/9
Test g.raphics
GRAPHICS
In the “Program run” operating modes “full sequence” and “single block”, you can graphically simulate machining programs via the “GRAPHICS” keys. Display modes: plan view with depth l view in three planes l 3-D view l
External data transfer
indication
In the “Programming and editing” mode, programs can be read-in from an external storage medium, such as the FE 401 Floppy Disk Unit, and read-out to an external unit (data storage, printer). Data transfer takes place via the RS-232-C data interface. In the “Program run single block” and “Program run full sequence” modes of operation it is possible to read-in programs whose size exceeds the control’s memory block by block for simultaneous execution.
HEIDENHAIN TNC 2500B
General Information
Page A5
Accessories 3D Touch Probe Systems
The TNC software incorporates measuring cycles for the application of a HEIDENHAIN 3-D Touch Probe in the “Manual”, “Handwheel” and “Program run” operating modes.
Manual
use
The following the “Manual” l l l l l
measurements can be performed in and “Handwheel” operating modes:
position line angle corner point circle radius and circle center.
The probing functions allow compensation of workpiece misalignment and automatic setting the position displays. Thus, they help you setup workpieces more easily, quickly and accurately.
of
The probing functions can also be used for measurements on the workpiece.
run
You can program position measurements in the “Programming and editing” operating mode. This feature can be used with 0 parameter programming to execute measurements before, during and after machining a piece (see index “Programming and Editing”, Programmable probing function and Parameter programming).
TS 120
HEIDENHAIN offers touch probes in various versions. There are different clamping shafts to affix the probe head in the spindle like a tool. The stylus is replaceable. Standard versions are: TS 120
Touch Probe System 120 with cable connection and interface incorporated into probe. Touch Probe System 511 with infrared transmission, separate electronics and transmitter/receiver
TS 511
electronics,
interface unit.
This probe head has a transmitter and receiver window (for the triggering signal) on one side and another transmitter window offset by 180°. The side with the transmitter and receiver window must be pointed towards the transmitter/receiver unit during measurement. TS 511
Certain provisions probe system.
Page A6
are required
by the machine
General
Information
tool manufacturer
for the connection
of a touch
Accessories FE 401 Floppy Disk Unit HR 130/HR 330 Electronic Handwheels FE 401 Floppy Disk Unit
Part programs which do not have to reside permanently in the control memory can be stored with the FE 401 Floppy Disk Unit. The storage medium is a normal 3 l/2 inch diskette, capable of storing up to 256 programs and a total of approximately 25000 program blocks. Programs can be transferred diskette or vice-versa.
from the TNC to
Programs written at off-line programming stations can also be stored on diskette with the FE 401 and read into the control as needed.
1I Machrine I1
In the case of extremely long programs which exceed the storage capacity of the TNC, the FE 401 can be used to transfer a program blockwise into the control while simultaneously executing it. A second
Technical Data
diskette
drive is provided
for backing
up stored programs
and for copying
purposes.
FE 401 Floppy Disk Unit with two drives Data medium
3 l/2 inch diskette,
Storage
approx.
capacity
double-sided,
790 KB (25000
Data interface
Two RS-232-C
Transfer rate
“TNC” interface: “PRT” interface:
blocks);
max. 256 programs
2400/9600/19200/38400 baud 110/150/300/600/1200/2400/4800/9600
The control can be equipped with an electronic handwheel for better machine setup. Two versions of the electronic handwheel are available:
HR 130
The HR 130 electronic handwheel is designed to be incorporated into the machine control unit. The axis of control is selected at the machine control .
HR 330
The portable HR 330 electronic handwheel includes keys for axis selection, axis direction, rapid traverse and emergency stop.
General
135 TPI
data interfaces
Handwheel
HEIDENHAIN TNC 25006
/I
Information
lbaud
1
Page A7
MOD Functions
In addition to the main operating modes, the TNC has supplementary MOD functions. These permit additional displays and settings.
operating
modes
or so-called
Initiate the dialog
Selecting
Terminating LIMIT X+ = + 350.000
Transfer numerical
Vacant
memory
The number MEMORY”.
Terminate
inputs with the “‘ENT” key before terminating
of free characters
in the program
memory
supplementary
is displayed
with the MOD function
You can use this MOD function to switch the control between conversational and IS0 format (ISO). Switchover is performed with the “ENT” key.
Baud rate
The transfer
RS-232-C interface
The data interfaces “ENT” key: 0 ME operation l FE operation l EXT operation:
can be switched
operation
is specified
with “BAUD
via “RS-232-C
with other external
interface”
mode.
the MOD functions.
Programming and editing
rate for the data interface
operating
format
“VACANT
(HEIDENHAIN)
RATE”.
to the following
operating
modes with the
devices.
NC software number
The software
number
of the TNC control
PLC software number
The software
number
of the integrated
parameters
Up to 16 machine parameters can be accessed by the machine operator with this MOD function. These parameters are defined by the machine manufacturer - he may be ed for more information.
Code number
A code number
Page A8
can be entered
is displayed
PLC is displayed
with this MOD function.
with this MOD function:
l
86357:
l
123: select the parameters. These parameters are accessible
I
with this MOD function.
cancel “erase and edit protection” on all controls
General Information
(see parameters)
I
HEIDENHAIN TNC 2500B
MOD Functions Position displays Change mm/inch
The MOD function “Change mm/inch” determines whether the control displays positions in the metric system (mm) or in the inch system. You switch between the mm and inch systems via the “ENT” key. After pressing this key the control switches to the other system. You can recognize whether the control is displaying in mm or inches by the number of digits behind the decimal point: Xl 5.789 mm display X 0.6216 inch display.
Position displays
The following
position
displays
can be selected:
0 nominal position of the control
NOML
0 difference nominal/actual position (lag distance)
LAG
0 actual position
ACTL.
8 remaining distance to programmed position
DIST.
0 position based on the scale datum
REF
A = last programmed position (starting position) B = new (programmed) target position, which is presently targeted W = Workpiece datum for the part program M = scale datum (machine-based) Switchover
Position display large/small
The character height of the position display can be changed in the operating modes “Program run/single block” or “Program run/full sequence”. The position display shows 11 program blocks with small characters, two with large characters. Switchover
HEIDENHAIN TNC 2500B
is with the “ENT” key.
I
is with the “ENT” key.
General
Information
I
Page A9
MOD Functions Traverse range limits
Limits
The maximum displacements are preset by fixed software limits. The MOD function “Limits” enables you to specify additional software limits for a “safety range” within the limits set by the fixed software limits, Thus you can, for example, protect against collision when clamping a dividing attachment. The displacements are limited on each axis successrvely in both directions based on the scale datum (reference marks). The position display must be switched to REF before specifying the limit positions of the position dtsplay. To work without safety limits, enter the maximum values +30000.000 or -30000.000 for the corresponding axes.
+ Effectiveness
Determine values
Enter
The entered limits do not for tool compensations. Like the software limit switches, they are only effective after you traverse the reference points. They are reactivated with the last entered values after a power interruption
To determine the input values, switch position display to REF.
values
= scale datum
Traverse to the end positions of the axis/axes which is/are to be limited. Note the appropriate REF displays (with signs).
the
Continue pressing until LIMIT appears.
Select
Enter value, or
Enter the limit(s)
select the next limit
terminate
Page A 10
General
Information
the input
Parameters General Information Machine parameters
The TNC contouring controls are individualized and adapted to the machine via machine parameters (MP). These parameters consist of important data which determine the behavior and performance of the machine.
Parameters accessible for the
Certain machine parameters which determine displays are accessible for the .
Examples
l l l
Accessibility
l
dealing
only with operation,
programming
Scaling factor only effective on X, Y or on X, Y, Z. Adapting the data interface to different external devices. Display possibilities of the screen.
The can access these machine l
functions
parameters
in two ways:
Access by entering the code number 123. This access is possible on every control (see code number 123). Access to additional parameters via the MOD function parameters. You can only access via the MOD function if the manufacturer has made the machine accessible for this purpose.
The machine parameters.
manufacturer
can inform you about the sequence,
Only these machine parameters may be changed change any ,non-accessible machine parameters.
meaning,
texts etc. of any
by the . In no case should
Selection
parameters
the
Select the parameter, Continue pressing until1 the desired PARAMETER or dialog appears,
Cl
Enter numbers.
Terminate
or select further
parameters then terminate.
HEIDENHAIN TNC 2500B
I
General
Information
with
/
and
Page A 11
and
Parameters
After entering the code number 123 via MOD, the following machine parameters and the parameters the data interface (see index “Programming Modes”, ” External data transfer”) can be selected and changed.
Measuring with the 3D touch probe
Display and programming
Function
Parameter no.
Input
Probe system selection
6010
0 + Cable transmission 1 + Infrared transmission
Probe system: feed rate for probing
/ 6120
1 80 to 3000
Probe system:
measuring
distance
/ 6130
1 0 to 30000.000
[mm]
Probe system: set-up clearance over measuring point for automatic measurement
6140
0 to 30000.000
[mm]
Probe system: probing
6150
80 to 29998
Parameter no.
Input
7210
0 + Control 1 + Programming 2 + Programming
rapid traverse
for
Function Programming
station
Block number
increment
I
[mm/min]
Input values station: station:
PLC active PLC inactive
7220
0 to 255
7230
0 + First dialog language 1 + Second dialog language
Inhibit PGM input for PGM no. = cycle no
7240
0 + Inhibited 1 + Uninhibited
Central tool file
7260
0 + No central tool file 1 to 99 = Central tool file Input value = Number of tools
Display of the current feed rate before start in the manual operating modes (same feed rate in all axes, i.e smallest programmable feed rate)
7270
0 --f No display 1 + Display
Decimal
character
7280
0 + Decimal 1 + Decimal
Display increment
7290
O-lum 1+5ym
Clearing the status display and the 0 parameters with M02, M30 and end of program
7300
0 + Status display 1 --f Status display
Graphics
7310
Switching of dialog German/English
language
(display mode)
Switch over projection “display in 3 planes”
type
Rotate the coordinate system in the machining plane by 90’
Page A 12
[mm/min]
Bit 0
1
General Information
(English)
comma point
is not cleared is cleared
+ 0 + German standard + 1 + American standard + 0 + No rotation + 2 + Coordinate system rotated by +90°
for
Parameters
Machining program
and run
Function
Parameter no.
Input
“Scaling” cycle is effective on 2 axes or 3 axes
7410
0 + 3 axes 1 - in the machining
SL cycles for milling pockets with irregular contour
7420 Bit 0
“Rough out” cycle: direction for pilot milling of contour
“Rough out” cycle: sequence for rough out and pilot milling
Input values
+ 0 + Pilot milling for pockets for islands + 1 + Pilot milling for pockets for islands
1
plane
of contour counterclockwise, clockwise of contour clockwise, counterclockwise
+ 0 + First mill a channel around the contour, then rough out the pocket + 2 + First rough out the pocket, then mill a channel around the contour
ing compensated or uncompensated contours
+ 0 + ing compensated contours + 4 --f ing uncompensated contours
“Rough out” and “pilot milling” to pocket depth or for every infeed
+o-”
+8-
Overlap factor for pocket milling
7430
Output
7440
of M functions
Programmed
0.1 to 1.414
Bit 0
stop at MO6
+ 0 + Programmed stop at MO6 + 1 + No programmed stop at MO6
1
Output of M89, modal cvcle call
Rough out” and “pilot milling” are performed continuously over all infeeds “Pilot milling” and then “rough out” are performed for every infeed (depending on bit 1) prior to the next infeed
+ 0 + No cycle call, normal output of M89 at start of block + 2 + Modal cycle call at end of block
Constant path speed at corners
7460
0 to 179.999
Display mode for rotary axis
7470
0 + 0 to 359.999 1 + + 30000.000
L
General
Information
I
Page A 13
Parameters
Hardware
Function Feed rate and spindle
Parameter no. override
Input values
7620 Bit 0
Feed rate override, if rapid traverse key is pressed in operating mode “Program run”
+ 0 - Override + 1 + Override
inactive active
Feed rate override in 2% increments or 1 % increments
1
+ 0 + 2% increments + 2 * 1 O/o increments
Feed rate override, if rapid traverse key and external direction buttons are pressed
2
+ 0 + Override + 4 + Override
Handwheel
Page A 14
Input
7640
General
Information
inactive active
0 = Machine with electronic handwheel 1 = Machine without electronic handwheel
Coordinates Coordinate
system
In a part program, the nominal positions of the tool (or of the tool cutting edge) are defined in relation to the workpiece; encoders on the machine axes continuously deliver the signals needed by the control for determining the current actual position. A reference system is always be workpiece-based.
required
for determining
Cartesian coordinates
The reference system normally used is the rectangular or Cartesian* coordinate system (coordinates are those values which define a unique point in a reference system). The system consists of three coordinate axes, perpendicular to each other and lying parallel to the machine axes, which intersect each other at the so-called origin or (absolute) zero pornt. The coordinate axes represent mathematically ideal straight lines with divisions; the axes are termed X, Y and Z.
Righthand rule
You can easily the traversing directions with the right-hand rule: the positive direction of the X axis is assigned to the thumb, that of the Y axis to the index finger, and that of the Z axis to the middle finger.
position.
In the present
case, such a system must
IS0 841 specifies that the 2 axis should be defined according to the direction of the tool spindle, whereby the positive Z direction always points from the workpiece to the tool.
“) after the French mathematician
HEIDENHAIN TNC 2500B
Rene Descartes,
General
Information
in Latin Renatus
Cartesius
(1596 - 1650)
Rage A 15
Coordinates Datum Relative tool movement
Part programs are always written with workpiecebased coordinates X, Y, Z. That is, they are written.as if the tool moves and the workpiece remains still, independent of the machine type. If, however, the work on a given machine actually moves in any axis, then the direction of the coordinate axis and the direction of traverse will be opposite. In such a case the machine as X’, Y’ and Z’.
1 Zero point of 1 the coordinate system
axes are designated
For the zero point of the coordinate system, the position on the workpiece which corresponds to the datum of the part drawing is generally chosen - that is, the point to which the part dimensioning is referenced. For reasons of safety, the workpiece datum in the Z axis is almost always positioned at the highest point on the workpiece. The datum position indicated in the drawing to the right is valid for all programming examples in this manual. Machining operations in a horizontal plane require freedom of movement mainly in the positive X and Y directions. lnfeeds starting from the upper edge of the workpiece Z = 0 correspond to negative position values.
i
Datum
Setting
The workpiece-based rectangular coordinate system is defined when the coordinates of any datum P are known - that is, when the tool is moved to the datum position and the control “sets” the corresponding coordinates (datum setting).
Y
Z
bE!! 0
10
20
30
40
X
0
Page A 16
General
Information
-x
HEIDENHAIN TNC 2500B
Coordinates Absolute and incremental
coordinates
If a given point on the workpiece is referenced to the datum, then one speaks of absolute coordinates or absolute dimensions. It is also possible to indicate a position which is referenced to another known workpiece position: in this case one speaks of incremental coordinates or incremental dimensions.
Absolute dimensions
The machine or to certain Example:
is to be moved to a certain position nominal coordinates.
X+30
Y+30
Dimensions in this manual are given as absolute Cartesian dimensions unless otherwise indicated.
Incremental dimensions
Incremental dimensions in a part program always refer to the immediately preceding nominal position. Incremental dimensions are indicated by the letter I. The machine is to be moved by a certain distance: it moves from the previous position along a distance given by the incremental nominal coordinate values. Example:
IX+10 IY+lO
Mixing absolute and incremental dimensions
It is possible to mix absolute and incremental coordinates within the same program block.
Polar coordinates
Positions on the workpiece can also be programmed by entering the radius and the direction angle referenced to a pole (see index Programming Modes, Polar coordinates).
Example:
L IX+10 Y+30
CC = Pole PR = Polar radius (distance PA = Polar angle (direction
HEIDENHAIN TNC 2500B
-
x
from pole) angle)
General
Information
I
Page A 17
Coordinates Linear and angle encoders
Linear and angle encoders in machine tools
Each machine axis requires a measuring system to provide the control with information position: linear encoders for linear axes, angle encoders for rotary axes.
Gratillg
DIADUR
glass
scale
period
Afl
Reference
Photovoltalc
Principle
of photoelectric
scanning
axes,
RON 706C.
position
mark
calls
of fine gratings
LS IOIC, LS 107c
With linear
on the actual
measurement
is generally
ROD 250C
based on either
a photoelectrically scanned steel or glass scale, or l the high-precision spindle, which also functions as the moving then produced by a rotary encoder coupled to the spindle). l
element
(the electrical
With rotary axes, a graduated disk permanently attached to the axis is photoelectrically TNC forms the position value by counting the generated impulses.
Page A 18
General
Information
signals are
scanned.
The
Coordinates Linear and angle encoders Linear and angle encoders Datum
Reference
are machine-based:
The datum for determination of the nominal and actual position must correspond to the workpiece datum, or be brought into correspondence by setting the correct position value (= the position value determined by the workpiece datum) in any axis position. This procedure is callecl datum setting (or datum presetting).
marks
After the control has been switched off or after a power Interruption, again. To srmplify this task, the encoders possess reference marks, datum points.
it is necessary to set the datum which in a sf?nse also represent
The relationship between axis positions and position values which were established by the last setting of the workpiece datum (datum setting), are automatically retrieved by traversing over the reference marks after switch-on. This also re-establishes the machine-based references such as the software limit switch or tool change position. In the case of linear encoders with distance-coded reference marks, the machine axes need only be traversed by a maximum of 20 mm. For angle encoders with distance-coded reference marks, a rotation of just 20° is required. Linear encoders with only one reference mark have an “RM” label which indicates the position of the reference mark, while angle encoders with one reference mark indicate the position with a notch on the shaft.
Schematic
ot scale with distance-coded
General
reterence
Information
marks
Page A 19
Cutting Data Feed rate diagram The feed rate F must be defined in [mm/min] in the program. Usually, the number of teeth n on the tool, the permitted chip thickness d per tooth and the previously determined spindle speed S are given. The diagram below helps you determine the feed rate F. Determine Given: Selected: Find:
the required n= d= S= F=
feed
rate F in [mm/min]
number of teeth permitted depth of cut per tooth spindle speed feed rate
Example 6 0.1 [mm] 500 [rpm 1
Depth of cut
d [mm1
Spindle
speed
S [rpml !
Calculation
Horizontal line through depth of cut 0.1 mm Vertical line through cutting speed 500 m/min At the point of intersection, read off the feed rate F = 50 [mm/min]; this is multiplied by the number of teeth n = 6: F = 300 mm/min d=
Formula
Page A 20
Prerequisites: The feed rate determination assumes that l the tool axis infeed = l/2 tool radius or l the lateral infeed = l/4 tool radius and the downfeed is selected equal to the tool radius
&orF=d.S.n
General
Information
I
HEIDENHAIN TNC 2500B
Cutting Spindle
Data speed diagram
The spindle speed S must be defined in [rpm] in the program. Usually the tool radius R is given in [mm] and the cutting speed V in [m/min]. The diagram below helps you determine the spindle speed S. Determining
spindle speed S in [rpm]
the required
Example 16 [mm] 50 [m/min]
Given: R = tool radius V = cutting speed Find: S = spindle speed Tool radius
R [mm1
Cutting speed V [m/min]
Calculation
Horizontal line through the tool radius R = 16 mm Vertical line through the cutting speed V = 50 m/min Read off the value at the point of intersection:
Formula
V=2R.n.S;
S=V
approx.
497 rpm)
2R n
I
HEIDENHAIN TNC 2500B
500 rpm (calculated:
I
General Information
-
Page A 21
Cutting Data Feed rate diagram
for tapping
When tapping a thread, the pitch P is given [mm/rev]. The spindle speed S and the feed rate F must be defined in the program. First, the spindle speed is determined in the appropriate diagram, then the feed rate is found in the diagram below. Determine Given: Selected: Find:
the required
feed
rate F in [mm/min] Example 1 [mm/rev] 100 [rpm]
p = pitch [mm/rev] S = spindle speed [rpm] F = feed rate [mm/min]
Pitch P
[mm/rev1
Spindle
speed
S [rpml
Calculation
Horizontal line through pitch p = 1.0 mm/rev Vertical line through spindle speed S = 100 rpm Read off feed rate at point of intersection: F = 100 mm/min
Formula
p=iorF=p.S
Page A 22
General
Information
Machine
Operating
Modes
(M)
Switch-On
Manual
Traversing
the reference
points
1
Traversing
with the axis direction
Operation
3D Touch
Spindle
speed S/Miscellaneous
Datum
setting
buttons functions
with
probe
Calibrating
effective length
Calibrating
effective radius
Referencesurface, Basic rotation,
;!
Position Angular
system
measurement
measurement
Corner = datum/Determining
corner
Circle center = datum/Determining Datum setting probe system
coordinates the circle radius
without
Electronic Handwheel/ Jog Increment
with
Manual
15
Data Input Tool call/Spindle Positioning
Program
M
Probe
or
Positioning
;!
axis/Spindle
to entered
speed
17 18
position
Run Single
19
block, Full sequence
Interrupting
the program
Checking/changing Background Blockwise
20
run
0 parameters
22
programming transfer
Machine
(Reloading
Operating
21
operation)
Modes
23
Switch-On Traversing the reference Switch-On
points
0d?b
Switch
MEMORY TEST
power
on
The TNC tests the internal control electronics. The display is automatically cleared
POWER INTERRUPTED
Delete the message. The control then tests the EMERGENCY STOP circuit.
RELAY EXT. DC VOLTAGE MISSING
Switch
MANUAL
Traverse the axes over the reference in the displayed sequence.
OPERATION
TRAVERSE REFERENCE POINTS
on the control
IDC voltage.
points
Start each axis separa-tely or move the axes with the external direction keys.
z AXIS x AXIS Y AXIS
The sequence of the axes is determined the machine manufacturer.
4th AXIS
MANUAL
Encoders
HEIDENHAIN TNC 2500B
“Manual operation” matically.
OPERATION
The required traversing distance for linear and angle encoders with distance-coded reference marks is max. 10 mm or 20 mm/IO’ or 20’. If the encoder has only one reference mark, it must be traversed.
I
Machine
Operating
Modes
is now selected
auto-
by
Manual Operation Traversing with the axis direction buttons/ Spindle speed S/Miscellaneous functions M The machine axes can be moved and the datum set in the “Manual” operating mode.
Jog mode
piiz-000 00000
The machine axis moves as long as the corresponding external axis direction button is held down. Several axes can be driven simultaneously in the jog mode.
liooo;r 00000 00000 00000
If the machine “START” button is pressed simultaneously with an axis direction button, the selected machine axis continues to move after the two buttons are released. Movement is stopped with the external “STOP” button.
Continuous operation
0000 0000 0000 0000
ooocl
00000
I @4PoooooI L-Q?-.-.I F O/o
Feed rate override
The traverse speed (feed rate) is preset by machine override (F %) of the control.
Spindle speed S
The spindle
Spindle override
On machines with continuously override (S %).
speed
can be selected
parameters
S O/o
and can be varied with the feed rate
with “TOOL CALL”
variable
spindle
drives, the speed can also be varied with the spindle
Initiate the dialog Key in the spindle
SPINDLE SPEED S RPM ?
Confirm Switch
Miscellaneous function M
Use the “STOP”
key to enter a miscellaneous
speed.
entry. on the spindle.
function:
Initiate the dialog
r Key in the M function.
MISCELLANEOUS FUNCTION M ?
Page M2
I
Machine
Operating
Modes
Confirm
entry.
Activate
the miscellaneous
I
function.
HEIDENHAIN TNC 2500B
3D Touch Probe Datum setting with probe system
Using the touch probe for setup
For workpiece setup the 3D touch probe systems from HEIDENHAIN in association with TNC software offer considerable benefits. One is that the workpiece does not have to be aligned precisely to the machine axes: The TNC will determine and compensate misalignment automatically (“basic rotation”). Another important benefit of the 3D touch probe systems is significantly faster and more accurate datum setting.
TS 511 Probing functions
The touch probe functions described below can also be employed in the “electronic handwheel” operating mode.
CALIBRATION EFFECTIVE LENGTH CALIBRATION EFFECTIVE RADIUS BASIC ROTATION SURFACE = DATUM CORNER = DATUM CIRCLE CENTER = DATUM
Pressing the “TOUCH PROBE” key calls the menu shown here to the right. The probing function is selected with the cursor keys and entered with the “ENT” key. Calibration
The effective length of the probe and the effective radius of the probing ball must be calibrated once, before beginning touch probe work. Both dimensions are determined by CALIBRATION routines and stored in the control.
Terminating the probing functions
The probing functions time with “END 0”.
Calibrating/ working procedure
The probe head traverses to the side or upper surface of the work. The feed rate during measurement and the maximum measuring distance are set by the machine manufacturer via machine parameters.
can be terminated
II I “g’l
at any
Fl
F.1 .o
0A a F2 0 t
The touch probe system signals with the workpiece to the control. The control stores the coordinates of the ed points. The probing axis is stopped and retracted to the starting point. Overrun caused by braking does not affect the measured result. @
= prepositioning with the external direction buttons. Fl = feed rate for prepositioning. F2 = feed rate for probing. FMAX = retraction in rapid traverse.
HEIDENHAIN TNC 2500B
Machine
axis
Operating
/
I=MAX
d
Modes
Page M3
3D Touch Probe Calibrating effective length
Work aid: ring gauge
For calibration of the effective length, a ring gauge of known height and known internal radius is clamped to the machine table. A B C D L R
= = = = = =
zero tool 3D touch probe ring gauge reference plane (surface) length of the zero tool ball tip radius
The reference to calibration.
Procedure
plane is set with the zero tool prior
To determine the effective length of the stylus, the probe head touches the reference plane. After ing the surface, the probe head is retracted in rapid traverse to the starting positron. The length L is stored by the control and automatically compensated during the measurements.
Initiate the dialog
CALIBRATION
TOOL
EFFECTIVE
AXIS
Select probing and enter.
LENGTH
Enter a different
= Z
function
tool axis if required.
Select the “Datum”. DATUM
Enter the datum e.g. +5.0 mm.
+5
in the tool axis,
Move the touch probe to the vicinity of the reference plane. Select the direction of probe movement, here Z-. The probe head moves in negative
z+ z-
After touching the surface and returning to the starting position, the control automatically switches to the “Manual operation” or “Handwheel” operating mode.
The value for effective length
Display
Page M4
can be displayed
Machine
Operating
by selecting
Modes
“Calibration
effective length”
again
3D Touch Probe Calibrating effective radii
Procedure
1s
The probe ball is lowered into the bore of the ring gauge. 4 points on the wall must be touched to determine the effective radius of the stylus ball. The traverse directions are determined by the control, e.g. X+, X-, Y+, Y- (tool axis = Z). The probe head is retracted in rapid traverse the starting position after every deflection.
to
The radius R is stored by the control and automatically compensated during the measurements
Initiate the dialog Select probing and enter.
CALIBRATION EFFECTIVE RADIUS
cl
( TOOL AXIS = Z
Enter another Select “Radius
r x-
Y+
tool axis if required. ring gauge”.
Enter the radius of the ring gauge, e.g. 10.0 mm.
RADIUS RING GAUGE = 10
x+
function
Traverse approximately to the center of the ring gauge. Select the traversing direction of the probe head (only necessary if you prefer a certain sequence or the exclusion of one probing direction).
Y-
Probe a total of 4 times. After ing the wall of the ring gauge four times, the control automatically switches to the “Manual operation” or “Handwheel” operating modes. L
Display
You can display the value for effective radius by selecting
Error messages
All touch probe systems:
Touch probe system TS 511:
TOUCH POINT INACCESSIBLE
PROBE SYSTEM NOT READY
The stylus was not deflected within the measuring distance (machine parameter).
Probe system not set up correctly, or transmission path was interrupted. The transmitter and receiver window (i.e. the side with two windows) must ble pointed towards the transmitter/receiver unit.
STYLUS ALREADY IN The stylus was already deflected
HEIDENHAIN TNC 2500B
at the start.
Machine
Operating
Modes
“Calibration
effective radius”
again
Page M5
3D Touch Probe Reference surface, Position measurement The position of a surface on the clamped workpiece is determined with the probing function “Surface = datum”.
Functions
Setting
Measuring positions
the reference
plane @
l
Measuring
positions
@
l
Measuring
distances
0
Initiate the dialog Select probing and enter.
SURFACE = DATUM
function
Move to the starting x+
x-
Y+
Y-
z-t
z-
c+
c-
Select the traversing
position.
direction,
e.g. Z-
Move the probe head in negative Z direction. The probe head is retracted in rapid traverse to the starting position after touching the surface.
Measured
value
DATUM Z-18,125
The control
Setting the _i reference plane
Enter a new value if required,
DATUM Z+O
Measuring ~ distances
You can also measure
Page M6
displays the measured
Confirm
distances
on an aligned
l
Probe the first position
and set the datum
l
Probe the second position. The distance can be read in the “Datum”
Machine
workpiece.
(e.g. 0 mm). display
Operating
Modes
entry.
value.
e.g. 0 mm.
3D Touch Probe Basic rotation, Angular
measurement
The probing function “Basic rotation” determines the angle of deviation of a plane surface from a nominal direction. The angle is determined in the machining plane.
Functions
l
Basic rotation (the control compensates misalignment)
Y
for an angular
l
Correct an angular misalignment (on a machine tool with rotary axis)
l
Measure
a=?
f
Basic
rotation
Sk 2
an angle.
1
0”
X
Initiate the dialog BASIC
ROTATION
ROTATION
ANGLE
Select probing and enter.
furlction
Select the “Rotation
angle”.
Enter the nominal direction of the surface to be probed, e.g. O”.
= 0
Move the probe head to the starting posi-tion 0. x+
x-
Y+
Select the probing
Y-
direction,
e.g. Y-t
The probe head travels in the selected direction, e.g. Y+. The probe head retums to the starting position after touching the side surface.
Move the probe head to the starting position CD. The probe head travels in the selected direction, e.g. Y+. The probe head returnls to the second starting position after making . The control automatically switches to the “Manual operation” or “Handwheel” operating mode.
HEIDENHAIN TNC 2500B
Machine
Operating
Modes
Page M7
3D Touch Probe Basic rotation, Ar igular measurement Displaying the rotation angle
The measured rotation angle is displayed by selecting the probing function “Basic rotation”. Compensation of angular misalignment is ed on the screen with “ROT” in the status display. It also remains stored after a power interruption.
Cancelling the basic rotation (rotation angle O”)
The basic rotation is the probing function entering a O0 rotation The “ROT” display is
BRSIC ROTRTION p3 xY+ Y-
p ----------------_---------------
cancelled by selecting “Basic rotation” and angle. cleared.
ACTL.
x 2
+ +
I
49t2Ei8 15,321
q +
Y
+
on aligned
workpieces
23,254 84,000
Once basic rotation is activated, all subsequent programs are executed with rotation and shown rotated in the graphic simulation.
Measuring
angles
In addition
to basic rotation,
Carry out the following l
Compensating misalignment
folr
angle measurements
can also be performed
procedure:
Execute a basic rotation.
l
Display the rotation
l
Cancel the basic rotation.
On machine axis.
angle.
tools with a rotary axis, you can also correct
Carry out the following
misalignment
of a workpiece
by rotating
the
procedure:
l
Execute a basic rotation.
l
Display and note the rotation
l
Cancel the basic rotation.
angle.
0 Enter the noted value for the rotary axis incrementally in the “Positioning with MDI” operating mode (cf. Posrtioning at the entered position without radius compensation) and start the rotation with the machine “START” button.
Page MS
Machine
Operating
Modes
3D Touch Probe Corner = datum/ Determining corner coordinates r
With the probing function “Corner = datum”, the control computes the coordinates of a corner on the clamped workpiece. The computed value can be taken as datum for subsequent machining. All nominal positions then refer to this point. The probing function “Basic rotation” should be performed before “Corner = datum”.
Procedure
The probe head touches two side surfaces figure) from two different starting positions side.
(see per
The corner point P is computed by the control as the intersection of straight line A ( points 0 and 0) with straight line B ( points 0 and 6).
After performing a basic rotation
HEIDENHAIN TNC 2500B
If the probing function “Corner = datum” is called after performing a basic rotation (straight line A), the first side need not be ed.
Machine
Operating
Modes
Page M9
3D Touch Probe Corner = datum/ Determining corner coordinates To transfer the direction of the first side face from the routine “basic rotation”, simply respond to the dialog query TOUCH POINTS OF BASIC ROTATION ? by pressing the “ENT” key (otherwise “NO ENT”). If only the probing rotation.
function
“CORNER = DATUM”
is performed,
then it does not contain
a basic
Initiate the dialog CORNER
Select probing and enter.
= DATUM
First side face
function
Move the probe head to the first starting po:sition. x+
x-
Y+
Y-
Select the probing
direction,
e.g. Y+.
The probe head travels in the selected direction. After touching the side face, the probe head IS retracted to the starting position. Traverse to the second starting position and probe in the same probing direction as described above. Second side face Move the probe head to the third starting po:sition. x-b
x-
Y+
Y-
Select the probing
direction,
e.g. X+.
The probe head travels in the selected direction. After touching the side face, the probe head is retracted to the starting position. Traverse to the fourth starting in the same probing direction Display corner coordinates/ Setting the datum
DATUM
X+0
DATUM
Y+O
cl
Enter the corner coordinates for X and Y if required, e.g. X+0, Y+O.
c
Confirm
Page M 10
Machine
Operating
Modes
position and probe as described above.
entries.
1
3D Touch Probe Circle center = datum/ Determining the circle radius In the probing function “Circle center = datum”, the control computes the coordinates of the circle center and the circle radius on a clamped workpiece with cylindrical surfaces. The coordinates of the center can be used as the datum for subsequent machining. All nominal positions are then referenced to this point. The “Basic rotation” probing function must be carried out prior to “Circle center = datum”.
Bore, Circular
Outer
pocket
cylinder
HEIDENHAIN TNC 2500B
Position the probe head in the bore with the remote axis direction keys. 4 different positions are then touched by pressing the machine START button.
On workpieces with cylindrical outer surfaces, the probing directions must be specified for each of the four points.
I
Machine
Operating
Modes
!
Page M 11
3D Touch Probe Circle center = datum/ Determining the circle radius Initiate the dialog Select the probing and enter.
CIRCLE CENTER = DATUM
function
Move the probe head to the first
x+
x-
Y+
Select the probing
Y-
direction
if required,
Probe head travels in the selected direction. After touching face, the probe head is retracted to the starting position. Traverse to the second and third starting positions and probe in different directions as described above.
I x+
Move the probe head to the fourth x-
Y+
Select the probing
Y-
direction
if required,
The probe head travels in the selected direction. The probe head is retracted to the starting position after touching the side face.
Display
X+54.3
Y+21.576
Coordinates Circle radius.
PR+20
Datum
setting
DATUM X+40
Enter the X and Y cosordinates of the circle center if necessary, e.g. X+40, Y+30.
DATUM Y+30
0 Confirm
Page M 12
of the circle c:enter.
Machine
Operating
Modes
entries.
,
Manual Operation Datum setting without
Align workpiece and set datum
First align the workpiece parallel to the machine axes in the conventional way. For datum setting the machine is then moved to a known position relative to the workpiece and the relevant positron values are set with the axis kevs.
Touching machining
Touch both sides of the workpiece with a tool or edge finder and, at , set the actual position display of the associated axis to the tool radius or the ball tip radius of the edge finder with a negative sign (here e.g. X = -5 mm, Y = -5 mm).
in the plane
probe system
a 5
Touching in the feed axis (spindle axis)
The actual position display is set to zero when the zero tool touches the work surface. If with the work surface is not allowed, you can lay a metal shim of known thickness (e.g. 0.1 mm) on it. Then enter the thickness of the metal when is made (e.g. Z = +O.l mm).
Preset
When using preset tools, i.e. when the tool lengths are already known, touch the work surface with any tool. To assign the value 0 to the surface, enter the length L of the inserted tool with a positive sign as the actual value for the infeed axis. If the work surface has a value other than 0, enter the following actual value: (actual value Z) = (tool length L) + (surface position)
tools
Example: tool length L: 100 mm position of the work surface:
t-50 mm
actual value to be entered: Z = 100 mm + 50 mm = 150 mm
HEIDENHAIN TNC 25006
Machine
Operating
Modes
Page M 13
Manual Operation Datum setting without
The datum is to be set with a drill (tool radius R = 5 mm) as shown to the right.
Example: Setting the datum
0 Touch the workpiece
Touching Z axis
probe system
surface.
0 Touch side by moving
the Y axis.
0 Touch side by moving
the X axis.
uZ
Initiate the dialog
with
, after surface
0 is touched
Enter the value for the Z axis, e.g. 0 mm.
DATUM SET Z =
Confirm entry. The Z display reads: 0.000
, Y axis
clY , after surface 0 is touched
Initiate the dialog
DATUM SET Y =
cl
Enter the value for the Y axis, e.g. 5 mm Here with a negative
sign.
Confirm entry. The Y display reads: -5.000
X axis
?c
, after surface 0 is touched.
Initiate the dialog
DATUM SET X =
Enter the value for the X axis, e.g. 5 mm. Here with a negative! sign. Confirm entry. The X display reads: -5.000
The datum
for the fourth axis can be set in a similar way
If the dialog DATUM SET was opened “END Cl”.
by mistake, the dialog
can be cleared
The set datum is only shown in the “ACTUAL” position display. This display may have to be selected with “MOD” (see index General Position displays).
Machine
Operating
Modes
with “NO ENT” or
Informatio~n/MOD
Functions
-
Electronic
Handwheel/Jog
Increment
/
1
Versions
The control is usually equipped with an electronic handwheel. It can be used, for example, to set up the machine. There are two versions wheel:
of the electronic
HR 130: to be incorporated operating
hand-
into machine
HR 330: portable version with axis selection keys, axis direction keys, rapid traverse key, EMERGENCY STOP button.
Interpolation factor
The displacement per handwheel turn is determined by the interpolation factor (see table to the right).
Interpolation factor 0
Displacement in mm per turn 20.0
1 2
Operating the HR 130
The handwheel is switched to the required machine axis with the axis keys of the control
Operating the HR 330
The axis is selected on the handwheel. The axis to be driven by the electronic is highlighted in the screen display.
handwheel
10.0 5.0
3 4
2.5 1.25
5 6
0.625 0.313
7 8
0.156 0.078
9 10
0.039 0.020
FRCTOR: 1
INTERPOLRTION
RCTL.
In the “Electronic handwheel” operating mode, the machine axes can also be driven with the external axis direction buttons.
x
+
Y
+
Ia
+
49,258 23,254 15,321
00
HEIDENHAIN TNC 2500B
I
Machine
Operating
Modes
I
MS/9
Page M 15
Electronic
Operating the HR 130/330
Set operating
Handwheel/Jog
Increment
mode and initiate the dialog
I INTERPOLATION
FACTOR:
q
3
I Enter the desired e.g. 4. Confirm
INTERPOLATION
FACTOR:
4
factor,
entry.
on the control or on the handwheel
The tool can now be moved in a positive or negative Y direction with the electronic wheel.
Jog
interpolation
(HR 330)
hand-
The machine manufacturer can activate jog positioning via the integral PLC. In this case, a traversing increment can be entered in this operating mode.
positioning
The axis is moved by the entered increment when you press an external axis button. This can be repeated as often as desired. Only single-axis movements are possible. @Jog
Entering the jog increment
increment:
e.g. 2 mm.
0 External axis button
(e.g. X) pressed
0 External axis button
pressed
Set operating
once.
twice.
mode and initiate the dialog
JOG-INCREMENT:
Enter the jog increment,
1.000
Confirm
JOG-INCREMENT:
2.000
or another
e.g. 2 mm.
the entry.
remote
axis key.
The axis is driven by the entered
Page M 16
Machine
Operating
Modes
jog increment.
Positioning with Manual Data Input Tool call/Spindle axis/Spindle speed You must first define (i.e. enter the dimensions of) a tool before you can call it with “TOOL CALL” in the “Positioning with MDI” operating mode. You can define a tool either in the central tool file or in the part program. If in the operating modes “Program run/full sequence” or “Program run/single block” you are working without a central tool file, you must define each tool with “TOOL DEF”. The concepts “TOOL DEF” and “TOOL CALL” are defined under “Tool definition”.
in the “Programmrng
ano Editing”
section
Initiate dialog Example: Tool call
TOOL NUMBER ?
cl
Enter tool number. Confirm
Select the spindle axis
WORKING SPINDLE AXIS X/Y/Z ?
Select spindle
SPINDLE SPEED S RPM ?
the speed
2
cl
Enter spindle
axis, e.g. Z.
Enter spindle
speed.
Confirm
BLOCK COMPLETE
HEIDENHAIN TNC 2500B
entry.
1
entry.
Start tool call
Machine
Operating
Modes
Page M 17
Positioning Positioning
with Manual Data Input to entered position
In the operating mode “Positioning with manual data input”, single-axis entered and executed (the entered positioning blocks are not stored).
Traversing position
to
Initiate the dialog
or another
POSITION VALUE ?
0
1
Incremental
positioning
blocks can be
axis key. - absolute?
Enter a numerica value for the selected axis. Confirm the entry.
Radius compensation
TOOL RADIUS COMP.: R+/R-/NO
COMP. ?
Enter either radius compensation
or
no radius compensation.
FEED RATE ? F = / FMAX = ENT
Enter either the feed rate or no value for rapid traverse.
Either enter a miscellaneous e.g. MO3 or
MISCELLANEOUS FUNCTION M ?
choose
BLOCK COMPLETE
Terminate entry
block
Single-axis radius compensation
no miscellaneous
Start the positioning
Direct termination of input. Data entered previously such as radius compensation, of spindle rotation then remain permanently effective
function,
function.
block.
feed rate, or direction
For single-axis positioning blocks, you only have to consider whether the tool path is lengthened or shortened by the tool. R+ tool path to be increased. R- tool path to be reduced. If a radius compensation R+/R- is also entered to position the spindle axis, this axis is not compensated. A radius compensation is also ignored the 4th axis is used for a rotary table.
0 Nominal
Page M 18
when
position
Machine
Operating
Modes
HEIDENHAIN TNC 25006
Program Run Single block, Full sequence Stored programs sequence”.
are executed
in the operating
modes “Program
The workpiece datum must be set before machining See: Datum setting with/without probe system.
Program run single block
In this operating mode, the control restarted after every block. Program
Operating
executes
run full
the work!
the part program
run single block is best used for program
run single block” and “Program
block by block. The program
test and for the first program
must be
run.
mode
Selecting the program
select block 0.
The first program block is line of the program.
0 BEGIN PGM 7225
Starting
Program run full sequence
In this operating program occurs.
mode, the control
Stop functions: M02, M30, MOO (MO6 “STOP”, The program
Selecting the program
Operating
if assigned
run is also stopped
You must restart the program
executes
the machining
a stop function
if an error message
to continue
program
until a programmed
via machine
after a programmed
stop.
Full sequence Select the program scribed above.
mode
The program programmed occurs.
Feed rate
The programmed
feed rate can be varied via the feed rate override.
Spindle
The programmed
spindle
HEIDENHAIN TNC 25008
parameter)
appears
Starting the run
speed
speed
can be varied via the spindle
Machine
Operating
stop or end of
Modes
override
and block number
runs continuously stop or
(if output
as de-
until a
is analog)
Page M 19
Program Run nterrupting the program
run
stop
Stop program run: Stop axis movements with the machine STOP button. The block currently being processed is not completed. The “Control in operation” ( Ile ) display blinks.
Abort
Interrupt program run. The “Control in operation” cleared.
The control
Switching to single block
( Ile ) display is
stores:
l
the last tool called
l
coordinate
l
the last valid circle center/p01
l
the current
l
the return jump
transformations program
In the “Program “Single block”.
section
CC repeat
label for subprograms
run full sequence”
The block currently
operating
being processed
mode, you can interrupt
the prograim
run by switching
to
is completed.
I Program run is to be discontinued tion of the current block.
EMERGENCY STOP
The machine The control
can be switched acknowledges
To continue, either st8r-t each block separately or reactivate “Program run full sequence”.
after execu-
off in an emergency
by hitting one of the EMERGIENCY STOP buttons
this with the message
EMERGENCY STOP To continue
working,
release the emergency
stop key by turning
1. Remove the cause of error 2. Switch
on the control
3. Clear the message 4. Restart the program
Page M 20
power
again
EMERGENCY
STOP with the “CE” key
run.
Machine
Operating
Modes
it clockwise,
then
Program Run Checking/Changing 0 parameters Interrupt program
You can check and, if necessary,
Cl parameters change
0 parameters
after interrupting
the program
run.
run Interrupt
program
run.
Check parameter
Change parameter
Terminate change
HEIDENHAIN TNC 2500B
Machine
Operating
Modes
0 parameter the pararneter
display or and confirm
Page M 21
Program Run Background programming
Programming during program execution
While a part program is being executed in the “Program run full sequence” program can, in the “Programming and editing” mode, be simultaneously via the data interface FL-232-CN.24. This parallel
operation
A program
Starting the part program
Operating
cannot
is especially
advantageous
for long programs
operating mode, another either edited or transferred
with little operator
activity
be run and edited at the same time.
mode
lnrtiate the dialog
Igram. Start machining.
Parallel operating mode: programming and editing
Operating
mode
or gram via the RS-232.C/V.24
Screen display
The screen is divided into two halves during parallel operation: The program to be edited is shown in the upper half. The program currently in process appears in the lower half: program number, current block number and current status are displayed.
Terminating the parallel operating mode
Operating
Page M 22
mode Parallel operating is terminated by pressing “Program run full sequence” key.
I
Machine
Operating
Modes
HEIDENHAIN TNC 25008
the
I
Program Run Blockwise transfer (Reloading operation) Execution from external storage
In the “Program run full sequence” or “Single block” operating mode, part programs can be “transferred blockwise” from a remote computer, a storage medium or a HEIDENHAIN FE unit via the RS-232-C/V.24 serial data interface. This allows execution of part programs which exceed the storage capacity of the control.
Data interface
The data interface is programmable parameters (see index “Programming External data transfer).
via machine Modes”,
The RS-232-C interface of the TNC must be set for external transfer or FE operation!
iYYII.3 Machine
Program structure
Only linear programs
Block numbers (sequence numbers)
with “Blockwise
Program calls, subprogram executed.
calls, program
l
Unless the control
with a central tool file, only the tool last defined
The program
operates
to be transferred
are displayed
sequentially;
and conditional
(sequence however,
Data transfer from an external storage device can be started sequence/single block” with the “EXT” key. The control the storage
stores the transferred capacity is full.
No program ferred.
blocks are displayed
After starting, the processed external storage device.
over blocks
HEIDENHAIN TNC 2500B
program
blocks in available
until the available
blocks are cleared
memory ‘START”
numbers)
jumps cannot
be
can be called.
exceeding
no block number
999
imay exceed the
Operating
in the operating memory
modes
and intermpts
is full or the prograrrl button even when
“Program
run full
data transfer
is completely
no program
when
trans-
block is dis-
run, you should already have a number of stored proit is advantageous to wait until the available memory
and further
If, in “Blockwise transfer” operation, you press the “GOT0 number, all blocks preceding this number will be ignored.
Machine
progr’am
on the screen with 2 lines
The program run can be started with the machine played. To avoid unnecessary interruptions of the program gram blocks as a buffer before starting. Therefore, is full.
Skipping program
repeats
can have block numbers
The blocks do not have to be numbered number 65 534. numbers
section
transfer”.
l
High sequence
Starting “blockwise transfer”
can be executed
Modes
blocks are continuously
0” key before starting
called from the
and enter a sequence
Page M 23
Notes
Page M 24
I
Machine
Operating
Modes
HEIDENHAIN TNC 25006
Programming
Modes
Conversational
(P)
Programming General information Responding to dialog queries Editing functions Clearing/deleting functions
Program
1 2 3 5
Selection Opening a program Program protection Blank form definition
Tool Definition Tool definition in part program Tool definition in program 0 Transferring tool length Tool radius
Cutter
Path Compensation Entering RLfRR Working with radius compensation Radius compensation R+/R-
15 16 17
Tool call Tool change
1B 19
Tools
Feed rate F/ Spindle Speed Miscellaneous Programmable Dwell Time
S/ Function Stop/
M
20 2’1
Path Movements Entry Initiating the dialog Overview of path functions lD/2D/3D movements Linear Movement/ Cartesian Positioning Drilling Chamfer Example Additional
in rapid traverse
axes
26 27 28 213 30
Circular Movement/ Cartesian Circular interpolation planes Selection guide: Arbitrary transitions Tangential transitions
.-P I
HEIDENHAIN TNC 2500B
I
Programming
Modes
f
t 2 8 h
Programming
Circular [F]
Modes
(P)
Movement/Cartesian
p]
,G cl RNO
cc + c
:34
CR
136
Corner rounding Tangential
Polar
RND
:38
arc CT
40
Coordinates Fundamentals
42
Pole
43
Straight
line LP
44
Circular
path
45
Tangential
arc CTP
Corner rounding
RND
Helical interpolation
Contour
Approach
Predetermined
Program
Jumping
46 46
(CC + ) + Z
and Departure Starting and end position on an arc
49 !51
Constant contour speed: M90 Small contour steps: M97 End of compensation: M98 Machine-based coordinates: M91/M92
!52 !53 !54 !55
Overview
!56
M Functions
Jumps
Within
a Program Program markers (labels) Program section repeats Subprograms Nesting subprograms Example: Hole pattern Example: Horizontal geometric
Program
47
Calls
form
!57 !58 60 62 63 64
65
Programming
Modes
Programming
Standard
Modes
(P)
Cycles Introduction,
Overview
66
Fixed Cycles Preparatory measures Cycle 1 : Pecking Cycle 2: Tapping with floating tap holder Cycle 17: Rigid tapping Cycle 3: Slot milling Cycle 4: Rectangular pocket milling Cycle 5: Circular pocket milling
6-7 613 71 72 l 713 7!5 7'7
SL Cycles Fundamentals Cycle 14 Contour geometry Cycle 6 Rough-out PGM 7206: Rectangular pocket PGM 7207: Rectangular island Overlaps Overlapping pockets Overlapping islands Overlapping pockets and islands Cycle 15: Pilot drilling Cycle 16: Contour milling (finishing) Machining with several tools
7!3 80 80 82 8:3 84 8!5 8i3 8!3 91 92 913
Coordinate Transformations Overview Cycle 7: Cycle 8: Cycle 10: Cycle 1 1 :
Datum shift Mirror image Coordinate system rotation Scaling
9!3 96 913 100 102
Other Cycles Cycle 9: Dwell time Cycle 12: Program call Cycle 13: Oriented spindle
stop
104 1 O!J 106
Parametric Programming Overview Selection Algebraic functions Trigonometric functions Conditional/unconditional jumps Special functions Examples: Bolt-hole circle Drilling with chip breaking Ellipse as an SL cycle Sphere
l
New function
HEIDENHAIN TNC 2500B
Programming Modes
IO.7 IO{3 IO!3 110 1 1 12 1 1 :3 1 1 !3 116 1 1 '7 119
Programming
Programmed
Modes
(P)
Probing Overview Example:
Digitizing
measuring
length and angle
122 123
3D Contours Overview Defining the scanning range Line-by-line digitizing Defining the MEANDER scanning cycle Level-by-level digitizing Defining the CONTOUR LINES scanning cycle Executing a program with digitized positions Error messages
125 1260 128 130
Test Run
136
137
I
l
Data Transfer
New function
Programming
Modes
l
131 0 132 l 133 0
134
General information Transfer menu Connecting cable/Pin assignment for RS-232-C Peripheral devices HEIDENHAIN FE 401 Floppy Disk Unit Non-HEIDENHAIN devices Machine parameters
l
1290
Teach-In
External
l
140 141 142 143 144 145 146
Conversational Programming General information
Introduction
The individual work steps on a conventional machine tool must be initiated by the operator. On an NC machine, the numerical control assumes computation of the tool path, coordination of the feed movements on the machine slides and generally also monitors the spindle speed. The control receives the information for this in form of a program in which the machining of the workpiece is described.
Define and call a tool, move to the tool change
position.
Move to the workpiece
contour,,
machine
contour,
depart
the workpiece from the workpiece
Traverse to the tool change
contour,
position.
End of program Program Programs
The control can store up to 32 programs (HEIDENHAIN or ISO) with a total of 4000 (HEIDENHAIN dialog).
blocks
One part program
blocks
Individual numbers. Switching between conversational and DIN/IS0 programming
programs
can contain
up to 4000
are identified
scheme
1
by program
The control is switched to conversational or IS0 programming via the MOD functions (see: index General Information, MOD functions). A program consists of individual gram blocks (symbol: q ).
lines, called pro-
/ Every block in a program work step, e.g.
Blocks
corresponds
to one
7
L X+20 Y+30 Z-t50 ROFlOOOM03. Block numbers (Sequence numbers)
The block number (also called the sequence number) identifies the program block in a part program. The control assigns a unique number each block.
Words
Each block is composed
Address Values
A word is composed of an address and a value, e.g. +20. Abbreviations
of words,
to
e.g. X+20;
8 9 10 11 12 13
L
z-20 x-12 L x+20 L RND R+5 x+50 L cc
x-10
c
x+70
ROFMAX
MO3
Y-k60 ROFMAX Y-k60 RR F40 F2:O Y-120 RR F40 Y-1-80 Y-151,715DR+ RR
letter, e.g. X
used above:
L = linear interpolation X, Y, Z = coordinates = no tool radius compensation RO F = feed rate M = miscellaneous function
HEIDENHAIN TNC 2500B
Programming
Modes
Page PI
Conversational Programming Responding to dialog queries The dialog principle
Program input is dialog guided, i.e. the control requests the required data. The corresponding dialog sequence for each program block is started with a diaitiation key, e.g. “TOOL DEF” (the control subsequently requests the tool number, then the tool length, etc.).
Initiate dialog:
Example: tool definition
query appears
Errors are displayed in plain language during program input. False entries can be corrected immediately - while entering the program.
Second dialog query appears
current
block
L
Responding to dialog queries/ Continuing the dialog
After you press a diaitiation key, the control requests the necessary data. You must give a response to every dialog query. The response is shown in the highlighted field on the screen. After answering the dialog query, the entry is transferred to the memory with the “ENT” key. “ENT” is short for “enter” (i.e. confirm entry, transfer, store). The control then displays the next dialog query.
Skipping queries
To make the entries in the preceding block modal, that means valid for the current block, (e.g. feed rate or spindle speed), do not respond to the associated dialog queries; skip them with the “NO ENT” key.
dialog
PROGRRMMING
RNO
43
CYCL
Entries already displayed in the highlighted field or already included in the program are deleted with “NO ENT”; the next dialog query appears on the screen.
44
L
4L
L
X-70 2-2 X+70
46
L
y+ss
During program run, the previously programmed values are valid for the associated address.
__---------_----y--------------RCTL.
OEF
X + El+
1.5
EDITING FG0 Y-55
49,258 15,321
R0
m
M99
R
F
t-l99
R
F
tlss
Y c
+ +
23,254 84,000
R0
If you have programmed “END 0”.
Directly terminating a block
all the desired
information
In a block, you can directly terminate
The control saves the entered data, and no more queries for this block appear. Data not programmed in this block remain effective as programmed in previous Certain routines, such as “Read-in program”, are also terminated with this key.
MS/9
the block with
blocks.
Numerical values are entered with the numeric keypad - with a decimal point or decimal comma (selectable via machine parameter) and sign key. You need not enter preceding or succeeding zeroes. You can enter the sign before, during or after the entering the number.
Entering numerical values
Page P2
Programming
Modes
HEIDENHAIN TNC 2500B
Conversational Programming Editing functions
Editing
The term editing
means entering,
The editing functions are helpful effective at the touch of a kev.
Selecting a block
The current A specific
changing,
supplementing
in selecting
and changing
block stands between block is selected
two horizontal
with “GOT0
and checking program
programs.
blocks and words,
and they become
lines.
0”.
Initiate the dialog
El
GOTO: NUMBER =
Paging through the program
Vertical
cursor
the block number.
keys:
Select the next lower or next higher block number. Hold down
Inserting a block
Key in and confirm
a vertical cursor key to continuously
run through
the program
lines
You can insert new blocks anywhere in existing programs, Just call the block which is to precede new block. The block numbers of the subsequent blocks are automatically increased. If the program
storage
capacity
is exceeded,
this is reported
at diaitiation
the
with the error message:
= PROGRAM MEMORY EXCEEDED =. This error message also appears lower block number.
Editing
words
Horizontal
if program
end (PGM END block) is selected.
cursor keys:
The highlighted changed.
field is moved
One word in the current be changed:
The dialog query appears word, e.g.
within
program
the current
block and can be placed
block is to
If all corrections
HEIDENHAIN TNC 2500B
word to be
field to the word
for the highlighted
0X Change
another
on the iprogram
Move the highlighted to be changed.
COORDINATES ?
To change
You should then select a
the value.
Move the highlighted word to be changed.
word:
Transfer the block (or move the highlighted or left off the screen).
have been made:
Programming
Modes
field to the
field to the right
Page P3
Conversational Programming Editing functions You can use the vertical
Searching for certain addresses
Use the horizontal cursor then page in the program
cursor keys to search for blocks containing
a certain address
keys to place the highlighted field on a word with the vertical cursor keys:
only those blocks having the desired
All blocks with the address are to be displayed:
address
in the program.
having the search address,
and
are drsplayed.
Select one block with the desired address.
M
Place the highlighted field on a word with the required address.
MISCELLANEOUS FUNCTION M ?
Page P4
Programming
Call blocks with the desired
Modes
address.
HEIDENHAIN TNC 2500B
Clear program
Conversational Clearing/deleting
Programming functions
The dialog for clearing
is initiated
a program
with the CL PGM
key.
Initiate the dialog ERASE
= ENT/END
Program
= NOENT
is to be cleared:
select a program number.
or
Erase the program.
Program
Delete
block
is not to be cleared:
The current
block (in a program)
The block to be deleted
is deleted
is selected
with DEL q .
with GOT0
0 or a cursor key.
Program blocks can only be deleted in the PROGRAMMING AND EDITING operating mode. After deletion, the block with the next lower sequence number appears in the current program The following
sequence
Delete program section
To delete program
Clear entry, error message
You can clear numerical pressing the “CE” key.
Then continue
numbers
sections,
pressing
are corrected
call the last block of the program
DEL 0 until all blocks in the definition
inputs
with
Non-blinking
error
messages
An entered
value
and the address
the “CE”
section. or program
key. A zero appears
can also be cleared
are completely
Programming
line.
automatically.
Modes
with
the “CE”
cleared
with
section
are deleted.
in the higrllighted
field after
key.
“NO ENT”.
1
Page P5
Program Selection Opening a program Selecting an existing proaram ”
You open a program and select a stored program by first pressing the “PGM NR” key (program number). PROGRAM
A table with the HEIDENHAIN dialog programs and IS0 programs stored in the TNC appears on the screen. The program number last selected is highlighted. The program length in characters is given after the program number. IS0 programs are designated by “ISO” after the program number.
111 10002 111 11111
RCTL.
Depending on the selected opened (see index General
a
IS0
:3 2 __------------------------------
You can select the desired program either l via the cursor keys or l by entering its number. If the selected program number does not yet exist, a new program is opened.
Opening program
SELECTION
X Et
756 1440 1548 44 450 900
+
49,258 15,321
Y C
t t
23,254 84,000
rlG/9
Id0
program type, HEIDENHAIN dialog programs Information, MOD Functions).
or IS0 programs
can be
Initiate the dialog
PROGRAM SELECTION
q
PROGRAM NUMBER = MM = ENT / INCH = NO ENT
Example
Selecting existing ram
display
an
Enter the program number (maximum 8 characters). Confirm entry. for dimensions
in mm, or
for dimensions
in inches.
0 BEGIN PGM 96231MM 1 END PGM 96231MM
All existing programs executed, regardless
(HEIDENHAIN format and ISO) can be edited, tested, of the selected type of programming.
displayed
graphically
and
Initiate the dialog
Place the highlighted the desired program
field on number.
or
0 Example
display
Page P6
Enter the program
number.
0 BEGIN PGM 7645MM 1 BLK FORM Z X+0 Y+O z-40 2 BLK FORM X+100 Y+lOO z+o
Programming
Modes
HEIDENHAIN TNC 25008
Program Program
Edit protection
Selection protection
After creating
a program,
The program
is then marked
Protected
programs
you can designate
it as erase- and edit-protected.
with a P (“protected”)
can be executed
and viewed,
at the start and end of the program. but not changed.
A protected program can only be erased or changed if the erase/edit This is done by selecting the program and entering the code number
Activating protection
edit
edit
is, removed
beforehand.
;:i;t;i.mber
of the
Initiate the dialog
0 BEGIN PGM 22 MM
Press the key until the dialog “PGM protection” appears.
PGM PROTECTION ?
Protect the program
0 BEGIN PGM 22 MM
Removing protection
protection 86357.
Erase/edit P appears
P
query
protection is programmed. at the end of the line.
Initiate the dialog
PROGRAM NUMBER =
0 BEGIN PGM 22 MM
cl
P
Code number 86357
Enter the number of the program whose edit protection is to be removed.
Select the auxiliary
operating
mode.
Select the MOD function “Code number”.
VACANT MEMORY: 148330BYTE
CODE NUMBER =
0
Enter code number
86357.
I
I Erase/edit protection The P is deleted.
0 BEGIN PGM 22 MM
HEIDENHAIN TNC 25008
~
Programming
Modes
is removed.
I
Page P7
Program Selection Blank form definition
Test graphics
A blank form definition must be programmed before the machining program can be simulated graphically.
Blank
For the graphic displays, the blank dimensions of the workpiece (BLK FORM = BLANK FORM) must be entered at the start of program. The blank form must always be programmed a cuboid, aligned with the machine axes. Maximum dimensions: 14000 mm x 14000 mm x 14000
Minimum Maximum
point point
as
mm.
The cuboid is defined with the minimum point (MIN) and maximum point (MAX) (points with “minimum” and “maximum” coordinates). MIN can only be entered in absolute MAX may also be incremental.
dimensions;
The blank data are stored in the associated machining program and are available after program call.
Graphic display
Machining can be simulated in the three main axes - with a fixed tool axis.
Tool form
Machining is correctly displayed tool in the graphic view.
with a cylindrical
The graphic must be interpreted when using form tools.
accordingly
Page P8
Programming
Modes
I
HEIDENHAIN TNC 2500B
Program Selection Blank form definition The MIN point has the coordinates X0, YO and Z-40.
Example
The MAX point has the coordinates Xl 00. YIOO and ZO.
To define a blank, a program must be selected in the “Programming and editing” operating mode.
Entering the cuboid corner points
Initiate the dialog WORKING
SPINDLE
AXIS
X/Y/Z
?
0
Z
Enter the spindle
axis, e.g. Z.
MIN
Y coordinate.
MAX DEF BLK
FORM:
MAX-CORNER
?
X coorclinate. Y coordinate. Z coordinate.
Example
display
1 BLK FORM 0.1 Z X+0 Y+O z-40 2 BLK FORM 0.2 X+100 Y+lOO z+o
Error messages
BLK FORM DEFINITION INCORRECT The MIN and MAX points are incorrectly defined, or the machining blank definition, or the side proportions differ too greatly.
program
contsins
more than one
PGM SECTION CANNOT BE SHOWN Wrong spindle axis is programmed.
HEIDENHAIN TNC 2500B
I
Programming
Modes
I
Page P9
Tool Definition Tool definition in pat-t program
Tool definition
The control requires the tool length and tool radius to enable it to compute the tool path from the given work contour PROGRRHHING
These data are programmed
in the tool definition.
Whether the tools are defined decentralized in the appropriate part program or in a central tool file (program 0) is determined by a machine parameter.
2
BLK
3
TOOL
4
TOOL
5
END
FORH y+100 DEF
C3.2
x+100 z+0 L+0 R+5
1
CRLL PGH
EDITING
1 s
2 12s
55
MM
-------------------------------RCTL.
Compensation values always refer to a certain tool which is designated by a number.
Tool number
RN0
X
+
q +
49,258 15,321
Y C
+ t
23,254 84,000
Id0
Valid tool numbers:
HS/9
with automatic tool change or in program 0: 1 to 99 without automatic tool change or in the machining program: 1 to 254.
Tool definition in the part program
If tools required in a program tions of the tool dimensions.
input
Initiate the dialog TOOL
NUMBER
are defined
in that program,
?
a program
printout
will include
Enter the tool number.
cl
The tool number 0 cannot under TOOL DEF. Tool 0 is internally defined L = 0 and R = 0.
Page P 10
TOOL
LENGTH
TOOL
RADIUS
the specifica
be programmed
with
Enter the tool length or the difference to the zero tool.
L ?
0
R ?
Programming
Modes
Enter the tool radius
HEIDENHAIN TNC 2500B
Tool Definition Tool definition in program
Central tool file
0
If the central tool file (program 0) is activated by machine parameters, the tools must always be defined there. They then only have to be called in any program. The central tool file is programmed, changed, output and read in the “Programming and editing” operating mode. Every tool is entered with the tool number, length, radius and pocket number. Tool 0 must be defined with L = 0 and R = 0.
PROGRRMMING
L+s, L+12,45 L+2s,
Tf
KE L+32,71
Ts8 -----------------_--------------
k:A47a
q z
Tool 3 is to be defined
EDITING 3
R+6 R+7,7.9 R+3,5 R+2,S R+2 R+8 R+13 R+lS,S
21
Ts4
RCTL.
Example
AND
12 T3
+ +
=2 l
49,258 15,321.
Y C
+ +
23,254 84,000
with L = 5, R = 7
Initiate the dialog PGM
NAME
BEGIN
k3
?
TOOL
LO
MM
Select the tclol
RO
Enter the length. Enter the radius.
Tool changer with flexible pocket coding
On machines with a tool magazine and flexible magazine pocket than they were taken from. The control
memorizes
which
tool number
pocket coding,
is stored in which
the tools can be returned pocket.
“TOOL DEF” functions like a tool pre-selection here, i.e. the tool search DEF”. In this case, only the query for the tool number appears.
Oversize tools
Oversize tools occupying three pockets are to be designated returned to the same pocket. Program
by placing the highlighted
SPECIAL
TOOL
and respond
field on the dialog
to a different
as “special
is programmed
with,“TOOL
tools”. A special tool is always
query
?
with the “ENTER”
key.
The preceeding and succeeding pocket numbers should be deleted by positioning the highlighted field and pressing the “NO ENT” key. A Ile is displayed in place of the erased pocket number. “S” for special tool and “P” for pocket number only appear if this function was selected via machine parameters. PO (spindle)
HEIDENHAIN TNC 25006
or another
pocket must be free in the magazine.
Programming
Modes
Page P 11
Tool Definition
Tool length
L
The tool length is compensated with a single adjustment of the spindle axis by the length compensation. Compensation becomes effective after tool call and subsequent movement of the tool axis.
Zero tool
Compensation ends after a tool is called or with T,, (T, is called the zero tool and has a length of 0). The correct compensation value for the tool length can be determined on a tool pre-setter or on the machine. If the compensation value is to be determined on the machine, then you must first enter the workpiece datum.
Length differences
When
the compensation
The length differences length compensations.
values are determined
on the machine,
-Z or +Z of the other clamped
the zero tool serves as a reference.
tools to this zero tool are programmed
as tool
If a tool is shorter than the zero tool, the difference is entered as a negative tool length compensation. If a tool is longer than the zero tool, the difference is entered as a positive tool length compensation. Preset
tools
If a tool pre-setter is used, all tool lengths are already known. The effective compensation correspond to the tool length and are entered with the correct signs according to a list.
Page P 12
Programming
Modes
values
HEIDENHAIN TNC 2500B
Tool Definition Transferring tool length
Tool lengths can be easily and quickly entered with the actual position transfer function. 1. Move the zero tool To to the work surface set the spindle axis to zero. 2. After exchanging, the work surface.
and
L-0
L=+...
move the tools TI or T2 to
3. Transfer each display value in this position to the tool length definition. This gives you the length compensation to the zero tool.
To
Input
Operating
TI
T2
mode Touch the sLITface with the zero tool.
Initiate the dialog
II!z
DATUM SET
q
Spindle
axis, e.g. Z.
Reset to zero. Also touch the surface with the new tools TI or T2
Operating
mode Either 1. call a tool definition in a program the dialog “TOOL LENGTH L ?“,
and initiate
or 2. select a tool in the central tool file and initiate the dialog “TOOL LENGTH L ?“.
qz
Select the spindle axis to transfer the tool lenqth.
I
Transfer the length compensation.
cl
TOOL RADIUS R ?
HEIDENHAIN TNC 2500B
Programming
Modes
Enter the radius.
I
Page P 13
Tool Definition Tool radius Tool radius
R
The tool radius is entered as a positive (exception: radius compensation when ming the cutter center path).
number program-
A tool radius must always be programmed before a machining program can be checked with test graphics.
Tool radius compensation
Drilling work is programmed without radius compensation (RO), while milling jobs are usually programmed with radius compensation (RL/RR). Compensation is effective after a tool call, programming with RL or RR in a positioning block (L, C etc.), or a movement in the active interpolation plane. Compensation ends with a positioning block which contains RO. If the tool tool center radius, the tour at the grammed
Outside
corners
travels with path compensation, i.e. the path is offset by the programmed tool tool follows a path parallel to the condistance of the tool radius. The profeed rate applies to the center path.
The control inserts a transition around the corner.
curve for the center
In most cases, the tool is thus guided Automatic
decleration
at a constant
L
path of the tool at outside path speed around
corners,
the outside
so the tool rolls
corner.
at corners
If the programmed feed rate is too high for the transition curve, the path speed is reduced (which produces a more precise corner). The limit value is permanently programmed in the control (machine parameter).
Inside
corners
Page P 14
The control (equidistant)
automatically determines at inside corners.
the intersection
S of the two cutter paths parallel to the contour
This prevents back-cutting in the contour; the work is not damaged. distances according to the tool radius in use.
The control
The radius of the tool must always be chosen can be machined.
element
Programming
so that every contour
Modes
thus shortens
- even when
traversing
shortened
HEIDENHAIN TNC 2500B
-
Cutter Path Compensation
Entering RIJRR To automatically compensate for the tool radius as entered in the TOOL DEF blocks - the control must be informed whether the tool travels to the left of, to the right of, or directly on the programmed contour.
RO
If the tool is to travel on the programmed contour, no radius compensation should be programmed in the positioning block. At the dialog query TOOL RADIUS COMP.: RL/RR/NO COMP. ? press the “ENT” key. Screen display: RO
Programming radius compensation
The radius compensation is entered in positioning blocks (L, C etc.) with the “RL” and “RR” keys at the dialog query TOOL RADIUS COMP.: RL/RR/NO COMP. ? “Left” or “right” should be understood in the direction of movement.
as looking
RR
If the tool is to travel at the distance of the radius to the right of the programmed contour, press the “RR” key. Display: RR
RL
If the tool is to travel at the distance of the radius to the left of the programmed contour, press the “RL” key. Display: RL
If the previous compensation effective (modal): press the “NO ENT” key. Display: R
HEIDENHAIN TNC 2500B
should
1
remain
Programming
Modes
Page P 15
Cutter Path Compensation Working
Starting point RO
with radius compensation
Change the tool and call the compensation with “TOOL CALL”. Traverse rapidly to the starting
values
point 0.
At the same time lower Z to the working depth (if danger of collision, first traverse in X/Y, then separately in Z!). This compensates for the tool length. The radius compensation off with ‘30”.
still remains
switched
IS’ contour point RL/RR
Traverse to contour point 0 wrth radius compensation RL/RR at reduced feed rate.
Machining around the contour
Program the following milling feed rate.
contour
points to 0 at
Since the RL/RR asignment remains constant, the associated dialog queries can be skipped with “NO ENT” or “END 0”.
Last contour point RLIRR
After a complete circulation, the last contour point 0 is identical to the first cantor point 0 and is still radius compensated.
End point RO
The end point (outside the contour) must be programmed without compensation RO for complete machining.
r”t
To prevent collisions, only retract in the machining plane to cancel the radius compensation. Then back-off
Page P 16
I
the tool axis separately.
Programming
Modes
/
HEIDENHAIN TNC 2500B
Cutter Path Compensation Radius compensation R+, RInitiating the dialog
Em...
By pressing “R+” or “R-“, you can lengthen or shorten a single-axis displacement by the tool radius This simplifies: positioning with manual data input, l single-axis machining 0 prepositioning for the “Slot” cycle. The input dialog may be initiated - as on the point-to-point and straight cut controls TNC 131/ TNC 135 - directly via the corresponding yellow axis key. This radius compensation has the following effect: l
Effect
l
The displacement radius:
is shortened by the tool display R-.
l
The tool traverses position:
to the programmed display RO.
0 The displacement radius: R-t/R-
Example
nominal
is lengthened by the tool display R+.
do not affect the spindle
The tool is to traverse
axis
from initial position
X = 0 to X = (46 + tool radius).
Application example: prepositioning for the “Slot” cycle.
Initiate the dialog 1 POSITION
TOOL
VALUE
RADIUS
?
COMP.:
R+/R-/NO
COMP.
? Display:
X+46
Mixing and clX
Uncompensated blocks (e.g. L X+20 RO) and single-axis blocks (e.g. X+20 RO or X+20 R+) can be mixed in a part program. Single-axis compensated positioning blocks (R+/R-) and radius compensated positioning blocks (RR/RL) are not to be entered in succession! Incorrect:
Correct: L X+15
Y+50 x+40 Y+70
HEIDENHAIN TNC 2500B
R+
L X+15
Y+20 RO
Y+50
RO R+ RO
L X+50
Programming
Modes
Y+20 RR
R+ Y+57 RR
Page P 17
Tools Tool call With TOOL CALL a new tool and the associated compensation values for length and radius are called up.
call
Spindle axis
In addition to the tool number, the control also needs to know the spindle axis to carry out length compensation in the correct axis or radius compensation in the correct plane.
Compensation effect
The spindle axis also defines the plane (e.g. XV) for circular movements: compensation” plane. This is also the plane for “coordinate rotation” and “mirror image”. Spindle
axis
2 Y X
/ Length
compensation
to the “radius
1 Radius compensation XY zx YZ
Z Y X
The spindle speed is entered directly after the spindle axis. Input range of the control: 0 to 99999 rpm. If the speed exceeds the valid range for the machine, the following run
Spindle speed
It is identical
error message
appears
at program
WRONG RPM Activating compensation
Ending compensation
A tool call activates length compensation. It first becomes effective when the next tool axis movement is programmed. It can be seen as a single infeed height movement. Radius compensation first becomes effective when the compensation direction grammed in a positioning block. A “TOOL CALL” block ends the “old” tool length and tool radius compensation compensation values. Example: TOOL CALL 12 Z S 300 Tool radius compensation
is also ended
If only the spindle speed is entered Example: TOOL CALL S 300 Tool call
by programming
“RL” or “RR” is pro-
and calls the new
“RO” in the positioning
with “TOOL CALL”, the compensations
block.
remain valid
Initiate the dialog
0
TOOL NUMBER ?
Spindle axis
WORKING SPINDLE AXIS X/Y/Z
Spindle speed
SPINDLE SPEED S RPM ?
Page P 18
2
?
u
n Programming
Modes
Enter the tool number.
Enter the spindle
axis, e.g. Z.
Enter the spindle
speed (rpm).
HEIDENHAIN TNC 25008
Tools Tool change
Tool change position
To change the tool, the main spindle must be stopped and the tool retracted in the spindle axis. We recommend the insertion of an additional block in which the axes of the machining plane are likewise backed-off.
Workpiecerelated change position
The tool moves to a workpiece-related
position
Example: L Z+lOO FMAX MO6 The tool is driven 100 mm over the work surface programmed.
if no additional
measures
if the tool length
are taken.
is 0 or TOOL CALL 0 was /’
TO reduces the distance to the workpiece was effective prior to TOOL CALL 0.
Machine-related change position
Manual tool change
You can use M91, M92
or a PLC positioning
Example: L Z+lOO FMAX M92 (see Machine-related coordinates
(danger
of collision!)
to traverse to a machine-related
The program must be stopped for a manual tool change. Therefore, enter a program STOP before the TOOL CALL. M6 has this stop effect when the control is set accordingly via machine parameters. The program is then stopped until the external START button is pressed.
tool change
position
a
1 BLK FORM
0.1 Z X+0
Y+O Z-40
2 BLK FORM
0.2 X+100
Y+lOO Z+O
3 TOOL
DEF 1 L+O R+S
4 TOOL
DEF 2 L-2,4
5 TOOL
CALL
6 L Z+200 7 TOOL 8 L X+25
HEIDENHAIN TNC 2500B
compensation
M91/M92)
The program STOP can only be omitted when tool call is programmed solely to change the spindle speed.
Automatic tool change
if a positive4ength
The tool is changed at a defined change position. The control must therefore move the tool to a machine-specific change position. The program run is not interrupted.
Programming
Modes
0 Z
RO FMAX CALL
R.+3 MO6
1 Z S 1000
Y+30 FMAX
9 LZ+2FMAXM3
Page P 19
Feed Rate F/Spindle Speed S/ Miscellaneous Functions M Feed rate
F
The feed rate F, i.e. the traversing speed of the tool in its path, is programmed in positioning blocks in mm/min or 0.1 inch/min. The current feed rate is shown in the status display on the lower right of the screen.
Feed rate override
The feed rate can be varied within a range of 0% to 150% with the feed rate override on the control operating . The effective range of the potentiometer for tapping is limited by machine parameters!
Rapid
traverse
The maximum input value (rapid traverse) 29998 mm/min or l 11 800/l 0 inch/min.
on the control
for positioning
is:
l
The maximum operating speeds are set for each axis. FMAX or the max. input is programmed for rapid traverse. The control automatically limits rapid traverse to the permissible FMAX
values.
is only effective blockwise.
If the F display is highlighted and the axes do not move, this means the feed rate was not enabled at the control interface. In this case, you must your machine manufacturer,
The spindle
Spindle speed
speeds
are set with “TOOL CALL”
S Spindle override
On machines with continuous spindle override.
Miscellaneous functions
Miscellaneous functions can be programed to regulate certain machine functions (e.g. spindle “on”), to control program run and to influence tool movements. The miscellaneous functions are comprised of the address M and a code number according to IS0 6983. All of the M functions from MOO to M99 can be used.
M
spindle
drive, the speed can be varied from 0% to 150%
using the
Certain M functions become effective at the start of block (e.g. M03: spindle “on” clockwise), i.e. before movement, and others become effective at the end of block (e.g. M05: spindle “stop”). A list of all M functions with their effects as determined by the control can be found inside the back cover. Only a certain number of these M functions are effective on a given machine. Some machines may employ additional, non-standard M functions not defined M functions are normally programmed in positioning blocks (L, C etc.). However, M functions can also be programmed without positioning:
l l
Page P 20
Via the “STOP” key or by initiating the dialog with the “L” key and skipping
Programming
Modes
the queries
by the control.
with “NO ENT” up to address
M
Programmable
Stopping program
run
Stop/Dwell
Program run can be stopped by one of the following Restart by pressing the external START button.
Time
functions.
Initiate the dialog
MISCELLANEOUS FUNCTIONS M ? Miscellaneous
function
No miscellaneous
is desired:
function
desired:
18 STOP
Example
Enter the miscellaneous
cl
No entry.
M
Program run is stopped at block 18 No miscellaneous function
M02/M30
l
Program stop and (according to ISO) also spindle Return to block 1 of the program.
stop and coolant
off
MOO
l
Program
stop and (according
to ISO) also spindle
stop and coolant
off.
MO6
l
Program
stop and (according
to ISO) also spindle
stop, coolant
Program
stops only when
Dwell
time
set accordingly
by machine
Cycle 9 “Dwell time” can be used during program grammed time period (see “Other cycles”). Note : The program
HElDENHAlN TNC 2500B
m
continues
running
function.
off and tool change.
parameter!
run to delay execution
of the next block for the pro-
after the dwell time runs out!
Programming
I
Modes
1
Page P 21
Path Movements Entry The control/operator dialog for entering straight line movement.
Operating
positioning
blocks is illustrated
below
using the example
of a
Programs can only be input in “PROGRAMMING AND EDITING”.
mode L El
Initiate the dialog Example
Select the type of movement,
e.g. straight line.
Enter the end point of movement: COORDINATES
X cl
?
n
I
Incremental
- absolute
Enter numbers
n 0
Select the axis, e.g. X
Y
Enter further
?
with sign. coordinates.
If all endpoint coordinates confirm the entry.
TOOL
RADIUS
COMP.:
RL/RR/NO
COMP.
Enter the radius compensation
?
no radius compensation
1 FEED
are entered,
(RO).
Enter the feed rate or press only
RATE?F=
for FMAX = rapid traverse.
MISCELLANEOUS
Subsequent coordinates.
FUNCTION
blocks can be ended
Page P 22
may be skipped
cl
M ?
immediately
In these cases, the last entries remain Addresses
or
with “END 0”. e.g. after entering
valid for non-programmed
with “NO ENT”.
Programming
Enter a miscellaneous if desired.
Modes
addresses
function
the corner point
Path Movements
Initiating the dialog Contour elements
The shape tool were composed computes
of the workpiece is programmed without considering the tool. You program as though the constantly being moved, regardless of the machine design. The programmable contours are of the contour elements straight line and circle. Using tool radius compensation, the control the tool-dependent path for the cutter center along which the tool is guiided
Generating the workpiece contour
To be able to generate the workpiece contour, the control must be given the individual contour elements. Since each program block specifies the next step, the following information is required:
Contour
l l
straight line or circle the coordinates of each endpoint or other geometrical data such as the circle center and contour radius.
Straight
elements line
To program a contour element, always begin with one of the gray path function keys. The type of movement is then defined for the contour element in question.
Coordinates
Point coordinates the path function.
Incremental/ Absolute
To enter the point coordinates press the key for incremental
u
can only be input after selecting
Helix
f /
Path function Initiating the dialog
Circular arc
keys
[8) L
c [% clP
incrementally, inputs.
I
HEIDENHAIN TNC 2500B
Programming
Modes
Page P 23
Path Movements Overview
Straight lines
of path functions
Straight line (L): The tool moves in a straight The endpoint of the straight grammed. Chamfer A chamfer lines.
Circles
is inserted
between
line. line must be pro-
two
straight
+ss Circle center (CC) cl also the pole for polar coordinates: Used to program the circle center for a circular arc with the “C” key, or to program the pole for polar coordinates. CC generates no movement!
El
c Circular movement (C): The tool is moved in a circular arc. Program the endpoint of the arc. The circle center must be specified beforehand.
RND
0*c
Corner rounding (RND): An arc with tangential connections is inserted between two contour elements. Program the arc radius and (in other blocks) the contour elements of the corner to be rounded. Circular arc (CT) = “circle tangential”: A circular arc is tangentially connected to the preceding Only the endpoint of the arc is programmed.
q c&
Circular arc (CR) = ,,circle per radius”: The tool is moved on a circular path. Program the circle radius and the endpoint
Multi-axis movements
A maximum
Graphics
The examples on the following display IS wanted:
Page P 24
Z
for straight
pages must be supplemented
X+0 Y+O Z-40 x+100 Y+lOO z+o
Programming
element
of the arc (but not the circle center)
of three axes can be programmed
BLK FORM 0.1 BLK FORM 0.2
contour
Modes
lines and a maximum
with a uniform
of two axes for circles.
BLK FORM if a graphic
Tl
Path Movements lD/2D/3D movements
L
Movements are referred to - depending on the number of simultaneously traversed axes - as ID, 2D or 3D movements.
Single-axis traverse: ID movements
If the tool is moved relative to the work on a straight line along the direction of a machine axis, this is called single-axis positioning or machining. Single-axis movements can also be programmed without using the grey path function keys. Only the radius compensation R-t/R- is then available (see Radius compensation R+/R-).
2D movements
Movement in a main plane (XV, YZ. ZX) is called 2D movement. Straight lines and circles can be generated main planes with 2D movements.
3D movements
If the tool is moved relative to the workpiece on a straight line with simultaneous movement of all three machine axes, It IS called a 3D straight line. 30 movements are required planes and bodies.
HEIDENHAIN TNC 2500B
in the
to generate
Programming
oblique
Modes
Page P 25
[gl
Linear Movement/Cartesian Positioning in rapid traverse
Positioning
The tool is at the starting point 0 and must travel on a straight line to target point 0. You always program the target point 0 (nominal position) of straight lines.
L
Position 0 can be entered coordinates.
in Cartesian
or polar
The first position in a program must always be entered as an absolute value. The following positions can also be incremental values.
Example tool definition/ call
1 L+lO
R5
Tool 1 has length 10 mm and radius 5 mm
1
Z
Tool 1 is called in the spindle Spindle
s200
speed
axis Z.
is 200 rpm.
Z is traversed with length compensation. Only press “ENT” after all simultaneously traversing axes are entered!
Positioning block: complete input (main block) RO FMAX L X+50
Y+30
M3
Z+O RO FMAX
via “ENT”!
Rapid traverse clockwise.
“FMAX”,
movement
spindle
M3
Re-entry at tool calls is especially tool call. Rapid traverse
“RO” is only programmed
can also be entered
easy if you enter a main block (= complete
as a machine-specific
value (e.g. F 6000),
positioning
block) after a
if known
Positioning in the XY plane without radius compensation. The tool center is driven to the programmed position (if RO was programmed in preceding blocks).
Abbreviated input
After entering the desired data is unchanged.
Page P 26
values, program
Programming
blocks may be shortened
Modes
with the “END 0” key if remaining
II
Linear Movement/Cartesian Drilling
L
Absolute Cartesian coordinates
L x+30 Y-t40 z+2
3: 1. )
Multidimensional contour elements can only be entered after initiating with a gray path function key!
10
LO
3
Incremental Cartesian dimensions
Only incremental
pJ[T][Yj20
entry.
L IX-t-20
The position for X is entered in Incremental dimensions, for Y in absolute dimensions.
Mixed entries
Example drilling
Program
A bore is programmed
0 1 2 3 4 5
below
for illustration
purposes
BEGIN PGM 5231MM BLK FORM 0.1 Z X+0 Y+O Z-20 BLK FORM 0.2 X+100 Y+lOO Z+O TOOL DEF 1 L+O R5 TOOL CALL 1 Z S1250 L Z+200 ROFMAX M6
HEIDENHAIN TNC 25008
L Z-i-2 FMAX L Z-10 F80 L Z+2 FlOOO L X+50 Y+70 ROFMAX L z-10 F80 L Z+2 FlOOO L X+75 Y+30 ROFMAX L z-10 F80 L Z+200 FMAX M2 END PGM 5231MM
Programming
cycles
Blank form definition (only if graphic simulation desired) Tool definition Tool call Retract in Z, tool change Positioning to lSt hole in X/Y, rapid traverse, switch on spindle Pilot positioning in Z Drilling at programmed feed rate Retract in Z Positioning to 2”d hole in X/Y Drilling at programmed feed rate Retract in Z Positioning to 3’d hole in X/Y Drilling at programmed feed rate Retract in Z End of program
6 L X+20 Y+30 ROFMAX M3 7 8 9 10 11 12 13 14 15 16
without
Modes
workpiece
Page P 27
L?l
Linear Movement/Cartesian Chamfer
Chamfer
A chamfer can be programmed for contour corners formed by the intersection of two straight lines. The angle between the two straight lines can be arbitrary.
L
L
El
Prerequisites
A chamfer is completely defined by the points 0 0 0 and the chamfer block. A positioning block containing both coordinates of the machining plane should be programmed before and after a chamfer block. The compensation RLMR/RO must be identical before and after the chamfer block. A contour cannot be started with a chamfer. A chamfer can only be executed in the machining plane. The machining plane in the positioning block before and after the chamfer block must therefore be the same. The chamfer length must not be too long or too short at inside corners: the chamfer must “fit between the contour elements” and also be machineable with the chosen tool. The previously programmed effective for the chamfer.
Programming
feed rate remains
Program a chamfer as a separate block. Only enter the chamfer length - no coordinates. The “corner point” itself is not traversed?
Entering the chamfer
Is”]
Program
L4
block
L
L = chamfer
TOOL DEF 1 L+O RIO TOOL CALL 1 Z S200 L X+0 Y+50 RL F300 M3 L x+50 Y+.50 L4 L x+50 Y+O
Example
Page P 28
r
length
Position 0 (cf. figure above) Position 0 Chamfer Position 0
Programming
Modes
‘[Bj L
Linear Movement/Cartesian Example
Example: milling straight lines
The block numbers are shown you in following the sequence.
Program
1 2 3 4 2 7 8 9 10 11 12 13 14
HEIDENHAIN TNC 2500B
I
TOOL DEF 1 L+O R5 TOOL CALL 1 Z S500 L Z+200 RO FMAX M6 L X-10 Y-20 RO FMAX M3 L Z-20 R F80 L X+0 Y+O RL F200 L X+0 Y+30 RL F400 L x+30 Y+50 RL L X+60 Y+50 RL L2 L X+60 Y+O RL L X+0 Y+O RL L X-20 Y-10 RO L Z+200 R FMAX M2
Programming
in the figure to aid
Tool definition Tool call Tool change Pilot position (tool is up) Plunge at downfeed rate Approach the contour, call radius compensation Machine the contour
Chamfer
block
Last block with radius compensation Cancel radius compensation Back-off Z
Modes
/
Page P 29
[8)
Linear Movement/Cartesian Additional axes
Linear axes u, v, Qv
Linear interpolation can be performed simultaneously with a maximum of 3 axes - even when using additional axes.
L
For linear interpolation with an additional linear axis, this axis must be programmed with the corresponding coordinate in every NC block. This requirement holds even when the coordinate remains unchanged from one block to the next. If the additional axis is not specified, the control traverses the main axes of the machining plane again. Example: linear interpolation tool axis Z.
Rotary
axes
A. B. C
11
L
x+0
IV+0
12
L
x+100
IV+0
13
L
X+150
IV+70
RR FlOO
with X and IV,
If the additional axis is a rotary axis (A, B or C axis), the control s the entered value in angular degrees. During linear interpolation with one linear and one rotary axis, the TNC interprets the programmed feed rate as the path feed rate. That is, the feed rate is based on the relative speed between the workpiece and the tool. Thus, for every point on the path, the control computes a feed rate for the linear axis FL and a feed rate for the angular axis Fw: FL =
F.hL d (A L)’ + (A W)’
F =F’Aw w d (A L)’ + (A W)2 where: F = = FL = Fw A L = A W =
M94 for rotary axes
programmed feed rate linear component of the feed rate (axis slides) angular component of the feed rate (rotary table) linear axis displacement angular axis displacement
The position
display for rotary axes can be set via machine
+ 360’ or f 00 (i.e. + max. display value). If f 00 is chosen as the measuring below 360’ with M94.
parameters
for either:
l l
Page P 30
range, the position
Programming
Modes
display for rotary axes can be reduced
to values
Circular Movement/Cartesian Circular interpolation planes Main
planes
Circular arcs can be directly
TOOL
CALL
The circular interpolation plane is selected by defining the spindle axis in the “TOOL CALL” block. This also allocates the tool compensations. The axis printed bold below (e.g. X) is identical in its positive direction with the angle O” (leading axis)
Interpolation planes
Spindle axis parallel to
Standard for milling machines
programmed
in the main planes XY, YZ, ZX
Circular
interpolation
plane
XY
Z
Standard horizontal
for borers
Y
z
0" Y DRt
k
X
X
Oblique circles in space
HEIDENHAIN TNC 2500B
Circular arcs which are not parallel to a main plane can be programmed as a sequence of multiple short straight lines (L blocks).
I
Programming
Modes
via 0 parameters
I
and executed
Page P 31
Circular Movement/Cartesian Selection guide: Arbitrary transitions
Circular movement
The control moves two axes simultaneously, so the tool describes a circular arc relative to the workpiece.
Arbitrary transitions
The functions the preceding tangential and beginning and
Prerequisite
The starting point 0 of the circular movement must be approached in the immediately preceding block.
Circle
The circle endpoint CR block.
endpoint
Both definitions rotation.
Rotating direction DR+/DR-
C and CR define - together with block - arbitrary transitions (i.e. non-tangential transitions) at the end of the arc.
0 is programmed
also contain
Positive rotating direction ) is counterclockwise. Negative
rotating
direction
in a C or
the direction
of
(in mathematical
is clockwise.
The radius is indirectly given for “C” as the distance from the position programmed in the immediately preceding C block (start of arc) to the circle center CC. Full circles can only be programmed in one block, with “C”. With CR the radius can be entered directly (CC not required). 1 Select Given
Radius
Full circles CR Selecting
Starting
point of arc 0
Circle center
cl4”
End point of arc 0
[%
Starting
point of arc 0
Radius + end point of arc 0 Page P 32
e.g. c!$p
Approach starting point
C
e.g,
tirp c!
Approach
starting
point
El5 Programming
Modes
Circular Movement/Cartesian Selection guide: Tangential transitions
Tangential transitions
The “RND” and “CT” functions automatically produce a tangential (soft) entry into the arc. Departure from the arc is also tangential with “RND”, and arbitrary with “CT”. The direction of movement when entering the circle thus also determines the shape of the arc.
Direction of rotation
The direction given.
Center
The circle center is not reauired
RND
The “RND” rounding is inserted between two contour elements which can be either straight lines or arcs.
of rotation
need therefore
not be
for either function.
Program the corner point 0 that is not approached and directly thereafter a separate rounding block “RND” with the rounding radius R. Entry and departure from the rounding is necessarily tangential and is automatically computed by the control.
CT
With “CT” only the arc endpoint programmed.
Selecting
Given
Select
Point 0
e.g. approach
with
v 0
Corner 0
e.g. approach
with
y cl
Rounding
0 is to be
RND
cd cl
radius
Point 0
e.g. approach
with
q
Tangent-forming point 0
e.g. approach
with
‘fl cl
Tangential
e.g. approach
with
entry 0
y
End point of circular arc 0
HEIDENHAIN TNC 25008
I
Programming
Modes
cc -+ 01%
c
4” Cl Circle center
Circular
cc + c
Movement/Cartesian
CC has two functions: I, Specifying the circle center for circular be programmed with “C”). 2. Defining the pole for polar coordinates.
CC
The circle center CC must be programmed before circular interpolation with “C”. The CC coordinates remain valid until changed by new CC coordinates There are three methods
for programming
The circle center CC is directly Cartesian coordinates.
l
The coordinates last programmed define the circle center.
l
The current position is taken as CC with “NO ENT” or “END 0” (without numerical input).
the circle center
CC incremental: “CC” produces
Approaching the starting point
Approach
Radius
The distance
by
in a CC block
for positions
The dialog for the circle center CC absolute:
defined
CC:
l
This is also possible in polar coordinates.
Circle G El
arcs (to
programmed
is initiated
with the “CC” key.
is based on the work datum.
the circle center
is based on the tool position
the starting
point for the circular
from the starting
arc before the C block.
point to the circle center determines
The tool is to travel from position 0 to target point 0 in a circular path. Only program 0 in the C block. Position 0 can be entered in Cartesian or polar coordinates.
C
The direction of rotation DR must be defined for circular movement: rotation in positive direction DR+ (counterclockwise) rotation in negative direction DR- (clockwise).
Direction of rotation
Any tool radius compensation before a circular arc.
Page P34
last programmed.
no movement!
must begin
Programming
Modes
the radius.
cc +I+ Elm
c
Input tolerance
Input
CC
Input
C
Circular
cc + c
Movement/Cartesian
The starting and endpoint must lie on the same circular path, i.e. they must be at the same distance from the circle center CC. The tolerance of position inputs for the starting position, end position and circle center is III 8 urn.
Circle center Arc endpoint Specify the rotating press once for press twice for + Program
blocks
direction
with the “+/-”
cc x+50 Y+50 C X+15 Y+50 DREnter R. F and M as for straight lines. Input is only needed to change earlier specifications
Example full circle
Full circle in the XY plane (outer circle) around center X+50. Y-t50 with 35 mm radius
Program
TOOL TOOL
DEF 1 L+O R5 CALL 1 Z S200
L X+15 cc
x+50
c x+15
Y+50 RL F300 M3 Y+50 Y+50
DR- RL
Full circles can be programmed with “C” in one block. The circle starting point and the circle endpoint are identical.
Example
arc
Program
X
Semicircle in the XY plane (inside circle) around center X+50 Y+50 with 35 mm radius. L X+85 cc
x+50
C X+15
HEIDENHAIN TNC 25006
I
Y+50 RL F300 M3 Y+50 Y+50 DR+ RL
Programming
Modes
Page P 35
key:
cl
Circular
Circle
If the contour radius is given in the drawing, but no circle center, the circle can be defined via the “CR” key with the l endpoint of the circular arc l radius and l direction of rotation. R, F and M are entered as for straight lines and are only required when changing earlier specifications.
CR 2@
CR
CR
clc%
Starting
Movement/Cartesian
point
Endpoint
The starting point of the arc must be approached in the preceding block. In the CR block the endpoint can only be programmed with Cartesian coordinates. The distance between starting and end point of the arc must not exceed 2 x R. With CR, full circles can be programmed in 2 blocks.
Central
angle
There are two geometric solutions for connecting two points with a defined radius (see figure), depending on the size of the central angle p: The smaller arc 1 has a central angle PI < 180°, the larger arc 2 has a central angle p2 > 180’. Enter a positive radius to program the smaller arc (f3 < 180”). (The + sign is automatically generated.)
Contour radius
To program the larger arc (f3 > 1800), enter the radius as a negative value. The maximum definable radius = 30 m. Arcs up to 99 m can be produced with parametric programming.
Depending on the allocation of radius compensation RL/RR, the rotating direction determines whether the circle curves inward (= concave) or outward (= convex). In the adjacent figure, DR- produces a convex contour element, DR+ a concave contour element.
Rotating direction
Page P 36
Programming
Modes
HEIDENHAIN TNC 2500B
CR c))” Cl
CR
Input
[5jpq80pJ40
Endpoint
R-t100
Radius, positive
DR
Direction of rotation sign key.
CR
Program
block
Circular
Movement/Cartesian
of arc sign specified
with the change
CR X+80 Y+40 R+lOO DR-
Examples:
TOOL DEF 1 L+O R.5 TOOL CALL 1 Z S200
Arc A
L X+20 Y+60 RL F300 M3 CR X+80 Y+60 R+50 DR-
Arc B
L X+20 Y+60 RL F300 M3 CR X+80 Y+60 R-50
Arc C
DR-
L X+20 Y+60 RL F300 M3 CR X+80 Y+60 R+.50 DR+
Arc D
L X+20 Y+60 RL F300 M3 CR X+80 Y+60 R-50
DR+
The position X+20 Y-t60 is the start of arc in the examples; the position X+80 Y+60 is the end of arc.
HEIDENHAIN TNC 2500B
I
Programming
Modes
Page P37
cl
Circular Movement/Cartesian Corner rounding RND
RNR Gcl
“RND” has two functions: rounding of corners, if RND is “in the contour”, 0 soft approach and departure from the contour, if RND is at the start or end of the contour. l
Circular
arc
RND
clcd2
Contour corners can be rounded with arcs. The circle connects tangentially with the preceding and succeeding contour. A rounding arc can be inserted at any corner formed by the intersection of the following contour elements: straight line - straight line, straight line - circle, or circle - straight 0 circle - circle. l l
line,
Prerequisites
Rounding is completely defined by the RND block and the points 0 0 0. A positioning block containing both coordinates of the machining plane should be programmed before and after the RND block. The RL/RR/RO compensation must be identical before and after the RND block.
Note
The rounding arc can only be executed in the machining plane. The machining plane must be the same in the positioning block before and after the rounding block. The rounding radius cannot be too large or too small for inside corners - it must “fit between the contour elements” and be machinable with the current tool. The feed rate for corner rounding is effective blockwise. The previously programmed feed rate is reactivated after the RND block.
Programming
Error messages
The rounding arc is programmed as a separate block following the corner to be rounded. Enter the rounding radius and a reduced feed rate F, if needed. The “corner point” itself is not approached!
PLANE WRONGLY DEFINED The machining planes are not identical and after the RND block.
before
ROUNDING RADIUS TOO LARGE The rounding
Page P 38
I
is geometrically
impossible.
Programming
Modes
The tool radius can be larger than the rounding radius on outside corners. The tool radius must be sSmaller than or equal to the rounding radius on inside corners.
LJ
Circular Movement/Cartesian Corner rounding RND
Input
0SC 8
Rounding
FlOO
A separate feed rate can be entered effective for this rounding.
RN0 w 4i
RNO
RND
Program
block
Sequence
and is only
RND 8 FlOO
TOOL DEF 1 L-t0 R5 TOOL CALL 1 Z S200
Examples:
Sequence
radius
A
B
HEIDENHAIN TNC 2500B
L X+10 Y+60 RL F300 M3
Position 0
L X+50 Y+60
“Corner
RND7
Rounding
L x+90 Y+50
Position 0
L X+10 Y+60 RR F300 M3
Position 0
L X+50 Y+60
“Corner
RND7
Rounding
L x-t-90 Y+50
Position 0
I
point” 0
point” 0
Programming
Modes
I
Page P 39
[PI
Circular Movement/Cartesian Tangential arc CT
Circular
A circular arc can be programmed more easily if it connects tangentially to the preceding contour. The circular arc is defined by merely entering the arc endpoint with the “CT” key.
CT
arc CT
CT
[_b”l
Geometry
An arc with tangential connection is exactly defined by its endpoint.
to the contour
This arc has a specific radius, a specific direction of rotation and a specific center. This data need not therefore be programmed.
Prerequisites
The contour element which connects tangentially to the circle is programmed immediately before the tangential arc. Both coordinates of the same machining plane must be programmed in the block for the tangential arc and in the preceding block.
Tangent
The tangent is specified by both positions 0 and 0 directly preceding the CT block. Therefore, the first CT block can appear no earlier than the third block in a program.
Circular
arc CT
Machining
The tool is to travel a circle connecting tangen tially to 0 and 0 to target point 0. Only 0 is programmed in the CT block.
Geometry
Coordinates
The endpoint of the circular path can be programmed in either Cartesian or polar coordinates
Error messages
WRONG CIRCLE DATA The required minimum 2 positions block were not programmed.
sequence
before the CT
ANGLE REFERENCE MISSING Both coordinates of the machining plane are not given in the CT block and the preceding block. Cartesian
coordinates PA
I
Polar coordinates
Page P 40
Programming
Modes
Circular Movement/Cartesian Tangential arc CT
Input
CT
Program
Arc endpoint
block
CT X+90 Y+40 Enter R, F and M as for straight lines. Input is only necessary to change earlier definitions
Examples: different endpoints
TOOL DEF 1 L+O R10 TOOL CALL 1 Z S200
Arc A
L X+10 Y+80 RL F300 M3 1”’ tangent point L x+50 Y+80 Stat-t of arc CT X+130 Y+30 End of arc
Arc B semicircle
L X+10 Y+SO RL F300 M3 Is1 tangent point L x+50 Y+80 Start of arc CT X+50 Y+O End of arc. A semicircle with R = 40 is formed
Arc C quarter
circle
L X+10 Y+80 RL F300 M3 IS’ tangent point L X+50 Y+80 Start of arc CT X+80 Y+50 End of arc. A quarter circle with R = 30 is formed.
io
80
130
Different tangents Arc A
L X+10 Y+80 RL F300 M3 L X+50 Y+80 CT X+90 Y+40
Arc B
L X+10 Y+60 RL F300 M3 L X+50 Y+80 CT X+90 Y+40
Arc C
L X+50 Y+llO RL F300 M3 L X+50 Y+80 CT X+90 Y+40
HEIDENHAIN TNC 2500B
I
Programming
Modes
I
Page P 41
cl
Polar Coordinates Fundamentals
P
The control allows you to enter nominal positions in either Cartesian or polar coordinates. In polar coordinates, the points in a plane are specified by the polar radius PR (distance to the pole), and the polar angle PA (angular direction). The pole position is entered with the “CC” key in Cartesian coordinates based on the workpiece datum.
Marking
Blocks in polar coordinates (LP, etc.).
Angle reference axis
The +X +Y +Z
angle axis in axis in axis in
are marked
r
by a P
reference axis (0” axis) is the the XY plane, the YZ plane, the ZX plane.
The machining plane (e.g. XY plane) is determined by a tool call. The sign of the angle PA can be seen in the adjacent figure.
Absolute polar coordinates
Absolute‘dimensions are based on the current pole. Example: LP PR+50 PA+40
Incremental coordinates
A polar coordinate radius entered changes the last radius. Example: LP IPR+lO
polar
An incremental polar coordinate to the last direction angle. Example: LP IPA+lS
incrementally
angle IPA refers
O0 Absolute and incremental coordinates mixed within one block. Example: LP PR-t.50IPAt-
Mixing
may be
Page P 42
Programming
Modes
Po’ecc cl+
Polar Coordinates Pole
Pole
The pole must be specified with “CC” before entering polar coordinates. The pole can be set anywhere in the program prior to using polar coordinates.
04”
The pole is programmed tal Cartesian coordinates. CC absolute: piece datum.
in absolute
or incremen-
the pole is referenced
to the work-
CC incremental: last programmed
the pole is referenced nominal tool position.
A CC block is programmed of the machining plane.
to the
with the coordinates
Example
CC X+60 Y+30
Transferring the pole
The last programmed position is transferred the pole. Program an empty CC block.
as
Directly transferring the pole in this manner is especially well suited for polygon shapes with polar dimensions (see illustration below).
Example
L X+26 Y+30 cc LP PR+17 PA-45 cc LP PR+18 IPA-
POLE 1 POLE 2
X Modal effect
A pole definition remains valid in a program until it is overwritten with another definition. The same pole therefore need not be programmed repeatedly.
VI 0
I CCY
F
cc;X
HEIDENHAIN TNC 2500B
I
Programming
Modes
I
Page P 43
Polar Coordinates Straight line LP
After opening
with the ‘I”
key, you must press the “P” key to enter positions
in polar coordinates.
For dimensions which are referenced to a rotational axis in some way, such as bolt hole circles or cams, programming is usually easier in polar coordinates than in Cartesian coordinates because calculations are avoided.
Range for polar angle
Input range for linear interpolation:
absolute
or incremental
PA PA positive: counterclockwise angle PA negative: clockwise angle.
Example
Milling
an inside contour:
Program
TOOL DEF 2 L+O R2 TOOL CALL 2 Z S200 CC X+50 Y-t60
Set POLE
L X+15 Y+50 ROFlOOOM3 Approach
starting point externally (Cartesian coordinates)
L Z-5 FlOO
Plunge
LP PR+40 PA+180 RR F200 Approach LP IPALP IPALP IPAL X+85 Y+50 RO L Z+50 ROF9999 M2
Page
P44
I
lSt contour point with compensation (polar coordinates) 2”d contour pornt Last contour point Depart from contour, cancel compensation Retract
Programming
Modes
-360“
to +360”.
Polar Coordinates
Circular path Circular
arc
If the target point on the arc is programmed in polar coordinates, you only have to enter the polar angle PA to define the endpoint. The radius IS defined by the distance from the starting point of the arc to the programmed circle center CC. When programming a circle in polar coordinates, the angle PA and the rotating direction DR can be entered positively or negatrvely. The angle PA determines the endpoint of the arc. If the angle PA is entered incrementally, the sign of the angle and the sign of the rotating direction should be the same. In the figure to th’e right, this means that IPA is negative and DR is allso negative.
Range for polar angle
PA
Input range for circle interpolation: absolute or incremental -5400° to +5400°
Example
An arc with radius 35 and circle center X+50 Y+60 is to be milled. Rotating direction is clockwise.
Program
TOOL TOOL
DEF 1 L-t0 R5 CALL 1 Z S200
CC X+50
Y+60
LP PR+35 PA+210
C PA+0
DR- F300
Coordinates of circle center RL F200 M3
Approach circle (circle radius is 35 mm) Circular movement clockwise
------o X
In the example, a contour radius of 35 mm is obtained from the distance between thIe POLE and the approach point on the circle.
HEIDENHAIN TNC 2500B
Programming
Modes
Polar Coordinates Tangential arc CTP Corner rounding RND
[g-q
cl RND c%c
Tangential
arc
(T-Jlp)
The endpoints of tangential arcs may be entered in polar coordinates to simplify the programming of, for example, cams. The start of the arc is automatically when programming with CT.
tangential
If the transition point are not calculated exactly, the arc elements could become “jagged”. Specify the pole CC before programming coordinates.
in polar
Example
A straight line through 0 and 0 is to tangentially meet the arc to 0. The radius and direction angle of 0 with respect to CC are known.
Program
TOOL DEF 1 L-t0 R4 TOOL CALL 1 Z S200 60
CC X+65 Y+20 L X+10 Y+30 RL F500 M3 L X+20 Y+60 CTP PR+70 PA+80
0.
El
Polar “corners” can also be rounded with the “corner rounding” function (see Circular Movement/Cartesian, Corner rounding RND).
RND a-&
Page P 46
Programming
Modes
IO
20
65
c i%cl
P
Polar Coordinates Helical interpolation
(CC + ) + z
+El Helix
If 2 axes are moved simultaneously to describe a circle in a main plane (XV. YZ, ZX), and a uniform linear motion of the tool axis is superimposed, then the tool moves along a helix (helical interpolation).
Applications
Helical interpolation can be used to advantage with form cutters for producing internal and external threads with large diameters, or for lubricating grooves. This can save you substantial tool costs.
Input
The helix is programmed
data
in polar coordinates.
First specify the POLE or circle center CC.
Angle
range
Height
Enter the total angle of tool rotation for the polar angle IPA in degrees: IPA = number of rotations x 360° Maximum angle of rotation: f 5400° (15 complete rotations).
The total height H (= IZ) is entered axis (Z) at the query “Coordinates”.
for the tool
Calculate the value from the thread pitch and the required number of tool rotations. IZ = P . n, IZ = total height/depth to be entered P = pitch n = number of threads The total height/depth can be entered in absolute or incremental dimensions.
Thread
A complete thread can be programmed quite easily with IZ and IPA; the number of threads is then specified with a program section repeat REP.
Radius compensation
The radius compensation l l l
HEIDENHAIN TNC 25008
depends
rotating direction (right/left), type of thread (internal/external), milling direction (positive/negative direction) (see table to the right).
upon the
axis
Programming
Modes
Page P 47
Polar Coordinates Helical interpolation Input example
[$ci
[q
[y]
360 [y]
[y]
2
(CC + ) + z Endpoint Rotating direction
IPA+
IZ+2 DR+
Task
A right-hand internal thread M64 x 1.5 is to be produced in one cut with a multi-cutter tool.
Thread
Thread pitch start end Number Overrun at start at end
Catcu taations
data: P = 1.5 mm
a, = O” a, = O” = 360° of threads of threads:
no = 5 n, = l/2 n2 = l/2
Total height: IZ = P. n = 1.5 mm
[5 + (2 . l/2)] = 9 mm
Incremental polar angle: IPA = 360° t n = 360° t [5 + (2 . l/2)] = 2160° Due to overrun of l/2 thread, the start of thread is advanced starting angle a, = a, + (-1807 = O” + (-1807 = -180°
by 180?
The overrun of l/2 thread at the start of thread gives the following Z = -P n = -1.5 mm . [5 + l/2] = -8.25 mm
initial value for Z:
TOOL DEF 1 L+O R20 TOOL CALL 1 Z S.500
Program
L x+50 Y+30
Approach
cc
Take the position
L Z-8.25 ROFMAX M3
Downfeed
LP PR+32 PA-180 RL FlOO Approach
Page P 48
value
Z
the wall with radius R and starting
Helical movement and total height
L X+50 Y+30 MO5
Retract in XY
L Z+lOO FMAX
Retract in Z
cannot
as pole
at center to initial
IPA+ 160 IZ+9 DR+ RL F200
Helical interpolation
Note
the hole center
be graphically
Programming
with incremental IZ
displayed
Modes
angle
angle IPA
a,
Contour Approach and Departure Starting and end position Selecting contour
the lSt point
Before beginning contour programming, compensation is to begin.
Starting
point
In the vicinity of the first contour point, define an uncompensated starting point, that can be approached in rapid traverse, and be sure to consider the tool in use. The starting point must fulfill the following criteria: l l l l
Direct
approach
Starting
points
approachable without collision near the first contour point outside the material the contour will not be damaged
specify the first contour
when
approaching
point at which
the first contour
with
radius
point.
When working on a circle (RND) without the TNC approach/departure does not blemish the contour due to a direction change. 0 Not recommended
machining
function,
also check that the tool
Surface blemish due to change of Y-axis direction
0 Not recommended 0 Suitable
Also for end point
0 Optimal
Lies on the extension of the compensated path
0 Not recommended
Contour
damage
@ Not permitted! Radius compensation must remain for the starting position (RO).
switched
off
i End points
The same prerequisites apply for selecting the uncompensated end point as for the starting point. The ideal end point 6 lies on the extension last contour element RL.
of the
0, 0 Not recommended
Surface blemish due to change of the X-axis direction
0 Suitable
Also for the starting point
@I Optimal
Lies on the extension of the compensated path
0 Not recommended
Contour
+i+c
4 35
-.
.-.-B. 2 ij
1 @
damage
@ Not permitted!
b
Radius compensation must be switched departure from the contour (RO).
off after lllustratron
Common starting and end point
For a common starting and end point, select point 0 on the bisecting line of the angle between the first and last contour element.
-.-.-
programmed path traversed cutter center path
HEIDENHAIN TNC 25008
I
Programming
Modes
Page P49
._
Contour Approach and Departure Starting and end position The starting position 0 must be programmed without radius compensation, i.e. with RO.
Approach
The control guides the tool in a straight line from the uncompensated position 0 to the compensated position 0 of contour point 0. The tool center is then located perpendicular to the start of the first radius-compensated contour element.
Departure
.At a transition from RL/RR to RO, the control positions the tool center in the last radius compensated block (RL) perpendicular to the end of the last contour section. Then the next uncompensated approached with RO.
position
is
Approaching from an unsuitable position
If radius compensation is begun from Sl, the tool will damage the contour at the first contour point if no extra measures are taken!
Departure
The same applies contour.
Page P 50
when
departing
from the
Programming
Modes
Contour Approach on an arc
RND 0o/-c
Approach departure an arc
and on
RNO cd2 c!
and Departure
The TNC enables you to automatlcally approach and depart from contours on a circular path.
Begin programming
with the “RND” key.
The tool traverses from the starting position 0 initially on a straight line and then on a tangentially connected arc to the programmed contour. The starting point can be selected as desired, is approached without radius compensation (with RO).
and
The straight line positioning block to contour point 0 must contain radius compensation (RL or RR). Then program Departure
a RND block.
The tool travels from the last contour point 0 on a tangentially connecting arc and then on a tangentially connecting straight line to the end position 0. The positioning block for 0 should radius compensation (i.e. RO).
Approach departure
arc/ arc
Feed rate
Program scheme
not contain
The radius R can be substantially less than the tool radius. It must be small enough to fit between 0 and 0 or 0 and 0. A feed rate exclusively for the approach and departure arc can be programmed separately the RND block.
in
s
L Xs Ys Zs RO FMAX L X1 Y1 RL F500
L k, Ys RL F200
RND 2.5 FlOO
RND 2.5 FlOO
L X2 Y2 F200
L XE YE RO F500 2200 FMAX
Notes
HEIDENHAIN TNC 2500B
Programming
Modes
Page P 51
Predetermined M Functions Constant contour speed: M90 Standard practice: automatic deceleration at corners
For angular transitions such as internal corners and contours with RO, the axes are stopped briefly because an abrupt change of direction is not mechanically possible. This protects the machine definition of corners.
and results in sharp
For some tasks it is advantageous corners.
not to stop at
Example: The contour of a free-form surface produced with a large number of short linear movements. Here it is desireable to smooth the corners.
The corners grammed in ther and can stoppage of corners.
M90
are smoothed if M90 is proevery block. The workpiece is smoobe machined faster. M90 prevents the axes blockwise for RO or internal Without
Drawbacks
Greater strain on the machine at sharper changes of direction, until safety limit is reached (specified by the machine manufacturer).
Note
The exact execution depends on the machine parameters. the machine manufacturer for more information.
M90
With M90
Page P 52
Programming
Modes
Predetermined M Functions Small contour steps: M97 If there is a step in the contour which is smaller than the tool radius, the standard transition arc would cause contour damage. The control therefore issues an error message and does not execute the corresponding positioning block.
M97
M97 prevents insertion of the transition arc. The control then determines a contour intersection 0 as at inside corners and guides the tool over this point. The contour is not damaged. However, machining is then incomplete and the corner may have to be reworked. A smaller tool may help. M97 is effective blockwise and must be programmed in the block containing the outside corner point. Without
Example
M97
TOOL DEF 1 L+O R10 TOOL CALL 1 Z S 100 L L L L L L
X+0 Y+30 RL F200 M3 X+40 Y+30 M97 X+40 Y-t28 X+80 Y+28 X+80 Y+30 M97 x+100 Y+30
0 0 0 @ 0
With M97
With M97
HEIDENHAIN TNC 25008
Programming
Modes
Page P 53
Predetermined M Functions End of compensation: M98 Standard inside corner compensation
On inside corners in a continuously radius-compensated contour, the tool moves only to the intersection of the equidistants (see top figure). The work cannot be completely machined at positions 0 and 6.
M98
The middle figure shows two independent workpieces. Positions 0 and 6 are not connected. The tool must therefore be guided to positions @ and @. If you program a position with M98, the path offset remains valid until the end of this element and is ended there for this block. No intersection is computed and no transition arc is generated for the end position, so the tool is always traversed perpendicular to the contour end point. The previous compensation is reactivated matically in the following block 6. Position @ is approached The contour and 0.
L L L L L L
perpendicularly
is thus completely
X+0 Y+26 RL FIOO X+20 Y+26 X+20 Y+O M98 x+50 Y+O X+50 Y+26 X60 Y26
Stepover milling with M98
Stepover
milling
Example
TOOL DEF 1 L+O R5 TOOL CALL 1 Z S200
machined
auto to 6 at 0
0 0 0 0 0 @
with infeeds
in Z.
L x+70 Y-10 RRFMAXM3
Prepositioning
L Z-10 FMAX
Plunge
L Y+llO F200 M98
Stepover
L Z-20 FMAX
Second
L Y+llO RL F200
Prepositioning
L Y-10 M98
Stepover
infeed
Programming
Modes
Predetermined Machine-based
Coordinates
programmed
M Functions coordinates:
with M91 and M92 are independent
M91/M92!
of the manually
set workpiece
datum
M91
Positions programmed with M91 are referenced to the datum of the linear or angle encoders. The datum is located at the negative end of the measuring range on linear encoders with distance-coded reference marks. On encoders with a single reference mark, the datum is set by this reference mark (the position of the reference mark is indicated by the RM sticker).
M92
When
Applications
The miscellaneous
Displaying fixed machine coordinates
HEIDENHAIN TNC 2500B
programming
M92, nominal
functions
l
approach
fixed machine
l
approach
the tool change
positions
refer to the machine
M91 and M92 are used, for example,
datum
to
points, or position.
You may use the “MOD” key to display the coordinates (see index “General Information”, MOD Functions).
Programming
Modes
referenced
to the datum
of the encoders
Page P 55
Program Jumps Overvievv
Jumping within a program
The following gram: 0 Program
jumps section
l
Subprogram
l
Conditional
l
Unconditional
can be made within
a pro-
Examples:
CALL LBL 4 REP 3/3
repeat
CALL LBL 7
call
IF QS GTO GOT0 LBL, 12
jump
IF 0 EQU 0 GOT0 LBL 8
jump
Nesting: A program section repeat or a subprogram also be called from within another program tion repeat or subprogram. (Maximum nesting depth: 8 levels)
can sec-
Examples:
CALL PGM 3 CYCL DEF PGM CALL PGM 3
L X+50 M99
Page P 56
Programming
Modes
Jumping Program
Labels
Within a Program markers (labels)
Labels (program markers) can be set during programming to mark the beginning of a subprogram or program section repeat. These labels can be jumped to during program run (e.g. to execute the appropriate subprogram)
Setting a label
Label
A label is set with the “LBL SET” key. The label numbers 1 to 254 can be set only once in a program.
0
Label number 0 always marks the end of a subprogram (cf. “Subprogram”) and is therefore the return jump marker. It can thus occur more than once in a program.
Calling a label number
The dialog
is initiated
with the “LBL CALL” key.
With LBL CALL you can: l
0 BEGIN PGM 1 MM 1 BLK FORM 0.1 Z X-t0 Y+O Z-40 2 BLK FORM 0.2 X+1,00 Y+lOO Z+O 3 TOOL DEF 1 L+O R+3 4 TOOL CALL 1 Z S 500 5 CYCL DEF 1.0 PECKING 6 CYCL DEF 1.1 SET UP -2 7 CYCL DEF 1.2 DEPTH -20 8 CYCL DEF 1.3 PECIKG. -6 9 CYCL DEF 1.4 DWELL 0 10 CYCL DEF 1.5 F120 11 L Z+50 ROFMAX MO6 12 L X+10 Y+20 R FMAX MO3 13 L Z+2 FMAX 14 CALL LBL 1 REP 15 L X+20 Y+50 FMAX 16 CALL LBL 1 17 L X+10 Y+80 FMAX 18 CALL LBL 1 19 L Z+50 ROFMAX MO2 20 LBL 1 21 CYCL CALL M 22 LBL 2 23 L IX+10 R FMAX 1699 24 CALL LBL 2 REP 5 f5 25 LBL 0 26 END PGM 1 MM
call subprograms
0 create program
section
Pecking cycle Refer to “Fixed cycles” for explanation
repeats.
Label numbers (1 to 254) can be called as often as desired. Do not call label O!
Program repeats
section
For program repetitions.
section
repeats,
to the query REPEAT REP ? by entering
Subprograms
For subprogram
Conditional jumps
You can make the call of a program Programming, Overview).
Error
JUMP TO LABEL 0 NOT PERMITTED
messages
calls, respond
respond
the number
of required
to this query with the “NO ENT” key.
label be dependent
on a mathematical
condition
(see Parametric
This jump (CALL LBL 0) is not allowed.
LABEL NUMBER ALLOCATED Each label number
HEIDENHAIN TNC 2500B
- except LBL 0 - can be allocated
Programming
Modes
(set) only once
in a given program.
Page P 57
Jumping Program
Program repeats
section
Within a Program section repeats
An executed program section can be executed again immediately. This is called a program loop or program section repeat.
LBL SET
A label number marks the beginning of the program section which is to be repeated.
LBL CALL REP with number
The end of the program section to be repeated is designated by a call LBL CALL with the number of repetitions REP. A program times.
Jump
Program
direction
run
section can be repeated
up to 65534
22 LBL 2 23 L IX+10 FMAX M99 24 CALL LBL 2 REP 5 /5
A called program section repeat is always executed completely, i.e. until LBL CALL. A program jump is therefore only meaningful if it is a return jump. In other words, the called label (LBL SET) must have a smaller block number than the calling block (LBL CALL). The control executes the main program (along with the associated program section) until the label number is called. Then the return jump is carried out to the called program label and the program section is repeated. The number of remaining repetitions play is reduced by 1: REP 2/l. After another return jump, the program repeated a second time.
on the dis-
section
22 LBL 2 is
23 L IX+10
FMAX M99
When all programmed repetitions have been performed (display: REP 2/O), the main program is resumed.
24 CALL LBL 2 REP515
The total number of times a program section is executed is always one more than the programmed number of repeats.
Error message
EXCESSIVE SUBPROGRAMMING A jump was programmed incorrectly: 1. No REP value was entered for a program section repeat. If no response is given to the query REP (by pressing the “NO ENT” key), the program section is treated like a subprogram without a correct ending (LBL 0): the label number is called 8 times. During program run or a test run, the error message appears on the screen alfter the 8th repetition 2. The subprogram
Page P 58
I
was programmed
without
Programming
LBL 0 for an intended
Modes
subprogram
call.
Jumping Program
Setting the program label
Within a Program section repeats
Example: Program
Repeating a program section after LBL
Example bolt-hole
row
label 1 is set
6 repetitions after LBL 1. The program section between LBL 1 and CALL LBL 1 is executed a total of 7 times.
The illustrated bolt-hole row with 7 identical bores is to be drilled with a program section repeat. The tool is pilot positioned (offset to the left by the bore center distance) before starting the repeat to simplify programming.
Program
Nesting of repetitions
TOOL TOOL
DEF 1 L+O R2.5 CALL 1 Z S200
L X-7
Y+lO
Z+2 RO FMAX
LBL 1 LIX+1.5
FMAX
L z-10 L Z+2 CALL LBL
FlOO FMAX 1 REP 6
Tool definition Tool call M3
Pilot positioning
Start of the program section repeat Incremental distance between the bores, rapid traverse Absolute drilling depth, drilling feed rate Absolut retraction height, rapid traverse Call for repeats
The main program is executed until the jump to LBL 17 (CALL LBL 17). The program section between LBL 17 and CALL LBL 17 is repeated twice. The control then resumes the main program until the jump to LBL 15 (CALL LBL 15).
run
Og The program section until CALL LBL 17 REP 2/2 is repeated once and the nested program section also two more times. Then the program run is resumed.
SE=
0 o
=0 -
CALL LBL 17
0 0 CALL LBL 15
0
SO
LBL 17
REI’ 2/Z ===o izE5 -Z -0 REP l/l
0 3
-
0
I
L HEIDENHAIN TNC 25008
Programming
Modes
Page P 59
Jumping Within Subprograms
Subprograms
a Program
If a program section occurs several times in the same program, it can be designated as a subprogram and called whenever required. This speeds up programming.
Start of subprogram
The start of subprogram is marked number (can be any number).
End of subprogram
The end of the subprogram label 0.
with a label
is always marked
by
The different subprograms are then called in the main program as often as wanted and in any sequence.
i4 CALL LBL 1 15 L x+20 Y+50 16 CALL LBL 1 17 L x+10 Y+80 18 CALL LBL 1 19 L Z+50 ROFMAX MO2 20 LBL 1 21 CYCL CALL M 22 LBL 2 23 L IX+10 R FMAX M99 24 CALL LBL 2 REP 5 f5 25 LBL 0 26 END PGM 1 MM
No repetitions Reply to REPEAT REP with
When the subprogram is called with LBL CALL, the “NO ENT” key must be pressed after the dialog query REPEAT REP ? appears. A subprogram can be called at any point in the rnain program (but not from within the same subprogram)
Program
The control subprogram
run
executes call 0.
the main program
A jump to the called program performed. Subprogram 1 is processed of subprogram).
until the
label 0 is then until label 0 (0) (end
CALL LBL 1 LX...Y ..
Then the return jump to the main program follows. The main program is resumed with the block 6 following the subprogram call.
MO2 LBL 1
iBL 0
Subprograms should be placed after the main program (behind M2 or M30) for the sake of clarity. If a subprogram is placed within the main program, it is also executed once during program run without being called. Error
messages
If a subprogram call is programmed incorrectly (e.g. an end of subprogram REPEAT REP ? was entered), the error message
EXCESSIVE SUBPROGRAMMING appears.
Page P 60
I
Programming
Modes
lacks LBL 0, or a value for
Jumping Within Subprograms Entry example: Subprogam
a Program
BEGIN PGM 1 MM 2
Subprogram program.
:
Conclude
L ZlOO FMAX M2
2 is called from within
the main
with “NO ENT”
Retract and return jump to start
LBL 2
Start of subprogram
LBL 0
End of subprogram
END PGM 1 MM
2
2
End of main program
Example
A group of four bores is to be programmed as subprogram 2 and executed at three different positions.
Program
TOOL DEF 1 L+O R2.5 TOOL CALL 1 Z S200 CYCL DEF PECKING SET UP -2 DEPTH -20 PECKG. -10 DWELL 0 FEEDRATE FlOO L x+15 Y+lO ROFMAX M3
Approach
bore group 0
L Z+2 FMAX CALL LBL 2
Subprogram
L X+45 Y+60 FMAX CALL LBL 2
Approach bore group 0 Subprogram call
L X+75 Y+lO FMAX CALL LBL 2
Approach bore group 0 Subprogram call
L Z-t50 FMAX M2
Retract tool axis
LBL 2 CYCL CALL L IX+20 FMAX M99 L IY+20 FMAX M99 L IX-20 FMAX M99 LBL 0
call
Start of subprogram Call peck drilling cycle Incremental traverse, drill Incremental traverse, drill Incremental traverse, drill End of subprogram M99 = blockwise
Cross-reference
HEIDENHAIN TNC 25008
You will find an explanation
cycle call
of the peck drilling
Programming
cycle in the section
Modes
“Fixed cycles”.
Page P 61
Jumping Within a Program Nesting subprograms
Nesting subprograms
The main program is executed until the jump command CALL LBL 17 is reached.
BEGIN PGM 12 MM
The subprogram beginning with LBL 17 is subsequently executed until the next CALL LBL 20, which is then run until CALL LBL 53. The lowest nested subprogram until its LBL 0. At the return grams finally
CALL LBL 17 M2
53 is run through
LBL 17
end (LBL 0) of the last subprogram (53). jumps are made to the preceding subpro(20 and 17). until the main program is reached.
CALL LBL 20 iBL 0
The main program is then taken up again at the point immediately following CALL LBL 17. A subprogram call is considered when the first LBL 0 is reached!
LBL 20
executed
CALL LBL 53 iBL 0 LBL 53 iBL 0 END PGM 12 MM
Repeating subprograms
You can execute subprograms the nesting technique:
repeatedly
with
Subprogram 50 is called in a program section repeat. This subprogram call is the only block in the program section repeat. : the subprogram will be executed more time than the programmed number of repeats.
LBL 5 CALL LBL 50 CALL LBL 5 REP 9
one
M2 LBL 50
LBL 0
Page P 62
Programming
Modes
Jumping Example:
Based on the example “group of four holes at three different positions” (see the section “Subprograms” on the previous pages), three different tools and drilling operations will be added to the program. You will find an explanation of the pecking and tapping cycles in the section “Fixed cycles”.
Task
Note
0 BEGIN PGM 183MM 1 BLK FORM 0.1 Z X+0 Y+O Z-20 2 BLK FORM 0.2 X+110 Y+lOO Z+O 3 TOOL DEF 25 L+O R+2.5 4 TOOL DEF 30 L+O R+3 5 TOOL DEF 35 L+O R+3.5 6 CYCL DEF 1.0 PECKING 7 CYCL DEF 1.1 SET UP -2 8 CYCL DEF 1.2 DEPTH -3 9 CYCL DEF 1.3 PECKG -3 10 CYCL DEF 1.4 DWELL 0 11 CYCL DEF 1.5 FlOO 12 TOOL CALL 35 Z S 500 13 CALL LBL 1 14 CYCL DEF 1.0 PECKING 15 CYCL DEF 1.1 SET UP -2 16 CYCL DEF 1.2 DEPTH -25 17 CYCL DEF 1.3 PECKG -6 18 CYCL DEF 1.4 DWELL 0 19 CYCL DEF 1.5 F50 20 TOOL CALL 25 Z S 1000 21 CALL LBL 1 22 CYCL DEF 2.0 TAPPING 23 CYCL DEF 2.1 SET UP -2 24 CYCL DEF 2.2 DEPTH -15 25 CYCL DEF 2.3 DWELL 0 26 CYCL DEF 2.4 FlOO 27 TOOL CALL 30 Z S 250 28 CALL LBL 1 29 L Z-t50 ROFMAX M2
Countersink
Pecking
Tapping
Subprogram
Subprogram
Within a Program Hole pattern with several tools
1
2
Call subprogram
Retract spindle
30 LBL 1 31 L X+15 Y+lO ROFMAX M3 32 L Z-i-2 FMAX 33 CALL LBL 2 34 L X+45 Y+60 FMAX 35 CALL LBL 2 36 L X+75 Y+lO FMAX 37 CALL LBL 2 38 LBL 0 39 LBL 2 40 CYCL CALL 41 L IX+20 42 L IY+20 43 L IX-20 44 LBL 0
1
axis; jump to start of’program
Approach bore group 0 Traverse to safety clearance Call subprogram 2 Approach bore group 0 Approach
bore group 0
Cycle call (countersink,
pecking,
tapping)
M99 M99 M99 M99 = blockwise
45 END PGM 183MM
Programming
Modes
cycle call
I
Page P 63
Task
Jumping
Within a Program
Example:
Horizontal
geometric
form
The adjacent geometric contour is to be machined from a cuboid with an end mill which is to be continuously advanced in the Y direction by a program section repeat. The contour is divided into two halves along the line of symmetry to simplify the working procedure. The contour is to be machined upwards. In addition to the adjacent length is specified with: Y = 100 mm.
Program procedure
dimensions,
the cuboid
The adjacent figure schematically shows the cutter center path and the associated program blocks. The entire contour is divided into a “left” and “right” half and is machined in the two program section repeats LBL 1 and LBL 2. The program runs without radius compensation, i.e. the cutter center path is programmed. To obtain the desired contour, the tool radius must be subtracted on the left side and added on the right side (all X coordinates). 0 1 2 3 4 5
BEGIN PGM BLK FORM BLK FORM TOOL DEF TOOL CALL L X-20 Y-l
90007685 MM 0.1 Z X+0 Y+O Z-70 0.2 X+100 Y+lOO Z+O 1 L+O R+lO 1 Z SlOOO FMAX M3
Program section repeat 1 Approach
starting
lnfeed in Y axis Program section
point for “left side”
is executed
41 times
Retract spindle axis Approach starting point for “right side”
1.5 L Z+20 FMAX 16 L X+120 Y-l Program section repeat 2
lnfeed in Y axis Program section 26 L Z+20 FMAX M2 27 END PGM 90007685
is executed
Retract spindle axis, jump to start of program
MM Programming
Modes
41 times
Program
Jumping another program
to main
Calls
You can call another program which is stored in the control from any machining This allows you to create your own fixed cycles with parametric programming. Program the call with a “PGM CALL” key.
program
Calling criteria
The program to be called cannot contain MO2 or M30. In the called program, do not program back to the original program (creates an endless loop). Only one BLK FORM can exist.
Process
The control executes main program 1 until CALL PGM 28. Then a jump is made to main program 28. Main program end.
28 is executed
from beginning
a jump
/I
to BEGIN
Then a return jump is made to main program 1. Main program 1 is resumed with the block following the program call.
87 CALL
PGM
1 MM
1 BEGIN 0 m;m
PGM 28 MM
70 END
PGM 28 MM
0
PGM 28
0
0
0 END PGM 1 MM
Example
1 Call with a separate
CALL PGM 10 Example
2
line
The program to be called can also be specified with a cycle definition. The call then functions like a fixed cycle.
Call e.g. via M99 (see Other Cycles, Cycle 12)
CYCL DEF 12.0PGM CALL CYCL DEF 12.1PGM 20
HEIDENHAIN TNC 2500B
prograrn
Programming
Modes
Page P 65
0
Standard Cycles Introduction, Overview
Standard
cycles
To facilitate programming, frequently recurring machining sequences (drilling and milling jobs) and certain coordinate transformations are preprogrammed as standard cycles.
Machine builder cycles
The machine manufacturer can own programs as cycles in the cycles can be called under the 68 to 99. the machine more information.
Selecting a cycle
After pressing the “CYCLE DEF” key, data for the cycles shown to the right can be entered and also any programmed cycles can be selected. The desired cycle can be selected with the vertical cursor keys or with “GOT0 0”.
Defining a cycle
also store his control. These cycle numbers manufacturer for
Cycle
1 2 17 3 4 5 12
Pecking Tapping Rigid tapping Slot milling Pocket milling Circular pocket Program call
: 0 0 0 0 0
14 15 6 16
Contour geometry Pilot drilling Rough-out Contour milling
0 0 0
Cycles must be called after moving the tool to the appropriate position - only then will the last defined cycle be executed.
No.
Cycle
There are three ways to call a cycle:
i 10
The cycle definitions can be entered after pressing “ENT”.
in the dialog i E ‘El s iT
Calling a fixed cycle
l
With a separate
M99
l
Via the miscellaneous function M99. “CYCL CALL” and M99 are only effective blockwise and must therefore be reprogrammed for every execution.
M89
l
Page P 66
CYCL CALL block
Via the miscellaneous
M89 M89 Coordinate transformations
Effective after call
No.
function
11
QE zi
M89 (depending
9
on machine
transformations
Dwell time
parameters)
and the dwell time are effective immediately
Programming
Modes
0
Datum shift Mirror image Rotating the coordinate system Scaling
is effective modally, i.e. the last programmed cycle is called at every subsequent IS cancelled or cleared by M99 or by CYCL CALL.
Coordinate changed.
Effective immediately
positioning
and rernain effective until
block.
Fixed Cycles Preparatory Prerequisites
Dimensions
measures
The following must be programmed cycle call (e.g. M99).
before a
l
Tool call: to specify the spindle spindle speed
axis and the
l
Positioning block to the starting position in the plane with miscellaneous function for specifying the rotating direction of the spindle
l
Cycle definition
l
Posittoning
(CYCL DEF)
the spindle
axis
In the cycle definition, dimensions for the tool axes are to be entered incrementally, referenced to the tool position at cycle call. The “incremental” key does not have to be pressed! All infeeds must have the same sign (usually negative).
Selecting a cycle
Initiate the dialog
Search for the cycle by name: Select the desired cycle
CYCL DEF 1 PECKING
Confirm
cycle.
01
CYCL DEF 1 PECKING
0
Select the cycle Iby its number: Enter the cycle number with “GOT0 0” Confirm
Entering values
cycle.
Enter all values as requested and confirm entry with “ENT”. You must respond to every dialog query by entering a value!
Programming
Modes
Page P 67
Fixed Cycles Cycle 1: Pecking
The cycle
Input
A hole is drilled with multiple infeeds, lowed by a complete retraction.
data
each fol-
lnfeed value signs: - for negative working direction + for positive working direction
l l
All infeeds
must have the same sign.
Setup clearance (starting position)
A: distance between tool tip and workpiece surface.
Total hole depth B: distance piece surface and the bottom the drill taper). Pecking
depth
between the workof the hole (tip of
C: the infeed per cut
Dwell time: the time the tool remains tom of the bore hole for chip breaking.
at the bot-
Feed rate F: traversing speed of the tool during infeed in mm per minute.
l
l
l
l
l
l
Advanced stop distance
Drilling and retraction are performed alternately until the programed total hole depth is reached. After the dwell time at the hole bottom, the tool is retracted to the starting position in rapid traverse.
The advanced stop distance computed by the control: l
l
Page P 68
The tool must be positioned to the setup clearance with a separate block, before the cycle call. The tool drills from the starting position to the first pecking depth at the programmed feed rate. After reaching the first pecking depth the tool is retracted in rapid traverse FMAX to the starting position and advanced again to the first pecking depth, minus the advanced stop distance t. The tool then advances by another infeed at the programmed feed rate, returns again to the starting position etc.
t is automatically
For a total hole depth up to 30 mm: t = 0.6 mm; For a total hole depth over 30 mm: t = total hole depth/50, whereby the maximum advanced stop distance is limited to t,,, = 7 mm.
Programming
Modes
Fixed Cycles Cycle 1: Pecking
Defining the cycle
Operating
mode
Initiate the dialog
CYCL DEF 1 PECKING
Select the cycle.
I
I
q
SET UP CLEARANCE ?
Specify setup clearance Enter the sign correctly (normally positive) Confirm
TOTAL HOLE DEPTH ?
cl
entry
Specify hole depth Enter the sign correctly (normally negative) Confirm
u
PECKING DEPTH ?
Specify pecking
cl
cl
HEIDENHAIN TNC 25008
I
total hole depth
Programming
and pecking
Modes
of the
entry
Enter the feed rate for pecking Confirm
The signs for setup clearance,
entry
Enter the dwell time at the bottom hole (zero for no dwell time) Confirm
FEED RATE ? F =
depth
Enter the sign correctly (normally negative) Confirm
DWELL TIME IN SECS. ?
entry
entry
depth are all the same (normally
I
negative)!
Page P 69
Fixed Cycles Cycle 1: Pecking
Remarks
l
The total hole depth can be programmed equal to the pecking depth. The tool then traverses in one work step to the programmed depth (e.g. for centering).
l
The the will the
l
If the specified pecking depth is greater than the total hole depth, drilling is only performed to the programmed total hole depth.
pecking depth need not be a multiple of total depth. In the last work step, the tool only be advanced the remaining distance to programmed hole depth.
The above also applies to other fixed cycles.
Example
Drill 2 holes with the standard
pecking
TOOL DEF 1 L+O R3 TOOL CALL Z S200 The definition
CYCL CYCL CYCL CYCL CYCL CYCL
DEF DEF DEF DEF DEF DEF
occupies
r
cycle.
Tool definition and call 6 program
1.0 PECKING 1.1 SET UP -2 1.2 DEPTH -20 1.3 PECKG -10 1.4 DWELL 2 1.5 F 80
blocks Setup clearance Total depth Pecking depth Dwell time Feed rate
L
Page P 70
L X+20 Y+30 ROFMAX M3
Pilot positioning,
L Z+2 FMAX M99
lSt hole, cycle call
L X+80 Y+50 FMAX M99
2”d hole, cycle call
Programming
spindle
Modes
on
HEIDENHAIN TNC 2500B
Fixed Cycles Cycle 2: Tapping with floating tap holder
The cycle
The thread is cut in one operation. A floating tap holder is required for tapping. It must compensate for the tolerances between the feed rate, speed and the tool geometry as well as spindle run out after the position is reached. Spindle speed override is inactive after a cycle call; the feed rate override is only active over a limited range (set by the machine manufacturer via machine parameters).
Input
data
Setup clearance A: distance between tool tip (starting position) and workpiece surface (standard value: approx. 4 x thread pitch). The preceding sign depends on the working direction. Total hole depth B (= thread length): distance between workpiece surface and end of thread. The signs for setup clearance and total hole depth are the same (usually negative). Dwell time: enter either the time between tool, or 0. This time is machine-dependent.
Feed rate/ thread pitch
Feed rate F: traversing Determining the required F=SxP F: feed rate S: spindle speed P: thread pitch
Y///l///d
reversing
speed of the tool during
the direction
of spindle
rotation
and retracting
tapping.
feed rate:
The thread pitch is determined indirectly of the cycle (see “Cutting data”).
by the spindle
speed specified
in the tool call and the feed rate
Once the tool has reached the total hole depth, the direction of spindle rotation is reversed within a time period set by machine parameters. At the end of the programmed dwell time, the tool is retracted to the starting position. The spindle direction is reversed again in the retracted position. Input
Analogous
to “Pecking”.
Example
Tap an M6 hole with 0.75 mm pitch at 100 rpm.
TOOL DEF 1 L+O R3 TOOL CALL 1 Z SlOO The definition
occupies
Tool definition and call 5 program
blocks.
CYCL DEF 2.0 TAPPING SET UP -3 Setup clearance DEPTH -20 Thread depth Dwell time DWELL 0.4 F 15 Feed rate L X+50 Y+20 ROFMAX M3 Pilot positioning, L Z+3 FMAX M99 Cycle call
HEIDENHAIN TNC 25008
the
Programming
spindle
Modes
right
Page P 71
Fixed Cycles Cycle 17: Rigid tapping The cycle
Threads are cut without a floating tap holder in one or - if necessary - several es (example: removing chips in a blind hole). Rigid tapping offers the following advantages over tapping using a floating tap holder: l Higher machining speeds possible l Repeated tapping of the same thread; repetitions are made possible by means of a spindle orientation referenced to the 0’ positron during cycle call l Simpler input data l Increased usable traverse range of the spindle axis
Input
data
Setup clearance (starting position) ing sign depends
A: distance between tool tip and workpiece surface. Precedon the working direction.
Thread depth B: distance between workpiece surface and end of thread. The signs for setup clearance and the thread depth are always the same (usually negative). Pitch C: thread pitch. The preceding pitch + = right-hand thread pitch - = left-hand thread
sign differentiates
between
right-hand
and left-hand
threads
Feed rate
The control calculates the feed rate F from the active spindle speed S and the pitch P (F = S x P). If spindle speed override is activated during tapping, the feed rate is automatically adjusted.
Input
Similar to the pecking
Example
Producing
a right-hand
cycle (cycle 1)
M6 thread
with 0.75 mm pitch at 100 rpm:
TOOL DEF 1 L+O R3 TOOL CALL 1 Z SlOO The definition
CYCL CYCL CYCL CYCL
DEF DEF DEF DEF
occupies
4 program
blocks
17.0RIGID TAPPING 17.1 SET UP -10 17.2DEPTH -30 17.3 PITCH +0.75
The control and the machine rigid tapping.
Page P 72
Tool definition Tool call
Setup clearance Thread depth Thread pitch
must be specially
Programming
prepared
Modes
by the machine
manufacturer
to enable
HEIDENHAIN TNC 25008
Fixed Cycles Cycle 3: Slot milling
The cycle
The slot milling cycle is a combined finishing cycle.
roughing/
The slot is parallel to one axis of the current coordinate system (rotation with cycle 10, if desired). Tool required
The cycle requires a center-cut end mill. The cutter diameter must be slightly smaller than the slot width.
Input
Setup clearance (starting position)
data
A: distance between tool tip and workpiece surface.
Milling depth B: (= slot depth): distance between work surface and bottom of slot. Pecking depth C: penetrating tool into the workpiece.
distance
of the
The signs for setup clearance, milling depth and pecking depth are all the same (usually negative).
r Feed rate for pecking: tool during penetration.
traversing
speed of the
IS’ side length D: slot length (finished size). Sign depends on the first direction of cut parallel to the longitudinal axis of the slot. 2”d side length E: slot width, the tool radius (finished size). Feed rate: traversing machining plane.
Roughing process
l
l
l
Finishing process
maximum
4 times
speed of the tool in the
The tool penetrates the work from the starting position. Subsequent milling is in the longitudinal direction of the slot. After downfeed at the end of the slot, milling is in the opposite direction. The procedure is repeated until the programmed milling depth is reached.
The control advances the tool in a semicircle at the bottom of the slot by the remaining finishing depth and down-cut mills the contour (with M3) The tool is subsequently retracted in rapid traverse to the setup clearance. If the number of infeeds was odd, the cutter returns along the slot at the setup clearance to the starting position in the main plane.
Programming
Modes
I
Page P 73
Fixed Cycles Cycle 3: Slot milling A horizontal slot with length 50 mm and width 10 mm as well as a vertical slot with length 80 mm and width 10 mm are to be milled.
Example
0 BEGIN PGM SLOTS MM 1 BLK FORM 0.1 Z X+0 Y-t0 Z-40 2 BLK FORM 0.2 X+100 Y+lOO Z+O
3 TOOL DEF 1 L+O R+4 4 TOOL CALL 1 Z S1800 5 L Z+50 ROFMAX
Cycle definition
Starting
position
Page P 74
6 CYCL DEF 3.0 SLOT MILLING 7 CYCL DEF 3.1 SET UP -2 8 CYCL DEF 3.2 DEPTH -20 9 CYCL DEF 3.3 PECKG -5 F80 10 CYCL DEF 3.4 X-50 11 CYCL DEF 3.5 Y+10 12 CYCL DEF 3.6 F120
Definition of the horizontal slot Setup clearance Milling depth Pecking depth, feed rate for pecking Length of slot and first milling direction Slot width Feed rate
13 L X+76 Y+15 ROFMAX M3 14 L Z+2 ROFlOOOM99
Approach starting position without compensation, taking the tool radius into in the longitudinal direction of the slot; spindle on Pilot positioning in Z, cycle call
15 CYCL DEF 3.0 SLOT MILLING 16 CYCL DEF 3.1 SET UP -2 17 CYCL DEF 3.2 DEPTH -20 18 CYCL DEF 3.3 PECKG -5 F80 19 CYCL DEF 3.4 Y-t80 20 CYCL DEF 3.5 X+10 21 CYCL DEF 3.6 F120 22 L X+20 Y+14 ROFMAX M99
Definition of the vertical slot Setup clearance Milling depth Pecking depth, feed rate for pecking Slot length and first milling direction Slot width Feed rate Approach starting position, cycle call
23 L Z+50 ROFMAX M2 24 END PGM SLOTS MM
Retract in tool axis End of program
Programming
Modes
(-)
(+)
HEIDENHAIN TNC 2500B
Fixed Cycles Cycle 4: Rectangular The cycle
The rectangular cycle.
pocket
Tool required
The cycle requires a center-cut drilling at the pocket center.
pocket milling
milling cycle is a roughing
end mill, or pilot
The tool determines the radius at the pocket corners. There is no circular movement in the pocket corners. Position
Input
The pocket sides are parallel to the coordinate system axis; the coordinate system may have to be rotated (see Cycle 10: Rotating the coordinate system).
data
Setup clearance A: distance between tool tip (starting position) and workpiece surface. Milling depth B (= pocket depth): distance between workpiece surface and bottom of pocket. Pecking depth C: amount by which the tool penetrates the workpiece. The signs for setup clearance, milling depth and pecking depth are all the same (usually negative). Feed rate for pecking F,: traversing speed of the tool at penetration. lSt side length D: pocket length parallel to the first main axis of the machining plane. The sign is always positive. 2”d side length E: pocket width; the sign is always positive. Feed rate F2: traversing speed of the tool in the machining plane. Direction Climb DR+:
of the milling
path:
milling (down cut) counterclockwise, down-cut with M3
Conventional milling (up cut) DR-: clockwise, up-cut milling
FMAX
milling
100
with M3
Starting position
The starting position S (pocket center) must be approached without radius compensation in a preceding positioning block.
Process
l
l
The tool penetrates the work from the starting position (pocket center). The cutter then follows the programmed path at feed rate F2.
The starting direction of the cutter is the positive axis direction of the longer side, i.e. if this longer side is parallel to the X axis, the cutter starts in the positive X direction. The cutter always starts in the positive Y direction on square pockets.
HEIDENHAIN TNC 2500B
I
Programming
Modes
I
Page P 75
The milling direction depends on the programming (here, DR+). The maximum stepover is k. The process is repeated until the programmed milling depth is reached. On completion, the tool is withdrawn to the start in.g position.
Stepover k is computed by the control to the following formula:
according
k=FxR k: stepover F: the overlap factor specified by the machine manufacturer (depends upon a machine parameter, see index General Information, MOD Functions, parameters) R: cutter radius
55 + s 15
80 100
;;1.
TOOL DEF 1 L+O R5 TOOL CALL 1 Z S200
Example
4.0 POCKET MILLING 4.1 SET UP -2 4.2 DEPTH -30 4.3 PECKG -10 F 80 CYCL DEF 4.4 X+80 CYCL DEF 4.5 Y+40 CYCL DEF 4.6 F 100 DR+
The definition occupies 7 program blocks Setup clearance Milling depth Pecking depth Feed rate for pecking lSt side length of the pock.et 2”d side length of the pocket Feed rate and rotating dirlection of the cutter path
L X+60 Y+35 RO FMAX M3
Pilot positioning spindle on
in X, Y,
L Z+2 FMAX M99
Pilot positioning cycle call
in Z,
CYCL CYCL CYCL CYCL
Page P 76
DEF DEF DEF DEF
Programming
Modes
HEIDENHAIN TNC 2500B
Fixed Cycles Cycle 5: Circular pocket milling The cycle
The circular cycle.
Tool required
The cycle requires a center-cut end mill or pilot drilling at the pocket center S.
Input
Setup clearance A: distance between tool tip (starting position) and workpiece surface. Milling depth B (= pocket depth): distance between workpiece surface and bottom of pocket. Pecking depth C: amount by which the tool penetrates the workpiece.
data
pocket milling
cycle is a roughing
The signs for setup clearance, milling depth and pecking depth are all the same (usually negative). Feed rate for pecking F,: traversing speed of the tool at penetration. Circle radius R: radius of the circular pocket. Feed rate Fp: traversing speed of the tool in the machining plane. Direction of the milling path: Climb milling (down cut) DR+: counterclockwise, down-cut with M3 Conventional milling (up cut) DR-: clockwise, up-cut milling
milling
with M3
Starting position
The starting position S (pocket center) must be approached without radius compensation in a preceding positioning block.
Process
l
The tool penetrates the work from the starting position (pocket center) at the “feed rate for pecking”.
l
The cutter then follows the programmed spiral path at feed rate F2. The direction of the path depends upon the programming (here, DR+).
The starting l l l
direction
of the cutter is for the
IF2
XY plane the Y-t direction, ZX plane the X+ direction, YZ plane the Z+ direction.
The maximum stepover is the value k (see Rectangular Pocket Milling cycle). The process is repeated until the programmed milling depth is reached. When milling is completed, to the starting position.
the tool is withdrawn
Programming
Modes
I
Page P 77
Fixed Cycles Cycle 5: Circular pocket milling A circular pocket with radius 35 mm and depth 20 mm is to be milled at position X+60 Y+50.
Example
TOOL DEF 1 L+O RlO TOOL CALL 1 Z S200
CYCL CYCL CYCL CYCL
Page P78
DEF DEF DEF DEF
5.0 ClRCULAR POCKET 5.1 SET UP -2 5.2 DEPTH -20 5.3 PECKG -6 F 80 CYCL DEF 5.4 RADIUS 35 CYCL DEF 5.5 FlOO DR-
Setup clearance Milling depth Pecking depth Feed rate for pecking Circle radius Milling feed rate and direction
L X+60 Y+50 ROFMAX MO3
Pilot positioning
in X and Y
L Z-t2 FMAX M99
Starting
in Z, cycle call
Programming
Modes
position
of the cutter path
HEIDENHAIN TNC 25006
SL Cycles Fundamentals
CYCL DEF 14 CONTOUR GEOMETRY
The group of cycles that we categorize as SL cycles is designed for efficient programming and milling of contours with one or more tools. The contour can be composed of several overlapping subcontours which are defined in separate subprograms.
i CYCL DEF 15 PILOT DRILLING
The term SL cycles is derived from the characteristic Subcontour List of cycle 14: The control superimposes the separate contours to form a single whole. The programmer need not calculate the points of intersection!
CYCL DEF 6 ROUGH-OUT
The subcontours are defined in the form of subprograms Cycle 14, Contour geometry, is more or less a list of the corresponding label numbers and can store up to 12 islands or pockets. Each subcontour is programmed as a closed pattern.
CYCL DEF 16 CONTOUR MILLING
To be able to work with several tools, the machining task is described data or feed values; those are entered in the individual cycles: Cycle Cycle Cycle
in cycle 14 ltiithout
tool-specific
15 Pilot drilling (if required) 6 Rough-out 16 Contour milling (finishing)
M2 Subprograms of the individual subcontours Scheme of a program with SL cycles
Each subprogram must specify whether RL or RR radius compensation applies and in which direction the contour is to be machined. The control deduces from these data whether the specific subprogram describes a pocket or an island. The control The control
recognizes recognizes
a pocket if the tool path lies inside the contour. an island if the tool path lies outside the contour.
Please be sure to run a graphic simulation was computed by the control as desired.
before executing
All coordinate
in programming
transformations
are allowed
Not all of the SL cycles are always
/
to see whether
the contour
the contours.
required
For easier familiarization, the following examples progressively to the full range of functions.
HEIDENHAIN l-NC 2500B
a program
Programming
begin with only the rough-out
Modes
cycle and then proceed
I
Page P 79
SL Cycles Cycle 14: Contour geometry Cycle 6: Rough-out The label numbers (subprograms) of the subcontours are specified in cycle 14. Up to 12 label numbers can be entered. The TNC computes the intersections of the resulting contour from the subcontours. Cycle 14 is immediately effective after definition (this cycle cannot be called). The list of subcontours in cycle 14 should begin with a pocket.
Cycle 14 Contour geometry
PA cl D
A
H,
B =
B
I’OCketS
C, D = Islands
5 CYCL DEF 14.0 CONTOUR GEOM.
Example
6 CYCL DEF 14.1 CONTOUR LABEL 11/ 12/ 13
The definition occupies up to 3 program blocks 11, 12 and 13 define the The subprograms complete contour in the example.
Cycle 6 Rough-out
Cycle 6 specifies the cutting path and partitioning. It must be called, and can be executed separately.
Tool required
Cycle 6 requires a center-cut end mill (IS0 1641) if no pilot drilling e&y jump over contours and plunge to the milling depth.
Input
Setup clearance (A), milling depth (B), pecking depth (C) are incremental with the same signs (usually negative).
data
Feed rate for pecking: tool at penetration (Fl).
traversing
Finishing allowance: allowance ing plane (positive value) (D).
speed of the in the machin-
Rough-out angle: roughing out direction relative to the reference axis of the machining plane.
is desired
and if the tool must repeat-
1
FMAX
a
Fl
a
F2
Feed rate: traversing speed of the tool in the machining plane (F2). The tool must be positioned at the setup clearance (A) before the cycle call.
16 CYCL DEF 6.0 ROUGH-OUT 17 CYCL DEF 6.1 SET UP -2 DEPTH -20 18 CYCL DEF 6.2 PECKG -10 ALLOW +l F40 19 CYCL DEF 6.3 ANGLE +0 F60
Example
Page P 80
Programming
Setup clearance Milling depth Pecking depth Feed rate for penetration and finishing Rough-out angle Feed rate in the machining plane
Modes
allowance
HEIDENHAIN TNC 2500B
SL Cycles Cycle 6: Rough-out
Process
The tool IS automatrcally positioned over the first penetration point (with finishing allowance). It may be necessary to pilot position the tool before the call to prevent collision. The tool penetrates at the feed rate for pecking.
Milling the contour
After reaching the first pecking depth, the tool mills the first subcontour at the programmed milling feed rate with the finishing allowance. At the penetration point, the tool is advanced to the next pecking depth. This process is repeated until the programmed milling depth is attained. Further subcontours are milled in the same manner.
Clearing the surface
The surface is then roughed out. The feed direction corresponds to the programmed rough-out angle and can be set, so the resulting cuts are as long as possible with few cutting movements. The stepover equals the tool radius. Clearing out can be performed with multiple downfeeds. The tool is retracted end of the cycle.
to the setup clearance
-D!l
‘d
FMAX
at the
D = Finishing allowance E = Stepover a = Rough-out angle Sequence contour milling/ surface machining
Climb/ conventional
A machine parameter determines whether the contour is milled first and then surface machined or vice versa. In the same way is specified whether contour milling or roughing out is performed continuously over all infeeds, or for each infeed in the specified sequence.
a = O"
A machine parameter also determines whether the contour is milled conventionally or by climb cutting (see index General Information, MOD Functions, parameter MP 7420).
a=90°
-.-. -‘‘LD.-.-
-ld 7, 2
I
Begin with contour milling
HEIDENHAIN TNC 2500B
I
Programming
Modes
Begin with surface cl’earing
I
Page P 81
SL Cycles Roughing-out
a rectangular
Task
Interior machining 5 mm
PGM 7206
0 BEGIN PGM 1 BLK FORM 2 BLK FORM 3 TOOL DEF 4 TOOL CALL 5 L Z+lOO RO
7206 MM 0.1 Z X+0 Y+O Z-40 0.2 X+100 Y+lOO Z+O 1 L-t0 R+5 1 Z S 111 FMAX MO3
6 CYCL 7 CYCL 8 CYCL 9 CYCL 10 CYCL 11 CYCL
14.0 CONTOUR GEOM. 14.1 CONTOUR LABEL 1 6.0 ROUGH-OUT 6.1 SET UP -2 DEPTH -20 6.2 PECKG -8 FlOO ALLOW 6.3 ANGLE +0 F500
DEF DEF DEF DEF DEF DEF
12 L X+40
I
with a center-cut
end mill, tool radius
“List” of contour subprograms Definition for “rough-out” +0
Pilot positioning,
M99
MO2
creates a contour
corners,
Blank min. point Blank max. point Tool definition Tool call
cycle call
Retract, return jump to start of program Contour
LBL 1 L X+40 Y+60 RL L X+15 RND R12 L Y+20 RND R12 L x+70 RND R12 L Y+60 RND R12 L X+40 LBL 0 END PGM 7206 MM
PGM 7207
Page P 82
pocket with rounded
Y-t50 Z+2 RO FMAX
13 L Z-t20 FMAX 14 15 16 17 18 19 20 21 22 23 24 25 26
of rectangular
pocket
subprogram
From radius compensation RL and counterclockwise machining direction, the control deduces a pocket.
island with identical
Programming
dimensrons.
Modes
I
HEIDENHAIN TNC 2500B
SL Cycles Roughing-out
Exterior 5 mm.
Task
machining
a rectangular
of rectangular
island with rounded
island
corners,
with a center-cut
end mill, tool radius
L
0 BEGIN PGM 7207 MM 1 BLK FORM 0.1 Z X+0 Y+O Z-40 2 BLK FORM 0.2 X+100 Y+lOO Z+O 3 TOOL DEF 1 L+O R+5 4 TOOL CALL 1 Z S 111 5 L Z+lOO ROFMAX MO3 6 CYCL DEF 14.0 CONTOUR GEOM. 7 CYCL DEF 14.1 CONTOUR LABEL 2 / 1 8 CYCL DEF 6.0 ROUGH-OUT 9 CYCL DEF 6.1 SET UP -2 DEPTH -20 10 CYCL DEF 6.2 PECKG -8 FlOO ALLOW +0 11 CYCL DEF 6.3 ANGLE +0 F500 12 L X+40 Y+50 Z+2 ROFMAX M99 13 L Z+20 FMAX MO2 14 LBL 1 15 L X+40 Y+60 RR 16 L X+15 17 RND R12 18 L Y+20 19 RND R12 20 L x+70 21 RND R12 22 L Y+60 23 RND R12 24 L X+40 25 LBL 0 26 LBL 2 27 L X-5 Y-5 RL 28 L x+105 29 L Y+105 30 L x-5 31 L Y-5 32 LBL 0 33 END PGM 7207MM
PGM 7207
PGM 7206
HEIDENHAIN TNC 2500B
creates a contour
pocket with identical
Programming
Modes
Blank Tool
“List” of contour subprograms Definition for “rough-out”
Pilot positioning,
(sequence!)
cycle call
Retract, return jump to start of program From radius compensation RR and the counterclockwise machining direction, the control deduces an island.
Auxiliary pocket to externallly limit the machined surface
dimensions.
Page P 83
SL Cycles Overlaps Overlapping pockets and islands
Pockets and Islands can be overlapped (superimposed). The resulting contour is computed by the TNC. The area of a pocket can for example be enlarged by an another pocket or reduced island.
Starting position
by an
Machining begins at the starting position of the first contour label of cycle 14. The starting positions should be located as far as possible from the superimposed contours. If the subcontours are always defined in the same working direction, then for example with a positive working direction pockets can be easily recognized by the ‘XL” compensation, and islands by the “RR”.
Page P 84
Programming
Modes
SL Cycles Overlapping
pockets
Task
Interior machining
PGM 7208
0 BEGIN PGM 7208MM 1 BLK FORM 0.1 Z X+0 Y+O Z-40 2 BLK FORM 0.2 X+100 Y+lOO Z+O 3 TOOL DEF 2 L+O R+3 4 TOOL CALL 2 Z S 100 5 L Z+200 ROFMAX 6 L X+50 Y+50 FMAX MO3
of overlapping
pockets
with a center-cut
end mill, tool radius 3 mm.
Blank, tool axis Tool
Pilot position
X and Y, spindle
on
7 CYCL DEF 14.0 CONTOUR GEOM. 8 CYCL DEF 14.1 CONTOUR LABEL 1/ 2
“List” of contour
subprograms
9 CYCL DEF 6.0 ROUGH-OUT 10 CYCL DEF 6.1 SET UP -2 DEPTH -10 11 CYCL DEF 6.2 PECKG -10 F500 ALLOW +0 12 CYCL DEF 6.3 ANGLE +0 F500
Definition
13 L Z+2 ROFMAX M99
Setup clearance
14 L Z+200 ROFMAX MO2
Retract return jump to start of program
for “rough-out”
Z, cycle call
Machining begins with the first contour label defined in block 8! The first pocket must begin outside the second pocket.
Note
HEIDENHAIN TNC 2500B
Programming Modes
Page P85
SL Cycles Overlapping
Points of intersection
pockets
The pocket elements A and B overlap each other. They are programmed as full circles. Since the control automatically computes the points of intersection Sl and S2, these points need not be programmed.
1.5LBL 1 16 L X+10 Y+50 RL 17 cc x+35 Y+50 18 C X+10 Y+50 DR+ 19 LBL 0
A
Left pocket
B
Right pocket
1
20 LBL 2 21 L X+90 Y+50 RL
22 CCX+65 Y+50 23 CX+9OY+50 DR+ 24 LBL 0
25 END PGM 7208 MM Depending on the control or the surface.
Execution
Contour
Page P 86
edge is machined
setup (machine
parameters),
first
machining
begins
Surface is machined
Programming
Modes
either with the contour
first
HEIDENHAIN TNC 25008
edge
SL Cycles Overlapping “Sum”
area
pockets
Both areas (element A and element B) along with the common overlapping area are to be machined. l A and B must be pockets. 0 the first pocket (in cycle 14) must begin outside the second.
16 LBL 1 17 L X+10 Y+50 RL
18 ccx+35 Y+50 19 C X+10 Y+50 DR+ 20 LBL 0 21 LBL 2
22 L X+90 Y+50 RL 23 CCX+65 Y+50 24 CX+9OY+50 DR+
I
1
--
25 LBL 0 0 A and 0 B are the starting contour labels. “Difference” area
Area A is to be machined overlapped by B:
without
points of the
the portion
A must be a pocket and B an island. A must begin outside of B.
l l
15 LBL 1 16 L X+10 Y-t50 RL 17 cc x+35 Y+50 18 C X+10 Y+50 DR+ 19 LBL 0 20 LBL 2 21 L X+90 Y+50 RR
22 CC X+65 Y-t50 23 CX+9OY+50 DR+ 24 LBL 0
An Island can also reduce several pocket areas. The starting points of the pocket contours must all be outside the island.
“Intersecting” area
Only the area overlapped is to be machined. l l
commonly
by A and B
A and B must be pockets. A must begin inside of B.
15 LBL 1 16 L X+60 Y+50 RL 17 cc x+35 Y+50 18 C X+60 Y+50 DR+ 19 LBL 0 20 LBL 2 21 L X+90 Y+50 RL
i
22 CCX+65 Y+50 23 CX+9OY+50 DR+ 24 LBL 0
HEIDENHAIN TNC 25006
Programming
Modes
Page P 87
SL Cycles Overlapping
Expanding PGM 7208
“Sum”
area
islands
7 CYCL DEF 14.0 CONTOUR GEOM. 8 CYCL DEF 14.1 CONTOUR LABEL 1 / 2 / 5
An island always requires = pocket (here, LBL 5).
25 LBL 5 26 L X+5 Y+5 RL 27 L X+95 28 L Y+95 29 L X+5 30 L Y+5 31 LBL 0
A pocket can also reduce several island areas. This pocket must begin instde the first island. The starting points of the remaining intersected island contours must be outside the pocket.
an additional
outer limit
Both areas (element A and element B) along with the common overlapping area are to remain unmachined. l A and B must be islands. l The first island must begin outside the second.
16 LBL 1 17 L X+10 Y+50 RR 18 cc x+35 Y+50 19 C X+10 Y+50 DR+
20 LBL 0 21 LBL 2 22 L X+90 Y+50 RR F500
23 CCX+65 Y+50 24 CX+9OY+50 DR+ 25 LBL 0 “Difference” area
Area tion l A l A
0 A, 0 B are the starting
points of the subcontours.
A is to remain unmachined except that poroverlapped by B. must be an island and B a pocket. must begin outside of B.
15 LBL 1 16 L X+10 Y+50 RR 17 cc x+35 Y+50 18 C X+10 Y+50 DR+
19 LBL 0 20 LBL 2 21 L x+40 Y+50 RL
22 CC X+65 Y+50 23 CX+4OY+50 DR+ 24 LBL 0
“Intersecting” area
Only the area overlapped commonly remains unmachined. l A and B must be islands. l A must begin inside of B.
by A and B
15 LBL 1
16 L X+60 Y+50 RR 17 cc x+35 Y+50 18 C X+60 Y+50 DR+ 19 LBL 0 20 LBL 2 21 L X+90 Y+50 RR
22 CCX+65 Y+50 23 CX+9OY+50 DR+ 24 LBL 0
Page P 88
Programming
Modes
HEIDENHAIN TNC 25008
SL Cycles Overlapping
Task
Main 7209
pockets and islands
Interior machining of overlapping pockets and islands with a center-cut Islands are located within a pocket area.
PGM
0 BEGIN PGM 7209 MM 1 BLK FORM 0.1 Z X+0 Y+O Z-40 2 BLK FORM 0.2 X+100 Y+lOO Z+O 3 TOOL DEF 2 L+O R+3 4 CYCL DEF 14.0 CONTOUR GEOM. 5 CYCL DEF 14.1 CONTOUR LABEL 6 LBL 10 7TOOLCALLOZS0 8 L Z+20 RO FMAX 9 L X-20 Y-20 FMAX 10 LBL 0 11 STOP MO6 12 TOOL CALL 2 Z S 100 13 14 15 16 17 18 19 20
CYCL CYCL CYCL CYCL L Z-r-2 CYCL CALL L Z+20
PGM 7209
HEIDENHAIN TNC 2500B
1/ 2 / 3 / 4
DEF 6.0 ROUGH-OUT DEF 6.1 SET UP -2 DEPTH -10 DEF 6.2 PECKG -5 F500 ALLOW DEF 6.3 ANGLE +0 F500 RO FMAX CALL MO3 LBL 10 RO FMAX MO2 is an expansion
elements
+0
of PGM 7208: the interior
Programming
List of contour
end mill, tool radius 3 mm
Modes
islands are added
(subprograms
3 and 4)
Page P 89
SL Cycles Overlapping
pockets and islands
The entire contour is composed of the elements A and B, i.e. two overlapping pockets and C and D, i.e. two islands within these pockets.
Contour subprograms for PGM 7209
21 LBL 1 22 L X+35 Y+25 RL
1 I
23 CCX+35 Y+50 24 C X+35 Y+25 DR+ 25 LBL 0 26 LBL 2 27 L X+65 Y+25 RL
28 CC X+65 Y+50 29 CX+65 Y+25 DR+ 30 LBL 0 31 LBL 3 32 L X+35 Y-t42 RR 33 L x+43 34 L Y+58 35 L X+27 36 L Y+42 37 L x+35 38 LBL 0 39 LBL 4 40 L X+65 Y+42 RR 41 L x+73 42 L X+65 Y+58 43 L X+57 Y+42 ti 44 L X+65 45 LBL 0 46 END PGM 7209MM Execution
Machining
of the contour
A
Left pocket
B
Right pocket
I
edges
Square
D
Triangular
Surface
r
Programming
C
Modes
machining
island
island
(unfinished)
SL Cycles Cycle 15: Pilot drilling The cycle
Pilot drill the cutter infeed points at the starting points of the subcontours, compensated by the finishing allowance. For closed contour sequences resulting from multiple superimposed pockets and islands, the infeed point is the starting point of the first subcontour. This cycle must be called!
0 Cutter infeed point Input
data
The input values are identical to pecking; finishing allowance in addition.
enter a
Finishing allowance: allowance for drilling (positive value), effective in the working plane. The sum of the tool radius and the finishing allowance should be the same for pilot drilling and roughing-out.
y
0 R .
The tool must be at the setup clearance calling the cycle!
!
before
s
------T
D = Finishing allowance R = Tool radius Process
The tool is automatically positioned over the first infeed point, offset by the allowance. The tool may have to be pilot positioned to prevent collision! The drilling process is identical “pecking” (cycle 1).
to the fixed cycle
Subsequently, the tool is positioned over the second infeed point at the programmed setup clearance, and the drilling procedure is repeated.
Example
HEIDENHAIN TNC 2500B
18 CYCL DEF 15.0PILOT DRILL 19 CYCL DEF 15.1 SET UP -2 DEPTH -20 20 CYCL DEF 15.2PECKG -10 ALLOW +l F40
Programming
Setup clearance Drilling depth Pecking depth Feed rate for infeed and finishing
Modes
allowance Page P 91
SL Cycles Cycle 16: Contour milling The cycle
Cycle 16 “contour contour pocket.
milling”
is used for finishing
(finishing)
the
The cycle can also be generally used to mill contours made up of subcontours. This offers the following benefits: l contour intersections are computed, l collisions are avoided. Tool required
The cycle requires
a center cutting
tool.
The cycle must be called! The setup clearance A, milling depth B and pecking depth C are identical to pecking. The signs must be the same (normally negative).
Input
Feed rate for pecking: tool traversing speed at infeed (Fr). Rotating direction for contour milling: milling direction along the pocket contour (island contours: opposite milling direction). For the following directions, M3 means DR+: down-cut milling for pocket and island, DIG: up-cut milling for pocket and island. Feed rate: tool traversing speed in the machining plane ( F2).
data
The tool must be at the setup clearance to the cycle call.
a I
FMPX FI F2
-
(A) prior
The tool is automatically positioned over the first contour pornt. Beware of collisions with clamping devices! The tool then penetrates the workpiece at the programmed feed rate to the first pecking depth. After reaching the first pecking depth, the tool mills the first contour at the programmed feed rate in the specified rotating direction. At the infeed point, the tool is advanced to the next pecking depth. The procedure is repeated until the programmed milling depth is attained. The next subcontours are milled in the same manner.
Process
+
r y,
P = Programmed contour (pocket) D = Finishing allowance from cycle 6 rough-out
25 CYCL DEF 16.0 CONTOUR MILLG. 26 CYCL DEF 16.1 SET UP -2 DEPTH -20 27 CYCL DEF 16.2 PECKG -10 DR- F60 F40
Example
Page P 92
Programming
Setup clearance Milling depth Pecking depth Feed rate for infeed, milling direction feed rate in the working plane Modes
and
SL Cycles Machining with sever-al tools The follovving scheme Illustrates the applrcation of the SL cycles pilot drilling, rough-out, and coiltour milling in one program: List of contour subprograms
Cycle definition: CYCL DEF 14.0 CONTOUR No call!
GEOM.
Drilling Define and call the drill Cycle defrnrtron: CYCL DEF 15.0 PILOT Pilot positioning, Cycle call!
Rough-out
DRILL
Define and call the roughing ‘cutter Cycle definition. CYCL DEF 6.0 ROUGH-OUT Pilot positioning, Cycle call!
Finishing Define and call the finishing Cycle definition: CYCL DEF 16.0 CONTOUR Pilot positioning, Cycle call!
cutter MILLG.
STOP MO2 Contour subprograms
Subprograms
for the subcontours
Programming
Modles i
IPage P 93
.-
SL Cycles Machining with several tools
Task
Overlapping
pockets
Interior machining Main PGM
7210
with islands.
with pilot drilling,
roughing,
0 BEGIN PGM 7210 MM 1 BLK FORM 0.1 Z X+0 Y+O Z-40 2 BLK FORM 0.2 X+100 Y+lOO Z+O 3 TOOL DEF 1 L+O R+2.2 4 TOOL DEF 2 L+O R+3 5 TOOL DEF 3 L+O R+2.5 6 CYCL DEF 14.0 CONTOUR GEOM. 7 CYCL DEF 14.1 CONTOUR LABEL 8 LBL 10 9TOOLCALLOZS0 10 L Z+20 RO FMAX 11 L X-20 Y-20 RO FMAX 12 LBL 0
finishing.
Drill Roughing cutter Finishing cutter l/2/3/4 Tool change
13 14 15 16 17 18 19 20
STOP TOOL CYCL CYCL CYCL L Z+2 CYCL CALL
MO6 CALL 1 Z S 100 DEF 15.0 PILOT DRILL DEF 15.1 SET UP -2 DEPTH -20 DEF 15.2 PECKG -5 F500 ALLOW RO FMAX CALL MO3 LBL 10
21 22 23 24 25 26 27 28 29
STOP TOOL CYCL CYCL CYCL CYCL L Z+2 CYCL CALL
MO6 CALL 2 Z S 100 DEF 6.0 ROUGH-OUT DEF 6.1 SET UP -2 DEPTH -20 DEF 6.2 PECKG -5 FlOO ALLOW DEF 6.3 ANGLE +0 F500 RO FMAX CALL MO3 LBL 10
30 31 32 33 34 35 36 37 38
STOP MO6 TOOL CALL 3 Z S 500 CYCL DEF 16.0 CONTOUR MILLG. CYCL DEF 16.1 SET UP -2 DEPTH -20 CYCL DEF 16.2 PECKG -5 FlOO DR- F500 L Z+2 RO FMAX CYCL CALL MO3 CALL LBL 10 L Z+20 RO FMAX MO2
Pilot drilling +2
Roughing-out +2
Finishing
Retract and return jump
PGM 7210 builds upon PGM 7209: The main program The contour
Page P 94
section
subprograms
is expanded
by the cycle definitions
1 to 4 are identical
Programming
and calls for pilot drilling
to those in PGM 7209
Modes
and are to be added
and finishing after block 38.
HEIDENHAIN TNC 2500B
Coordinate Overview
The following mations: 7.0 8.0 10.0 11 .O
Original
Transformations
cycles serve for coordinate
transfor-
Datum shift Mirror image Rotation Scaling
With the help of coordinate transformations, a program section can be executed as a variant of the “original”. In the following descriptions, subprogram 1 is always the “original” subprogram (identified by the grey background).
datum shift
mirror image
rotatron
scaling
L Immediate activation
Duration activation
Every transformation
of
End of activation
A coordinate
is immediately
transformation
HEIDENHAIN TNC 2500B
remains
You can cancel coordinate l
Cycle definition
l
Programming parameters);
for basic condition
CYCL
program
or cancelled.
and aborting program with “GOT0 0”.
transformations
of miscellaneous
being called
valid until it is changed
Its effect is not impaired by interrupting gram is restarted from another location
0 Selecting another “single block”.
Error message
valid - without
in the following
run. This is also true when
the same pro-
ways:
(e.g.: scaling factor 1.0);
functions
MO2 or M30, or END PGM
with “PGM NR” in the operating
(depen’ding
mode program
on the machine
run “full sequence”
or
INCOMPLETE
This error message is displayed if a fixed cycle is called after defining a transformation but no machining cycle was defined. Otherwise the control executes the fixed cycle which was last defined.
Programming
Modes
Page P 95
Coordinate Transformations Cycle 7: Datum shift
The cycle
You can program a datum shift (also called a zero offset) to any point within a program. The manually set absolute workpiece datum remains unchanged. Thus, identical machining steps (e.g. subprograms) can be executed-at different positions on the workpiece without having to reenter the program section each time.
Combining with other coordinate transformations
If a datum shift is to be combined with other transformations, the shift has to be made before the other transformations!
Effect
For a datum shift definition, only the coordinates of the new datum are to be entered. An active datum shift is displayed in the status field. All coordinate inputs then refer to the new datum.
Incremental/ absolute
1
In the cycle definition the coordinates can be entered as absolute or incremental dimensions:
Cancelling the shift
l
Absolute: The coordinates of the new datum refer to the manually set workpiece datum. Refer to the center figure.
l
Incremental: The coordinates of the new datum refer to the last valid datum, which can itself be shifted. Refer to the lower figure.
A datum shift is cancelled by entering the datum shift XO/YO/ZO Only the “shifted” axes have to be entered. CYCL CYCL CYCL
DEF 7.0 DATUM DEF 7.1 X+0 DEF 7.2 Y+O
SHIFT Absolute
Incremental
Page P 96
Programming
Modes
datum
shift
datum shift
’
Coordinate Transformations Cycle 7: Datum shift Selecting the cycle
Entering the value
Initiate the dialog
or
CYCL
DEF 7 DATUM
SHIFT
?
SHIFT
Confirm
0
X
the selected
Select the axis. Enter the coordrnates the new datum.
0
cycle.
of
0Y :
The datum shift is possible 5 axes.
in all
When shifting in several axes, only confirm entry after entering all the coordinates!
Example
A machining a) referred
task is to be carried out as a subprogram to the set datum
b) additionally
referred
TOOL TOOL
DEF 1 LO R5 CALL 1 Z S200
CALL
LBL
CYCL CYCL CYCL
DEF 7.0 DATUM DEF 7.1 X+40 DEF 7.2 Y-t60
CALL
LBL
CYCL CYCL CYCL
DEF 7.0 DATUM DEF 7.1 X+0 DEF 7.2 Y+O
and
to the shifted datum X+4O/Y+60.
1
Without
1
L Z+50 FMAX
X+O/Y+O
datum
shift 0
SHIFT
With datum
shift 0
SHIFT Datum shift reset
MO2
Subprogram LBL 1 L X-10 L Z+2 L Z-5 L X+0 L Y+20 L x+25 L x+30 L Y+O L x+0 L X-10 L Z+2 LBL 0
HEIDENHAIN TNC 25008
Y-10 RO FMAX FMAX FlOO Y+O RL F500
MO3
Y+lS
Y-10 FMAX
RO
Programming
Modes
I
Page P 97
Coordinate Transformations Cycle 8: Mirror image
The cycle
The direction of an axis is reversed when it is mirrored. The sign is reversed for all coordrnates of this axis. The result is a mirror image of a progammed contour or of a hole pattern. Mirroring is only possible in the machining plane. You can mirror In one axis or both axes simultaneously.
Activation
The mirror image is immediately valid upon definition. The mirrored axes can be recognized by the highlighted axis designations In the status drsplay for the datum shift. Mirroring is performed at the current datum. The datum must therefore be shifted to the required position before a “mirror image” cycle definition.
Mirrored axes
Enter the axis or axes to be mirrored. The tool axis cannot be mirrored.
Climb and conventional milling
Mirroring one axis: The rotating direction is changed with the coordinate signs, so climb milling becomes conventional and vice versa. The milling direction remains unchanged for fixed cycles. Mirroring two axes: The contour which was mirrored in one axis is mirrored a second time - in the other axis. The direction of rotation and e.g. climb milling remains the same.
X I--- -
0
0 ---..
/’ i \
\
\ \
\ \~~
,’
/’ i\ \\ ‘-(GiK? 0
‘\\\ /I 0 ---l’
WY
Y
X, Y = Axes to be mirrored Datum position
Cancelling the mirror image
1. If the datum is on the part contour, only mirrored across the axis.
the part is
2. If the datum also moved!
the part is
is outside
the contour,
The mirror image cycle is cancelled by entering the mirror image cycle and responding to the dralog query “mirror image axis” with “NO ENT”: CYCL CYCL
Page P 98
i
DEF 8.0 MIRROR DEF 8.1
IMAGE
3,D Programming
Modes
HEIDENHAIN TNC 2500B
Coordinate Transformations Cycle 8: Mirror image Selecting the cycle
MIRROR
Example
IMAGE
AXIS
clX Enter the axis to be mirrored, e.g. X. Enter the second axis to be mirrored if applicable, e.g. Y. Confirm the axes and always terminate the Input with “END 0”.
?
A program section (subprogram 1) IS to be executed once - at position X+O/Y+O, and also mirrored once in X at posrtion X+7O/Y+60. TOOL TOOL
DEF 1 L+O R5 CALL 1 Z S200
CALL
LBL
1 REP
Not mirrored Mirrored execution sequence
CYCL CYCL CYCL
DEF 7.0 DATUM DEF 7.1 X+70 DEF 7.2 Y+60
CYCL CYCL CALL
DEF 8.0 MIRROR DEF 8.1 X LBL 1
IMAGE
CYCL CYCL CYCL CYCL CYCL
DEF DEF DEF DEF DEF
MIRROR DATUM X+0 Y+O
8.0 8.1 7.0 7.1 7.2
L Z+50 FMAX Subprogram:
LBL 1 L X-10 L Z+2 L Z-5 L X+0 L Y+20 L xi-25 L x+30 L Y+O L x+0 L X-10 L Z+2 LBL 0
SHIFT
:
Datum shift 0
Mirror
image 0
Subprogram
call
IMAGE
Reset mirror
image
SHIFT
Cancel datum
MO2
Y-10 RO FMAX FMAX FlOO Y+O RL F200
HEIDENHAIN TNC 25008
shift
Retract, return jump
MO3
y+15
Y-10 FMAX
RO
For correct machining according to the drawing, shown in the above execution be retained!
Note
0
Programming
It IS absolutely
Modes
necessary
that the sequence
of cycles
Page P 99
Coordinate Transformations Cycle 10: Coordinate system rotation The cycle
The coordinate system can be rotated in the machining plane about the current datum In a program.
Activation
Rotation is effective without being called and is also active in the operating mode “Positioning with MDI”.
Rotation
To rotate the coordinate system, you only have to enter the rotation angle ROT.
Planes
XY plane: YZ plane: ZX plane:
+X axis = O” (standard) +Y axis = O” +Z axis = O”
All coordinate inputs following the rotation are then referenced to the rotated coordinate system. The rotation angle is entered Input range: -360” to +360” mental).
Activating the rotation
CYCL CYCL
DEF 10.0 ROTATION DEF 10.1 ROT+35
The active rotation the status display. Cancelling the rotation
Page P 100
angle is Indicated
A rotation is cancelled angle O”. CYCL CYCL
in degrees (“). (absolute or incre-
DEF DEF
by entering
by “ROT” in
the rotation
10.0 ROTATION 10.1 ROT+0
Programming
Modes
,
Coordinate Transformations Cycle 10: Coordinate system rotation
Selecting the cycle
Initiate the dialog CYCL
DEF 10 ROTATION
ROTATION
ANGLE
Confirm
?
Enter the rotation 0
I
HEIDENHAIN TNC 2500B
angle.
entry.
A program section (subprogram 1) is to be executed: once based on datum X+O/Y+O, a second trme based on datum X+70 Y+60.
TOOL TOOL
DEF 1 LO R5 CALL 1 Z S200
CALL
LBL
CYCL CYCL CYCL
DEF 7.0 DATUM DEF 7.1 X+70 DEF 7.2 Y+60
CYCL CYCL
DEF 10.0 ROTATION DEF 10.1 ROT+35
2. Rotation 0
CALL
LBL
3. Subprogram
CYCL CYCL
DEF 10.0 ROTATION DEF 10.1 ROT 0
Reset rotation
CYCL CYCL CYCL
DEF 7.0 DATUM DEF 7.1 X+0 DEF 7.2 Y-t0
Cancel datum
L Z+200
Subprogram
cycle.
Incremental/absolute? Confirm
Example
the selected
I
Non-rotated SHIFT
Rotated execution.
The associated
SHIFT
MO2
subprogram
0
Sequence:
1. Datum shift 0
1
FMAX
execution
call
shift
Return jump to first block of the main program
(see cycle 7, Datum shift) is programmed
Programming
Modes
after M02.
Page P 101
Coordinate Transformations Cycle 11: Scaling ’
The cycle
Contours can be enlarged or reduced with this cycle. This permits generation of contours geometrically similar to an original without reprogramming, and also use of shrinkage and growth allowances. Scaling is effective machine parameters plane or in the three General Information, parameters).
depending on the specified - either in the machining main axes (see index MOD Functions,
Activation
Scaling is effective immediately, without being called. Scaling factors greater than 1 result in magnification, factors between 0 and 1 result in reduction.
SCL factor
The scaling factor SCL (scaling) is entered to magnify or reduce a contour. The control applies this factor to all coordinates and radii either in the machining plane or (depending on MP 7410; see Index General Information, MOD Functions, parameters) in all three axes X, Y and Z. The factor also affects dimensions in cycles. Input range: 0.000001
Datum
position
to 99.999999.
It is helpful to locate the datum on an edge of the subcontour. This way, the datum of the coordinate system is retained during a reduction or magnification as long as it is not subsequently moved or if the move is programmed before the scaling factor.
Activating scaling
CYCL DEF 11.0 SCALING CYCL DEF 11.1 SCL 0.8
Cancelling scaling
The scaling cycle is cancelled
by entering
l------L
the factor 1 in the scaling cycle:
CYCL DEF 11.0 SCALING CYCL DEF 11.1 SCL 1.0
Programming
_----._--_ ----Yq -4 L ‘-----It
Modes
Coordinate Transformations Cycle 11: Scaling
Selecting the cycle
Initiate the dialog :ycle.
FACTOR ?
Enter the scaling factor. Confirm
Example
~
entry.
A program section (subprogram 1) is to be executed one time based on the manually set datum X+O/Y+O, and one time based on X+6O/Y+70 with the scaling factor 0.8.
TOOL DEF 1 L-t0 R5 TOOL CALL 1 Z S200
Subprogram
HEIDENHAIN TNC 2500B
CALL LBL 1
Execution
in original
CYCL DEF 7.0 DATUM CYCL DEF 7.1 X+60 CYCL DEF 7.2 Y+70
Execution
with scaling factor. Sequence:
CYCL DEF 11.0 SCALING CYCL DEF 11.1 SCL 1.0
2. Define scaling factor 0
CALL LBL 1
3. Call subprogram
CYCL DEF 11.0 SCALING CYCL DEF 11.1 SCL 1.0 CYCL DEF 7.0 DATUM CYCL DEF 7.1 X+0 CYCL DEF 7.2 Y+O L Z+200 FMAX MO2
Cancel transformations
The corresponding
subprogram
size 0
1. Shift datum 0
(scaling
factor effective)
Retract, return jump
(see cycle 7, Datum shift) is programmed
Programming
Modes
after MO2
1
Page P 103
Other Cycles Cycle 9: Dwell time
The cycle
In a program which is being run, the next block will be executed only after the end of the programmed dwell time. Modal conditions, such as spindle rotation, are not affected.
Activation
The dwell cycle is valid immediately tion, without being called.
upon defini-
CYCL DEF 9.0 DWELL TIME CYCL DEF 9.1 DWELL 0.500 Possible applications
For example, chip breaking can easily be programmed with a dwell cycle after every drilling step.
Input
The dwell time is specified In seconds. Input range: 0 to 30000 s (A 8.3 hours)
range
Cycle definition
or
Initiate the dialog
CYCL DEF 9.0 DWELL TIME
Confirm
DWELL TIME IN SECS. ?
cl
Enter desired Confirm
Page P 104
Programming
Modes
the selected
cycle.
dwell time, in seconds.
entry.
I
HEIDENHAIN TNC 25008
Other Cycles Cycle 12: Program call
The cycles
Machining procedures that you have programmed - such as special drillrng cycles, curve milling, or geometry modules - can be created as callable main programs and be used like fixed cycles. They can be called from any program with a cycle call. They can thus help speed up programming and improve safety, since you are using proven modules.
Cycle 12 PGM CALL
A callable
program
defined
as a cycle becomes
in essence
a fixed cycle.
It can be called with
CYCL CALL (separate
block) or
M99
(blockwise)
M89
(modally)
or
Initiate the dialog Entering the cycle selection
0
PROGRAM NUMBER ?
Example
The callable
program
50 is to be called from program
Program
number
5
Program :
BEGIN PGM 5 MM
CYCL DEF 12.0 PGM CALL CYCL DEF 12.1 PGM 50
Definition: “Program 50 is a cycle”
L X+20 Y+50 FMAX M99
Call program
50
EtiD PGM’5 MM Cross-reference Drilling with chip breaking
A realistic example of a program programming PGM 7445): 1. Subprogram
1 is written
call with cycle 12 can be taken from the drilling
separately
as PGM 7444
(without
1 is deleted
in the main program
Programming
e.g. 7445.
7445.
4. Instead of CALL LBL 1, write in PGM 7445: CYCL DEF 12 PGM CALL 7444, and M99 in a subsequent
HEIDENHAIN TNC 25006
(Parameter
LBL 1 or LBL 0)
2. PGM 7444 now exists as a callable, additional drilling procedure. This PGM can remain stored in the control and be called by any other program, 3. Subprogram
example
Modes
positioning
block.
Page P 105
Other Cycles Cycle 13: Oriented The cycle
spindle stop
The control can address the machine tool spindle as a 4 or 5’h axis and turn it to a certain angular position. Applications: l
l
Activation Ml9
Tool changing systems with defined change position for tool. Orientation of the transmitter/receiver window of the TS 511 3D-touch probe system from HEIDENHAIN.
The cycle - if provided on the machine - is executed through M19. The spindle orientation is activated either through l machine parameter or l cycle 13: spindle orientation. If the cycle spindle will been set in information builder.
Input
range
Cycle definition
is called without prior definition, the be oriented to an angle which has the machine parameters. Further is available from the machine tool
The angle of orientation Input range: 0 to 360”. Input resolution: 0.V.
is entered
according
to the reference
axis of the working
plane
Initiate dialog
ORIENTATION
Example
CYCL CYCL
Page P 106
ANGLE
?
Enter new angle for spindle.
DEF 13.0 ORIENTATION DEF 13.1 ANGLE 45
Programming
Modes
HEIDENHAIN TNC 2500B
Parametric programming
Parametric Overview
Programming
Parametric programming of the control enormously such as:
expands the capabilities and offers features
0 Variable drilling programs Processing of mathematical curves (e.g.: sine wave, ellipse, parabola, hyperbola) l Programs for machining families of parts l 3D programming for mold making l
Basic functions
The mathematical and logical functions the right are available for programming.
listed at
Computation time
The time required for one computing step depending on the workload on the processor can reach the millisecond range. For this reason, very many computations and very small displacements may cause the machine axes to be halted. In this case you have to make a compromise between high surface definition (many computations, small displacements) and efficient machining.
Variable addresses with parameters
The program data shown at the right can be kept variable by using the 0 parameters: Enter a 0 parameter instead of a specific number.
FN FN FN FN FN
0: 1: 2: 3: 4:
ASSIGN ADDITION SUBTRACTION MULTIPLICATION DIVISION
FN FN FN FN
5: 6: 7: 8:
SQUARE ROO’T SINE COSINE ROOT-SUM OF SQUARES
FN 9: FN 10: FN 11: FN 12:
IF IF IF IF
EQUAL, JU:MP UNEQUAL, JUMP GREATER, JUMP LESS, JUMP
FN 13: FN 14:
ANGLE ERROR
Nominal
positions
Inch dimensions
HEIDENHAIN TNC 2500B
value for 021 must be computed or be defined before it IS called.
Programs using parameters as jump address (e.g. GOT0 LBL 010) are not to be switched from mm to inches or vice versa, because the contents of the 0 parameters are also converted during switchover, which would result in false jump addresses.
Programming
Modes
L X+Q21
Y+Q22
Circle data
CC XtQl Y+Q2 C X+IQIO Y+Q20 CT XtQll Y+Q21 RND Ql CR XtQ21 Y+Q22
Feed rate
F QlO
Tool data
TOOL TOOL
Example for variable positioning: instead of L X+20.25 you write L X+Q21 The parameter in the program
CODE
Conditional Cycle data
jump
R Q62
DEF 1 L+Ql R 42 CALL QS Z S Q6
IF+QlO GT+O GOT0 LBL Q30 CYCL DEF 1.0 PECKING SET LJP -Ql/DEPTH -42 PECK.G -Q3 DWELL Q4lF QS
I
Page P 107
Parametric Selection
Selecting basic functions
After pressing the associated
Defining parameters
A parameter
Programming
“Q”, the functions can be selected function number and “ENT”.
is designated
by the letter 0 and any number
Specific numerical values (contents) cal and logical functions. Parameter programmed. Starting
either with the vertical cursor
between
keys or with “GOT0
q “,
0 and 99.
can be allocated to the parameter contents can also have a negative
either directly or with mathematisign. Positive signs need not be
Parameters must be defined before they can be used. When program run is started, all parameters are automatically assigned the value 0 if machine parameter MP 7300 = 0. If the parameters are to be assigned values before program start, set MP 7300 = 1. The parameter values are then not deleted at program start. Examples
of defined
parameters:
Ql = +1.5 Q5 = +Ql Q9 = +Ql * +Q5 Notation
The notation corresponds to the standard computer format: The operands and the operator are on the right, the desired a mathematical operation and not as an equation! Here also use the “ENT” key to continue
Example
The following
multiplication
the dialog within
result on the left. Consider one program
the entire line as
line.
is to be entered:
QlO = Q5 . 1.7 Initiate the dialog
FN 0: = ASSIGN
Select multiplication (operation).
or
I
PARAMETER NUMBER FOR RESULT?
Parameter
FIRST VALUE OR PARAMETER?
IS’ operand
SECOND VALUE OR PARAMETER?
2”d operand.
for result. (parameter).
-i
FN 3: QlO = +Q5 * +1.7
010 is assigned
Page P 108
the result when
Finished
the operation
Programming
is executed;
Modes
the contents
prog?i
of Q5 are retained.
I
Parametric Programming Algebraic functions FN 0: Assignment
This function assigns a parameter either a numerical value or another parameter. The assignment
FN 1: Addition
FN 2: Subtraction
FN 3: Multiplication
FN 4: Division
root
Sign for operands
FN 1: 417 = +Q2 + +5
This function defines a certain parameter to be the difference between two parameters, two numbers or one parameter and one number.
FN 2: Qll = +5 - +Q34
This function defines a certain parameter to be the product of two parameters, two numbers or one parameter and one number.
FN 3: Q21= +Ql * +60
This function defines a certain parameter to be the quotient of two parameters, two numbers or one parameter and one number.
FN 4: 412 = +Q2 DIV +6:!
Q17 417 417 417
Qll Qll Qll Qll
Parameters
with negative
= = = =
+5 + +7 +5 + -412 -44 + +QS +Q17 + +Q17
+5 - +7 +5 - -Q12 +Q4 - +QS +Qll - -4111
+5 * +5 * +Q4 +Q21
+7 -Q12 * -Q8 * +Q21
417 = +5 DIV +7 Q17 = t-5 + DIV -Q12 Q17 = t-Q4 DIV +Q8
FN 5: Q98 = SQRT +2
This function defines a certain parameter to be the square root of one parameter or one number. The operand must be positive.
Qll
= = = =
421 = 421 = Q21= Q21=
by 0 is not permitted!
498 = SQRT +Q12 Q98 = SQRT -470
signs can be used in equations.
= +5 - -434
E.G. subtraction
HEIDENHAIN TNC 2500B
Q5 = +Q12 Q5 = -Q13
to an equal sign.
This function defines a certain parameter to be the sum of two parameters, two numbers or one parameter and one number.
Division
FN 5: Square
corresponds
Example:
FN 0: Q5 = +65.432
can be obtained
from an addition
Programming
and vice versa. This also applies
Modes
I
for other operations.
Page P 109
Parametric Programming Trigonometric functions
Basics of trigonometry
A circle with radius c is divided symmetrically into four quadrants 0 to 6 by the two axes X and Y. If the radius c forms the angle a with the X-axis, the two components a and b of the right-angled triangle depend upon angle a.
Defining the trigonometric functions
sin a =
opposite side a hypotenuse = c
or a = c
sin a
cos a =
adjacent side b hypotenuse = c
or b = c
cos a
sin a tan a =-----== cos a
According
Length of one side
opposite adjacent
side side
to the Pythagorean
=-
a b
theorem:
c2 = a2 + b2 or c = I&%?
Table for preceding
Angle
FN 6: Sine
A parameter is defined as the sine of an angle, whereby the angle can be a number or a parameter (unit of measurement of the angle: degrees). 044 = sin 011
FN 6: Q44 = SIN + Qll A parameter is defined as the cosine of an angle, whereby the angle can be a number or a parameter (unit of measurement of the angle: degrees). 081 = cos 011
FN 7: Cosine
FN 7: QSl = cos + Qll A parameter is computed as the square root of the sum of squares of two numbers or parameters (LEN = length).
FN 8: Root sum of squares
03 = JQ452
+ 30*
FN 8: Q3 = +Q45 LEN+30
Page P 110
Programming
Modes
sign .and angle range
0”
90”
180”
.I
I
I
270° I
360’= I
Parametric Programming Trigonometric functions Angles from line segments or trigonometric functions
According to the definitions of the angular functions, either the angular functions sin a and cos a, or the lengths of sides a and b can be used to determine tan a: tan
a=-=-
sin a cos a
a b
The angle a is therefore sin a a = arc tan ~ = arc tan a cos a b
Unambiguous angle
If the value of sin a or the side a is known, possible angles always result: Example:
two
sin a = 0.5 a, = +30” and a2 = +150°
To determine angle a unambiguously, the value for cos a or side b is required. If this value is known, an unambiguous angle a is the result: Example:
sin a = 0.5 and cos a = 0.866 a = +30° , sin a = 0.5 and cos a = -0.866 a=+150°
FN 13: Angle
This function assigns a parameter the angle from a sine and cosine function, or from the two legs of the right-angled triangle. tana=-=-=p
sin a cos a
a = arc tan
a b
-5 8.66
-5 8.66
L-1
FN 13: Qll = -5 ANG +8.66
HEIDENHAIN TNC 2500B
Programming
Modes
Page P 111
Parametric Programming Conditional/unconditional
IF: IF-THEN jump
With the parameter functions FN 9 to FN 12, you can compare one parameter with another parameter or with a given number (e.g. a maximum value).
jumps
23 42 = 30 50 24 LBL 25 Ql = Ql + 1
+
Depending on the result of this comparison, a jump to a certain label in the program can be programmed (conditional jump): If the programmed IF condition is fulfilled, a jump is performed; if the condition is not fulfilled, the next block (following IF .) will be executed. Program
call
If you write a program call behind the called program label, a jump can be made to another program. (Program calls are for example PGM CALL or cycle 12).
27 L 2200 28 L x-20 Y-20
MO2
Examples:
Decision
Equation FN9: =
FN 9: IF + Ql EQU + 360 GOT0 LBL 30
A parameter is equal to a value or a second meter, e.g. Ql = 42 or in the example: 01 has the value 360.000.
Inequalities FN 10: +=
FN 10: IF + Ql NE + 42 GOT0 LBL 2
A parameter is not equal to a value or a second parameter, e.g. Ql + 42
FN 11:
>
FN 11: IF + Ql GT + 360 GOT0 LBL 17
A parameter is greater than a value or a second parameter, e.g. Ql > Q2. Also possible: greater thain zero, i.e. positive.
FN 12:
<
FN 12: IF + Ql LT + Q2 GOT0 LBL 3
A parameter is less than a value or a second parameter, e.g. Ql < Q2. Also possible: less than zero, i.e. negative.
Unconditional jumps
Abbreviations
Page P 112
.You can also program
unconditional
jumps
criteria :
to a label with the parameter
Example:
Decision
FN 9: IF 0 EQU 0 GOT0 LBL 30
The condition unconditional
EOU: NE: GT: LT:
equal to not equal to greater than less than
Programming
Modes
functions
para-
FN 9 to FN 12.
criterion : is always fulfilled, i.e. an jump is performed.
Parametric Programming Special functions
FN 14: Error code
You can call error messages and dialog texts of the machine manufacturer FN 14. To call, enter the error code number between 0 and 499. The error message terminates program run. The program must be restarted after the error has been corrected. The messages
are allocated
Error code 0
as follows:
Screen display
299
ERROR
0 . . . ERROR
299
PLC ERROR 01. . PLC ERROR 99 (or dialog determined by the machine
tool manufacturer).
483
DIALOG 1 . . . 83 (or dialog determined
by the machine
tool manufacturer)
484 .._ 499
PARAMETER (or dialog determined
15 . . . 0 by the machine
tool manufacturer)
300 400
from the PLC EPROM with
399
Example: FN 14: ERROR
0100
- 0107
= 100
The control can transfer Q parameter QIOO to 0107 are used for this.
values from the integrated
0108 Tool radius
The control always stores the tool radius of the last called tool in parameter 0108. Thus, the active tool radius can be used for the radius compensation in parameter computations and comparisons.
0109 Tool axis
The control stores the current Different machines alternately On these machines it is helpful this makes program branching
PLC to a NC program.
tool axis in parameter 0109: use the X,Y or Z axis as the tool axis. when the current tool axis can be requested in cycles possible.
Current tool axis
I Parameter
no tool axis called
I 0109 = -1
X axis is called
a09
=
0
Y axis is called
0109 =
1
Z axis is called
0109 =
2
Programming
Modes
The parameters
in the machining
program;
Page P 113
Parametric programming Special functions
0110 Spindle on/off
The value in parameter
0110 specifies
the last M function
M function
Qlll Coolant on/off
0110 = -1
MO3 spindle
on clockwise
QIIO =
0
MO4 spindle
on counterclockwise
I 0110 =
1
M05, if MO3 was previously
issued
a10
=
2
M05, if MO4 was previouslv
issued
CD10 =
3
0111 indicates
whether
the coolant
was switched
Meaning: switched
on
1 Qlll
=
1
MO9 coolant
switched
off
1 Qlll
=
0
0112 contains the overlap factor for pocket milling parameters, MP 7430).
(see index General
can be used to advantage
in milling
Parameter Q113 specifies whether the NC program at the highest programming with PGM CALL) contains mm or inch dimensions.
Parameters for programmable probing function: 0115 to 0118
program
Meaning:
1 Parameter
mm dimensions
IQ113 =
0
inch dimensions
0113 =
1
MOD
prograrns
level (in cases of sub-
Parameters 0115 to Q118 contain the uncompensated position measurements (i.e. length and radius of the stylus are neglected) that were acquired with the programmable probing function “surface = datum”: Measurement:
Parameter
X axis
0115
Y axis
Page P 114
Information,
1 Parameter
The overlap factor for pocket milling
0113 mm/inch dimensions
rotation:
on or off.
MO8 coolant
Parameter Functions,
of spindle
I Parameter
no M spindle function
Parameter
0112 Overlap factor
issued for the direction
I
0116
Z axis
1 0117
4’h axis
1 0118
Programming
Modes
Parametric Programming Example: Bolt-hole circle
Task
A bolt-hole circle is to be drilled ing cycle in the XY plane.
Example
Radius R of the bolt-hole
using the peck-
circle:
43 = 35 mm. Number
n of bore holes:
44 = 12. X coordinate
of the bolt circle center:
Ql = 50 mm. Y coordinate
of the bolt circle center:
Q2 = 50 mm.
Program Asg values
Computation
= = = =
Ql Q2 43 44
+50 +50 +35 +12
TOOL
DEF / TOOL
CYCL
DEF PECKING
Select and load drilling
FNO:
QlO = +0
Set starting
FN4:
414 = +360 DIV+Q4
Compute
angle increment
Approach
setup clearance
L Z+2 RO FMAX CC X+Ql
Execution
Center in X Center in Y Bolt circle radius Number of bore holes
FNO: FNO: FNO: FNO:
Define and call tool
CALL
MO3
cycle
angle
and switch
on spindle
Y+Q2
LP PR 43 PA+QlO
FMAX
Is’ bore
M99
Start of loop Angle
increment
Further bores If not all holes are drilled, jump to the start of the loop.
L Z+50
HEIDENHAIN TNC 2500B
RO FMAX
End of program
MO2
Programming
Modes
Page P 115
Parametric Programming Example: Drilling with chip breaking
Example
Interruptable drilling procedure with automatic approach to the setup clearance and raising of the tool to break the chip for longer tool life.
Main
BEGIN Ql=-1
program
Q2 43 44 QS Q6
= = = = =
PGM
-40 -5 +0.5 +200 +o
TOOL TOOL
DEF 1 L+O R2.5 CALL 1 Z S200
L X+20
Y+50 RO FMAX
CALL LBL 1 L Z+300 FMAX Subprogram Drilling procedure
7445 MM Setup clearance (incremental) Depth (incremental) lnfeed (incremental) Dwell time Drilling feed rate Work surface (absolute)
MO2
Define tool Call tool, spindle speed MO3 Approach drilling position Drilling End of main program
1: Setup clearance (absolute) Current work surface (absolute) Final drilling depth (absolute) Approach setup clearance in rapid traverse Compute (new) drilling depth Compute (new) chip breaking height Drilling depth would not be attained Drilling Chip breaking Another drilling
step required?
Drill directly to final depth Clear base of bore Return to setup clearance
END PGM
Page P 116
7445 MM
Programming
Modes
Parametric
Programming
Example: Ellipse as an SL cycle Programming of a mathematical illustrated with an ellipse.
curve will be
Geometry
An ellipse is defined according to the following formula (parameter form of the ellipse): X = a cos a Y = b . sin a a and b are referred to as the semiaxes of the ellipse. Starting at 0’ (02 = starting angle a,) and increasing a in small increments (Ql = incremental angles Aa) to 360” (Q3 = end angle a,). a multitude of points on an ellipse results. If these points are connected by short straight lines (see machining program, block 38), a closed contour is produced.
Process
The machining direction of the ellipse (counterclockwise) and the selected radius compensation RL produce an inside contour (pocket). The contour is contained in the subprogram with program section repeat.
Roughing
out
Error message
With the SL cycle “Contour”, you can write a parameter program as an SL subprogram and execute this with the SL cycle “rough-out” by selecting an appropriate incremental angle. TOO
MANY
SUBCONTOURS
If the incremental angle (Aa = QO) selected for roughing out is too small, the control calculates too many short straight lines, which are interpreted as excessive subcontours.
Remedy
A relatively large incremental angle (e.g. 00 = loo) suffices for roughing out.
Finishing
For subsequent finishing, the subprogram is executed in the conventional manner with a finer incremental angle (e.g. 01 = I’).
Note
This program works with only one tool. It can be expanded to use a roughing cutter for “roughing out” and a finishing cutter for “finishing”. Also, a center-cut end mill (IS0 1641) is required or cycle 15 is to be applied for pilot drilling.
HElDENHAlN TNC 2500B
Programming Modes
/
Page P 117
Parametric Programming Example: Ellipse as an SL cycle
0 BEGIN Parameter definition
Roughing
PGM
94152500
MM Incremental angle Aa for contour Incremental angle Aa for contour Starting angle a, End angle a,“’ Semiaxis a Semiaxis b X coordinate for the datum shift Y coordinate for the datum shift Setup clearance Z Pecking depth Z
1 FN 0: QO = +lO 2 FN 0: Ql = +l 3 FN 0: Q2 = +0 4 FN 0: 43 = +370 5 FN 0: Q4 = +45 6 FN 0: Q5 = +25 7 FN 0: 46 = +50 8 FN 0: Q7 = +50 9 FN 0: Q8 = +2 10 FN 0: Q9 = -5
out
Finishing
11 12 13 14 15 16 17 18 19 20
BLK FORM 0.1 Z X+0 Y+O Z-10 BLK FORM 0.2 X+100 Y+lOO Z+O TOOL DEF 2.5 L+O R+5 TOOL CALL 25 Z SlOOO L Z+50 RO FMAX M6 L Z+QS RO FMAX M3 FN: 0 414 = 42 CYCL DEF 7.0 DATUM CYCL DEF 7.1 X+Q6 CYCL DEF 7.2 Y+Q7
21 22 23 24 25 26 27
CYCL CYCL CYCL CYCL CYCL CYCL CYCL
28 29 30 31
FN 0: QO = +Ql FN 0: Q14 = 42 L Z+Q9 FlOO CALL LBL 2
DEF DEF DEF DEF DEF DEF CALL
32 L Z+50
Subprogram with program section repeat
14.0 CONTOUR GEOM. 14.1 CONTOUR LABEL2 6.0 ROUGH-OUT 6.1 SET UP -Q8 DEPTH +Q9 6.2 PECKG -5 FlOO ALLOW t-2 6.3 ANGLE +45 FlOO
angle for counter
Define subprogram 2 - as contour label SL cycle rough-out (for more information, see SL Cycles)
Cycle call
RO FMAX
Copy incremental angle for finishing Copy starting angle for counter Drove tool to milling depth Z Call subprogram 2 Retract spindle axis, jump to start of program
M2
33 LBL 2 34 FN 7: QlO = COS+Q2 35 FN 6: Qll = SIN+QZ 36 FN 3: Q12 = +QlO * +Q4 37 FN 3: Q13 = +Qll * +QS 38 L X+Q12 Y+Q13 RL F200 39FNl:Q =+Q ++QO 40 FN 12: IF +Q LT +Q3 GOT0 41 LBL 0 42 END PGM
Copy starting Datum shift
roughing finishing
94152500
*I End angle a, is greater
Computation of the X and Y positions elliptical path
on the
Feed rate for finishing Increase angle If angle not attained, jump to LBL 2
LBL 2
MM
than 360°, so the contour
is safely completed
with the cutter
If only the curve of the ellipse is to be milled, lines 1 and 21 - 27 are not needed. Line 30 (drive tool to milling depth Z) is inserted behind line 38.
Modified program
Page P 118
Programming
Modes
HEIDENHAIN TNC 2500B
Parametric Programmina Example:
u
Sphere
Task
Program 7513 machines sphere using concentric the horizontal plane.
Geometry
The size and location entered.
a convex segment circular movements
of the sphere
You obtain a hemisphere
when
Starting 3D angle End 3D angle Starting plane angle End plane angle
=oo = 9o” = 0” = 360”
01 02 06 07
of a in
can be
you select:
Cutting conditions
Cutting is performed during both the advance return movements. The following can be selected: 3D angle increment 03 Downfeed rate 011 Milling feed rate 012
Note
When selecting the 3D incremental angle, you have to make a compromise between the desired surface quality and the machining time. Small 3D incremental angles must be selected for high surface quality, but they require correspondingly long machining times.
Tool required
A spherical
Asg values
0 BEGIN PGM 1 FN 0 : Ql = 2 FN 0 : 42 = 3 FN 0 : Q3 = 4 FN 0 : 44 = 5 FN 0 : Q5 = 6 FN 0 : Q6 = 7 FN 0 : 47 = 8 FN 0 : QS = 9 FN 0 : Q9 = 10 FN 0 : QlO 11 FN 0 : Qll 12 FN 0 : Q12
cutter is used for finishing.
7816 MM +lO +55 +2 +50 +55 +300 +20 +50 +50 = -40 = +lOO = +500
Blank
13 BLK FORM 14 BLK FORM
Tool
15 TOOL 16 TOOL
Change/ Start position
17 L Z+lOO RO F9999 MO6 18 TOOL CALL 1 Z S 800
Subprogram
call
19 CALL
and
0.1 Z X+0 0.2 X+100
Starting 3D angle End 3D angle 3D incremental angle Sphere radius Setup clearance in Z Starting plane angle End plane angle X sphere center Y sphere center Z sphere center Downfeed rate Milling feed rate
c=,
F 012
Y+O Z-50 Y+lOO Z+O
DEF 1 L+O R-t5 CALL 0 Z S 0
LBL 2
20 L Z+lOO F9999 MO2 Roughing
HEIDENHAIN TNC 2500B
If roughing
is required,
an end mill can be used with a correspondingly
Programming
Modes
larger sphere
I
radius (04)
Page P 119
Parametric Programming Example: Sphere
Setting starting
the values
Starting position
Program
loop
21 LBL 2 22 CYCL DEF 7.0 DATUM 23 CYCL DEF 7.1 X+QS 24 CYCL DEF 7.2 Y+Q9 25 CYCL DEF 7.3 Z+QlO 26 CCX+OY+O 27 FN 0 : 420 = +Ql 28 FN 1 : Q31= +Q4 + +Q108 29 CALL LBL 3 30 LP PR+Q17 PA+Q6 ROF9999 MO3 31 L Z+Q5 32 L Z+Q15 FQll 33 PA+Q7 DR+ FQ12
Move datum to the sphere
Set circle center Starting and current 3D angle Compensate sphere radius (with tool radius) Compute starting position Approach starting positiorr Approach setup clearance Plunge cut at downfeed rate Circle segment to plane eindangle
34 LBL 1 35 FN 1 : Q20 = +Q20 + +Q3 36 FN 11 : IF +Q20 GT +Q2 GOT0 LBL 99 37 CALL LBL 3 38 L Z+Q15 FQll 39 LP PR+Q17 PA 420 FQ12 40 PA+Q6 DR- ROFQ12 41 FN 1 : 420 = +Q20 + +Q3 42 FN 11 : IF +Q20 GT +Q2 GOT0 LBL 99 43 CALL LBL 3 44 L Z+QlS FQll 45 LP PR+Q17 PA Q20 ROFQ12 46 PA+Q7 DR+ ROFQ12 47 FN 12 : IF +Q20 LT +Q2 GOT0 LBL 1
3D angle increment If condition* is fulfilled, then jump to end Position computation Pilot positioning for withdrawal Return to plane starting angle 3D angle increment If condition* is fulfilled, then jump to end Position computation Pilot positioning Arc to plane end angle If condition* is fulfilled, then jump to start of loop
48 LBL 99 49 L Z+Q5 ROF9999 50 CYCL DEF 7.0 DATUM 51 CYCL DEF 7.1 X+0 52 CYCL DEF 7.2 Y+O 53 CYCL DEF 7.3 Z+O 54 LBL 0
End
Position computations
Finished, retract Reset datum
Computations
55 LBL 3
Z components
57 FN 3 56 6 : Ql5 Q14 = +Q14 SIN +Q20 * +Q31 1 58 FN 7 : Q16 = COS +Q20 59 FN 3 : Q17 = +Q16 * +Q31 60 LBL 0 61 END PGM 7816 MM
Radius components
* Condition: Computation values
015: 017: 020: Q31: Q108:
Cycle
The program
sphere
center
Current Z height Current radius (polar radius) Current 3D angle Compensated contour radius Current tool radius
if current 3D angle 020 is greater than or less than end 3D angle 02, then jump to
can be used as a cycle:
1. Subprogram 2 (blocks 21 to 53) is written as a separate program. 2. Lines 21 and 54 are not required. Subprogram 3 (blocks 55 to 60) is written in place of block 29. 3. The must only write the surrounding program (blocks 1 to 20) and then call the cycle in block 19 (PGM CALL).
Page P 120
Programming
Modes
Parametric
Programming
Example: Sphere Machining sections of a hemisphere
Program 7816 can also be used to machine 3D angles. The graphics
always shows
the typical
sections
of a hemisphere
section for a cylindrical
Roughing End mill, R = 12 mm, 3D angle increment 4O
by limiting
the plane angles
end mill.
Finishing Spherical cutter, R = 3 mm, 3D angle increment lo
Hemisphere: 3D angle 0” to 90” Plane angle 0” to 360’
3D angle 00 to 900 Plane angle -60’ to 20’
3D angle IO0 to 55O Plane angle -60” to 20’
HEIDENHAIN TNC 2500B
Programming
Modes
Page P 121
and
Programmed Overview
Probing
The programmable probing function allows you to perform measurements before or during machining. For example, the surfaces of cast parts with different heights can be probed, so that the correct depth is always attained during subsequent machining. In addition, thermally-induced position deviations of the machine can be determined at selected time intervals and compensated.
Process
First, pilot position in rapid traverse while maintaining the setup clearance (machine parameter). Then probe with the probing axis at the measuring feed rate, transfer the probing position and retract to the setup clearance in rapid traverse. If the stylus is not deflected before reaching the maximum probing depth (machine parameter), the probing operation is aborted.
Initiate the diaput
POSITION
VALUE
All coordinates
?
of the pilot position
or incremental
Example
The probe is first to be pilot positioned to X-IO, Y+20 and Z-20, and then probing axis in positive direction. The probed result (X position) is to be stored in QIO.
Program
TOOL L Z+200
Q115 to Q118
CALL
begun with the X
0 Z SO
RO FMAX
TCH PROBE
0.0 REF.PLANE
TCH PROBE
0.1 X-10
0115 to 0118 contain
Tool change
MO6
Probing with the X axis in positive directron, measuring result in QIO Pilot positioning 010 contains the compensated X axis measurement after probing
QlO X+
Y+20 Z-20
the actual, uncompensated
Programming
position
values for X, Y, Z etc. after probing
Modes
Programmed Probing Example: Measuring length and an’de Task
A height (from the probing points 0 and 0) and an angle (from the probing points 0 and 6) are to be measured with parameter programming.
35
10
Main program: Definition of probing points (pilot positioning)
0 BEGIN
PGM
3DPROBE
Measure
Measure
length
angle
MM
1 FN 0: Qll = +20 2 FN 0: Q12 = t-50 3 FN 0: Q13 = +lO
Probing point 0 X, Y, Z coordrnates pilot positioning
4 FN 0: 421 = t-20 5 FN 0: Q22 = +15 6 FN 0: 423 = +0
Probing
7 FN 0: Q31= +20 8 FN 0: Q32 = +15 9 FN 0: 433 = -10
Probing point 0 Z coordinate 033 valid for probing point @
10 FN 0: Q41 = +50 11 FN 0: 442 = +lO
Probing
12 TOOL CALL 0 Z 13 L Z-t100 RO FlOOO M6
for
point 0
point 6
Retract, insert probe system
14 15 16 17 18 19
TCH PROBE TCH PROBE L Y+Q22 TCH PROBE TCH PROBE CALL LBL 1
0.0 REF.PLANE QlO Z0.1 X+Qll Y+Q12 Z+Q13
20 21 22 23 24
TCH TCH TCH TCH CALL
0.0 0.1 0.0 0.1
PROBE PROBE PROBE PROBE LBL 2
0 Probe Approach 0 Probe
0.0 PROBE Q20 Z0.1 X+Q21 Y+Q22 Z+Q23
auxiliary
Call subprogram REF.PLANE 430 Y+ X+Q31 Y+Q32 Z+Q33 REF.PLANE Q40 YX+Q41 Y+Q42 Z+Q33
point
1
0 Probe 8 Probe Call subprogram
25 STOP
2
Check result parameter (see index “Machine Operating Modes”, chapter “Program run”, Checking/Changing the 0 Parameters) Retract, jump to start of program
26 L Z+lOO RO FlOOO M2
HEIDENHAIN TNC 2500B
100
Programming
Modes
Programmed Example:
Probing
Measuring
Subprogram 1: measure length
27 LBL 1 28 FN 2: Ql = +Q20 - +QlO 29 LBL 0
Subprogram 2: measure angle
30 LBL 2 31 FN 2: Q34 = +Q40 - +Q30 32 FN 2: 435 = +Q41 - +Q31 33 FN 13: 42 = +Q34 ANG+Q35 34FNl:Q2=-360++Q2 35 LBL 0 36 END PGM 3DPROBE MM
Page P 124
/
Programming
length and angle
Modes
Measured
height
Measured
angle
in parameter
in parameter
01.
02.
Digitizing Overview
3D Contours
HEIDENHAIN diqitizinq software enables vou to reduce a three-dimensional Dart rnodel into discrete diaital information 6y scanning it with the TS’120 triggering 3D touch probe. Thanks .to the ability of this ” software to immediately access the position control loop of the TNC control, a series of 3 to 5 positions or more can be measured per second, depending on the machine. At a programmed point interval of 1 mm this results in scanning speeds of 180 to 300 mm/min (7 to 12 ipm).
Technical prerequisites
The following a 3D contour system :
components are required to digitize with the HEIDENHAIN touch probe
- TS 120 triggering 3D touch probe - Option for “digitizing with TS 120” - External data storage medium: HEIDENHAIN FE 401 floppy disk unit or PC (IBM or IBM compatible) with HEIDENHAIN data transfer software TNC.EXE - Evaluation software
0%!E!l TNC
0
PC
The control must be specially touch probe system.
prepared
by the machine
tool builder
to enable
the use of the 3D
The digitized positions are output in straight-line blocks in HEIDENHAIN format over the RS-232.C/V.24 data interface. Shorter programs can be stored in the FE 401 floppy disk unit, while longer programs must be stored in a PC. Evaluation software for PCs (positive/negative forms, tool radius compensation etc.) is now being developed. Through the digitizing process, however, NC programs are immediately produced which are usable without additional evaluation if the cutter radius is equal to the probing ball radius,.
Limitations
HEIDENHAIN TNC 2500B
- The scanning Programming - Only the main - Basic rotation inactive when
I
cycles are programmed in the HEIDENHAIN conversational programming language. in IS0 is not planned. axes X, Y, Z may be used in the scanning cycles (no parallel axes U, V, W). and coordinate transformation (datum shift, mirror image, rotation, scaling) must be the scanning cycles are called.
Programming
Modes
I
Page P 125
Digitizing 3D Contours Defining the scanning range
The digitizing
functions
comprise
TOUCH PROBE 5.0: RANGE TOUCH PROBE 6.0: MEANDER TOUCH PROBE 7.0: CONTOUR
Axis MIN point MAX point
NAME
Clearance
three cycles:
LINES
With the scanning cycle RANGE, a cuboid is defined by entering coordinates of two points, the minimum point (MIN) and the maximum point (MAX). The contour to be scanned lies within this space. This range is programmed FORM, but with additional name and the clearance
PGM
the following
r
similarly to the BLK input of a program height.
The program name (max. 8 characters) - which is also the file name for the external memory - indicates the NC program in which the measured positions are stored in the form of straight-line blocks. The program name must be entered. If different names are assigned in several range definitions within one scanning program, then a corresponding number of NC programs will automatically be generated for storage of the measured positions.
height
Page P 126
Input of a height, scanned.
I
in absolute
dimensions,
Programming
at which
Modes
the stylus cannot collide with the contour
to be
Digitizing 3D Contours Defining the scanning range
Initiate dialog TOUCH PGM
Select the RANGE cycle and enter.
PROBE 5.0: RANGE
NAME
MIN
z Cl
TCH PROBE AXIS ?
Enter axis parallel to touch probe, e.g. Z. X coordinate
MIN. POINT RANGE ?
Y coordinate Z coordinate
MAX X coordinate
MAX. POINT RANGE ?
Y coordinate Z coordinate
CLEARANCE HEIGHT
1 TCH PROBE 5.0 RANGE 2 TCH PROBE 5.1 PGM NAME: 12345678 3 TCH PROBE 5.2 Z X+0.000 z+o.ooo Y+O.OOO 4 TCH PROBE 5.3 X+100.000 Y+100.000 2+40.000 5 TCH PROBE 5.4 HEIGHT: +60.5
Display
HEIDENHAIN TNC
Enter the clearance
CLEARANCE HEIGHT ?
2500B
Programming
Modes
Page P 127
height
Digitizing 3D Contours Line-by-line digitizing
The MEANDER scanning cycle digitizes a 3D contour in a meandering pattern (in a series of parallel lines) within the RANGE which was previously defined.
Starting position
The starting point is approached automatically with an approach logic Z to clearance height, then X, Y. The starting point coordinates are obtained from the definition of the RANGE scanning cycle: X, Y: from the MIN corner z: clearance height
Approaching the contour
From the starting point 0 the touch probe moves in negative direction (Z-) toward the contour surface. At the first , the position 0 is stored.
Scanning
The touch probe moves in positive line while probing the surface in the probe vals (PP INT). The actual point intervals smaller than the programmed intervals ing on the machine parameters).
Ascending, descending contour
If the control recognizes an ascending or descending contour, the probe retracts in the vertical direction (normal to the current position). The length of the path of retraction In normal direction is referred to as TRAVEL.
direction point intercan be (depend-
At the positive end of the range 0 the touch probe moves by the programmed line spacing (L.SPAC) in the positive column direction 0. The touch probe This procedure The contour
Page P 128
now moves in negative is repeated
is departed
line direction
back to the negative
end of the range 0
line by line until the entire range is scanned. automatically
through
Programming
retraction
Modes
to the clearance
height.
HEIDENHAIN TNC 2500B
Digitizing 3D Contours Defining the MEANDER
scanning
cycle
Initiate dialog TOUCH
Select the MEANDER enter.
PROBE 6.0: MEANDER
clX
LINE DIRECTION
LIMIT IN NORMAL LINES DIRECTION ? LINE SPACING ?
c! El
MAX. PROBE POINT INTERVAL ?
cycle and
Key in the line direction, e.g. X, and enter.
Enter the travel, e.g. 0.5, and confirm entry. Enter the line spacing, e.g. 0.5, and confirm entry. Enter the point spacing, e.g. 0.5, and confirm entry.
0 BEGIN PGM 1 MM 1 TCH PROBE 5.0 RANGE 2 TCH PROBE 5.1 PGM NAME: 12345678 3 TCH PROBE 5.2 Z X+0.000 Y+O.OOO z+o.ooo 4 TCH PROBE 5.3 X+100.000 Y+100.000 2+40.000 5 TCH PROBE 5.4 HEIGHT: +60.5 6 TCH PROBE 6.0 MEANDER 7 TCH PROBE 6.1 DIRECTN: X 8 TCH PROBE 6.2 TRAVEL: 0.5 L.SPAC: 0.5 PP INT 0.5 9 END PGM 1
HEIDENHAIN TNC 25006
Programming
Modes
Page P 129
Digitizing 3D Contours Level-by-level digitizing
The CONTOUR LINES cycle scans a 3D contour by circling around the model in a series of upwardly successive levels within the RANGE which was previously defined.
Starting position
The starting point 0 is approached automatically with an approach logic Z to clearance height, then X, Y. The starting point coordinates are obtained as follows: X, Y: input in the CONTOUR LINES cycle Z: from the MIN point given in the RANGE cycle
Approaching the contour
From the starting point 0 the touch probe moves in the programmed direction (here Y+) toward the contour surface. At the first , the position 0 is stored (lst touch point = target point for the respective contour line).
Y t
The touch probe moves in the programmed direction of the starting axis along the contour while the probe positions are digitized in the programmed point interval (PP INT). The actual point interval may be less than the programmed interval (depending on the machine parameters).
Scanning
Once the first level has been rounded, i.e. the probe has returned to the first probe point 0, the probe is raised by the line spacing (L.SPAC) to the next level (0). This process is repeated until the range limit has been reached.
Departing the contour
The contour
is departed
For the CONTOUR
Time
limit
Page P 130
automatically
LINES scanning
through
retraction
to the safety clearance
cycle, the RANGE cycle must be defined
@
as follows:
l
In the touch probe axis (e.g. Z axis) the Z MAX point coordinates should be smaller than the maximum Z coordinate of the contour by at least the radius of the ball tip of the touch probe stylus.
l
In the working plane the range should of the touch probe stylus.
If the first probe point (0) is not reached ed with an error message.
Programming
be larger than the contour
within
the programmed
Modes
by at least the radius of the ball tip
time, the digitizing
process
is terminat-
HEIDENHAIN TNC 2500B
Digitizing 3D Contours Defining the CONTOUR LINES scanning cycle
Initiate dialog TOUCH
PROBE 7.0: CONTOUR
Select CONTOUR
LINES
LINES and
TIME LIMIT ? STARTING POINT ? Y+lOO, and confirm
entry.
AXIS AND DIRECTION OF APPROACH ? STARTING PROBE AXIS AND DIRECTN ?
and confirm
LIMIT IN NORMAL LINES DIRECTION ? LINE SPACING ?
n
MAX. PROBE POINT INTERVAL ?
Example
HEIDENHAIN TNC 2500B
entry.
Enter travel, e.g. 0.5, and confirm entry. Enter line spacing, e.g. 0.5, and confirm entry. Enter point interval, e.g. 0.5, and confirm entry.
0 BEGIN PGM 2 MM 1 TCH PROBE 5.0 RANGE 2 TCH PROBE 5.1 PGM NAME: 12345678 3 TCH PROBE 5.2 Z X+0.000 Y+O.OOO z+2.000 4 TCH PROBE 5.3 X+100.000 Y+100.000 z+10.000 5 TCH PROBE 5.4 HEIGHT: +60.5 6 TCH PROBE 7.0 CONTOUR LINES 7 TCH PROBE 7.1 TIME: 200 x+50.000 Y+100.000 8 TCH PROBE 7.2 ORDER: Y+/X+ 9 TCH PROBE 7.3 TRAVEL: 0.5 LSPAC: 0.5 PP INT: 0.5 10 END PGM 2 MM
Programming
Modes
Page P 131
Digitizing Executing
3D Contours a program with digitized
positions
An additional short program section permits the scanned program stored by the FE 401 floppy disk unit or by a computer to be executed without radius compensation (170) or any other changes, provided that the tool radius is equal to the effective ball tip radius of the 30 touch probe.
If a milling cutter with a different will result!
Program
of a 3D contour
digitized
radius is used, an incorrect
with the CONTOUR
0 BEGIN PGM 1 MM 1 L Z+O FMAX 2 L X+0 Y-25 FMAX 3 L x+0 Y-8.849 4 L X+2.003 Y-8619 29 L 30 L 31 L 32 L
LINES scanning
Starting Starting
X-1.808 Y-8.669 x+0 Y-8.85 Z+l X+0 Y-6.292 X+2.004 Y-5.965
or a contour
with oversize
cycle.
point in Z point in X, Y
New contour
53 L X+0 Y-6.293 54 L X+0 Y-25 FMAX 55 L Z+40 FMAX 56 END PGM 1 MM Before this program
contour
line
End point = starting point in X, Y End point = clearance height in Z
can be run, the following
short program
must be entered
and executed:
0 BEGIN PGM 2 MM 1 TOOL DEF 1 L+30 R+5
Tool definition: The tool radius must equal the radius of the ball tip of the 3D touch probe stylus as determined during calibration.
2 TOOL CALL 1 Z S 2250
Tool call
3 L ROF525 MO3
No radius compensation, with clockwise rotation
4LMxy
M function determined by the machine tool manufacturer with which the tool, feed rate and direction of spindle rotation remain modally effective - even if a new program is selected.
feed rate, spindle
5 END PGM 2 MM
Page P 132
Programming
Modes
HEIDENHAIN TNC 2500B
on
Digitizing 3D Contours Error messages
WRONG
AXIS
The touch calibration
FAULTY
PROGRAMMED
probe axis in the RANGE scanning of the touch probe system.
RANGE
cycle is not the same as the touch probe axis used for
DATA
- A MIN coordinate value is larger than or equal to the corresponding MAX coordinate value in the RANGE scanning cycle. - One or more coordinates in the RANGE scanning cycle are outside of the software limit switch range. - The RANGE scanning cycle was not defined before calling the MEANDER or CONTOUR LINES scanning cycle.
MIRRORING NOT PERMIlTED ROTATION NOT PERMIlTED SCALING FACTOR NOT PERMIlTED Mirroring, scanning
RANGE
rotation or scaling cycle IS called.
factor is active when
the RANGE,
MEANDER
beyond the borders
CYCL-PARAMETER
INCORRECT
of the range during
The programmed travel, line spacing or probe (only possible via O-parameter programming).
TOUCH
POINT
point spacing
probing,
i.e. the 3D contour
is negative
STYLUS
WRONGLY
START
INCORRECT
point coordinate
DOUBLE
LIMIT
and depar-
the beginning
of the scanning
cycle
DEFINED point coordinates
TIME
in the CONTOUR
is outside
LINES scanning
of the range in the starting
cycle is assigned
to the touch
probe axis.
PROGRAMMED
point coordinates
in the CONTOUR
LINES
scanning
cycle were both assigned
to the same
EXCEEDED
During the CONTOUR LINES programmed time limit.
HEIDENHAIN TNC 25008
during
One of the starting probe axis.
POSITION
to the 3D contour
IN
The stylus is not at rest position
The starting axis.
mm
INACCESSIBLE
ALREADY
The starting
lies partially out-
or larger than 65,535
- occurred during approach before the range was reached. - In the CONTOUR LINES cycle no occurred between approach ture from the range.
AXIS
LINES
EXCEEDED
The probe moved side of the range.
PLANE
or CONTOUR
scanning
cycle the first point of the line was not returned
Programming
Modes
to within
Page P 133
the
Teach-In Transferring
Tool compensation
tool compensation
Position values (coordinates) acquired via “Transfer actual position” contain the length and radius of compensation for the tool in use.
Therefore it is advisable when programmrng with “Transfer actual position” to enter the correct radius compensation (RL, RR or R+, R-) and use L = 0 and R = 0 in the tool definition.
values
1. Tool definition 3 TOOL
DEF
in the machining
program
1 L+O R+O
2. Tool definition
in the central tool file
Tl L+O R+O
If the tool breaks or another tool is selected instead of the original, then a different length and radius can be taken into . The new compensation are differences: Radius compensation
R = R2-RI R = R3-R, R = RI = R2 = R3 =
R=O
values for the tool radius
radius compensation for tool radius of the original tool radius of a new tool tool radius of a new tool
the tool definition tool 0 0 0
The compensation for the new tool length is also determined (see Tool definition, Transferring tool lengths). The new compensations
Page P 134
R= -...
or
The compensation R can be positive or negative, depending inserted tool is larger (+) or smaller (-) than the original tool.
Length compensation
R= +...
are entered
in the tool definition
Programming
Modes
on whether
the tool radius of the newly
as the difference
of the original
to the originally
used tool
tool (R = 0, L = 0)
HEIDENHAIN TNC 2500B
Teach-In Transferring
Transfer actual position
Application possibilities
B L
Actual Positions to Program
The actual tool position can be transferred to the machining program with the “Transfer actual position” key.
In this way you can transfer: positions l tool dimensions (see Tool Definition) l
or
or
Process
Traverse the tool to the desired
position
Open a program block (e.g. for a straight line) in the “Programming and editing” operating mode. Select the axis from which the actual value is to be transferred. This axis position is transferred “Transfer actual position” key.
by pressing
PROGRRHMING m 4 TOOL
END
the
FIND CALL
PGM
EDITING 1 s
2 126
55
------------------_------------RCTL. z1 :95%:: l 23,254 84,000
I
Move the axis or axes via the axis keys.
Example
Input
Initiate the dialog COORDINATES
? Terminate input.
RADIUS FEED
COMP.: RATE
a/RR/NO
COMP.
Enter the radius compensation if needed. Enter the feed rate, if needed, confirm entry.
?
?F =
MISCELLANEOUS
FUNCTIONS
Enter miscellaneous
M ?
You can skip dialog queries “END 0”.
HEIDENHAIN TNC 2500B
Programming
position
Modes
function
and if needed.
with “NO ENT” or
Page P 135
Test Run
In the “Test run” operating mode, a machining program is checked for the following errors without machine movement: l l l l l
TEST
Overrunning the traversing range of the machine Exceeding the spindle speed range Illogical entries, e.g. redundant input of one axis Failure to comply with elementary programming rules e.g. cycle call without a cycle definition Certain geometrical incompatibilities
0
RUN
BEGIN
666
FORM Y-70 2 8LK FORM y+70 __________----___--------------1
ELK
RCTL.
Testing the program
PGM
X 2
+ +
0.1
MM 2
X-85 2-30 X+85 2+0
0.2
49,2S8 15,321
Y
+
q +
23,254 84,000
Initiate the dialog
number
;fer the block up to vvhich the test is to run.
or
:te program.
No apparent errors
If the program contains no apparent errors, the program reached, or a jump is made back to the start of program
STOP/MO6
If a STOP or MO6 was programmed, pressing the “NO ENT” key.
Error
If an error is found, the program test is stopped. The error is usually located block. An error message is displayed on the screen. The program
Page P 136
test runs until the entered block number if no STOP or MO6 was programmed.
the test can be continued
test can be halted with the “STOP”
Programming
key and aborted
Modes
by entering
a new block number
at any time
is
or by
in or before the stopped
Test Graphics
GRAPHICS Machining programs can be simulated graphically and checked in the “Program run” operating modes “Full sequence” and “Single block”, if a blank has been previously defined (BLK FORM).
GRAPHICS
More information on the definition of the blank can be found in the section Program Selection, Blank form definition. SELECTIONxENT
GRAPHICS
After selecting a program, the “menu” shown at the right is displayed by pressing the GRAPHICS “MOD” key twice.
FAST 3D-VIEW
IMRGE
PLAN
VIEW
/ DRTA -
ENO=NOENT PROCESSING
__
One of the versions of the graphic presentations can be selected with the vertical cursor keys and entered with the “ENT” key. The graphic simulation or internal started with the “START” key.
computation
is
Fast data image processing
With “Fast data image processing” only the current block number is displayed on the screen and the internal computing also indicated by an asterisk (* = control is started). When the program has been processed, the “machrned” workpiece can be displayed in plan view, view in three planes or 3D view.
Plan view with depth indication
The workpiece center is shown in the plan view with up to 7 different shades: the lower the darker.
View three
The workpiece is shown - like in drafting plan view and two sections.
in planes
The sectional keys.
planes can be moved
- with a
via the cursor
The view in three planes can be switched from the German to the American projection standard via a machine parameter. A symbol (in conformance to IS0 6433) indicates the type of projection:
HEIDENHAIN TNC 2500B
Programming
Modes
Page P 137
Test Graphics
GRAPHICS 3D view
The program view. The with The L = A =
is simulated
In a three-dimensional
displayed workpiece can be rotated by 90’ each activation of the horizontal cursor keys. orientation is indicated by an angle. o” l= 180“ 9o” r = 270°
If the height to side proportion is between 0.5 and 50, the type of display can be changed with the vertical cursor keys. You can switch between a scaled and non-scaled view. The short height or side is shown with a better resolution in the nonscaled view. The dimensions of the angle indicator change to a show the disproportron.
Magnifying
Selecting sectional
You can magnify a detail of the displayed work with the “MAGI\]” key. A wire model with a hatched surface appears next to the graphic. This marks the sectional plane. You can select a different horizontal cursor keys.
sectional
Trimming
You can trim the selected section with the horizontal
plane or cancel the cursor keys.
Transferring the detail
Once the desired detail is displayed, select the dialog “TRANSFER DETAIL = ENT” with the vertrcal cursor keys and confirm with the “ENT” key.
Magnification
the plane
The “remaining workpiece” screen with “MAGN”.
plane with the
is displayed
on the
Another graphic simulation of the magnified detail can be executed in the plan view, the view in three planes or the 3D view via the “START” key.
Programming
Modes
MAGN
Test Graphics
GRAPHICS You can revert to the blank with the “BLK FORM” key and restart simulation with “START”.
Tips
The “3D view” and “View in three planes” require extensive computing. For long programs, we therefore recommend displaying the workpiece with “Fast data image processing” or in the quicker “Plan view with depth indication” first, and then switching to the “3D view” or the “View in three planes”.
Displaying
details
Tool call
The following
aids are available
if fine details are to be examined:
l
Trim the blank and magnify
l
Restrict the blank detail to the section
One “TOOL Specifying
in an additional
program
run
of interest,
CALL” must be programmed the spindle
graphic
prior to the first axis movement
axis in the BLK FORM definition
to designate
does not suffice for the graphic
the tool axis. program
Both entries for the axis must be the same. If the tool axis is not given, an error message
HEIDENHAIN TNC 2500B
Programming
appears
Modes
after starting
the graphics.
Page P 139
run.
External Data Transfer General information The control has one data interface following standard: . RS-232-C
for read-in
or output
Standard data transfer for the HEIDENHAIN ME magnetic * (no longer
External programming
The data format complies
with the
(ISO)
The data interface can function in two different manners: Blockwise transfer for the HEIDENHAIN FE 401 Floppy Disk Unit and compatible
Device adaptation
of programs.
computers
tape unit*, or for a printer, punch, reader, etc
in production)
The TNC can be adapted to various peripheral devices via machine parameters, which can be accessed as parameters. The settings for three different peripheral devices are permanently stored in the TNC (selectable via “MOD”): l
FE = for HEIDENHAIN
l
ME = for HEIDENHAIN
l
EXT = external devices. Interface defined by the machine manufacturer or via machine HEIDENHAIN device such as a printer, computer, etc.
Programs
FE 401 Floppy Disk Unit. ME magnetic
can also be written
Observe the programming
tape unit. parameters
to connect
externally.
rules in this manual
and the following
At the start of program grammed.‘)
l
After the end of program block, CR LF or LF or CR FF or FF’) and also ETX (Control grammed. Any character can be substituted for ETX.
l
Spaces
l
Zeroes between
l
During
read-in
and after every program
instructions.
l
between
a non-
single words
can be omitted.
single words
can be omitted.
of NC programs,
comments
block, CR LF or LF or CR FF or FF must be pro-
that are marked
C) must be pro-
with “*” or “;” are overread.
‘) CR, LF at the start of program and CR, LF or LF or FF after every block are not required transfer”. This function is assumed by the control characters.
Programming
Modes
I
for “blockwise
HEIDENHAIN TNC 25008
External Data Transfer Transfer menu Read-in/ read-out
Transfer
Machining programs can be read-out or read-in by the control. For example, the “Read-in program” display on the control means: data is entered from the floppy disk station and received by the control. Program transfer in the “Programming and editing” operating mode must be initiated from the control.
menu
The transfer mode is selected via a menu, which offers different read-in and read-out alternatives.
PROGRAMMING
AND EDITING
PROGRAM DIRECTORY READ-IN ALL PROGRAMS READ-IN PROGRAM OFFERED READ-OUT SELECTED PROGRAM READ-OUT ALL PROGRAMS Selections
Read-in
to the TNC
Read-out
from the TNC
PROGRAM DIRECTORY
READ-OUT SELECTED PROGRAM
The list of program numbers on the data medium is displayed. The programs are not transferred.
A single, selected
program
is read-out.
READ-OUT ALL PROGRAMS The entire NC program
memory
is read-out.
READ-IN ALL PROGRAMS All programs ium.
are read-in
from the data med-
READ-IN PROGRAM OFFERED The programs are offered in the sequence in which they were externally stored and, if desired, can be read-in.
READ-IN SELECTED PROGRAM A single, selected
program
is read-in.
Interrupting the data transfer
A started data transfer can be interrupted on the TNC by pressing After interruption of the data transfer, the following error message
Transfer TNC - TNC
Data can also be transferred
HEIDENHAIN TNC 2500B
the “END 0” key. appears:
PROGRAM INCOMPLETE
directly
between
Programming
two controls.
Modes
The receiving
control
must be started first
Page P 141
External Data Transfer Connecting cable/Pin assignment K-232-C HEIDENHAIN devices
Transmission
cable
for
LE
Cable adapter on the machine length max. 17 m
RS-232-C Cable adapter Id.-Nr. 239 758 01
Id.-Nr. 239760
ME
* 25 pole flange socket LE 2500: X25
HEIDENHAINstandard cable
The RS-232-C
data interface
has a different
pin layout at the LE and at the adapter
block.
PC Non-HEIDENHAIN devices * /;;;;;;;\
Cable for ,~;m~lDENHAIN
RS-232-C adapter block
LE Cable adapter at the machine
* 25 pole flange socket LE 2500: X25
Recommended pin layout for nonHEIDENHAIN devices
CHASSIS TRANSMIT
DATA
RECEIVE
DATA
REOUEST TO SEND CLEAR
TO SEND
DATA SET READY SIGNAL DATA TERMINAL
K-232-C DCl/DC3 Page P 142
data transfer protocol
Programming
with
Modes
READY
External Data Transfer Peripheral devices
Adaptation
The control
interface
HEIDENHAIN devices
HEIDENHAIN operation:
FE, ME
The adaptation for FE or ME can be selected via “MOD”. The transfer rate can be altered for the FE 401 B.
Connections
In built-in controls, peripheral devices can usually be connected or another accessible location on the machine.
Non-HEIDENHAIN devices
Non-HEIDENHAIN
devices
device which
are mated with the TNC controls
devices
must be individually
adapted.
l
Adapting
l
Setting
the peripheral
The suitable
especially
standard
easy to put Into
cable can be ordered.
via a cable adapter
on the operating
This also includes: effective by selecting
EXT.
device, e.g. via switches,
the baud rates for both devices. the data transfer
Please :
I
is to be connected.
and are therefore
0 Adapting the control via machine parameters. These settings are stored after input and are automatically
0 Wiring
HEIDENHAIN TNC 2500B
must be set for the specific
cable.
Both sides must be set identically. You should always document the settings!
Programming
Modes
I
Page P 143
External
Data Transfer
HEIDENHAIN FE 401 Floppy Disk Unit Preparing the FE *)
Connect the FE to the mains, plug in the data cable, switch on, insert floppy disk in the upper drive, select the baud rate if necessary. Please note when writing a diskette: 0 You must format the diskette before writing the first time. l
Setting
the TNC
Do not write-protect
for
the diskette.
Select at the TNC
RS-232-C INTERFACE =
Continue K-232-C
pressing until INTERFACE appears
Continue appears.
pressing
Terminate
Examples for using the FE Read-out selected program
until the ‘FE setting
the MOD operating
mode.
Select
READ-OUT SELECTED PROGRAM
Confirm the function.
OUTPUT = ENT/END = NOENT Select the program,
e.g. program
14.
Output the program.
EXTERNAL DATA OUTPUT
The FE is started and stopped transfer.
OUTPUT = ENT/END = NOENT
The next program
number
after program
is then highlighted
Select and output the next program terminate output. Very important!
Read-in selected program
or
Select Confirm
READ-IN SELECTED PROGRAM
Cl
PROGRAM NUMBER =
the function
Enter the number,
read-in
EXTERNAL DATA INPUT The FE generally like an ME.
functions
with “blockwise
*) The entire range of functions
Page P 144
transfer”
and can be switched
for the FE is described
Programming
Modes
in the operating
over on the rear to operate
manual for the FE.
HEIDENHAIN TNC 2500B
External Data Transfer Non-HEIDENHAIN devices EXT
After setting the TNC data interface
to EXT. the following
modes
can be selected
via machine
parameter:
Standard data transfer for printer, reader, puncher etc. Blockwise computer.
transfer
for
To transfer data from the control to non-HEIDENHAIN parameters. The transfer
Resetting the TNC to EXT
rate is set via the MOD function
devices, the control
Continue pressing until RS-232-C interface appears.
Select at the TNC
Continue appears.
pressing
Terminate
For standard the control:
data transfer
MP 5030 = 0 (standard
until the EXT setting
the MOD operating
(e.g. to a printer), you only have to enter the following data transfer
MP 5020 = e.g. 168 (data format) (see External Data Transfer, Machine Blockwise transfer
by machine
BAUD RATE.
RS-232-C INTERFACE
Standard data transfer
must be adapted
machine
mode.
parameters
is selected). parameters).
For “blockwise transfer” from a computer, transfer software is required, e.g. the data transfer from HEIDENHAIN for personal computers. For this operating mode, you must set the following machine parameters: MP 5030 = 1 (blockwise
transfer
at
software
is selected)
MP 5020 = e.g. 168 (data format). The following machine parameters determine the control character (for description see External Data Transfer, Machine parameters) and are valid for the data transfer software from HEIDENHAIN. If different transfer software is used, the machine parameters must be adapted correspondingly. MP 5010 = 515 MP 5010.1 = 17736 MP 5010.2 = 16712 MP 5010.3 = 279 MP 5010.4 = 5382 MP 5010.5 = 4 When using the transfer software from HEIDENHAIN, above machine parameters need not be entered. Adapting to non-HEIDENHAIN devices
Compare the Interface descriptions Then proceed as follows:
is normally
set to “FE”. Then the
of both devices
l
Determine the common settings (data format, baud rate) The peripheral device is usually set via internal switches.
l
Determine
l
Plug in the data transfer
l
Plug in the power
0 Switch
HEIDENHAIN TNC 2500B
the data interface
the pin layout for the data transfer
cable, and wire the cable.
cable
cord of the peripheral
device
on the power
l
Start the transfer
l
Select the transfer
software
on computers,
If required.
menu on the TNC with the “EXT” key and start the desired
Programming
Modes
transfer.
Page P 145
External Data Transfer Machine parameters The following settings To select the machine MP 5010 Control characters for blockwise transfer
are only effective when operating the data interface In the “EXT” operating mode. parameters, see index General Information, MOD Functions, parameters.
T
I
MP
Bit
Function
5010.0
0 7 8 _.. 15
ETX or any ASCII character. STX or any ASCII-character.
5010.1
0
7
8
15
H or any for data E or any for data
ASCII input ASCII input
0
7
8
15
H or any for data A or any for data
ASCII character. It is sent in the command output prior to the program number. ASCII character. It is sent in the command output after the program number.
0
7
8
15
0
7
5010.2
5010.3
5010.4
8 .., 15
5010.5
0
7
Input values” Character Character
for end of program. for start of program.
character. It is sent in the command prior to the program number. character. It is sent in the command after the program number.
block block block
ETB and SOH: 279
ACK or substitute character (decimal positive acknowledgement. It is sent is correctly received. NAK or substitute character (decimal negative acknowledgement. It is sent IS incorrectly transferred.
ACK and NAK: 5382
code 1-47): when the data block code l-47): when the data block
EOT or substitute character (decimal code l-47) is sent at the end of the data transfer.
End of program: Start of program:
software
EOT: 4
from HEIDENHAIN
of bit
Significance
of bit
6
5
4
3
2
1
0
128
64
32
16
8
4
2
1
0
0
0
0
0
0
1
1
15
14
13
12
11
10
9
8
512
256
32768
Enter 0 or 1 accordingly Determine
Page P 146
input value:
00000011 00000010
7
Enter 0 or 1 accordingly Bits 8 - 15
and one tor the start
BINARY code BINARY code
ETX STX
Bits 0 - 7 Significance
H and A: 16712
block
MP 5010.0 This defines one character frorr the ASCII character code for the end of program of program for external programming. ASCII characters l-47 are accepted. “End of program” is sent at “standard data interface” and “blockwise transfer”. “Start of program” is only sent at “blockwise transfer”.
Example:
H and E: 17736
ETB or substitute character (decimal code l-47) is sent at the end of the command block. SOH or substitute character (decimal code l-47) is sent at the beginning of the command block.
The input values apply for the data transfer
Determining bit significance MP 5010.0
ETX and STX: 515
16384 0
8192 0
0
2048 0
1024 0
0
1
The Input value for MP 5010.0 IS thus 515.
1 2 + 512 515
Programming
4096
Modes
HEIDENHAIN TNC 2500B
0
External Data Transfer Machine parameters
The data format and the type of transfer stop are determined wise transfer”. 0 is entered for standard data interface. MP 5020 Data format
r
Function
Bit
Input
7 or 8 data bits
0
+
Block Check Character
(BCC)
Transfer stop due to RTS
1 2
Transfer stop due to DC3 Character or odd Character Number
parity even
bits (ASCII code with = parity) bits (ASCII code with = 0 and gth bit = parity)
+ +
0 + any BCC character 2 + BCC character no control
+ +
0 + inactive 4 + active
+ +
0 + inactive 8 --f active
1 -
character -
8
+ O- even + 16+odd + 0 - not required + 32 + required
parity required
32
of stop bits 1 2 1 1
l/2 Stop bits Stop bits bit 6: + 64 Stop bit bit 7: + 128 Stop bit value to be entered
Notes on bit 1
Bit 1 is only set for “block-
Input values
0 + 7 data 8’h bit 1 + 8 data gfh bit
+
by MP 5020.
Input value does not contain the significance 2: The BCC can accept an arbitrary character (also control
character)
128
for MP 5020
in “blockwise
169
transfer”
Input value contains the significance 2: If the computation of the BCC during “blockwise transfer” results in a number less than 20 HEX” (control character), then a “space” character (20 HEX) is additionally sent prior to ETB. In this case, the BCC is always greater than 20 HEX and therefore not a control character. I) HEX = Hexadecimal
Example of value determination
Standard
7 data bits (ASCII code wii.h 7 bits, even parity) Transfer stop due to DC3, 1 stop bit
data format:
Bits 0 - 7 Significance
of bit
7
6
5
4
3
2
1
0
128
64
32
16
8
ZIE 4
2
1
1
0
1
0
1
0
0
0
Enter 0 or 1 accordrngly After adding the significances, In our example: 168.
MF 5030 Operating mode of the interface
HEIDENHAJN TNC 250OB
you obtain the input value for machine
parameter
5020.
Operating mode data interface RS-232-C This parameter determines the function of the data interface. 0 ” “standard 1 ” “blockwise
I
data inter-face” (normally for printer, reader, puncher) transfer” (normally for computer link)
Programming
Modes
I
Page P 147
Miscellaneous Miscellaneous
functions
functions
with predetermined
Ml3
Spindle
on clockwise/coolant
Ml4
Spindle
on counterclockwise/coolant
M30
like MO2
MS9
Vacant miscellaneous or Cycle call, modal (depends on machine
MS9
M
function.
on
l
on
l
function
l
P63
l
P69
l
parameters)
M90
Constant path speed on inside corners uncompensated corners
M91
in the positioning block: Coordinates refer to the scale reference
and
l
P55
l
P58
l
P58
L
M92
in the positioning block: Coordinates refer to a position defined manufacturer (machine datum), e.g. tool change position
point by the machine
L
M93
Reserved
M94
Reduce the display
M95
Reserved
l
M96
Reserved
l
M97
Path offset on outside corners: Intersection instead of tangential
l
c
M98
Blockwise
M99
Cycle call effective
of the rotary axis to a value under
end of path offset blockwise
360’
P31
l
l
P56
l
P57
l
P69
circle
Program
Diaitiation key
example:
I
milling
Example values
Function
I I
Program
number,
BEGIN PGM 729 MM
mm/inch
/ ,
Blank definition: spindle Minimum point Maximum point
Z
axis
x+0
Y+O z-40
x+100 Y+lOO z+o
Tool definition Tool number Tool length Tool radius
TOOL DEF 1 L-l-0 R 7.5
Tool call Tool number Spindle axis (e.g. Z), speed
TOOL CALL 1 2 s 100
(S)
i
Lzl L
Tool change Retract tool axis, length compensated, Radius uncompensated, rapid traverse,
i tool change
L z-t200 ROFMAX MO6
( I
L?l L
L x-20 Y-20
Starting position: Approach the workpiece No radius compensation, rapid traverse, Spindle rotates to the right
ROFMAX MO3
( ( I
[Bi L
Move tool axis to working
L
depth
Z-20
i I
[s’i L
Machine the work, approach 1st contour point with radius compensation, machining feed rate
L x+0 Y-k0 RL F200
‘MACHIRIING .
L3
Last contour point (with radius compensation)
t IB)
After machining Retract in the machining plane Deselect radius compensation, spindle
L
L x-t-o Yt-0 RL I
stop
L x-20 Y-20 RO F500 MO5
I I
Retract the spindle axis, Return jump to the 1st block
L
Z+200 MO2
I I
+ F!!!
. HEIDENHAIN
253
588
20
10
10191
H
Printed
!n
Subject
to alteration
PROGRAMMING 1
ELK
2
BLK
3
TOOL
4
TOOL
RND FDRM Y+0 FORM y+100 IIEF
Operating
EDITING
0.1
1 1 s
--------------------------------
x .., Y z etc. *: D: M: ROT: SCL: cc:
Block after next E
YN c + + F
Status display
37,580 82,600 37,000 0,7§0000 MS/9
Type of position display, switchable with MOD (further displays: NOML, DIST., LAG - see index “General Position coordinates t “control is started” display Datum shift, shown as an index on the shifted axis. Mirror image, shown as an index on the mirrored axis. Basic rotation of the coordinate system Scaling Circle center or pole
T . ... z: s:
Called tool Spindle axis Spindle speed
F: M:
Feed rate Spindle status (M03,
M04,
block
Next block
Status display: ACTL. :
t
block
1000
ROT SCL 2
Current
2
98,354 32,000
Tl
Preceding
x+0 z-20 x+100 z+0 L+l R+l
2
0.2
CRLL
mode
/ Error messages
M05, M13, M14)
Information”)
Guideline for procedure from preliminary operations to workpiece machining Sequence
Action
Iielect
Cross
Operating mode
tools
reference
Page I
I-
I
machining
Workpiece
drawing
Workpiece
coordrnates
2
Set datum
for workpiece
3
Determine
speeds
4
Switch
5
Traverse reference points (homing the machine)
Switch
6
Clamp workpiece
Clamping
Spindle speed, feed rate diagrams
and feed rates
on machine
Machine manual
I
Al5
A20
operating
on
I Ml
instructions
I
-
datum setting and compensation of workpiece misalignment or Manual operation
Ml3
Machine handbook: Tool change
in or from external
10
Graphic (without
storage
Back fold-out page, program example; Programming and editing
PI
Program
M20
program simulation axis movements) run
12
Opttmize
program
run
prnming
if necessary
and
~ P3
Programming and editing 13
Insert tool and machine workpiece automatic program run
Program Program run, Full sequence
run
M20
~
Operating
Machine
TNC 2500B
Operating Manual
Giii!
Entering
operation
@ a
Electronic
Dq
Positioning
3 Dl
Program Program
El
Programming
Modes
the Workpiece Straight
handwheel
Contour
line
Circle with known
center
run, Single block
Circle with known
radius
run, Full sequence
Circle with tangential
with manual
data input
Round corners/ Tangential contour
Programming
Define/Call
Modes Programming
El
approach
and departure
a tool
Specify mode tool radius compensation
and editing
Test run with graphic
Q
transition
Define/Call
simulation
a cycle
Label/Call a subprogram and program section repeats Program
Programmed
Management Naming/selecting
FE!
program
Touch probe functions
a program
Clear program
Ia
Programmable
wil
External
Ed
qII
program
program
Supplementary
call
input and output operating
modes
Entering
and Editing
Number
uP
Graphics II
Graphic
•!lI m
operating
point, sign change
Key for polar coordinates Key for Incremental
modes
dimensions
Enter parameter instead Define parameter
Magnify
Transfer actual posttron to memory
detail simulation
Q
Q
a
Feed rate override
WA F’/a Spindle
speed overnde
of a number,
Cursor keys, Jump to a certain block or cycle No entry, Enter data, Terminate block entry
Override 0 Q ns~/~
keys
Define blank form, reset blank form
Start graphic
El
Values
q m Axis keys q ...m Decimal
m
stop/Terminate
Delete block
Contents
General Information
Machine Operating Modes
Programming Modes
Introduction MOD Functions Coordinates Linear and Angle Cutting Data
Encoders
Switch-On Manual Operation 30 Touch Probe Datum Setting Electronic Handwheel Positioning with Manual Program Run
Al A8 Al 85 Al 8 A20
Ml M2
M21 Data Input
Conversational Programming Program Selection Tool Definition Cutter Path Compensation Tools Feed Rate F/Spindle Speed S/Miscellaneous Functions M Programmable Stop/Dwell Time Path Movements Linear Movement/Cartesian Circular Movement/Cartesian Polar Coordinates Contour Approach and Departure Predetermined M Functions Program Jumps Program Calls Standard Cycles Coordinate Transformations Other Cycles Cycle 13: Oriented spindle stop Parameter Programming Programmed Probing Digitizing 3D Contours Transferring Actual Positions to Program Test Run Test Graphics External Data Transfer
Ml3 Ml5 Ml7 Ml9
PI P6 PI 0 PI 5 PI8 P20 P2 ‘I P22 P26 P3 ‘I P42 P49 P52 P56 P65 P66 P95 PI 04 PI 06 PI 07 PI 22 PI 25 PI 34 PI 36 PI 37 PI 40
Manufacturer’s Certificate: This device is noise-suppressed in accordance with the Federal German regulations 1046/1984. The Federal German postal authorities have been notified of the market introduction of this unit and have been granted permission to test the series for compliance with the regulations. If the incorporates the device into a larger system then the entire system must comply with said regulations.
I General
I
Information
(A)
Introduction
I Brief description Machine
of TNC 25008
operating
Programming Accessories:
3
modes
and editing
4 operating
modes
3D Touch Probe Systems FE 401 Floppy Disk Unit HR 130/HR 330 Electronic
MOD Functions
Handwheels
8 Position
displays
9
Traverse range limits
10
parameters
1I
Coordinate
15
Coordinates system
Datum Absolute
16 and incremental
coordinates
Linear and angle encoders
1 ;7
18
Cutting Data Feed rate diagram
20
Spindle
2’1
speed diagram
Feed rate diagram
HEIDENHAIN TNC 2500B
for tapping
General Information
22
Introduction
Description
The TNC 2500B from HEIDENHAIN is a shop-floor programmable contouring control with up to 4 axes for milling and boring machines as well as for machining centers. It is conceived for the “man at the machine”, featuring conversational programming and graphic simulation of workpiece machining. Fixed cycles, coordinate transformations and parameter programming are available, as vvell as functions for 3D touch probes. Its “parallel operation” feature permits a new program to be created (or a program located in the control memory to be edited) while another program is being executed. Programs can be output to peripheral devices and read into the control via the RS-232-C allowing programs to be created and stored externally.
Conversational or IS0 programming
Inaddition to programs written in conversational the snap-on keyboard or via the data interface. reside in memory at the same time.
Compatibility
This control can execute programs from other HEIDENHAIN functions described in this manual.
Structure of manual
This manual addresses the skilled machine controlled boring and milling. TNC beginners already worked
format, IS0 programs can also b’e entered, either via Both interactive format and IS0 format programs can
operator
controls,
and requires
provided
appropriate
are advised to work through this manual and the examples with a HEIDENHAIN TNC, you can skip familiar topics.
they contain
knowledge
The sequence of chapters in this operating manual is according functions, as well as according to the logical working order: - manual
is described
modes
setup - set display
value - machine
The following
workpiece.
- test program.
symbols
are used in this manual:
Empty square:
keys for numerical
input on the TNC operatilig
cl Square with symbol, e.g. Circle with symbol, e.g.
L
HEIDENHAIN TNC 2500B
Program
L?l keys on the machine
operating
0
The pages of this manual
Typeface for screen displays
other keys on the TNC operating
are distinctly
blocks and TNC screen dialogs
marked
with the relevant
are printed
General Information
key symbols.
in this SPECIAL TYPE
I
in
and key
Programming modes: Enter program
Symbols for keys
operatir?g
If you have
Mechine operating modes: Switch-on
l
to control
only the
of non-NC-
systematically.
This manual deals with programming in HEIDENHAIN format. IS0 programming detail in a separate operating manual for the TNC 25OOB.
l
data interface,
Page Al
+
Introduction
Program Examples
The example programs in this manual are based on a uniform blank size and can be displayed on the screen by adding the following blank definition (see index “Programming Modes”, Program Selection):
BLK FORM 0.1 Z X+0 Y+O Z-40 BLK FORM 0.2 X+100 Y+lOO Z+O The examples can be executed on machine tools with tool axis Z and machining plane XY. If your machine uses a different axis as the tool axis, this axis must be programmed instead of Z and likewise the corresponding axes for the machining plane. Beware
Buffer batteries in the control
of collisions
Buffer batteries interruption. When
when
protect
executing
the stored
the example
programs
and machine
parameters
against
loss due to power
the message Battery type: 3 M-size batteries, leak-proof IEC designation “LR6”
EXCHANGE BUFFER BATTERY appears,
you must change
The batteries
Changing the battery
programs!
should
Battery replacement
the batteries.
be replaced
is described
once a year.
in the manual
of the machine
manufacturer.
Error messages The TNC checks
input data and status of the control
Cause and reaction
of the control:
/
Input range exceeded
The permitted range of values is exceeded: e.g. feed rate too high. The value is not accepted and an error message appears.
Incompatible/ contradictory inputs
E.g. L X+50 X+100
Malfunction of the machine or control
During “TEST” or during program execution, the TNC stops with an error message before executir the corresponding block and displays the block number in which an error was found. Malfunctions that affect operating blinking error messages. Note down
safety cause
and machine Remedy: Clear the value with the “CE” key, enter and confirm the correct value.
‘cl 1
Change to the “Programming” operating mode. The error can normally be found either in the block with the displayed block number or in a previously executed block. Then: correct the error. Operating mode “Full sequence” and restart. Switch
Remove Attempt
the error message!
off the machine
or the control
the fault if possible. to restart.
If the program then runs correctly, was only a spurious malfunction.
the problem
If the same error message comes up again, the customer serbrice of the machine manufacturer.
Page
A2
General
Information
HEIDENHAIN TNC 2500B
TNC 2500B Brief description Control type
Contouring
Traversing possibilities
Straight lines in 3 axes Circles in 2 axes Helix
Parallel operation
Programming
Graphics
Test graphics in the “Program
Program
input
control
for 4 axes
and program
In HEIDENHAIN
format
Max. 0.001 mm or 0.0001
Program
For 32 programs,
Tools
simultaneously
run” operating
or according
Input resolution memory
execution
modes
to IS0
inch or 0.001”
battery buffered:
4000
program
blocks
Up to 254 tool definitions in a program Up to 99 tools in the central tool file
Programmable Contour
functions
Straight line, chamfer Circle (input: center and end point of the arc or radius and end point of the arc), circle connected tially to the contour (input: arc end point) Corner rounding (input: radius) Tangential approach and departure from a contour
Program jumps
Subprograms,
Fixed cycles
Drilling cycles for pecking, tapping Milling cycles for rectangular pocket, circular pocket, slot “Subcontour List” cycles for milling pockets and islands with irregular
program
section
repeats, call of other programs
Coordinate transformations
Move and rotate the coordinate
Probing functions
For 3-D touch trigger
Digitizing
With TS 120 and software expansion Optional evaluation software for PC
Parameter programming
Mathematical 6 / m);
Traversing range
Max. + 30000
Cutting data
Traversing speed: max. 30 m/min Spindle speed: max. 99999 rpm
system, mirror
contours
image, scaling
probe option
functions (= / + / - / x / t / sin / cos / angle a from axis sections parameter comparison (= / =k / > / <)
f
mm or 1181 inches or 1181 inches/min
Hardware Component units
Logic unit, control
Block processing time
1500 blocks/min
Control loop cycle time
6 ms
Data interface
RS-232-C/V.24 Data transfer speed:
Ambient temperature
HEIDENHAIN TNC 2500B
and monochrome
screen
(40 ms)
max. 19200
baud
Operation: O” C to 45” C (32O F to 113O F) Storage: -30” C to 70° C (-22O F to 158O F)
General Information
Page A3
tangen-
Machine modes
Manual
operation
operating
The axes can be moved via the external axis direction buttons. Workpiece datum can be set as desired. The TNC functions as a conventional numerical position readout (DRO).
MRNURL p-
OPERATION
RCTL.
x
49,258 23,254 15,321
+
Y + Ea +
Electronic Handwheel
The axes can be moved either via an electronic handwheel or via the external axis direction buttons. It is also possible to position by defined jog increments.
INTERPOLRTION
ACTL.
FACTOR:
x
Fz
The axes are positioned according to the data keyed in. These data are not stored.
+
+
POSITIONING
ACTL.
49,258 23,254 15,321
+
Y El
Positioning with manual data input (MW
S
MANURL
El
DRTR
49,258 23,254 15,321
+
z+ v
INPUT
+
0 Program
run
Full sequence
Single
block
A part program in the memory executed by the machine.
of the control
is PROGRRM
After starting via the machine START button, the program is automatically executed until the end or a STOP is reached. Each block is started separately START button.
RUN/FULL
0
BEGIN
1
BLK
2
BLK
PGH FORH Y-70 FORM Y+70
with the machine RCTL.
I z
+ +
SEQUENCE
666 0.1
tln Z
X-85 Z-30 X+85 z+0
0.2
49,258 15,321
Y
Id0
Page A4
General
MS/9
Information
+
23,254
MS/9
Programming and editing operating modes Programming and editing
Part programs can be entered, looked over and altered in the “Programming and editing” operating mode.
PROGRRMflING
RNO
EDITING
.S
In addition, programs can be read in and output via the RS-232-C data interface.
18
L
19
CYCL
OEF
6.0
20
CYCL
DEF.
6.1
300
2+2 m F15998 ROUGH-OUT SET DEPTH
UP-2 -20
-----_-_-----------------------ACTL.
Lp 2
+ +
49,258 15,321
Y
I Test run
In the “Test run” operating mode, machining programs are analyzed for logical programming errors, e.g. exceeding the traversing range of the machine, redundant programming of axes, certain geometrical incompatibilities etc.
t103
+
23,254
MS/9
Id0
TEST
0
BEGIN
1
8LK
2
8LK
RCTL.
1
RUN
PGM FORH Y-70 FORH Y+70
x 2
+ +
666 0.1
MM 2
X-85 2-30 X+85 2+0
0.2
49,258 15,321
Y
+
q +
23,254 84,000
q 0
MS/9
Test g.raphics
GRAPHICS
In the “Program run” operating modes “full sequence” and “single block”, you can graphically simulate machining programs via the “GRAPHICS” keys. Display modes: plan view with depth l view in three planes l 3-D view l
External data transfer
indication
In the “Programming and editing” mode, programs can be read-in from an external storage medium, such as the FE 401 Floppy Disk Unit, and read-out to an external unit (data storage, printer). Data transfer takes place via the RS-232-C data interface. In the “Program run single block” and “Program run full sequence” modes of operation it is possible to read-in programs whose size exceeds the control’s memory block by block for simultaneous execution.
HEIDENHAIN TNC 2500B
General Information
Page A5
Accessories 3D Touch Probe Systems
The TNC software incorporates measuring cycles for the application of a HEIDENHAIN 3-D Touch Probe in the “Manual”, “Handwheel” and “Program run” operating modes.
Manual
use
The following the “Manual” l l l l l
measurements can be performed in and “Handwheel” operating modes:
position line angle corner point circle radius and circle center.
The probing functions allow compensation of workpiece misalignment and automatic setting the position displays. Thus, they help you setup workpieces more easily, quickly and accurately.
of
The probing functions can also be used for measurements on the workpiece.
run
You can program position measurements in the “Programming and editing” operating mode. This feature can be used with 0 parameter programming to execute measurements before, during and after machining a piece (see index “Programming and Editing”, Programmable probing function and Parameter programming).
TS 120
HEIDENHAIN offers touch probes in various versions. There are different clamping shafts to affix the probe head in the spindle like a tool. The stylus is replaceable. Standard versions are: TS 120
Touch Probe System 120 with cable connection and interface incorporated into probe. Touch Probe System 511 with infrared transmission, separate electronics and transmitter/receiver
TS 511
electronics,
interface unit.
This probe head has a transmitter and receiver window (for the triggering signal) on one side and another transmitter window offset by 180°. The side with the transmitter and receiver window must be pointed towards the transmitter/receiver unit during measurement. TS 511
Certain provisions probe system.
Page A6
are required
by the machine
General
Information
tool manufacturer
for the connection
of a touch
Accessories FE 401 Floppy Disk Unit HR 130/HR 330 Electronic Handwheels FE 401 Floppy Disk Unit
Part programs which do not have to reside permanently in the control memory can be stored with the FE 401 Floppy Disk Unit. The storage medium is a normal 3 l/2 inch diskette, capable of storing up to 256 programs and a total of approximately 25000 program blocks. Programs can be transferred diskette or vice-versa.
from the TNC to
Programs written at off-line programming stations can also be stored on diskette with the FE 401 and read into the control as needed.
1I Machrine I1
In the case of extremely long programs which exceed the storage capacity of the TNC, the FE 401 can be used to transfer a program blockwise into the control while simultaneously executing it. A second
Technical Data
diskette
drive is provided
for backing
up stored programs
and for copying
purposes.
FE 401 Floppy Disk Unit with two drives Data medium
3 l/2 inch diskette,
Storage
approx.
capacity
double-sided,
790 KB (25000
Data interface
Two RS-232-C
Transfer rate
“TNC” interface: “PRT” interface:
blocks);
max. 256 programs
2400/9600/19200/38400 baud 110/150/300/600/1200/2400/4800/9600
The control can be equipped with an electronic handwheel for better machine setup. Two versions of the electronic handwheel are available:
HR 130
The HR 130 electronic handwheel is designed to be incorporated into the machine control unit. The axis of control is selected at the machine control .
HR 330
The portable HR 330 electronic handwheel includes keys for axis selection, axis direction, rapid traverse and emergency stop.
General
135 TPI
data interfaces
Handwheel
HEIDENHAIN TNC 25006
/I
Information
lbaud
1
Page A7
MOD Functions
In addition to the main operating modes, the TNC has supplementary MOD functions. These permit additional displays and settings.
operating
modes
or so-called
Initiate the dialog
Selecting
Terminating LIMIT X+ = + 350.000
Transfer numerical
Vacant
memory
The number MEMORY”.
Terminate
inputs with the “‘ENT” key before terminating
of free characters
in the program
memory
supplementary
is displayed
with the MOD function
You can use this MOD function to switch the control between conversational and IS0 format (ISO). Switchover is performed with the “ENT” key.
Baud rate
The transfer
RS-232-C interface
The data interfaces “ENT” key: 0 ME operation l FE operation l EXT operation:
can be switched
operation
is specified
with “BAUD
via “RS-232-C
with other external
interface”
mode.
the MOD functions.
Programming and editing
rate for the data interface
operating
format
“VACANT
(HEIDENHAIN)
RATE”.
to the following
operating
modes with the
devices.
NC software number
The software
number
of the TNC control
PLC software number
The software
number
of the integrated
parameters
Up to 16 machine parameters can be accessed by the machine operator with this MOD function. These parameters are defined by the machine manufacturer - he may be ed for more information.
Code number
A code number
Page A8
can be entered
is displayed
PLC is displayed
with this MOD function.
with this MOD function:
l
86357:
l
123: select the parameters. These parameters are accessible
I
with this MOD function.
cancel “erase and edit protection” on all controls
General Information
(see parameters)
I
HEIDENHAIN TNC 2500B
MOD Functions Position displays Change mm/inch
The MOD function “Change mm/inch” determines whether the control displays positions in the metric system (mm) or in the inch system. You switch between the mm and inch systems via the “ENT” key. After pressing this key the control switches to the other system. You can recognize whether the control is displaying in mm or inches by the number of digits behind the decimal point: Xl 5.789 mm display X 0.6216 inch display.
Position displays
The following
position
displays
can be selected:
0 nominal position of the control
NOML
0 difference nominal/actual position (lag distance)
LAG
0 actual position
ACTL.
8 remaining distance to programmed position
DIST.
0 position based on the scale datum
REF
A = last programmed position (starting position) B = new (programmed) target position, which is presently targeted W = Workpiece datum for the part program M = scale datum (machine-based) Switchover
Position display large/small
The character height of the position display can be changed in the operating modes “Program run/single block” or “Program run/full sequence”. The position display shows 11 program blocks with small characters, two with large characters. Switchover
HEIDENHAIN TNC 2500B
is with the “ENT” key.
I
is with the “ENT” key.
General
Information
I
Page A9
MOD Functions Traverse range limits
Limits
The maximum displacements are preset by fixed software limits. The MOD function “Limits” enables you to specify additional software limits for a “safety range” within the limits set by the fixed software limits, Thus you can, for example, protect against collision when clamping a dividing attachment. The displacements are limited on each axis successrvely in both directions based on the scale datum (reference marks). The position display must be switched to REF before specifying the limit positions of the position dtsplay. To work without safety limits, enter the maximum values +30000.000 or -30000.000 for the corresponding axes.
+ Effectiveness
Determine values
Enter
The entered limits do not for tool compensations. Like the software limit switches, they are only effective after you traverse the reference points. They are reactivated with the last entered values after a power interruption
To determine the input values, switch position display to REF.
values
= scale datum
Traverse to the end positions of the axis/axes which is/are to be limited. Note the appropriate REF displays (with signs).
the
Continue pressing until LIMIT appears.
Select
Enter value, or
Enter the limit(s)
select the next limit
terminate
Page A 10
General
Information
the input
Parameters General Information Machine parameters
The TNC contouring controls are individualized and adapted to the machine via machine parameters (MP). These parameters consist of important data which determine the behavior and performance of the machine.
Parameters accessible for the
Certain machine parameters which determine displays are accessible for the .
Examples
l l l
Accessibility
l
dealing
only with operation,
programming
Scaling factor only effective on X, Y or on X, Y, Z. Adapting the data interface to different external devices. Display possibilities of the screen.
The can access these machine l
functions
parameters
in two ways:
Access by entering the code number 123. This access is possible on every control (see code number 123). Access to additional parameters via the MOD function parameters. You can only access via the MOD function if the manufacturer has made the machine accessible for this purpose.
The machine parameters.
manufacturer
can inform you about the sequence,
Only these machine parameters may be changed change any ,non-accessible machine parameters.
meaning,
texts etc. of any
by the . In no case should
Selection
parameters
the
Select the parameter, Continue pressing until1 the desired PARAMETER or dialog appears,
Cl
Enter numbers.
Terminate
or select further
parameters then terminate.
HEIDENHAIN TNC 2500B
I
General
Information
with
/
and
Page A 11
and
Parameters
After entering the code number 123 via MOD, the following machine parameters and the parameters the data interface (see index “Programming Modes”, ” External data transfer”) can be selected and changed.
Measuring with the 3D touch probe
Display and programming
Function
Parameter no.
Input
Probe system selection
6010
0 + Cable transmission 1 + Infrared transmission
Probe system: feed rate for probing
/ 6120
1 80 to 3000
Probe system:
measuring
distance
/ 6130
1 0 to 30000.000
[mm]
Probe system: set-up clearance over measuring point for automatic measurement
6140
0 to 30000.000
[mm]
Probe system: probing
6150
80 to 29998
Parameter no.
Input
7210
0 + Control 1 + Programming 2 + Programming
rapid traverse
for
Function Programming
station
Block number
increment
I
[mm/min]
Input values station: station:
PLC active PLC inactive
7220
0 to 255
7230
0 + First dialog language 1 + Second dialog language
Inhibit PGM input for PGM no. = cycle no
7240
0 + Inhibited 1 + Uninhibited
Central tool file
7260
0 + No central tool file 1 to 99 = Central tool file Input value = Number of tools
Display of the current feed rate before start in the manual operating modes (same feed rate in all axes, i.e smallest programmable feed rate)
7270
0 --f No display 1 + Display
Decimal
character
7280
0 + Decimal 1 + Decimal
Display increment
7290
O-lum 1+5ym
Clearing the status display and the 0 parameters with M02, M30 and end of program
7300
0 + Status display 1 --f Status display
Graphics
7310
Switching of dialog German/English
language
(display mode)
Switch over projection “display in 3 planes”
type
Rotate the coordinate system in the machining plane by 90’
Page A 12
[mm/min]
Bit 0
1
General Information
(English)
comma point
is not cleared is cleared
+ 0 + German standard + 1 + American standard + 0 + No rotation + 2 + Coordinate system rotated by +90°
for
Parameters
Machining program
and run
Function
Parameter no.
Input
“Scaling” cycle is effective on 2 axes or 3 axes
7410
0 + 3 axes 1 - in the machining
SL cycles for milling pockets with irregular contour
7420 Bit 0
“Rough out” cycle: direction for pilot milling of contour
“Rough out” cycle: sequence for rough out and pilot milling
Input values
+ 0 + Pilot milling for pockets for islands + 1 + Pilot milling for pockets for islands
1
plane
of contour counterclockwise, clockwise of contour clockwise, counterclockwise
+ 0 + First mill a channel around the contour, then rough out the pocket + 2 + First rough out the pocket, then mill a channel around the contour
ing compensated or uncompensated contours
+ 0 + ing compensated contours + 4 --f ing uncompensated contours
“Rough out” and “pilot milling” to pocket depth or for every infeed
+o-”
+8-
Overlap factor for pocket milling
7430
Output
7440
of M functions
Programmed
0.1 to 1.414
Bit 0
stop at MO6
+ 0 + Programmed stop at MO6 + 1 + No programmed stop at MO6
1
Output of M89, modal cvcle call
Rough out” and “pilot milling” are performed continuously over all infeeds “Pilot milling” and then “rough out” are performed for every infeed (depending on bit 1) prior to the next infeed
+ 0 + No cycle call, normal output of M89 at start of block + 2 + Modal cycle call at end of block
Constant path speed at corners
7460
0 to 179.999
Display mode for rotary axis
7470
0 + 0 to 359.999 1 + + 30000.000
L
General
Information
I
Page A 13
Parameters
Hardware
Function Feed rate and spindle
Parameter no. override
Input values
7620 Bit 0
Feed rate override, if rapid traverse key is pressed in operating mode “Program run”
+ 0 - Override + 1 + Override
inactive active
Feed rate override in 2% increments or 1 % increments
1
+ 0 + 2% increments + 2 * 1 O/o increments
Feed rate override, if rapid traverse key and external direction buttons are pressed
2
+ 0 + Override + 4 + Override
Handwheel
Page A 14
Input
7640
General
Information
inactive active
0 = Machine with electronic handwheel 1 = Machine without electronic handwheel
Coordinates Coordinate
system
In a part program, the nominal positions of the tool (or of the tool cutting edge) are defined in relation to the workpiece; encoders on the machine axes continuously deliver the signals needed by the control for determining the current actual position. A reference system is always be workpiece-based.
required
for determining
Cartesian coordinates
The reference system normally used is the rectangular or Cartesian* coordinate system (coordinates are those values which define a unique point in a reference system). The system consists of three coordinate axes, perpendicular to each other and lying parallel to the machine axes, which intersect each other at the so-called origin or (absolute) zero pornt. The coordinate axes represent mathematically ideal straight lines with divisions; the axes are termed X, Y and Z.
Righthand rule
You can easily the traversing directions with the right-hand rule: the positive direction of the X axis is assigned to the thumb, that of the Y axis to the index finger, and that of the Z axis to the middle finger.
position.
In the present
case, such a system must
IS0 841 specifies that the 2 axis should be defined according to the direction of the tool spindle, whereby the positive Z direction always points from the workpiece to the tool.
“) after the French mathematician
HEIDENHAIN TNC 2500B
Rene Descartes,
General
Information
in Latin Renatus
Cartesius
(1596 - 1650)
Rage A 15
Coordinates Datum Relative tool movement
Part programs are always written with workpiecebased coordinates X, Y, Z. That is, they are written.as if the tool moves and the workpiece remains still, independent of the machine type. If, however, the work on a given machine actually moves in any axis, then the direction of the coordinate axis and the direction of traverse will be opposite. In such a case the machine as X’, Y’ and Z’.
1 Zero point of 1 the coordinate system
axes are designated
For the zero point of the coordinate system, the position on the workpiece which corresponds to the datum of the part drawing is generally chosen - that is, the point to which the part dimensioning is referenced. For reasons of safety, the workpiece datum in the Z axis is almost always positioned at the highest point on the workpiece. The datum position indicated in the drawing to the right is valid for all programming examples in this manual. Machining operations in a horizontal plane require freedom of movement mainly in the positive X and Y directions. lnfeeds starting from the upper edge of the workpiece Z = 0 correspond to negative position values.
i
Datum
Setting
The workpiece-based rectangular coordinate system is defined when the coordinates of any datum P are known - that is, when the tool is moved to the datum position and the control “sets” the corresponding coordinates (datum setting).
Y
Z
bE!! 0
10
20
30
40
X
0
Page A 16
General
Information
-x
HEIDENHAIN TNC 2500B
Coordinates Absolute and incremental
coordinates
If a given point on the workpiece is referenced to the datum, then one speaks of absolute coordinates or absolute dimensions. It is also possible to indicate a position which is referenced to another known workpiece position: in this case one speaks of incremental coordinates or incremental dimensions.
Absolute dimensions
The machine or to certain Example:
is to be moved to a certain position nominal coordinates.
X+30
Y+30
Dimensions in this manual are given as absolute Cartesian dimensions unless otherwise indicated.
Incremental dimensions
Incremental dimensions in a part program always refer to the immediately preceding nominal position. Incremental dimensions are indicated by the letter I. The machine is to be moved by a certain distance: it moves from the previous position along a distance given by the incremental nominal coordinate values. Example:
IX+10 IY+lO
Mixing absolute and incremental dimensions
It is possible to mix absolute and incremental coordinates within the same program block.
Polar coordinates
Positions on the workpiece can also be programmed by entering the radius and the direction angle referenced to a pole (see index Programming Modes, Polar coordinates).
Example:
L IX+10 Y+30
CC = Pole PR = Polar radius (distance PA = Polar angle (direction
HEIDENHAIN TNC 2500B
-
x
from pole) angle)
General
Information
I
Page A 17
Coordinates Linear and angle encoders
Linear and angle encoders in machine tools
Each machine axis requires a measuring system to provide the control with information position: linear encoders for linear axes, angle encoders for rotary axes.
Gratillg
DIADUR
glass
scale
period
Afl
Reference
Photovoltalc
Principle
of photoelectric
scanning
axes,
RON 706C.
position
mark
calls
of fine gratings
LS IOIC, LS 107c
With linear
on the actual
measurement
is generally
ROD 250C
based on either
a photoelectrically scanned steel or glass scale, or l the high-precision spindle, which also functions as the moving then produced by a rotary encoder coupled to the spindle). l
element
(the electrical
With rotary axes, a graduated disk permanently attached to the axis is photoelectrically TNC forms the position value by counting the generated impulses.
Page A 18
General
Information
signals are
scanned.
The
Coordinates Linear and angle encoders Linear and angle encoders Datum
Reference
are machine-based:
The datum for determination of the nominal and actual position must correspond to the workpiece datum, or be brought into correspondence by setting the correct position value (= the position value determined by the workpiece datum) in any axis position. This procedure is callecl datum setting (or datum presetting).
marks
After the control has been switched off or after a power Interruption, again. To srmplify this task, the encoders possess reference marks, datum points.
it is necessary to set the datum which in a sf?nse also represent
The relationship between axis positions and position values which were established by the last setting of the workpiece datum (datum setting), are automatically retrieved by traversing over the reference marks after switch-on. This also re-establishes the machine-based references such as the software limit switch or tool change position. In the case of linear encoders with distance-coded reference marks, the machine axes need only be traversed by a maximum of 20 mm. For angle encoders with distance-coded reference marks, a rotation of just 20° is required. Linear encoders with only one reference mark have an “RM” label which indicates the position of the reference mark, while angle encoders with one reference mark indicate the position with a notch on the shaft.
Schematic
ot scale with distance-coded
General
reterence
Information
marks
Page A 19
Cutting Data Feed rate diagram The feed rate F must be defined in [mm/min] in the program. Usually, the number of teeth n on the tool, the permitted chip thickness d per tooth and the previously determined spindle speed S are given. The diagram below helps you determine the feed rate F. Determine Given: Selected: Find:
the required n= d= S= F=
feed
rate F in [mm/min]
number of teeth permitted depth of cut per tooth spindle speed feed rate
Example 6 0.1 [mm] 500 [rpm 1
Depth of cut
d [mm1
Spindle
speed
S [rpml !
Calculation
Horizontal line through depth of cut 0.1 mm Vertical line through cutting speed 500 m/min At the point of intersection, read off the feed rate F = 50 [mm/min]; this is multiplied by the number of teeth n = 6: F = 300 mm/min d=
Formula
Page A 20
Prerequisites: The feed rate determination assumes that l the tool axis infeed = l/2 tool radius or l the lateral infeed = l/4 tool radius and the downfeed is selected equal to the tool radius
&orF=d.S.n
General
Information
I
HEIDENHAIN TNC 2500B
Cutting Spindle
Data speed diagram
The spindle speed S must be defined in [rpm] in the program. Usually the tool radius R is given in [mm] and the cutting speed V in [m/min]. The diagram below helps you determine the spindle speed S. Determining
spindle speed S in [rpm]
the required
Example 16 [mm] 50 [m/min]
Given: R = tool radius V = cutting speed Find: S = spindle speed Tool radius
R [mm1
Cutting speed V [m/min]
Calculation
Horizontal line through the tool radius R = 16 mm Vertical line through the cutting speed V = 50 m/min Read off the value at the point of intersection:
Formula
V=2R.n.S;
S=V
approx.
497 rpm)
2R n
I
HEIDENHAIN TNC 2500B
500 rpm (calculated:
I
General Information
-
Page A 21
Cutting Data Feed rate diagram
for tapping
When tapping a thread, the pitch P is given [mm/rev]. The spindle speed S and the feed rate F must be defined in the program. First, the spindle speed is determined in the appropriate diagram, then the feed rate is found in the diagram below. Determine Given: Selected: Find:
the required
feed
rate F in [mm/min] Example 1 [mm/rev] 100 [rpm]
p = pitch [mm/rev] S = spindle speed [rpm] F = feed rate [mm/min]
Pitch P
[mm/rev1
Spindle
speed
S [rpml
Calculation
Horizontal line through pitch p = 1.0 mm/rev Vertical line through spindle speed S = 100 rpm Read off feed rate at point of intersection: F = 100 mm/min
Formula
p=iorF=p.S
Page A 22
General
Information
Machine
Operating
Modes
(M)
Switch-On
Manual
Traversing
the reference
points
1
Traversing
with the axis direction
Operation
3D Touch
Spindle
speed S/Miscellaneous
Datum
setting
buttons functions
with
probe
Calibrating
effective length
Calibrating
effective radius
Referencesurface, Basic rotation,
;!
Position Angular
system
measurement
measurement
Corner = datum/Determining
corner
Circle center = datum/Determining Datum setting probe system
coordinates the circle radius
without
Electronic Handwheel/ Jog Increment
with
Manual
15
Data Input Tool call/Spindle Positioning
Program
M
Probe
or
Positioning
;!
axis/Spindle
to entered
speed
17 18
position
Run Single
19
block, Full sequence
Interrupting
the program
Checking/changing Background Blockwise
20
run
0 parameters
22
programming transfer
Machine
(Reloading
Operating
21
operation)
Modes
23
Switch-On Traversing the reference Switch-On
points
0d?b
Switch
MEMORY TEST
power
on
The TNC tests the internal control electronics. The display is automatically cleared
POWER INTERRUPTED
Delete the message. The control then tests the EMERGENCY STOP circuit.
RELAY EXT. DC VOLTAGE MISSING
Switch
MANUAL
Traverse the axes over the reference in the displayed sequence.
OPERATION
TRAVERSE REFERENCE POINTS
on the control
IDC voltage.
points
Start each axis separa-tely or move the axes with the external direction keys.
z AXIS x AXIS Y AXIS
The sequence of the axes is determined the machine manufacturer.
4th AXIS
MANUAL
Encoders
HEIDENHAIN TNC 2500B
“Manual operation” matically.
OPERATION
The required traversing distance for linear and angle encoders with distance-coded reference marks is max. 10 mm or 20 mm/IO’ or 20’. If the encoder has only one reference mark, it must be traversed.
I
Machine
Operating
Modes
is now selected
auto-
by
Manual Operation Traversing with the axis direction buttons/ Spindle speed S/Miscellaneous functions M The machine axes can be moved and the datum set in the “Manual” operating mode.
Jog mode
piiz-000 00000
The machine axis moves as long as the corresponding external axis direction button is held down. Several axes can be driven simultaneously in the jog mode.
liooo;r 00000 00000 00000
If the machine “START” button is pressed simultaneously with an axis direction button, the selected machine axis continues to move after the two buttons are released. Movement is stopped with the external “STOP” button.
Continuous operation
0000 0000 0000 0000
ooocl
00000
I @4PoooooI L-Q?-.-.I F O/o
Feed rate override
The traverse speed (feed rate) is preset by machine override (F %) of the control.
Spindle speed S
The spindle
Spindle override
On machines with continuously override (S %).
speed
can be selected
parameters
S O/o
and can be varied with the feed rate
with “TOOL CALL”
variable
spindle
drives, the speed can also be varied with the spindle
Initiate the dialog Key in the spindle
SPINDLE SPEED S RPM ?
Confirm Switch
Miscellaneous function M
Use the “STOP”
key to enter a miscellaneous
speed.
entry. on the spindle.
function:
Initiate the dialog
r Key in the M function.
MISCELLANEOUS FUNCTION M ?
Page M2
I
Machine
Operating
Modes
Confirm
entry.
Activate
the miscellaneous
I
function.
HEIDENHAIN TNC 2500B
3D Touch Probe Datum setting with probe system
Using the touch probe for setup
For workpiece setup the 3D touch probe systems from HEIDENHAIN in association with TNC software offer considerable benefits. One is that the workpiece does not have to be aligned precisely to the machine axes: The TNC will determine and compensate misalignment automatically (“basic rotation”). Another important benefit of the 3D touch probe systems is significantly faster and more accurate datum setting.
TS 511 Probing functions
The touch probe functions described below can also be employed in the “electronic handwheel” operating mode.
CALIBRATION EFFECTIVE LENGTH CALIBRATION EFFECTIVE RADIUS BASIC ROTATION SURFACE = DATUM CORNER = DATUM CIRCLE CENTER = DATUM
Pressing the “TOUCH PROBE” key calls the menu shown here to the right. The probing function is selected with the cursor keys and entered with the “ENT” key. Calibration
The effective length of the probe and the effective radius of the probing ball must be calibrated once, before beginning touch probe work. Both dimensions are determined by CALIBRATION routines and stored in the control.
Terminating the probing functions
The probing functions time with “END 0”.
Calibrating/ working procedure
The probe head traverses to the side or upper surface of the work. The feed rate during measurement and the maximum measuring distance are set by the machine manufacturer via machine parameters.
can be terminated
II I “g’l
at any
Fl
F.1 .o
0A a F2 0 t
The touch probe system signals with the workpiece to the control. The control stores the coordinates of the ed points. The probing axis is stopped and retracted to the starting point. Overrun caused by braking does not affect the measured result. @
= prepositioning with the external direction buttons. Fl = feed rate for prepositioning. F2 = feed rate for probing. FMAX = retraction in rapid traverse.
HEIDENHAIN TNC 2500B
Machine
axis
Operating
/
I=MAX
d
Modes
Page M3
3D Touch Probe Calibrating effective length
Work aid: ring gauge
For calibration of the effective length, a ring gauge of known height and known internal radius is clamped to the machine table. A B C D L R
= = = = = =
zero tool 3D touch probe ring gauge reference plane (surface) length of the zero tool ball tip radius
The reference to calibration.
Procedure
plane is set with the zero tool prior
To determine the effective length of the stylus, the probe head touches the reference plane. After ing the surface, the probe head is retracted in rapid traverse to the starting positron. The length L is stored by the control and automatically compensated during the measurements.
Initiate the dialog
CALIBRATION
TOOL
EFFECTIVE
AXIS
Select probing and enter.
LENGTH
Enter a different
= Z
function
tool axis if required.
Select the “Datum”. DATUM
Enter the datum e.g. +5.0 mm.
+5
in the tool axis,
Move the touch probe to the vicinity of the reference plane. Select the direction of probe movement, here Z-. The probe head moves in negative
z+ z-
After touching the surface and returning to the starting position, the control automatically switches to the “Manual operation” or “Handwheel” operating mode.
The value for effective length
Display
Page M4
can be displayed
Machine
Operating
by selecting
Modes
“Calibration
effective length”
again
3D Touch Probe Calibrating effective radii
Procedure
1s
The probe ball is lowered into the bore of the ring gauge. 4 points on the wall must be touched to determine the effective radius of the stylus ball. The traverse directions are determined by the control, e.g. X+, X-, Y+, Y- (tool axis = Z). The probe head is retracted in rapid traverse the starting position after every deflection.
to
The radius R is stored by the control and automatically compensated during the measurements
Initiate the dialog Select probing and enter.
CALIBRATION EFFECTIVE RADIUS
cl
( TOOL AXIS = Z
Enter another Select “Radius
r x-
Y+
tool axis if required. ring gauge”.
Enter the radius of the ring gauge, e.g. 10.0 mm.
RADIUS RING GAUGE = 10
x+
function
Traverse approximately to the center of the ring gauge. Select the traversing direction of the probe head (only necessary if you prefer a certain sequence or the exclusion of one probing direction).
Y-
Probe a total of 4 times. After ing the wall of the ring gauge four times, the control automatically switches to the “Manual operation” or “Handwheel” operating modes. L
Display
You can display the value for effective radius by selecting
Error messages
All touch probe systems:
Touch probe system TS 511:
TOUCH POINT INACCESSIBLE
PROBE SYSTEM NOT READY
The stylus was not deflected within the measuring distance (machine parameter).
Probe system not set up correctly, or transmission path was interrupted. The transmitter and receiver window (i.e. the side with two windows) must ble pointed towards the transmitter/receiver unit.
STYLUS ALREADY IN The stylus was already deflected
HEIDENHAIN TNC 2500B
at the start.
Machine
Operating
Modes
“Calibration
effective radius”
again
Page M5
3D Touch Probe Reference surface, Position measurement The position of a surface on the clamped workpiece is determined with the probing function “Surface = datum”.
Functions
Setting
Measuring positions
the reference
plane @
l
Measuring
positions
@
l
Measuring
distances
0
Initiate the dialog Select probing and enter.
SURFACE = DATUM
function
Move to the starting x+
x-
Y+
Y-
z-t
z-
c+
c-
Select the traversing
position.
direction,
e.g. Z-
Move the probe head in negative Z direction. The probe head is retracted in rapid traverse to the starting position after touching the surface.
Measured
value
DATUM Z-18,125
The control
Setting the _i reference plane
Enter a new value if required,
DATUM Z+O
Measuring ~ distances
You can also measure
Page M6
displays the measured
Confirm
distances
on an aligned
l
Probe the first position
and set the datum
l
Probe the second position. The distance can be read in the “Datum”
Machine
workpiece.
(e.g. 0 mm). display
Operating
Modes
entry.
value.
e.g. 0 mm.
3D Touch Probe Basic rotation, Angular
measurement
The probing function “Basic rotation” determines the angle of deviation of a plane surface from a nominal direction. The angle is determined in the machining plane.
Functions
l
Basic rotation (the control compensates misalignment)
Y
for an angular
l
Correct an angular misalignment (on a machine tool with rotary axis)
l
Measure
a=?
f
Basic
rotation
Sk 2
an angle.
1
0”
X
Initiate the dialog BASIC
ROTATION
ROTATION
ANGLE
Select probing and enter.
furlction
Select the “Rotation
angle”.
Enter the nominal direction of the surface to be probed, e.g. O”.
= 0
Move the probe head to the starting posi-tion 0. x+
x-
Y+
Select the probing
Y-
direction,
e.g. Y-t
The probe head travels in the selected direction, e.g. Y+. The probe head retums to the starting position after touching the side surface.
Move the probe head to the starting position CD. The probe head travels in the selected direction, e.g. Y+. The probe head returnls to the second starting position after making . The control automatically switches to the “Manual operation” or “Handwheel” operating mode.
HEIDENHAIN TNC 2500B
Machine
Operating
Modes
Page M7
3D Touch Probe Basic rotation, Ar igular measurement Displaying the rotation angle
The measured rotation angle is displayed by selecting the probing function “Basic rotation”. Compensation of angular misalignment is ed on the screen with “ROT” in the status display. It also remains stored after a power interruption.
Cancelling the basic rotation (rotation angle O”)
The basic rotation is the probing function entering a O0 rotation The “ROT” display is
BRSIC ROTRTION p3 xY+ Y-
p ----------------_---------------
cancelled by selecting “Basic rotation” and angle. cleared.
ACTL.
x 2
+ +
I
49t2Ei8 15,321
q +
Y
+
on aligned
workpieces
23,254 84,000
Once basic rotation is activated, all subsequent programs are executed with rotation and shown rotated in the graphic simulation.
Measuring
angles
In addition
to basic rotation,
Carry out the following l
Compensating misalignment
folr
angle measurements
can also be performed
procedure:
Execute a basic rotation.
l
Display the rotation
l
Cancel the basic rotation.
On machine axis.
angle.
tools with a rotary axis, you can also correct
Carry out the following
misalignment
of a workpiece
by rotating
the
procedure:
l
Execute a basic rotation.
l
Display and note the rotation
l
Cancel the basic rotation.
angle.
0 Enter the noted value for the rotary axis incrementally in the “Positioning with MDI” operating mode (cf. Posrtioning at the entered position without radius compensation) and start the rotation with the machine “START” button.
Page MS
Machine
Operating
Modes
3D Touch Probe Corner = datum/ Determining corner coordinates r
With the probing function “Corner = datum”, the control computes the coordinates of a corner on the clamped workpiece. The computed value can be taken as datum for subsequent machining. All nominal positions then refer to this point. The probing function “Basic rotation” should be performed before “Corner = datum”.
Procedure
The probe head touches two side surfaces figure) from two different starting positions side.
(see per
The corner point P is computed by the control as the intersection of straight line A ( points 0 and 0) with straight line B ( points 0 and 6).
After performing a basic rotation
HEIDENHAIN TNC 2500B
If the probing function “Corner = datum” is called after performing a basic rotation (straight line A), the first side need not be ed.
Machine
Operating
Modes
Page M9
3D Touch Probe Corner = datum/ Determining corner coordinates To transfer the direction of the first side face from the routine “basic rotation”, simply respond to the dialog query TOUCH POINTS OF BASIC ROTATION ? by pressing the “ENT” key (otherwise “NO ENT”). If only the probing rotation.
function
“CORNER = DATUM”
is performed,
then it does not contain
a basic
Initiate the dialog CORNER
Select probing and enter.
= DATUM
First side face
function
Move the probe head to the first starting po:sition. x+
x-
Y+
Y-
Select the probing
direction,
e.g. Y+.
The probe head travels in the selected direction. After touching the side face, the probe head IS retracted to the starting position. Traverse to the second starting position and probe in the same probing direction as described above. Second side face Move the probe head to the third starting po:sition. x-b
x-
Y+
Y-
Select the probing
direction,
e.g. X+.
The probe head travels in the selected direction. After touching the side face, the probe head is retracted to the starting position. Traverse to the fourth starting in the same probing direction Display corner coordinates/ Setting the datum
DATUM
X+0
DATUM
Y+O
cl
Enter the corner coordinates for X and Y if required, e.g. X+0, Y+O.
c
Confirm
Page M 10
Machine
Operating
Modes
position and probe as described above.
entries.
1
3D Touch Probe Circle center = datum/ Determining the circle radius In the probing function “Circle center = datum”, the control computes the coordinates of the circle center and the circle radius on a clamped workpiece with cylindrical surfaces. The coordinates of the center can be used as the datum for subsequent machining. All nominal positions are then referenced to this point. The “Basic rotation” probing function must be carried out prior to “Circle center = datum”.
Bore, Circular
Outer
cylinder
HEIDENHAIN TNC 2500B
Position the probe head in the bore with the remote axis direction keys. 4 different positions are then touched by pressing the machine START button.
On workpieces with cylindrical outer surfaces, the probing directions must be specified for each of the four points.
I
Machine
Operating
Modes
!
Page M 11
3D Touch Probe Circle center = datum/ Determining the circle radius Initiate the dialog Select the probing and enter.
CIRCLE CENTER = DATUM
function
Move the probe head to the first
x+
x-
Y+
Select the probing
Y-
direction
if required,
Probe head travels in the selected direction. After touching face, the probe head is retracted to the starting position. Traverse to the second and third starting positions and probe in different directions as described above.
I x+
Move the probe head to the fourth x-
Y+
Select the probing
Y-
direction
if required,
The probe head travels in the selected direction. The probe head is retracted to the starting position after touching the side face.
Display
X+54.3
Y+21.576
Coordinates Circle radius.
PR+20
Datum
setting
DATUM X+40
Enter the X and Y cosordinates of the circle center if necessary, e.g. X+40, Y+30.
DATUM Y+30
0 Confirm
Page M 12
of the circle c:enter.
Machine
Operating
Modes
entries.
,
Manual Operation Datum setting without
Align workpiece and set datum
First align the workpiece parallel to the machine axes in the conventional way. For datum setting the machine is then moved to a known position relative to the workpiece and the relevant positron values are set with the axis kevs.
Touching machining
Touch both sides of the workpiece with a tool or edge finder and, at , set the actual position display of the associated axis to the tool radius or the ball tip radius of the edge finder with a negative sign (here e.g. X = -5 mm, Y = -5 mm).
in the plane
probe system
a 5
Touching in the feed axis (spindle axis)
The actual position display is set to zero when the zero tool touches the work surface. If with the work surface is not allowed, you can lay a metal shim of known thickness (e.g. 0.1 mm) on it. Then enter the thickness of the metal when is made (e.g. Z = +O.l mm).
Preset
When using preset tools, i.e. when the tool lengths are already known, touch the work surface with any tool. To assign the value 0 to the surface, enter the length L of the inserted tool with a positive sign as the actual value for the infeed axis. If the work surface has a value other than 0, enter the following actual value: (actual value Z) = (tool length L) + (surface position)
tools
Example: tool length L: 100 mm position of the work surface:
t-50 mm
actual value to be entered: Z = 100 mm + 50 mm = 150 mm
HEIDENHAIN TNC 25006
Machine
Operating
Modes
Page M 13
Manual Operation Datum setting without
The datum is to be set with a drill (tool radius R = 5 mm) as shown to the right.
Example: Setting the datum
0 Touch the workpiece
Touching Z axis
probe system
surface.
0 Touch side by moving
the Y axis.
0 Touch side by moving
the X axis.
uZ
Initiate the dialog
with
, after surface
0 is touched
Enter the value for the Z axis, e.g. 0 mm.
DATUM SET Z =
Confirm entry. The Z display reads: 0.000
, Y axis
clY , after surface 0 is touched
Initiate the dialog
DATUM SET Y =
cl
Enter the value for the Y axis, e.g. 5 mm Here with a negative
sign.
Confirm entry. The Y display reads: -5.000
X axis
?c
, after surface 0 is touched.
Initiate the dialog
DATUM SET X =
Enter the value for the X axis, e.g. 5 mm. Here with a negative! sign. Confirm entry. The X display reads: -5.000
The datum
for the fourth axis can be set in a similar way
If the dialog DATUM SET was opened “END Cl”.
by mistake, the dialog
can be cleared
The set datum is only shown in the “ACTUAL” position display. This display may have to be selected with “MOD” (see index General Position displays).
Machine
Operating
Modes
with “NO ENT” or
Informatio~n/MOD
Functions
-
Electronic
Handwheel/Jog
Increment
/
1
Versions
The control is usually equipped with an electronic handwheel. It can be used, for example, to set up the machine. There are two versions wheel:
of the electronic
HR 130: to be incorporated operating
hand-
into machine
HR 330: portable version with axis selection keys, axis direction keys, rapid traverse key, EMERGENCY STOP button.
Interpolation factor
The displacement per handwheel turn is determined by the interpolation factor (see table to the right).
Interpolation factor 0
Displacement in mm per turn 20.0
1 2
Operating the HR 130
The handwheel is switched to the required machine axis with the axis keys of the control
Operating the HR 330
The axis is selected on the handwheel. The axis to be driven by the electronic is highlighted in the screen display.
handwheel
10.0 5.0
3 4
2.5 1.25
5 6
0.625 0.313
7 8
0.156 0.078
9 10
0.039 0.020
FRCTOR: 1
INTERPOLRTION
RCTL.
In the “Electronic handwheel” operating mode, the machine axes can also be driven with the external axis direction buttons.
x
+
Y
+
Ia
+
49,258 23,254 15,321
00
HEIDENHAIN TNC 2500B
I
Machine
Operating
Modes
I
MS/9
Page M 15
Electronic
Operating the HR 130/330
Set operating
Handwheel/Jog
Increment
mode and initiate the dialog
I INTERPOLATION
FACTOR:
q
3
I Enter the desired e.g. 4. Confirm
INTERPOLATION
FACTOR:
4
factor,
entry.
on the control or on the handwheel
The tool can now be moved in a positive or negative Y direction with the electronic wheel.
Jog
interpolation
(HR 330)
hand-
The machine manufacturer can activate jog positioning via the integral PLC. In this case, a traversing increment can be entered in this operating mode.
positioning
The axis is moved by the entered increment when you press an external axis button. This can be repeated as often as desired. Only single-axis movements are possible. @Jog
Entering the jog increment
increment:
e.g. 2 mm.
0 External axis button
(e.g. X) pressed
0 External axis button
pressed
Set operating
once.
twice.
mode and initiate the dialog
JOG-INCREMENT:
Enter the jog increment,
1.000
Confirm
JOG-INCREMENT:
2.000
or another
e.g. 2 mm.
the entry.
remote
axis key.
The axis is driven by the entered
Page M 16
Machine
Operating
Modes
jog increment.
Positioning with Manual Data Input Tool call/Spindle axis/Spindle speed You must first define (i.e. enter the dimensions of) a tool before you can call it with “TOOL CALL” in the “Positioning with MDI” operating mode. You can define a tool either in the central tool file or in the part program. If in the operating modes “Program run/full sequence” or “Program run/single block” you are working without a central tool file, you must define each tool with “TOOL DEF”. The concepts “TOOL DEF” and “TOOL CALL” are defined under “Tool definition”.
in the “Programmrng
ano Editing”
section
Initiate dialog Example: Tool call
TOOL NUMBER ?
cl
Enter tool number. Confirm
Select the spindle axis
WORKING SPINDLE AXIS X/Y/Z ?
Select spindle
SPINDLE SPEED S RPM ?
the speed
2
cl
Enter spindle
axis, e.g. Z.
Enter spindle
speed.
Confirm
BLOCK COMPLETE
HEIDENHAIN TNC 2500B
entry.
1
entry.
Start tool call
Machine
Operating
Modes
Page M 17
Positioning Positioning
with Manual Data Input to entered position
In the operating mode “Positioning with manual data input”, single-axis entered and executed (the entered positioning blocks are not stored).
Traversing position
to
Initiate the dialog
or another
POSITION VALUE ?
0
1
Incremental
positioning
blocks can be
axis key. - absolute?
Enter a numerica value for the selected axis. Confirm the entry.
Radius compensation
TOOL RADIUS COMP.: R+/R-/NO
COMP. ?
Enter either radius compensation
or
no radius compensation.
FEED RATE ? F = / FMAX = ENT
Enter either the feed rate or no value for rapid traverse.
Either enter a miscellaneous e.g. MO3 or
MISCELLANEOUS FUNCTION M ?
choose
BLOCK COMPLETE
Terminate entry
block
Single-axis radius compensation
no miscellaneous
Start the positioning
Direct termination of input. Data entered previously such as radius compensation, of spindle rotation then remain permanently effective
function,
function.
block.
feed rate, or direction
For single-axis positioning blocks, you only have to consider whether the tool path is lengthened or shortened by the tool. R+ tool path to be increased. R- tool path to be reduced. If a radius compensation R+/R- is also entered to position the spindle axis, this axis is not compensated. A radius compensation is also ignored the 4th axis is used for a rotary table.
0 Nominal
Page M 18
when
position
Machine
Operating
Modes
HEIDENHAIN TNC 25006
Program Run Single block, Full sequence Stored programs sequence”.
are executed
in the operating
modes “Program
The workpiece datum must be set before machining See: Datum setting with/without probe system.
Program run single block
In this operating mode, the control restarted after every block. Program
Operating
executes
run full
the work!
the part program
run single block is best used for program
run single block” and “Program
block by block. The program
test and for the first program
must be
run.
mode
Selecting the program
select block 0.
The first program block is line of the program.
0 BEGIN PGM 7225
Starting
Program run full sequence
In this operating program occurs.
mode, the control
Stop functions: M02, M30, MOO (MO6 “STOP”, The program
Selecting the program
Operating
if assigned
run is also stopped
You must restart the program
executes
the machining
a stop function
if an error message
to continue
program
until a programmed
via machine
after a programmed
stop.
Full sequence Select the program scribed above.
mode
The program programmed occurs.
Feed rate
The programmed
feed rate can be varied via the feed rate override.
Spindle
The programmed
spindle
HEIDENHAIN TNC 25008
parameter)
appears
Starting the run
speed
speed
can be varied via the spindle
Machine
Operating
stop or end of
Modes
override
and block number
runs continuously stop or
(if output
as de-
until a
is analog)
Page M 19
Program Run nterrupting the program
run
stop
Stop program run: Stop axis movements with the machine STOP button. The block currently being processed is not completed. The “Control in operation” ( Ile ) display blinks.
Abort
Interrupt program run. The “Control in operation” cleared.
The control
Switching to single block
( Ile ) display is
stores:
l
the last tool called
l
coordinate
l
the last valid circle center/p01
l
the current
l
the return jump
transformations program
In the “Program “Single block”.
section
CC repeat
label for subprograms
run full sequence”
The block currently
operating
being processed
mode, you can interrupt
the prograim
run by switching
to
is completed.
I Program run is to be discontinued tion of the current block.
EMERGENCY STOP
The machine The control
can be switched acknowledges
To continue, either st8r-t each block separately or reactivate “Program run full sequence”.
after execu-
off in an emergency
by hitting one of the EMERGIENCY STOP buttons
this with the message
EMERGENCY STOP To continue
working,
release the emergency
stop key by turning
1. Remove the cause of error 2. Switch
on the control
3. Clear the message 4. Restart the program
Page M 20
power
again
EMERGENCY
STOP with the “CE” key
run.
Machine
Operating
Modes
it clockwise,
then
Program Run Checking/Changing 0 parameters Interrupt program
You can check and, if necessary,
Cl parameters change
0 parameters
after interrupting
the program
run.
run Interrupt
program
run.
Check parameter
Change parameter
Terminate change
HEIDENHAIN TNC 2500B
Machine
Operating
Modes
0 parameter the pararneter
display or and confirm
Page M 21
Program Run Background programming
Programming during program execution
While a part program is being executed in the “Program run full sequence” program can, in the “Programming and editing” mode, be simultaneously via the data interface FL-232-CN.24. This parallel
operation
A program
Starting the part program
Operating
cannot
is especially
advantageous
for long programs
operating mode, another either edited or transferred
with little operator
activity
be run and edited at the same time.
mode
lnrtiate the dialog
Igram. Start machining.
Parallel operating mode: programming and editing
Operating
mode
or gram via the RS-232.C/V.24
Screen display
The screen is divided into two halves during parallel operation: The program to be edited is shown in the upper half. The program currently in process appears in the lower half: program number, current block number and current status are displayed.
Terminating the parallel operating mode
Operating
Page M 22
mode Parallel operating is terminated by pressing “Program run full sequence” key.
I
Machine
Operating
Modes
HEIDENHAIN TNC 25008
the
I
Program Run Blockwise transfer (Reloading operation) Execution from external storage
In the “Program run full sequence” or “Single block” operating mode, part programs can be “transferred blockwise” from a remote computer, a storage medium or a HEIDENHAIN FE unit via the RS-232-C/V.24 serial data interface. This allows execution of part programs which exceed the storage capacity of the control.
Data interface
The data interface is programmable parameters (see index “Programming External data transfer).
via machine Modes”,
The RS-232-C interface of the TNC must be set for external transfer or FE operation!
iYYII.3 Machine
Program structure
Only linear programs
Block numbers (sequence numbers)
with “Blockwise
Program calls, subprogram executed.
calls, program
l
Unless the control
with a central tool file, only the tool last defined
The program
operates
to be transferred
are displayed
sequentially;
and conditional
(sequence however,
Data transfer from an external storage device can be started sequence/single block” with the “EXT” key. The control the storage
stores the transferred capacity is full.
No program ferred.
blocks are displayed
After starting, the processed external storage device.
over blocks
HEIDENHAIN TNC 2500B
program
blocks in available
until the available
blocks are cleared
memory ‘START”
numbers)
jumps cannot
be
can be called.
exceeding
no block number
999
imay exceed the
Operating
in the operating memory
modes
and intermpts
is full or the prograrrl button even when
“Program
run full
data transfer
is completely
no program
when
trans-
block is dis-
run, you should already have a number of stored proit is advantageous to wait until the available memory
and further
If, in “Blockwise transfer” operation, you press the “GOT0 number, all blocks preceding this number will be ignored.
Machine
progr’am
on the screen with 2 lines
The program run can be started with the machine played. To avoid unnecessary interruptions of the program gram blocks as a buffer before starting. Therefore, is full.
Skipping program
repeats
can have block numbers
The blocks do not have to be numbered number 65 534. numbers
section
transfer”.
l
High sequence
Starting “blockwise transfer”
can be executed
Modes
blocks are continuously
0” key before starting
called from the
and enter a sequence
Page M 23
Notes
Page M 24
I
Machine
Operating
Modes
HEIDENHAIN TNC 25006
Programming
Modes
Conversational
(P)
Programming General information Responding to dialog queries Editing functions Clearing/deleting functions
Program
1 2 3 5
Selection Opening a program Program protection Blank form definition
Tool Definition Tool definition in part program Tool definition in program 0 Transferring tool length Tool radius
Cutter
Path Compensation Entering RLfRR Working with radius compensation Radius compensation R+/R-
15 16 17
Tool call Tool change
1B 19
Tools
Feed rate F/ Spindle Speed Miscellaneous Programmable Dwell Time
S/ Function Stop/
M
20 2’1
Path Movements Entry Initiating the dialog Overview of path functions lD/2D/3D movements Linear Movement/ Cartesian Positioning Drilling Chamfer Example Additional
in rapid traverse
axes
26 27 28 213 30
Circular Movement/ Cartesian Circular interpolation planes Selection guide: Arbitrary transitions Tangential transitions
.-P I
HEIDENHAIN TNC 2500B
I
Programming
Modes
f
t 2 8 h
Programming
Circular [F]
Modes
(P)
Movement/Cartesian
p]
,G cl RNO
cc + c
:34
CR
136
Corner rounding Tangential
Polar
RND
:38
arc CT
40
Coordinates Fundamentals
42
Pole
43
Straight
line LP
44
Circular
path
45
Tangential
arc CTP
Corner rounding
RND
Helical interpolation
Contour
Approach
Predetermined
Program
Jumping
46 46
(CC + ) + Z
and Departure Starting and end position on an arc
49 !51
Constant contour speed: M90 Small contour steps: M97 End of compensation: M98 Machine-based coordinates: M91/M92
!52 !53 !54 !55
Overview
!56
M Functions
Jumps
Within
a Program Program markers (labels) Program section repeats Subprograms Nesting subprograms Example: Hole pattern Example: Horizontal geometric
Program
47
Calls
form
!57 !58 60 62 63 64
65
Programming
Modes
Programming
Standard
Modes
(P)
Cycles Introduction,
Overview
66
Fixed Cycles Preparatory measures Cycle 1 : Pecking Cycle 2: Tapping with floating tap holder Cycle 17: Rigid tapping Cycle 3: Slot milling Cycle 4: Rectangular pocket milling Cycle 5: Circular pocket milling
6-7 613 71 72 l 713 7!5 7'7
SL Cycles Fundamentals Cycle 14 Contour geometry Cycle 6 Rough-out PGM 7206: Rectangular pocket PGM 7207: Rectangular island Overlaps Overlapping pockets Overlapping islands Overlapping pockets and islands Cycle 15: Pilot drilling Cycle 16: Contour milling (finishing) Machining with several tools
7!3 80 80 82 8:3 84 8!5 8i3 8!3 91 92 913
Coordinate Transformations Overview Cycle 7: Cycle 8: Cycle 10: Cycle 1 1 :
Datum shift Mirror image Coordinate system rotation Scaling
9!3 96 913 100 102
Other Cycles Cycle 9: Dwell time Cycle 12: Program call Cycle 13: Oriented spindle
stop
104 1 O!J 106
Parametric Programming Overview Selection Algebraic functions Trigonometric functions Conditional/unconditional jumps Special functions Examples: Bolt-hole circle Drilling with chip breaking Ellipse as an SL cycle Sphere
l
New function
HEIDENHAIN TNC 2500B
Programming Modes
IO.7 IO{3 IO!3 110 1 1 12 1 1 :3 1 1 !3 116 1 1 '7 119
Programming
Programmed
Modes
(P)
Probing Overview Example:
Digitizing
measuring
length and angle
122 123
3D Contours Overview Defining the scanning range Line-by-line digitizing Defining the MEANDER scanning cycle Level-by-level digitizing Defining the CONTOUR LINES scanning cycle Executing a program with digitized positions Error messages
125 1260 128 130
Test Run
136
137
I
l
Data Transfer
New function
Programming
Modes
l
131 0 132 l 133 0
134
General information Transfer menu Connecting cable/Pin assignment for RS-232-C Peripheral devices HEIDENHAIN FE 401 Floppy Disk Unit Non-HEIDENHAIN devices Machine parameters
l
1290
Teach-In
External
l
140 141 142 143 144 145 146
Conversational Programming General information
Introduction
The individual work steps on a conventional machine tool must be initiated by the operator. On an NC machine, the numerical control assumes computation of the tool path, coordination of the feed movements on the machine slides and generally also monitors the spindle speed. The control receives the information for this in form of a program in which the machining of the workpiece is described.
Define and call a tool, move to the tool change
position.
Move to the workpiece
contour,,
machine
contour,
depart
the workpiece from the workpiece
Traverse to the tool change
contour,
position.
End of program Program Programs
The control can store up to 32 programs (HEIDENHAIN or ISO) with a total of 4000 (HEIDENHAIN dialog).
blocks
One part program
blocks
Individual numbers. Switching between conversational and DIN/IS0 programming
programs
can contain
up to 4000
are identified
scheme
1
by program
The control is switched to conversational or IS0 programming via the MOD functions (see: index General Information, MOD functions). A program consists of individual gram blocks (symbol: q ).
lines, called pro-
/ Every block in a program work step, e.g.
Blocks
corresponds
to one
7
L X+20 Y+30 Z-t50 ROFlOOOM03. Block numbers (Sequence numbers)
The block number (also called the sequence number) identifies the program block in a part program. The control assigns a unique number each block.
Words
Each block is composed
Address Values
A word is composed of an address and a value, e.g. +20. Abbreviations
of words,
to
e.g. X+20;
8 9 10 11 12 13
L
z-20 x-12 L x+20 L RND R+5 x+50 L cc
x-10
c
x+70
ROFMAX
MO3
Y-k60 ROFMAX Y-k60 RR F40 F2:O Y-120 RR F40 Y-1-80 Y-151,715DR+ RR
letter, e.g. X
used above:
L = linear interpolation X, Y, Z = coordinates = no tool radius compensation RO F = feed rate M = miscellaneous function
HEIDENHAIN TNC 2500B
Programming
Modes
Page PI
Conversational Programming Responding to dialog queries The dialog principle
Program input is dialog guided, i.e. the control requests the required data. The corresponding dialog sequence for each program block is started with a diaitiation key, e.g. “TOOL DEF” (the control subsequently requests the tool number, then the tool length, etc.).
Initiate dialog:
Example: tool definition
query appears
Errors are displayed in plain language during program input. False entries can be corrected immediately - while entering the program.
Second dialog query appears
current
block
L
Responding to dialog queries/ Continuing the dialog
After you press a diaitiation key, the control requests the necessary data. You must give a response to every dialog query. The response is shown in the highlighted field on the screen. After answering the dialog query, the entry is transferred to the memory with the “ENT” key. “ENT” is short for “enter” (i.e. confirm entry, transfer, store). The control then displays the next dialog query.
Skipping queries
To make the entries in the preceding block modal, that means valid for the current block, (e.g. feed rate or spindle speed), do not respond to the associated dialog queries; skip them with the “NO ENT” key.
dialog
PROGRRMMING
RNO
43
CYCL
Entries already displayed in the highlighted field or already included in the program are deleted with “NO ENT”; the next dialog query appears on the screen.
44
L
4L
L
X-70 2-2 X+70
46
L
y+ss
During program run, the previously programmed values are valid for the associated address.
__---------_----y--------------RCTL.
OEF
X + El+
1.5
EDITING FG0 Y-55
49,258 15,321
R0
m
M99
R
F
t-l99
R
F
tlss
Y c
+ +
23,254 84,000
R0
If you have programmed “END 0”.
Directly terminating a block
all the desired
information
In a block, you can directly terminate
The control saves the entered data, and no more queries for this block appear. Data not programmed in this block remain effective as programmed in previous Certain routines, such as “Read-in program”, are also terminated with this key.
MS/9
the block with
blocks.
Numerical values are entered with the numeric keypad - with a decimal point or decimal comma (selectable via machine parameter) and sign key. You need not enter preceding or succeeding zeroes. You can enter the sign before, during or after the entering the number.
Entering numerical values
Page P2
Programming
Modes
HEIDENHAIN TNC 2500B
Conversational Programming Editing functions
Editing
The term editing
means entering,
The editing functions are helpful effective at the touch of a kev.
Selecting a block
The current A specific
changing,
supplementing
in selecting
and changing
block stands between block is selected
two horizontal
with “GOT0
and checking program
programs.
blocks and words,
and they become
lines.
0”.
Initiate the dialog
El
GOTO: NUMBER =
Paging through the program
Vertical
cursor
the block number.
keys:
Select the next lower or next higher block number. Hold down
Inserting a block
Key in and confirm
a vertical cursor key to continuously
run through
the program
lines
You can insert new blocks anywhere in existing programs, Just call the block which is to precede new block. The block numbers of the subsequent blocks are automatically increased. If the program
storage
capacity
is exceeded,
this is reported
at diaitiation
the
with the error message:
= PROGRAM MEMORY EXCEEDED =. This error message also appears lower block number.
Editing
words
Horizontal
if program
end (PGM END block) is selected.
cursor keys:
The highlighted changed.
field is moved
One word in the current be changed:
The dialog query appears word, e.g.
within
program
the current
block and can be placed
block is to
If all corrections
HEIDENHAIN TNC 2500B
word to be
field to the word
for the highlighted
0X Change
another
on the iprogram
Move the highlighted to be changed.
COORDINATES ?
To change
You should then select a
the value.
Move the highlighted word to be changed.
word:
Transfer the block (or move the highlighted or left off the screen).
have been made:
Programming
Modes
field to the
field to the right
Page P3
Conversational Programming Editing functions You can use the vertical
Searching for certain addresses
Use the horizontal cursor then page in the program
cursor keys to search for blocks containing
a certain address
keys to place the highlighted field on a word with the vertical cursor keys:
only those blocks having the desired
All blocks with the address are to be displayed:
address
in the program.
having the search address,
and
are drsplayed.
Select one block with the desired address.
M
Place the highlighted field on a word with the required address.
MISCELLANEOUS FUNCTION M ?
Page P4
Programming
Call blocks with the desired
Modes
address.
HEIDENHAIN TNC 2500B
Clear program
Conversational Clearing/deleting
Programming functions
The dialog for clearing
is initiated
a program
with the CL PGM
key.
Initiate the dialog ERASE
= ENT/END
Program
= NOENT
is to be cleared:
select a program number.
or
Erase the program.
Program
Delete
block
is not to be cleared:
The current
block (in a program)
The block to be deleted
is deleted
is selected
with DEL q .
with GOT0
0 or a cursor key.
Program blocks can only be deleted in the PROGRAMMING AND EDITING operating mode. After deletion, the block with the next lower sequence number appears in the current program The following
sequence
Delete program section
To delete program
Clear entry, error message
You can clear numerical pressing the “CE” key.
Then continue
numbers
sections,
pressing
are corrected
call the last block of the program
DEL 0 until all blocks in the definition
inputs
with
Non-blinking
error
messages
An entered
value
and the address
the “CE”
section. or program
key. A zero appears
can also be cleared
are completely
Programming
line.
automatically.
Modes
with
the “CE”
cleared
with
section
are deleted.
in the higrllighted
field after
key.
“NO ENT”.
1
Page P5
Program Selection Opening a program Selecting an existing proaram ”
You open a program and select a stored program by first pressing the “PGM NR” key (program number). PROGRAM
A table with the HEIDENHAIN dialog programs and IS0 programs stored in the TNC appears on the screen. The program number last selected is highlighted. The program length in characters is given after the program number. IS0 programs are designated by “ISO” after the program number.
111 10002 111 11111
RCTL.
Depending on the selected opened (see index General
a
IS0
:3 2 __------------------------------
You can select the desired program either l via the cursor keys or l by entering its number. If the selected program number does not yet exist, a new program is opened.
Opening program
SELECTION
X Et
756 1440 1548 44 450 900
+
49,258 15,321
Y C
t t
23,254 84,000
rlG/9
Id0
program type, HEIDENHAIN dialog programs Information, MOD Functions).
or IS0 programs
can be
Initiate the dialog
PROGRAM SELECTION
q
PROGRAM NUMBER = MM = ENT / INCH = NO ENT
Example
Selecting existing ram
display
an
Enter the program number (maximum 8 characters). Confirm entry. for dimensions
in mm, or
for dimensions
in inches.
0 BEGIN PGM 96231MM 1 END PGM 96231MM
All existing programs executed, regardless
(HEIDENHAIN format and ISO) can be edited, tested, of the selected type of programming.
displayed
graphically
and
Initiate the dialog
Place the highlighted the desired program
field on number.
or
0 Example
display
Page P6
Enter the program
number.
0 BEGIN PGM 7645MM 1 BLK FORM Z X+0 Y+O z-40 2 BLK FORM X+100 Y+lOO z+o
Programming
Modes
HEIDENHAIN TNC 25008
Program Program
Edit protection
Selection protection
After creating
a program,
The program
is then marked
Protected
programs
you can designate
it as erase- and edit-protected.
with a P (“protected”)
can be executed
and viewed,
at the start and end of the program. but not changed.
A protected program can only be erased or changed if the erase/edit This is done by selecting the program and entering the code number
Activating protection
edit
edit
is, removed
beforehand.
;:i;t;i.mber
of the
Initiate the dialog
0 BEGIN PGM 22 MM
Press the key until the dialog “PGM protection” appears.
PGM PROTECTION ?
Protect the program
0 BEGIN PGM 22 MM
Removing protection
protection 86357.
Erase/edit P appears
P
query
protection is programmed. at the end of the line.
Initiate the dialog
PROGRAM NUMBER =
0 BEGIN PGM 22 MM
cl
P
Code number 86357
Enter the number of the program whose edit protection is to be removed.
Select the auxiliary
operating
mode.
Select the MOD function “Code number”.
VACANT MEMORY: 148330BYTE
CODE NUMBER =
0
Enter code number
86357.
I
I Erase/edit protection The P is deleted.
0 BEGIN PGM 22 MM
HEIDENHAIN TNC 25008
~
Programming
Modes
is removed.
I
Page P7
Program Selection Blank form definition
Test graphics
A blank form definition must be programmed before the machining program can be simulated graphically.
Blank
For the graphic displays, the blank dimensions of the workpiece (BLK FORM = BLANK FORM) must be entered at the start of program. The blank form must always be programmed a cuboid, aligned with the machine axes. Maximum dimensions: 14000 mm x 14000 mm x 14000
Minimum Maximum
point point
as
mm.
The cuboid is defined with the minimum point (MIN) and maximum point (MAX) (points with “minimum” and “maximum” coordinates). MIN can only be entered in absolute MAX may also be incremental.
dimensions;
The blank data are stored in the associated machining program and are available after program call.
Graphic display
Machining can be simulated in the three main axes - with a fixed tool axis.
Tool form
Machining is correctly displayed tool in the graphic view.
with a cylindrical
The graphic must be interpreted when using form tools.
accordingly
Page P8
Programming
Modes
I
HEIDENHAIN TNC 2500B
Program Selection Blank form definition The MIN point has the coordinates X0, YO and Z-40.
Example
The MAX point has the coordinates Xl 00. YIOO and ZO.
To define a blank, a program must be selected in the “Programming and editing” operating mode.
Entering the cuboid corner points
Initiate the dialog WORKING
SPINDLE
AXIS
X/Y/Z
?
0
Z
Enter the spindle
axis, e.g. Z.
MIN
Y coordinate.
MAX DEF BLK
FORM:
MAX-CORNER
?
X coorclinate. Y coordinate. Z coordinate.
Example
display
1 BLK FORM 0.1 Z X+0 Y+O z-40 2 BLK FORM 0.2 X+100 Y+lOO z+o
Error messages
BLK FORM DEFINITION INCORRECT The MIN and MAX points are incorrectly defined, or the machining blank definition, or the side proportions differ too greatly.
program
contsins
more than one
PGM SECTION CANNOT BE SHOWN Wrong spindle axis is programmed.
HEIDENHAIN TNC 2500B
I
Programming
Modes
I
Page P9
Tool Definition Tool definition in pat-t program
Tool definition
The control requires the tool length and tool radius to enable it to compute the tool path from the given work contour PROGRRHHING
These data are programmed
in the tool definition.
Whether the tools are defined decentralized in the appropriate part program or in a central tool file (program 0) is determined by a machine parameter.
2
BLK
3
TOOL
4
TOOL
5
END
FORH y+100 DEF
C3.2
x+100 z+0 L+0 R+5
1
CRLL PGH
EDITING
1 s
2 12s
55
MM
-------------------------------RCTL.
Compensation values always refer to a certain tool which is designated by a number.
Tool number
RN0
X
+
q +
49,258 15,321
Y C
+ t
23,254 84,000
Id0
Valid tool numbers:
HS/9
with automatic tool change or in program 0: 1 to 99 without automatic tool change or in the machining program: 1 to 254.
Tool definition in the part program
If tools required in a program tions of the tool dimensions.
input
Initiate the dialog TOOL
NUMBER
are defined
in that program,
?
a program
printout
will include
Enter the tool number.
cl
The tool number 0 cannot under TOOL DEF. Tool 0 is internally defined L = 0 and R = 0.
Page P 10
TOOL
LENGTH
TOOL
RADIUS
the specifica
be programmed
with
Enter the tool length or the difference to the zero tool.
L ?
0
R ?
Programming
Modes
Enter the tool radius
HEIDENHAIN TNC 2500B
Tool Definition Tool definition in program
Central tool file
0
If the central tool file (program 0) is activated by machine parameters, the tools must always be defined there. They then only have to be called in any program. The central tool file is programmed, changed, output and read in the “Programming and editing” operating mode. Every tool is entered with the tool number, length, radius and pocket number. Tool 0 must be defined with L = 0 and R = 0.
PROGRRMMING
L+s, L+12,45 L+2s,
Tf
KE L+32,71
Ts8 -----------------_--------------
k:A47a
q z
Tool 3 is to be defined
EDITING 3
R+6 R+7,7.9 R+3,5 R+2,S R+2 R+8 R+13 R+lS,S
21
Ts4
RCTL.
Example
AND
12 T3
+ +
=2 l
49,258 15,321.
Y C
+ +
23,254 84,000
with L = 5, R = 7
Initiate the dialog PGM
NAME
BEGIN
k3
?
TOOL
LO
MM
Select the tclol
RO
Enter the length. Enter the radius.
Tool changer with flexible pocket coding
On machines with a tool magazine and flexible magazine pocket than they were taken from. The control
memorizes
which
tool number
pocket coding,
is stored in which
the tools can be returned pocket.
“TOOL DEF” functions like a tool pre-selection here, i.e. the tool search DEF”. In this case, only the query for the tool number appears.
Oversize tools
Oversize tools occupying three pockets are to be designated returned to the same pocket. Program
by placing the highlighted
SPECIAL
TOOL
and respond
field on the dialog
to a different
as “special
is programmed
with,“TOOL
tools”. A special tool is always
query
?
with the “ENTER”
key.
The preceeding and succeeding pocket numbers should be deleted by positioning the highlighted field and pressing the “NO ENT” key. A Ile is displayed in place of the erased pocket number. “S” for special tool and “P” for pocket number only appear if this function was selected via machine parameters. PO (spindle)
HEIDENHAIN TNC 25006
or another
pocket must be free in the magazine.
Programming
Modes
Page P 11
Tool Definition
Tool length
L
The tool length is compensated with a single adjustment of the spindle axis by the length compensation. Compensation becomes effective after tool call and subsequent movement of the tool axis.
Zero tool
Compensation ends after a tool is called or with T,, (T, is called the zero tool and has a length of 0). The correct compensation value for the tool length can be determined on a tool pre-setter or on the machine. If the compensation value is to be determined on the machine, then you must first enter the workpiece datum.
Length differences
When
the compensation
The length differences length compensations.
values are determined
on the machine,
-Z or +Z of the other clamped
the zero tool serves as a reference.
tools to this zero tool are programmed
as tool
If a tool is shorter than the zero tool, the difference is entered as a negative tool length compensation. If a tool is longer than the zero tool, the difference is entered as a positive tool length compensation. Preset
tools
If a tool pre-setter is used, all tool lengths are already known. The effective compensation correspond to the tool length and are entered with the correct signs according to a list.
Page P 12
Programming
Modes
values
HEIDENHAIN TNC 2500B
Tool Definition Transferring tool length
Tool lengths can be easily and quickly entered with the actual position transfer function. 1. Move the zero tool To to the work surface set the spindle axis to zero. 2. After exchanging, the work surface.
and
L-0
L=+...
move the tools TI or T2 to
3. Transfer each display value in this position to the tool length definition. This gives you the length compensation to the zero tool.
To
Input
Operating
TI
T2
mode Touch the sLITface with the zero tool.
Initiate the dialog
II!z
DATUM SET
q
Spindle
axis, e.g. Z.
Reset to zero. Also touch the surface with the new tools TI or T2
Operating
mode Either 1. call a tool definition in a program the dialog “TOOL LENGTH L ?“,
and initiate
or 2. select a tool in the central tool file and initiate the dialog “TOOL LENGTH L ?“.
qz
Select the spindle axis to transfer the tool lenqth.
I
Transfer the length compensation.
cl
TOOL RADIUS R ?
HEIDENHAIN TNC 2500B
Programming
Modes
Enter the radius.
I
Page P 13
Tool Definition Tool radius Tool radius
R
The tool radius is entered as a positive (exception: radius compensation when ming the cutter center path).
number program-
A tool radius must always be programmed before a machining program can be checked with test graphics.
Tool radius compensation
Drilling work is programmed without radius compensation (RO), while milling jobs are usually programmed with radius compensation (RL/RR). Compensation is effective after a tool call, programming with RL or RR in a positioning block (L, C etc.), or a movement in the active interpolation plane. Compensation ends with a positioning block which contains RO. If the tool tool center radius, the tour at the grammed
Outside
corners
travels with path compensation, i.e. the path is offset by the programmed tool tool follows a path parallel to the condistance of the tool radius. The profeed rate applies to the center path.
The control inserts a transition around the corner.
curve for the center
In most cases, the tool is thus guided Automatic
decleration
at a constant
L
path of the tool at outside path speed around
corners,
the outside
so the tool rolls
corner.
at corners
If the programmed feed rate is too high for the transition curve, the path speed is reduced (which produces a more precise corner). The limit value is permanently programmed in the control (machine parameter).
Inside
corners
Page P 14
The control (equidistant)
automatically determines at inside corners.
the intersection
S of the two cutter paths parallel to the contour
This prevents back-cutting in the contour; the work is not damaged. distances according to the tool radius in use.
The control
The radius of the tool must always be chosen can be machined.
element
Programming
so that every contour
Modes
thus shortens
- even when
traversing
shortened
HEIDENHAIN TNC 2500B
-
Cutter Path Compensation
Entering RIJRR To automatically compensate for the tool radius as entered in the TOOL DEF blocks - the control must be informed whether the tool travels to the left of, to the right of, or directly on the programmed contour.
RO
If the tool is to travel on the programmed contour, no radius compensation should be programmed in the positioning block. At the dialog query TOOL RADIUS COMP.: RL/RR/NO COMP. ? press the “ENT” key. Screen display: RO
Programming radius compensation
The radius compensation is entered in positioning blocks (L, C etc.) with the “RL” and “RR” keys at the dialog query TOOL RADIUS COMP.: RL/RR/NO COMP. ? “Left” or “right” should be understood in the direction of movement.
as looking
RR
If the tool is to travel at the distance of the radius to the right of the programmed contour, press the “RR” key. Display: RR
RL
If the tool is to travel at the distance of the radius to the left of the programmed contour, press the “RL” key. Display: RL
If the previous compensation effective (modal): press the “NO ENT” key. Display: R
HEIDENHAIN TNC 2500B
should
1
remain
Programming
Modes
Page P 15
Cutter Path Compensation Working
Starting point RO
with radius compensation
Change the tool and call the compensation with “TOOL CALL”. Traverse rapidly to the starting
values
point 0.
At the same time lower Z to the working depth (if danger of collision, first traverse in X/Y, then separately in Z!). This compensates for the tool length. The radius compensation off with ‘30”.
still remains
switched
IS’ contour point RL/RR
Traverse to contour point 0 wrth radius compensation RL/RR at reduced feed rate.
Machining around the contour
Program the following milling feed rate.
contour
points to 0 at
Since the RL/RR asignment remains constant, the associated dialog queries can be skipped with “NO ENT” or “END 0”.
Last contour point RLIRR
After a complete circulation, the last contour point 0 is identical to the first cantor point 0 and is still radius compensated.
End point RO
The end point (outside the contour) must be programmed without compensation RO for complete machining.
r”t
To prevent collisions, only retract in the machining plane to cancel the radius compensation. Then back-off
Page P 16
I
the tool axis separately.
Programming
Modes
/
HEIDENHAIN TNC 2500B
Cutter Path Compensation Radius compensation R+, RInitiating the dialog
Em...
By pressing “R+” or “R-“, you can lengthen or shorten a single-axis displacement by the tool radius This simplifies: positioning with manual data input, l single-axis machining 0 prepositioning for the “Slot” cycle. The input dialog may be initiated - as on the point-to-point and straight cut controls TNC 131/ TNC 135 - directly via the corresponding yellow axis key. This radius compensation has the following effect: l
Effect
l
The displacement radius:
is shortened by the tool display R-.
l
The tool traverses position:
to the programmed display RO.
0 The displacement radius: R-t/R-
Example
nominal
is lengthened by the tool display R+.
do not affect the spindle
The tool is to traverse
axis
from initial position
X = 0 to X = (46 + tool radius).
Application example: prepositioning for the “Slot” cycle.
Initiate the dialog 1 POSITION
TOOL
VALUE
RADIUS
?
COMP.:
R+/R-/NO
COMP.
? Display:
X+46
Mixing and clX
Uncompensated blocks (e.g. L X+20 RO) and single-axis blocks (e.g. X+20 RO or X+20 R+) can be mixed in a part program. Single-axis compensated positioning blocks (R+/R-) and radius compensated positioning blocks (RR/RL) are not to be entered in succession! Incorrect:
Correct: L X+15
Y+50 x+40 Y+70
HEIDENHAIN TNC 2500B
R+
L X+15
Y+20 RO
Y+50
RO R+ RO
L X+50
Programming
Modes
Y+20 RR
R+ Y+57 RR
Page P 17
Tools Tool call With TOOL CALL a new tool and the associated compensation values for length and radius are called up.
call
Spindle axis
In addition to the tool number, the control also needs to know the spindle axis to carry out length compensation in the correct axis or radius compensation in the correct plane.
Compensation effect
The spindle axis also defines the plane (e.g. XV) for circular movements: compensation” plane. This is also the plane for “coordinate rotation” and “mirror image”. Spindle
axis
2 Y X
/ Length
compensation
to the “radius
1 Radius compensation XY zx YZ
Z Y X
The spindle speed is entered directly after the spindle axis. Input range of the control: 0 to 99999 rpm. If the speed exceeds the valid range for the machine, the following run
Spindle speed
It is identical
error message
appears
at program
WRONG RPM Activating compensation
Ending compensation
A tool call activates length compensation. It first becomes effective when the next tool axis movement is programmed. It can be seen as a single infeed height movement. Radius compensation first becomes effective when the compensation direction grammed in a positioning block. A “TOOL CALL” block ends the “old” tool length and tool radius compensation compensation values. Example: TOOL CALL 12 Z S 300 Tool radius compensation
is also ended
If only the spindle speed is entered Example: TOOL CALL S 300 Tool call
by programming
“RL” or “RR” is pro-
and calls the new
“RO” in the positioning
with “TOOL CALL”, the compensations
block.
remain valid
Initiate the dialog
0
TOOL NUMBER ?
Spindle axis
WORKING SPINDLE AXIS X/Y/Z
Spindle speed
SPINDLE SPEED S RPM ?
Page P 18
2
?
u
n Programming
Modes
Enter the tool number.
Enter the spindle
axis, e.g. Z.
Enter the spindle
speed (rpm).
HEIDENHAIN TNC 25008
Tools Tool change
Tool change position
To change the tool, the main spindle must be stopped and the tool retracted in the spindle axis. We recommend the insertion of an additional block in which the axes of the machining plane are likewise backed-off.
Workpiecerelated change position
The tool moves to a workpiece-related
position
Example: L Z+lOO FMAX MO6 The tool is driven 100 mm over the work surface programmed.
if no additional
measures
if the tool length
are taken.
is 0 or TOOL CALL 0 was /’
TO reduces the distance to the workpiece was effective prior to TOOL CALL 0.
Machine-related change position
Manual tool change
You can use M91, M92
or a PLC positioning
Example: L Z+lOO FMAX M92 (see Machine-related coordinates
(danger
of collision!)
to traverse to a machine-related
The program must be stopped for a manual tool change. Therefore, enter a program STOP before the TOOL CALL. M6 has this stop effect when the control is set accordingly via machine parameters. The program is then stopped until the external START button is pressed.
tool change
position
a
1 BLK FORM
0.1 Z X+0
Y+O Z-40
2 BLK FORM
0.2 X+100
Y+lOO Z+O
3 TOOL
DEF 1 L+O R+S
4 TOOL
DEF 2 L-2,4
5 TOOL
CALL
6 L Z+200 7 TOOL 8 L X+25
HEIDENHAIN TNC 2500B
compensation
M91/M92)
The program STOP can only be omitted when tool call is programmed solely to change the spindle speed.
Automatic tool change
if a positive4ength
The tool is changed at a defined change position. The control must therefore move the tool to a machine-specific change position. The program run is not interrupted.
Programming
Modes
0 Z
RO FMAX CALL
R.+3 MO6
1 Z S 1000
Y+30 FMAX
9 LZ+2FMAXM3
Page P 19
Feed Rate F/Spindle Speed S/ Miscellaneous Functions M Feed rate
F
The feed rate F, i.e. the traversing speed of the tool in its path, is programmed in positioning blocks in mm/min or 0.1 inch/min. The current feed rate is shown in the status display on the lower right of the screen.
Feed rate override
The feed rate can be varied within a range of 0% to 150% with the feed rate override on the control operating . The effective range of the potentiometer for tapping is limited by machine parameters!
Rapid
traverse
The maximum input value (rapid traverse) 29998 mm/min or l 11 800/l 0 inch/min.
on the control
for positioning
is:
l
The maximum operating speeds are set for each axis. FMAX or the max. input is programmed for rapid traverse. The control automatically limits rapid traverse to the permissible FMAX
values.
is only effective blockwise.
If the F display is highlighted and the axes do not move, this means the feed rate was not enabled at the control interface. In this case, you must your machine manufacturer,
The spindle
Spindle speed
speeds
are set with “TOOL CALL”
S Spindle override
On machines with continuous spindle override.
Miscellaneous functions
Miscellaneous functions can be programed to regulate certain machine functions (e.g. spindle “on”), to control program run and to influence tool movements. The miscellaneous functions are comprised of the address M and a code number according to IS0 6983. All of the M functions from MOO to M99 can be used.
M
spindle
drive, the speed can be varied from 0% to 150%
using the
Certain M functions become effective at the start of block (e.g. M03: spindle “on” clockwise), i.e. before movement, and others become effective at the end of block (e.g. M05: spindle “stop”). A list of all M functions with their effects as determined by the control can be found inside the back cover. Only a certain number of these M functions are effective on a given machine. Some machines may employ additional, non-standard M functions not defined M functions are normally programmed in positioning blocks (L, C etc.). However, M functions can also be programmed without positioning:
l l
Page P 20
Via the “STOP” key or by initiating the dialog with the “L” key and skipping
Programming
Modes
the queries
by the control.
with “NO ENT” up to address
M
Programmable
Stopping program
run
Stop/Dwell
Program run can be stopped by one of the following Restart by pressing the external START button.
Time
functions.
Initiate the dialog
MISCELLANEOUS FUNCTIONS M ? Miscellaneous
function
No miscellaneous
is desired:
function
desired:
18 STOP
Example
Enter the miscellaneous
cl
No entry.
M
Program run is stopped at block 18 No miscellaneous function
M02/M30
l
Program stop and (according to ISO) also spindle Return to block 1 of the program.
stop and coolant
off
MOO
l
Program
stop and (according
to ISO) also spindle
stop and coolant
off.
MO6
l
Program
stop and (according
to ISO) also spindle
stop, coolant
Program
stops only when
Dwell
time
set accordingly
by machine
Cycle 9 “Dwell time” can be used during program grammed time period (see “Other cycles”). Note : The program
HElDENHAlN TNC 2500B
m
continues
running
function.
off and tool change.
parameter!
run to delay execution
of the next block for the pro-
after the dwell time runs out!
Programming
I
Modes
1
Page P 21
Path Movements Entry The control/operator dialog for entering straight line movement.
Operating
positioning
blocks is illustrated
below
using the example
of a
Programs can only be input in “PROGRAMMING AND EDITING”.
mode L El
Initiate the dialog Example
Select the type of movement,
e.g. straight line.
Enter the end point of movement: COORDINATES
X cl
?
n
I
Incremental
- absolute
Enter numbers
n 0
Select the axis, e.g. X
Y
Enter further
?
with sign. coordinates.
If all endpoint coordinates confirm the entry.
TOOL
RADIUS
COMP.:
RL/RR/NO
COMP.
Enter the radius compensation
?
no radius compensation
1 FEED
are entered,
(RO).
Enter the feed rate or press only
RATE?F=
for FMAX = rapid traverse.
MISCELLANEOUS
Subsequent coordinates.
FUNCTION
blocks can be ended
Page P 22
may be skipped
cl
M ?
immediately
In these cases, the last entries remain Addresses
or
with “END 0”. e.g. after entering
valid for non-programmed
with “NO ENT”.
Programming
Enter a miscellaneous if desired.
Modes
addresses
function
the corner point
Path Movements
Initiating the dialog Contour elements
The shape tool were composed computes
of the workpiece is programmed without considering the tool. You program as though the constantly being moved, regardless of the machine design. The programmable contours are of the contour elements straight line and circle. Using tool radius compensation, the control the tool-dependent path for the cutter center along which the tool is guiided
Generating the workpiece contour
To be able to generate the workpiece contour, the control must be given the individual contour elements. Since each program block specifies the next step, the following information is required:
Contour
l l
straight line or circle the coordinates of each endpoint or other geometrical data such as the circle center and contour radius.
Straight
elements line
To program a contour element, always begin with one of the gray path function keys. The type of movement is then defined for the contour element in question.
Coordinates
Point coordinates the path function.
Incremental/ Absolute
To enter the point coordinates press the key for incremental
u
can only be input after selecting
Helix
f /
Path function Initiating the dialog
Circular arc
keys
[8) L
c [% clP
incrementally, inputs.
I
HEIDENHAIN TNC 2500B
Programming
Modes
Page P 23
Path Movements Overview
Straight lines
of path functions
Straight line (L): The tool moves in a straight The endpoint of the straight grammed. Chamfer A chamfer lines.
Circles
is inserted
between
line. line must be pro-
two
straight
+ss Circle center (CC) cl also the pole for polar coordinates: Used to program the circle center for a circular arc with the “C” key, or to program the pole for polar coordinates. CC generates no movement!
El
c Circular movement (C): The tool is moved in a circular arc. Program the endpoint of the arc. The circle center must be specified beforehand.
RND
0*c
Corner rounding (RND): An arc with tangential connections is inserted between two contour elements. Program the arc radius and (in other blocks) the contour elements of the corner to be rounded. Circular arc (CT) = “circle tangential”: A circular arc is tangentially connected to the preceding Only the endpoint of the arc is programmed.
q c&
Circular arc (CR) = ,,circle per radius”: The tool is moved on a circular path. Program the circle radius and the endpoint
Multi-axis movements
A maximum
Graphics
The examples on the following display IS wanted:
Page P 24
Z
for straight
pages must be supplemented
X+0 Y+O Z-40 x+100 Y+lOO z+o
Programming
element
of the arc (but not the circle center)
of three axes can be programmed
BLK FORM 0.1 BLK FORM 0.2
contour
Modes
lines and a maximum
with a uniform
of two axes for circles.
BLK FORM if a graphic
Tl
Path Movements lD/2D/3D movements
L
Movements are referred to - depending on the number of simultaneously traversed axes - as ID, 2D or 3D movements.
Single-axis traverse: ID movements
If the tool is moved relative to the work on a straight line along the direction of a machine axis, this is called single-axis positioning or machining. Single-axis movements can also be programmed without using the grey path function keys. Only the radius compensation R-t/R- is then available (see Radius compensation R+/R-).
2D movements
Movement in a main plane (XV, YZ. ZX) is called 2D movement. Straight lines and circles can be generated main planes with 2D movements.
3D movements
If the tool is moved relative to the workpiece on a straight line with simultaneous movement of all three machine axes, It IS called a 3D straight line. 30 movements are required planes and bodies.
HEIDENHAIN TNC 2500B
in the
to generate
Programming
oblique
Modes
Page P 25
[gl
Linear Movement/Cartesian Positioning in rapid traverse
Positioning
The tool is at the starting point 0 and must travel on a straight line to target point 0. You always program the target point 0 (nominal position) of straight lines.
L
Position 0 can be entered coordinates.
in Cartesian
or polar
The first position in a program must always be entered as an absolute value. The following positions can also be incremental values.
Example tool definition/ call
1 L+lO
R5
Tool 1 has length 10 mm and radius 5 mm
1
Z
Tool 1 is called in the spindle Spindle
s200
speed
axis Z.
is 200 rpm.
Z is traversed with length compensation. Only press “ENT” after all simultaneously traversing axes are entered!
Positioning block: complete input (main block) RO FMAX L X+50
Y+30
M3
Z+O RO FMAX
via “ENT”!
Rapid traverse clockwise.
“FMAX”,
movement
spindle
M3
Re-entry at tool calls is especially tool call. Rapid traverse
“RO” is only programmed
can also be entered
easy if you enter a main block (= complete
as a machine-specific
value (e.g. F 6000),
positioning
block) after a
if known
Positioning in the XY plane without radius compensation. The tool center is driven to the programmed position (if RO was programmed in preceding blocks).
Abbreviated input
After entering the desired data is unchanged.
Page P 26
values, program
Programming
blocks may be shortened
Modes
with the “END 0” key if remaining
II
Linear Movement/Cartesian Drilling
L
Absolute Cartesian coordinates
L x+30 Y-t40 z+2
3: 1. )
Multidimensional contour elements can only be entered after initiating with a gray path function key!
10
LO
3
Incremental Cartesian dimensions
Only incremental
pJ[T][Yj20
entry.
L IX-t-20
The position for X is entered in Incremental dimensions, for Y in absolute dimensions.
Mixed entries
Example drilling
Program
A bore is programmed
0 1 2 3 4 5
below
for illustration
purposes
BEGIN PGM 5231MM BLK FORM 0.1 Z X+0 Y+O Z-20 BLK FORM 0.2 X+100 Y+lOO Z+O TOOL DEF 1 L+O R5 TOOL CALL 1 Z S1250 L Z+200 ROFMAX M6
HEIDENHAIN TNC 25008
L Z-i-2 FMAX L Z-10 F80 L Z+2 FlOOO L X+50 Y+70 ROFMAX L z-10 F80 L Z+2 FlOOO L X+75 Y+30 ROFMAX L z-10 F80 L Z+200 FMAX M2 END PGM 5231MM
Programming
cycles
Blank form definition (only if graphic simulation desired) Tool definition Tool call Retract in Z, tool change Positioning to lSt hole in X/Y, rapid traverse, switch on spindle Pilot positioning in Z Drilling at programmed feed rate Retract in Z Positioning to 2”d hole in X/Y Drilling at programmed feed rate Retract in Z Positioning to 3’d hole in X/Y Drilling at programmed feed rate Retract in Z End of program
6 L X+20 Y+30 ROFMAX M3 7 8 9 10 11 12 13 14 15 16
without
Modes
workpiece
Page P 27
L?l
Linear Movement/Cartesian Chamfer
Chamfer
A chamfer can be programmed for contour corners formed by the intersection of two straight lines. The angle between the two straight lines can be arbitrary.
L
L
El
Prerequisites
A chamfer is completely defined by the points 0 0 0 and the chamfer block. A positioning block containing both coordinates of the machining plane should be programmed before and after a chamfer block. The compensation RLMR/RO must be identical before and after the chamfer block. A contour cannot be started with a chamfer. A chamfer can only be executed in the machining plane. The machining plane in the positioning block before and after the chamfer block must therefore be the same. The chamfer length must not be too long or too short at inside corners: the chamfer must “fit between the contour elements” and also be machineable with the chosen tool. The previously programmed effective for the chamfer.
Programming
feed rate remains
Program a chamfer as a separate block. Only enter the chamfer length - no coordinates. The “corner point” itself is not traversed?
Entering the chamfer
Is”]
Program
L4
block
L
L = chamfer
TOOL DEF 1 L+O RIO TOOL CALL 1 Z S200 L X+0 Y+50 RL F300 M3 L x+50 Y+.50 L4 L x+50 Y+O
Example
Page P 28
r
length
Position 0 (cf. figure above) Position 0 Chamfer Position 0
Programming
Modes
‘[Bj L
Linear Movement/Cartesian Example
Example: milling straight lines
The block numbers are shown you in following the sequence.
Program
1 2 3 4 2 7 8 9 10 11 12 13 14
HEIDENHAIN TNC 2500B
I
TOOL DEF 1 L+O R5 TOOL CALL 1 Z S500 L Z+200 RO FMAX M6 L X-10 Y-20 RO FMAX M3 L Z-20 R F80 L X+0 Y+O RL F200 L X+0 Y+30 RL F400 L x+30 Y+50 RL L X+60 Y+50 RL L2 L X+60 Y+O RL L X+0 Y+O RL L X-20 Y-10 RO L Z+200 R FMAX M2
Programming
in the figure to aid
Tool definition Tool call Tool change Pilot position (tool is up) Plunge at downfeed rate Approach the contour, call radius compensation Machine the contour
Chamfer
block
Last block with radius compensation Cancel radius compensation Back-off Z
Modes
/
Page P 29
[8)
Linear Movement/Cartesian Additional axes
Linear axes u, v, Qv
Linear interpolation can be performed simultaneously with a maximum of 3 axes - even when using additional axes.
L
For linear interpolation with an additional linear axis, this axis must be programmed with the corresponding coordinate in every NC block. This requirement holds even when the coordinate remains unchanged from one block to the next. If the additional axis is not specified, the control traverses the main axes of the machining plane again. Example: linear interpolation tool axis Z.
Rotary
axes
A. B. C
11
L
x+0
IV+0
12
L
x+100
IV+0
13
L
X+150
IV+70
RR FlOO
with X and IV,
If the additional axis is a rotary axis (A, B or C axis), the control s the entered value in angular degrees. During linear interpolation with one linear and one rotary axis, the TNC interprets the programmed feed rate as the path feed rate. That is, the feed rate is based on the relative speed between the workpiece and the tool. Thus, for every point on the path, the control computes a feed rate for the linear axis FL and a feed rate for the angular axis Fw: FL =
F.hL d (A L)’ + (A W)’
F =F’Aw w d (A L)’ + (A W)2 where: F = = FL = Fw A L = A W =
M94 for rotary axes
programmed feed rate linear component of the feed rate (axis slides) angular component of the feed rate (rotary table) linear axis displacement angular axis displacement
The position
display for rotary axes can be set via machine
+ 360’ or f 00 (i.e. + max. display value). If f 00 is chosen as the measuring below 360’ with M94.
parameters
for either:
l l
Page P 30
range, the position
Programming
Modes
display for rotary axes can be reduced
to values
Circular Movement/Cartesian Circular interpolation planes Main
planes
Circular arcs can be directly
TOOL
CALL
The circular interpolation plane is selected by defining the spindle axis in the “TOOL CALL” block. This also allocates the tool compensations. The axis printed bold below (e.g. X) is identical in its positive direction with the angle O” (leading axis)
Interpolation planes
Spindle axis parallel to
Standard for milling machines
programmed
in the main planes XY, YZ, ZX
Circular
interpolation
plane
XY
Z
Standard horizontal
for borers
Y
z
0" Y DRt
k
X
X
Oblique circles in space
HEIDENHAIN TNC 2500B
Circular arcs which are not parallel to a main plane can be programmed as a sequence of multiple short straight lines (L blocks).
I
Programming
Modes
via 0 parameters
I
and executed
Page P 31
Circular Movement/Cartesian Selection guide: Arbitrary transitions
Circular movement
The control moves two axes simultaneously, so the tool describes a circular arc relative to the workpiece.
Arbitrary transitions
The functions the preceding tangential and beginning and
Prerequisite
The starting point 0 of the circular movement must be approached in the immediately preceding block.
Circle
The circle endpoint CR block.
endpoint
Both definitions rotation.
Rotating direction DR+/DR-
C and CR define - together with block - arbitrary transitions (i.e. non-tangential transitions) at the end of the arc.
0 is programmed
also contain
Positive rotating direction ) is counterclockwise. Negative
rotating
direction
in a C or
the direction
of
(in mathematical
is clockwise.
The radius is indirectly given for “C” as the distance from the position programmed in the immediately preceding C block (start of arc) to the circle center CC. Full circles can only be programmed in one block, with “C”. With CR the radius can be entered directly (CC not required). 1 Select Given
Radius
Full circles CR Selecting
Starting
point of arc 0
Circle center
cl4”
End point of arc 0
[%
Starting
point of arc 0
Radius + end point of arc 0 Page P 32
e.g. c!$p
Approach starting point
C
e.g,
tirp c!
Approach
starting
point
El5 Programming
Modes
Circular Movement/Cartesian Selection guide: Tangential transitions
Tangential transitions
The “RND” and “CT” functions automatically produce a tangential (soft) entry into the arc. Departure from the arc is also tangential with “RND”, and arbitrary with “CT”. The direction of movement when entering the circle thus also determines the shape of the arc.
Direction of rotation
The direction given.
Center
The circle center is not reauired
RND
The “RND” rounding is inserted between two contour elements which can be either straight lines or arcs.
of rotation
need therefore
not be
for either function.
Program the corner point 0 that is not approached and directly thereafter a separate rounding block “RND” with the rounding radius R. Entry and departure from the rounding is necessarily tangential and is automatically computed by the control.
CT
With “CT” only the arc endpoint programmed.
Selecting
Given
Select
Point 0
e.g. approach
with
v 0
Corner 0
e.g. approach
with
y cl
Rounding
0 is to be
RND
cd cl
radius
Point 0
e.g. approach
with
q
Tangent-forming point 0
e.g. approach
with
‘fl cl
Tangential
e.g. approach
with
entry 0
y
End point of circular arc 0
HEIDENHAIN TNC 25008
I
Programming
Modes
cc -+ 01%
c
4” Cl Circle center
Circular
cc + c
Movement/Cartesian
CC has two functions: I, Specifying the circle center for circular be programmed with “C”). 2. Defining the pole for polar coordinates.
CC
The circle center CC must be programmed before circular interpolation with “C”. The CC coordinates remain valid until changed by new CC coordinates There are three methods
for programming
The circle center CC is directly Cartesian coordinates.
l
The coordinates last programmed define the circle center.
l
The current position is taken as CC with “NO ENT” or “END 0” (without numerical input).
the circle center
CC incremental: “CC” produces
Approaching the starting point
Approach
Radius
The distance
by
in a CC block
for positions
The dialog for the circle center CC absolute:
defined
CC:
l
This is also possible in polar coordinates.
Circle G El
arcs (to
programmed
is initiated
with the “CC” key.
is based on the work datum.
the circle center
is based on the tool position
the starting
point for the circular
from the starting
arc before the C block.
point to the circle center determines
The tool is to travel from position 0 to target point 0 in a circular path. Only program 0 in the C block. Position 0 can be entered in Cartesian or polar coordinates.
C
The direction of rotation DR must be defined for circular movement: rotation in positive direction DR+ (counterclockwise) rotation in negative direction DR- (clockwise).
Direction of rotation
Any tool radius compensation before a circular arc.
Page P34
last programmed.
no movement!
must begin
Programming
Modes
the radius.
cc +I+ Elm
c
Input tolerance
Input
CC
Input
C
Circular
cc + c
Movement/Cartesian
The starting and endpoint must lie on the same circular path, i.e. they must be at the same distance from the circle center CC. The tolerance of position inputs for the starting position, end position and circle center is III 8 urn.
Circle center Arc endpoint Specify the rotating press once for press twice for + Program
blocks
direction
with the “+/-”
cc x+50 Y+50 C X+15 Y+50 DREnter R. F and M as for straight lines. Input is only needed to change earlier specifications
Example full circle
Full circle in the XY plane (outer circle) around center X+50. Y-t50 with 35 mm radius
Program
TOOL TOOL
DEF 1 L+O R5 CALL 1 Z S200
L X+15 cc
x+50
c x+15
Y+50 RL F300 M3 Y+50 Y+50
DR- RL
Full circles can be programmed with “C” in one block. The circle starting point and the circle endpoint are identical.
Example
arc
Program
X
Semicircle in the XY plane (inside circle) around center X+50 Y+50 with 35 mm radius. L X+85 cc
x+50
C X+15
HEIDENHAIN TNC 25006
I
Y+50 RL F300 M3 Y+50 Y+50 DR+ RL
Programming
Modes
Page P 35
key:
cl
Circular
Circle
If the contour radius is given in the drawing, but no circle center, the circle can be defined via the “CR” key with the l endpoint of the circular arc l radius and l direction of rotation. R, F and M are entered as for straight lines and are only required when changing earlier specifications.
CR 2@
CR
CR
clc%
Starting
Movement/Cartesian
point
Endpoint
The starting point of the arc must be approached in the preceding block. In the CR block the endpoint can only be programmed with Cartesian coordinates. The distance between starting and end point of the arc must not exceed 2 x R. With CR, full circles can be programmed in 2 blocks.
Central
angle
There are two geometric solutions for connecting two points with a defined radius (see figure), depending on the size of the central angle p: The smaller arc 1 has a central angle PI < 180°, the larger arc 2 has a central angle p2 > 180’. Enter a positive radius to program the smaller arc (f3 < 180”). (The + sign is automatically generated.)
Contour radius
To program the larger arc (f3 > 1800), enter the radius as a negative value. The maximum definable radius = 30 m. Arcs up to 99 m can be produced with parametric programming.
Depending on the allocation of radius compensation RL/RR, the rotating direction determines whether the circle curves inward (= concave) or outward (= convex). In the adjacent figure, DR- produces a convex contour element, DR+ a concave contour element.
Rotating direction
Page P 36
Programming
Modes
HEIDENHAIN TNC 2500B
CR c))” Cl
CR
Input
[5jpq80pJ40
Endpoint
R-t100
Radius, positive
DR
Direction of rotation sign key.
CR
Program
block
Circular
Movement/Cartesian
of arc sign specified
with the change
CR X+80 Y+40 R+lOO DR-
Examples:
TOOL DEF 1 L+O R.5 TOOL CALL 1 Z S200
Arc A
L X+20 Y+60 RL F300 M3 CR X+80 Y+60 R+50 DR-
Arc B
L X+20 Y+60 RL F300 M3 CR X+80 Y+60 R-50
Arc C
DR-
L X+20 Y+60 RL F300 M3 CR X+80 Y+60 R+.50 DR+
Arc D
L X+20 Y+60 RL F300 M3 CR X+80 Y+60 R-50
DR+
The position X+20 Y-t60 is the start of arc in the examples; the position X+80 Y+60 is the end of arc.
HEIDENHAIN TNC 2500B
I
Programming
Modes
Page P37
cl
Circular Movement/Cartesian Corner rounding RND
RNR Gcl
“RND” has two functions: rounding of corners, if RND is “in the contour”, 0 soft approach and departure from the contour, if RND is at the start or end of the contour. l
Circular
arc
RND
clcd2
Contour corners can be rounded with arcs. The circle connects tangentially with the preceding and succeeding contour. A rounding arc can be inserted at any corner formed by the intersection of the following contour elements: straight line - straight line, straight line - circle, or circle - straight 0 circle - circle. l l
line,
Prerequisites
Rounding is completely defined by the RND block and the points 0 0 0. A positioning block containing both coordinates of the machining plane should be programmed before and after the RND block. The RL/RR/RO compensation must be identical before and after the RND block.
Note
The rounding arc can only be executed in the machining plane. The machining plane must be the same in the positioning block before and after the rounding block. The rounding radius cannot be too large or too small for inside corners - it must “fit between the contour elements” and be machinable with the current tool. The feed rate for corner rounding is effective blockwise. The previously programmed feed rate is reactivated after the RND block.
Programming
Error messages
The rounding arc is programmed as a separate block following the corner to be rounded. Enter the rounding radius and a reduced feed rate F, if needed. The “corner point” itself is not approached!
PLANE WRONGLY DEFINED The machining planes are not identical and after the RND block.
before
ROUNDING RADIUS TOO LARGE The rounding
Page P 38
I
is geometrically
impossible.
Programming
Modes
The tool radius can be larger than the rounding radius on outside corners. The tool radius must be sSmaller than or equal to the rounding radius on inside corners.
LJ
Circular Movement/Cartesian Corner rounding RND
Input
0SC 8
Rounding
FlOO
A separate feed rate can be entered effective for this rounding.
RN0 w 4i
RNO
RND
Program
block
Sequence
and is only
RND 8 FlOO
TOOL DEF 1 L-t0 R5 TOOL CALL 1 Z S200
Examples:
Sequence
radius
A
B
HEIDENHAIN TNC 2500B
L X+10 Y+60 RL F300 M3
Position 0
L X+50 Y+60
“Corner
RND7
Rounding
L x+90 Y+50
Position 0
L X+10 Y+60 RR F300 M3
Position 0
L X+50 Y+60
“Corner
RND7
Rounding
L x-t-90 Y+50
Position 0
I
point” 0
point” 0
Programming
Modes
I
Page P 39
[PI
Circular Movement/Cartesian Tangential arc CT
Circular
A circular arc can be programmed more easily if it connects tangentially to the preceding contour. The circular arc is defined by merely entering the arc endpoint with the “CT” key.
CT
arc CT
CT
[_b”l
Geometry
An arc with tangential connection is exactly defined by its endpoint.
to the contour
This arc has a specific radius, a specific direction of rotation and a specific center. This data need not therefore be programmed.
Prerequisites
The contour element which connects tangentially to the circle is programmed immediately before the tangential arc. Both coordinates of the same machining plane must be programmed in the block for the tangential arc and in the preceding block.
Tangent
The tangent is specified by both positions 0 and 0 directly preceding the CT block. Therefore, the first CT block can appear no earlier than the third block in a program.
Circular
arc CT
Machining
The tool is to travel a circle connecting tangen tially to 0 and 0 to target point 0. Only 0 is programmed in the CT block.
Geometry
Coordinates
The endpoint of the circular path can be programmed in either Cartesian or polar coordinates
Error messages
WRONG CIRCLE DATA The required minimum 2 positions block were not programmed.
sequence
before the CT
ANGLE REFERENCE MISSING Both coordinates of the machining plane are not given in the CT block and the preceding block. Cartesian
coordinates PA
I
Polar coordinates
Page P 40
Programming
Modes
Circular Movement/Cartesian Tangential arc CT
Input
CT
Program
Arc endpoint
block
CT X+90 Y+40 Enter R, F and M as for straight lines. Input is only necessary to change earlier definitions
Examples: different endpoints
TOOL DEF 1 L+O R10 TOOL CALL 1 Z S200
Arc A
L X+10 Y+80 RL F300 M3 1”’ tangent point L x+50 Y+80 Stat-t of arc CT X+130 Y+30 End of arc
Arc B semicircle
L X+10 Y+SO RL F300 M3 Is1 tangent point L x+50 Y+80 Start of arc CT X+50 Y+O End of arc. A semicircle with R = 40 is formed
Arc C quarter
circle
L X+10 Y+80 RL F300 M3 IS’ tangent point L X+50 Y+80 Start of arc CT X+80 Y+50 End of arc. A quarter circle with R = 30 is formed.
io
80
130
Different tangents Arc A
L X+10 Y+80 RL F300 M3 L X+50 Y+80 CT X+90 Y+40
Arc B
L X+10 Y+60 RL F300 M3 L X+50 Y+80 CT X+90 Y+40
Arc C
L X+50 Y+llO RL F300 M3 L X+50 Y+80 CT X+90 Y+40
HEIDENHAIN TNC 2500B
I
Programming
Modes
I
Page P 41
cl
Polar Coordinates Fundamentals
P
The control allows you to enter nominal positions in either Cartesian or polar coordinates. In polar coordinates, the points in a plane are specified by the polar radius PR (distance to the pole), and the polar angle PA (angular direction). The pole position is entered with the “CC” key in Cartesian coordinates based on the workpiece datum.
Marking
Blocks in polar coordinates (LP, etc.).
Angle reference axis
The +X +Y +Z
angle axis in axis in axis in
are marked
r
by a P
reference axis (0” axis) is the the XY plane, the YZ plane, the ZX plane.
The machining plane (e.g. XY plane) is determined by a tool call. The sign of the angle PA can be seen in the adjacent figure.
Absolute polar coordinates
Absolute‘dimensions are based on the current pole. Example: LP PR+50 PA+40
Incremental coordinates
A polar coordinate radius entered changes the last radius. Example: LP IPR+lO
polar
An incremental polar coordinate to the last direction angle. Example: LP IPA+lS
incrementally
angle IPA refers
O0 Absolute and incremental coordinates mixed within one block. Example: LP PR-t.50IPAt-
Mixing
may be
Page P 42
Programming
Modes
Po’ecc cl+
Polar Coordinates Pole
Pole
The pole must be specified with “CC” before entering polar coordinates. The pole can be set anywhere in the program prior to using polar coordinates.
04”
The pole is programmed tal Cartesian coordinates. CC absolute: piece datum.
in absolute
or incremen-
the pole is referenced
to the work-
CC incremental: last programmed
the pole is referenced nominal tool position.
A CC block is programmed of the machining plane.
to the
with the coordinates
Example
CC X+60 Y+30
Transferring the pole
The last programmed position is transferred the pole. Program an empty CC block.
as
Directly transferring the pole in this manner is especially well suited for polygon shapes with polar dimensions (see illustration below).
Example
L X+26 Y+30 cc LP PR+17 PA-45 cc LP PR+18 IPA-
POLE 1 POLE 2
X Modal effect
A pole definition remains valid in a program until it is overwritten with another definition. The same pole therefore need not be programmed repeatedly.
VI 0
I CCY
F
cc;X
HEIDENHAIN TNC 2500B
I
Programming
Modes
I
Page P 43
Polar Coordinates Straight line LP
After opening
with the ‘I”
key, you must press the “P” key to enter positions
in polar coordinates.
For dimensions which are referenced to a rotational axis in some way, such as bolt hole circles or cams, programming is usually easier in polar coordinates than in Cartesian coordinates because calculations are avoided.
Range for polar angle
Input range for linear interpolation:
absolute
or incremental
PA PA positive: counterclockwise angle PA negative: clockwise angle.
Example
Milling
an inside contour:
Program
TOOL DEF 2 L+O R2 TOOL CALL 2 Z S200 CC X+50 Y-t60
Set POLE
L X+15 Y+50 ROFlOOOM3 Approach
starting point externally (Cartesian coordinates)
L Z-5 FlOO
Plunge
LP PR+40 PA+180 RR F200 Approach LP IPALP IPALP IPAL X+85 Y+50 RO L Z+50 ROF9999 M2
Page
P44
I
lSt contour point with compensation (polar coordinates) 2”d contour pornt Last contour point Depart from contour, cancel compensation Retract
Programming
Modes
-360“
to +360”.
Polar Coordinates
Circular path Circular
arc
If the target point on the arc is programmed in polar coordinates, you only have to enter the polar angle PA to define the endpoint. The radius IS defined by the distance from the starting point of the arc to the programmed circle center CC. When programming a circle in polar coordinates, the angle PA and the rotating direction DR can be entered positively or negatrvely. The angle PA determines the endpoint of the arc. If the angle PA is entered incrementally, the sign of the angle and the sign of the rotating direction should be the same. In the figure to th’e right, this means that IPA is negative and DR is allso negative.
Range for polar angle
PA
Input range for circle interpolation: absolute or incremental -5400° to +5400°
Example
An arc with radius 35 and circle center X+50 Y+60 is to be milled. Rotating direction is clockwise.
Program
TOOL TOOL
DEF 1 L-t0 R5 CALL 1 Z S200
CC X+50
Y+60
LP PR+35 PA+210
C PA+0
DR- F300
Coordinates of circle center RL F200 M3
Approach circle (circle radius is 35 mm) Circular movement clockwise
------o X
In the example, a contour radius of 35 mm is obtained from the distance between thIe POLE and the approach point on the circle.
HEIDENHAIN TNC 2500B
Programming
Modes
Polar Coordinates Tangential arc CTP Corner rounding RND
[g-q
cl RND c%c
Tangential
arc
(T-Jlp)
The endpoints of tangential arcs may be entered in polar coordinates to simplify the programming of, for example, cams. The start of the arc is automatically when programming with CT.
tangential
If the transition point are not calculated exactly, the arc elements could become “jagged”. Specify the pole CC before programming coordinates.
in polar
Example
A straight line through 0 and 0 is to tangentially meet the arc to 0. The radius and direction angle of 0 with respect to CC are known.
Program
TOOL DEF 1 L-t0 R4 TOOL CALL 1 Z S200 60
CC X+65 Y+20 L X+10 Y+30 RL F500 M3 L X+20 Y+60 CTP PR+70 PA+80
0.
El
Polar “corners” can also be rounded with the “corner rounding” function (see Circular Movement/Cartesian, Corner rounding RND).
RND a-&
Page P 46
Programming
Modes
IO
20
65
c i%cl
P
Polar Coordinates Helical interpolation
(CC + ) + z
+El Helix
If 2 axes are moved simultaneously to describe a circle in a main plane (XV. YZ, ZX), and a uniform linear motion of the tool axis is superimposed, then the tool moves along a helix (helical interpolation).
Applications
Helical interpolation can be used to advantage with form cutters for producing internal and external threads with large diameters, or for lubricating grooves. This can save you substantial tool costs.
Input
The helix is programmed
data
in polar coordinates.
First specify the POLE or circle center CC.
Angle
range
Height
Enter the total angle of tool rotation for the polar angle IPA in degrees: IPA = number of rotations x 360° Maximum angle of rotation: f 5400° (15 complete rotations).
The total height H (= IZ) is entered axis (Z) at the query “Coordinates”.
for the tool
Calculate the value from the thread pitch and the required number of tool rotations. IZ = P . n, IZ = total height/depth to be entered P = pitch n = number of threads The total height/depth can be entered in absolute or incremental dimensions.
Thread
A complete thread can be programmed quite easily with IZ and IPA; the number of threads is then specified with a program section repeat REP.
Radius compensation
The radius compensation l l l
HEIDENHAIN TNC 25008
depends
rotating direction (right/left), type of thread (internal/external), milling direction (positive/negative direction) (see table to the right).
upon the
axis
Programming
Modes
Page P 47
Polar Coordinates Helical interpolation Input example
[$ci
[q
[y]
360 [y]
[y]
2
(CC + ) + z Endpoint Rotating direction
IPA+
IZ+2 DR+
Task
A right-hand internal thread M64 x 1.5 is to be produced in one cut with a multi-cutter tool.
Thread
Thread pitch start end Number Overrun at start at end
Catcu taations
data: P = 1.5 mm
a, = O” a, = O” = 360° of threads of threads:
no = 5 n, = l/2 n2 = l/2
Total height: IZ = P. n = 1.5 mm
[5 + (2 . l/2)] = 9 mm
Incremental polar angle: IPA = 360° t n = 360° t [5 + (2 . l/2)] = 2160° Due to overrun of l/2 thread, the start of thread is advanced starting angle a, = a, + (-1807 = O” + (-1807 = -180°
by 180?
The overrun of l/2 thread at the start of thread gives the following Z = -P n = -1.5 mm . [5 + l/2] = -8.25 mm
initial value for Z:
TOOL DEF 1 L+O R20 TOOL CALL 1 Z S.500
Program
L x+50 Y+30
Approach
cc
Take the position
L Z-8.25 ROFMAX M3
Downfeed
LP PR+32 PA-180 RL FlOO Approach
Page P 48
value
Z
the wall with radius R and starting
Helical movement and total height
L X+50 Y+30 MO5
Retract in XY
L Z+lOO FMAX
Retract in Z
cannot
as pole
at center to initial
IPA+ 160 IZ+9 DR+ RL F200
Helical interpolation
Note
the hole center
be graphically
Programming
with incremental IZ
displayed
Modes
angle
angle IPA
a,
Contour Approach and Departure Starting and end position Selecting contour
the lSt point
Before beginning contour programming, compensation is to begin.
Starting
point
In the vicinity of the first contour point, define an uncompensated starting point, that can be approached in rapid traverse, and be sure to consider the tool in use. The starting point must fulfill the following criteria: l l l l
Direct
approach
Starting
points
approachable without collision near the first contour point outside the material the contour will not be damaged
specify the first contour
when
approaching
point at which
the first contour
with
radius
point.
When working on a circle (RND) without the TNC approach/departure does not blemish the contour due to a direction change. 0 Not recommended
machining
function,
also check that the tool
Surface blemish due to change of Y-axis direction
0 Not recommended 0 Suitable
Also for end point
0 Optimal
Lies on the extension of the compensated path
0 Not recommended
Contour
damage
@ Not permitted! Radius compensation must remain for the starting position (RO).
switched
off
i End points
The same prerequisites apply for selecting the uncompensated end point as for the starting point. The ideal end point 6 lies on the extension last contour element RL.
of the
0, 0 Not recommended
Surface blemish due to change of the X-axis direction
0 Suitable
Also for the starting point
@I Optimal
Lies on the extension of the compensated path
0 Not recommended
Contour
+i+c
4 35
-.
.-.-B. 2 ij
1 @
damage
@ Not permitted!
b
Radius compensation must be switched departure from the contour (RO).
off after lllustratron
Common starting and end point
For a common starting and end point, select point 0 on the bisecting line of the angle between the first and last contour element.
-.-.-
programmed path traversed cutter center path
HEIDENHAIN TNC 25008
I
Programming
Modes
Page P49
._
Contour Approach and Departure Starting and end position The starting position 0 must be programmed without radius compensation, i.e. with RO.
Approach
The control guides the tool in a straight line from the uncompensated position 0 to the compensated position 0 of contour point 0. The tool center is then located perpendicular to the start of the first radius-compensated contour element.
Departure
.At a transition from RL/RR to RO, the control positions the tool center in the last radius compensated block (RL) perpendicular to the end of the last contour section. Then the next uncompensated approached with RO.
position
is
Approaching from an unsuitable position
If radius compensation is begun from Sl, the tool will damage the contour at the first contour point if no extra measures are taken!
Departure
The same applies contour.
Page P 50
when
departing
from the
Programming
Modes
Contour Approach on an arc
RND 0o/-c
Approach departure an arc
and on
RNO cd2 c!
and Departure
The TNC enables you to automatlcally approach and depart from contours on a circular path.
Begin programming
with the “RND” key.
The tool traverses from the starting position 0 initially on a straight line and then on a tangentially connected arc to the programmed contour. The starting point can be selected as desired, is approached without radius compensation (with RO).
and
The straight line positioning block to contour point 0 must contain radius compensation (RL or RR). Then program Departure
a RND block.
The tool travels from the last contour point 0 on a tangentially connecting arc and then on a tangentially connecting straight line to the end position 0. The positioning block for 0 should radius compensation (i.e. RO).
Approach departure
arc/ arc
Feed rate
Program scheme
not contain
The radius R can be substantially less than the tool radius. It must be small enough to fit between 0 and 0 or 0 and 0. A feed rate exclusively for the approach and departure arc can be programmed separately the RND block.
in
s
L Xs Ys Zs RO FMAX L X1 Y1 RL F500
L k, Ys RL F200
RND 2.5 FlOO
RND 2.5 FlOO
L X2 Y2 F200
L XE YE RO F500 2200 FMAX
Notes
HEIDENHAIN TNC 2500B
Programming
Modes
Page P 51
Predetermined M Functions Constant contour speed: M90 Standard practice: automatic deceleration at corners
For angular transitions such as internal corners and contours with RO, the axes are stopped briefly because an abrupt change of direction is not mechanically possible. This protects the machine definition of corners.
and results in sharp
For some tasks it is advantageous corners.
not to stop at
Example: The contour of a free-form surface produced with a large number of short linear movements. Here it is desireable to smooth the corners.
The corners grammed in ther and can stoppage of corners.
M90
are smoothed if M90 is proevery block. The workpiece is smoobe machined faster. M90 prevents the axes blockwise for RO or internal Without
Drawbacks
Greater strain on the machine at sharper changes of direction, until safety limit is reached (specified by the machine manufacturer).
Note
The exact execution depends on the machine parameters. the machine manufacturer for more information.
M90
With M90
Page P 52
Programming
Modes
Predetermined M Functions Small contour steps: M97 If there is a step in the contour which is smaller than the tool radius, the standard transition arc would cause contour damage. The control therefore issues an error message and does not execute the corresponding positioning block.
M97
M97 prevents insertion of the transition arc. The control then determines a contour intersection 0 as at inside corners and guides the tool over this point. The contour is not damaged. However, machining is then incomplete and the corner may have to be reworked. A smaller tool may help. M97 is effective blockwise and must be programmed in the block containing the outside corner point. Without
Example
M97
TOOL DEF 1 L+O R10 TOOL CALL 1 Z S 100 L L L L L L
X+0 Y+30 RL F200 M3 X+40 Y+30 M97 X+40 Y-t28 X+80 Y+28 X+80 Y+30 M97 x+100 Y+30
0 0 0 @ 0
With M97
With M97
HEIDENHAIN TNC 25008
Programming
Modes
Page P 53
Predetermined M Functions End of compensation: M98 Standard inside corner compensation
On inside corners in a continuously radius-compensated contour, the tool moves only to the intersection of the equidistants (see top figure). The work cannot be completely machined at positions 0 and 6.
M98
The middle figure shows two independent workpieces. Positions 0 and 6 are not connected. The tool must therefore be guided to positions @ and @. If you program a position with M98, the path offset remains valid until the end of this element and is ended there for this block. No intersection is computed and no transition arc is generated for the end position, so the tool is always traversed perpendicular to the contour end point. The previous compensation is reactivated matically in the following block 6. Position @ is approached The contour and 0.
L L L L L L
perpendicularly
is thus completely
X+0 Y+26 RL FIOO X+20 Y+26 X+20 Y+O M98 x+50 Y+O X+50 Y+26 X60 Y26
Stepover milling with M98
Stepover
milling
Example
TOOL DEF 1 L+O R5 TOOL CALL 1 Z S200
machined
auto to 6 at 0
0 0 0 0 0 @
with infeeds
in Z.
L x+70 Y-10 RRFMAXM3
Prepositioning
L Z-10 FMAX
Plunge
L Y+llO F200 M98
Stepover
L Z-20 FMAX
Second
L Y+llO RL F200
Prepositioning
L Y-10 M98
Stepover
infeed
Programming
Modes
Predetermined Machine-based
Coordinates
programmed
M Functions coordinates:
with M91 and M92 are independent
M91/M92!
of the manually
set workpiece
datum
M91
Positions programmed with M91 are referenced to the datum of the linear or angle encoders. The datum is located at the negative end of the measuring range on linear encoders with distance-coded reference marks. On encoders with a single reference mark, the datum is set by this reference mark (the position of the reference mark is indicated by the RM sticker).
M92
When
Applications
The miscellaneous
Displaying fixed machine coordinates
HEIDENHAIN TNC 2500B
programming
M92, nominal
functions
l
approach
fixed machine
l
approach
the tool change
positions
refer to the machine
M91 and M92 are used, for example,
datum
to
points, or position.
You may use the “MOD” key to display the coordinates (see index “General Information”, MOD Functions).
Programming
Modes
referenced
to the datum
of the encoders
Page P 55
Program Jumps Overvievv
Jumping within a program
The following gram: 0 Program
jumps section
l
Subprogram
l
Conditional
l
Unconditional
can be made within
a pro-
Examples:
CALL LBL 4 REP 3/3
repeat
CALL LBL 7
call
IF QS GTO GOT0 LBL, 12
jump
IF 0 EQU 0 GOT0 LBL 8
jump
Nesting: A program section repeat or a subprogram also be called from within another program tion repeat or subprogram. (Maximum nesting depth: 8 levels)
can sec-
Examples:
CALL PGM 3 CYCL DEF PGM CALL PGM 3
L X+50 M99
Page P 56
Programming
Modes
Jumping Program
Labels
Within a Program markers (labels)
Labels (program markers) can be set during programming to mark the beginning of a subprogram or program section repeat. These labels can be jumped to during program run (e.g. to execute the appropriate subprogram)
Setting a label
Label
A label is set with the “LBL SET” key. The label numbers 1 to 254 can be set only once in a program.
0
Label number 0 always marks the end of a subprogram (cf. “Subprogram”) and is therefore the return jump marker. It can thus occur more than once in a program.
Calling a label number
The dialog
is initiated
with the “LBL CALL” key.
With LBL CALL you can: l
0 BEGIN PGM 1 MM 1 BLK FORM 0.1 Z X-t0 Y+O Z-40 2 BLK FORM 0.2 X+1,00 Y+lOO Z+O 3 TOOL DEF 1 L+O R+3 4 TOOL CALL 1 Z S 500 5 CYCL DEF 1.0 PECKING 6 CYCL DEF 1.1 SET UP -2 7 CYCL DEF 1.2 DEPTH -20 8 CYCL DEF 1.3 PECIKG. -6 9 CYCL DEF 1.4 DWELL 0 10 CYCL DEF 1.5 F120 11 L Z+50 ROFMAX MO6 12 L X+10 Y+20 R FMAX MO3 13 L Z+2 FMAX 14 CALL LBL 1 REP 15 L X+20 Y+50 FMAX 16 CALL LBL 1 17 L X+10 Y+80 FMAX 18 CALL LBL 1 19 L Z+50 ROFMAX MO2 20 LBL 1 21 CYCL CALL M 22 LBL 2 23 L IX+10 R FMAX 1699 24 CALL LBL 2 REP 5 f5 25 LBL 0 26 END PGM 1 MM
call subprograms
0 create program
section
Pecking cycle Refer to “Fixed cycles” for explanation
repeats.
Label numbers (1 to 254) can be called as often as desired. Do not call label O!
Program repeats
section
For program repetitions.
section
repeats,
to the query REPEAT REP ? by entering
Subprograms
For subprogram
Conditional jumps
You can make the call of a program Programming, Overview).
Error
JUMP TO LABEL 0 NOT PERMITTED
messages
calls, respond
respond
the number
of required
to this query with the “NO ENT” key.
label be dependent
on a mathematical
condition
(see Parametric
This jump (CALL LBL 0) is not allowed.
LABEL NUMBER ALLOCATED Each label number
HEIDENHAIN TNC 2500B
- except LBL 0 - can be allocated
Programming
Modes
(set) only once
in a given program.
Page P 57
Jumping Program
Program repeats
section
Within a Program section repeats
An executed program section can be executed again immediately. This is called a program loop or program section repeat.
LBL SET
A label number marks the beginning of the program section which is to be repeated.
LBL CALL REP with number
The end of the program section to be repeated is designated by a call LBL CALL with the number of repetitions REP. A program times.
Jump
Program
direction
run
section can be repeated
up to 65534
22 LBL 2 23 L IX+10 FMAX M99 24 CALL LBL 2 REP 5 /5
A called program section repeat is always executed completely, i.e. until LBL CALL. A program jump is therefore only meaningful if it is a return jump. In other words, the called label (LBL SET) must have a smaller block number than the calling block (LBL CALL). The control executes the main program (along with the associated program section) until the label number is called. Then the return jump is carried out to the called program label and the program section is repeated. The number of remaining repetitions play is reduced by 1: REP 2/l. After another return jump, the program repeated a second time.
on the dis-
section
22 LBL 2 is
23 L IX+10
FMAX M99
When all programmed repetitions have been performed (display: REP 2/O), the main program is resumed.
24 CALL LBL 2 REP515
The total number of times a program section is executed is always one more than the programmed number of repeats.
Error message
EXCESSIVE SUBPROGRAMMING A jump was programmed incorrectly: 1. No REP value was entered for a program section repeat. If no response is given to the query REP (by pressing the “NO ENT” key), the program section is treated like a subprogram without a correct ending (LBL 0): the label number is called 8 times. During program run or a test run, the error message appears on the screen alfter the 8th repetition 2. The subprogram
Page P 58
I
was programmed
without
Programming
LBL 0 for an intended
Modes
subprogram
call.
Jumping Program
Setting the program label
Within a Program section repeats
Example: Program
Repeating a program section after LBL
Example bolt-hole
row
label 1 is set
6 repetitions after LBL 1. The program section between LBL 1 and CALL LBL 1 is executed a total of 7 times.
The illustrated bolt-hole row with 7 identical bores is to be drilled with a program section repeat. The tool is pilot positioned (offset to the left by the bore center distance) before starting the repeat to simplify programming.
Program
Nesting of repetitions
TOOL TOOL
DEF 1 L+O R2.5 CALL 1 Z S200
L X-7
Y+lO
Z+2 RO FMAX
LBL 1 LIX+1.5
FMAX
L z-10 L Z+2 CALL LBL
FlOO FMAX 1 REP 6
Tool definition Tool call M3
Pilot positioning
Start of the program section repeat Incremental distance between the bores, rapid traverse Absolute drilling depth, drilling feed rate Absolut retraction height, rapid traverse Call for repeats
The main program is executed until the jump to LBL 17 (CALL LBL 17). The program section between LBL 17 and CALL LBL 17 is repeated twice. The control then resumes the main program until the jump to LBL 15 (CALL LBL 15).
run
Og The program section until CALL LBL 17 REP 2/2 is repeated once and the nested program section also two more times. Then the program run is resumed.
SE=
0 o
=0 -
CALL LBL 17
0 0 CALL LBL 15
0
SO
LBL 17
REI’ 2/Z ===o izE5 -Z -0 REP l/l
0 3
-
0
I
L HEIDENHAIN TNC 25008
Programming
Modes
Page P 59
Jumping Within Subprograms
Subprograms
a Program
If a program section occurs several times in the same program, it can be designated as a subprogram and called whenever required. This speeds up programming.
Start of subprogram
The start of subprogram is marked number (can be any number).
End of subprogram
The end of the subprogram label 0.
with a label
is always marked
by
The different subprograms are then called in the main program as often as wanted and in any sequence.
i4 CALL LBL 1 15 L x+20 Y+50 16 CALL LBL 1 17 L x+10 Y+80 18 CALL LBL 1 19 L Z+50 ROFMAX MO2 20 LBL 1 21 CYCL CALL M 22 LBL 2 23 L IX+10 R FMAX M99 24 CALL LBL 2 REP 5 f5 25 LBL 0 26 END PGM 1 MM
No repetitions Reply to REPEAT REP with
When the subprogram is called with LBL CALL, the “NO ENT” key must be pressed after the dialog query REPEAT REP ? appears. A subprogram can be called at any point in the rnain program (but not from within the same subprogram)
Program
The control subprogram
run
executes call 0.
the main program
A jump to the called program performed. Subprogram 1 is processed of subprogram).
until the
label 0 is then until label 0 (0) (end
CALL LBL 1 LX...Y ..
Then the return jump to the main program follows. The main program is resumed with the block 6 following the subprogram call.
MO2 LBL 1
iBL 0
Subprograms should be placed after the main program (behind M2 or M30) for the sake of clarity. If a subprogram is placed within the main program, it is also executed once during program run without being called. Error
messages
If a subprogram call is programmed incorrectly (e.g. an end of subprogram REPEAT REP ? was entered), the error message
EXCESSIVE SUBPROGRAMMING appears.
Page P 60
I
Programming
Modes
lacks LBL 0, or a value for
Jumping Within Subprograms Entry example: Subprogam
a Program
BEGIN PGM 1 MM 2
Subprogram program.
:
Conclude
L ZlOO FMAX M2
2 is called from within
the main
with “NO ENT”
Retract and return jump to start
LBL 2
Start of subprogram
LBL 0
End of subprogram
END PGM 1 MM
2
2
End of main program
Example
A group of four bores is to be programmed as subprogram 2 and executed at three different positions.
Program
TOOL DEF 1 L+O R2.5 TOOL CALL 1 Z S200 CYCL DEF PECKING SET UP -2 DEPTH -20 PECKG. -10 DWELL 0 FEEDRATE FlOO L x+15 Y+lO ROFMAX M3
Approach
bore group 0
L Z+2 FMAX CALL LBL 2
Subprogram
L X+45 Y+60 FMAX CALL LBL 2
Approach bore group 0 Subprogram call
L X+75 Y+lO FMAX CALL LBL 2
Approach bore group 0 Subprogram call
L Z-t50 FMAX M2
Retract tool axis
LBL 2 CYCL CALL L IX+20 FMAX M99 L IY+20 FMAX M99 L IX-20 FMAX M99 LBL 0
call
Start of subprogram Call peck drilling cycle Incremental traverse, drill Incremental traverse, drill Incremental traverse, drill End of subprogram M99 = blockwise
Cross-reference
HEIDENHAIN TNC 25008
You will find an explanation
cycle call
of the peck drilling
Programming
cycle in the section
Modes
“Fixed cycles”.
Page P 61
Jumping Within a Program Nesting subprograms
Nesting subprograms
The main program is executed until the jump command CALL LBL 17 is reached.
BEGIN PGM 12 MM
The subprogram beginning with LBL 17 is subsequently executed until the next CALL LBL 20, which is then run until CALL LBL 53. The lowest nested subprogram until its LBL 0. At the return grams finally
CALL LBL 17 M2
53 is run through
LBL 17
end (LBL 0) of the last subprogram (53). jumps are made to the preceding subpro(20 and 17). until the main program is reached.
CALL LBL 20 iBL 0
The main program is then taken up again at the point immediately following CALL LBL 17. A subprogram call is considered when the first LBL 0 is reached!
LBL 20
executed
CALL LBL 53 iBL 0 LBL 53 iBL 0 END PGM 12 MM
Repeating subprograms
You can execute subprograms the nesting technique:
repeatedly
with
Subprogram 50 is called in a program section repeat. This subprogram call is the only block in the program section repeat. : the subprogram will be executed more time than the programmed number of repeats.
LBL 5 CALL LBL 50 CALL LBL 5 REP 9
one
M2 LBL 50
LBL 0
Page P 62
Programming
Modes
Jumping Example:
Based on the example “group of four holes at three different positions” (see the section “Subprograms” on the previous pages), three different tools and drilling operations will be added to the program. You will find an explanation of the pecking and tapping cycles in the section “Fixed cycles”.
Task
Note
0 BEGIN PGM 183MM 1 BLK FORM 0.1 Z X+0 Y+O Z-20 2 BLK FORM 0.2 X+110 Y+lOO Z+O 3 TOOL DEF 25 L+O R+2.5 4 TOOL DEF 30 L+O R+3 5 TOOL DEF 35 L+O R+3.5 6 CYCL DEF 1.0 PECKING 7 CYCL DEF 1.1 SET UP -2 8 CYCL DEF 1.2 DEPTH -3 9 CYCL DEF 1.3 PECKG -3 10 CYCL DEF 1.4 DWELL 0 11 CYCL DEF 1.5 FlOO 12 TOOL CALL 35 Z S 500 13 CALL LBL 1 14 CYCL DEF 1.0 PECKING 15 CYCL DEF 1.1 SET UP -2 16 CYCL DEF 1.2 DEPTH -25 17 CYCL DEF 1.3 PECKG -6 18 CYCL DEF 1.4 DWELL 0 19 CYCL DEF 1.5 F50 20 TOOL CALL 25 Z S 1000 21 CALL LBL 1 22 CYCL DEF 2.0 TAPPING 23 CYCL DEF 2.1 SET UP -2 24 CYCL DEF 2.2 DEPTH -15 25 CYCL DEF 2.3 DWELL 0 26 CYCL DEF 2.4 FlOO 27 TOOL CALL 30 Z S 250 28 CALL LBL 1 29 L Z-t50 ROFMAX M2
Countersink
Pecking
Tapping
Subprogram
Subprogram
Within a Program Hole pattern with several tools
1
2
Call subprogram
Retract spindle
30 LBL 1 31 L X+15 Y+lO ROFMAX M3 32 L Z-i-2 FMAX 33 CALL LBL 2 34 L X+45 Y+60 FMAX 35 CALL LBL 2 36 L X+75 Y+lO FMAX 37 CALL LBL 2 38 LBL 0 39 LBL 2 40 CYCL CALL 41 L IX+20 42 L IY+20 43 L IX-20 44 LBL 0
1
axis; jump to start of’program
Approach bore group 0 Traverse to safety clearance Call subprogram 2 Approach bore group 0 Approach
bore group 0
Cycle call (countersink,
pecking,
tapping)
M99 M99 M99 M99 = blockwise
45 END PGM 183MM
Programming
Modes
cycle call
I
Page P 63
Task
Jumping
Within a Program
Example:
Horizontal
geometric
form
The adjacent geometric contour is to be machined from a cuboid with an end mill which is to be continuously advanced in the Y direction by a program section repeat. The contour is divided into two halves along the line of symmetry to simplify the working procedure. The contour is to be machined upwards. In addition to the adjacent length is specified with: Y = 100 mm.
Program procedure
dimensions,
the cuboid
The adjacent figure schematically shows the cutter center path and the associated program blocks. The entire contour is divided into a “left” and “right” half and is machined in the two program section repeats LBL 1 and LBL 2. The program runs without radius compensation, i.e. the cutter center path is programmed. To obtain the desired contour, the tool radius must be subtracted on the left side and added on the right side (all X coordinates). 0 1 2 3 4 5
BEGIN PGM BLK FORM BLK FORM TOOL DEF TOOL CALL L X-20 Y-l
90007685 MM 0.1 Z X+0 Y+O Z-70 0.2 X+100 Y+lOO Z+O 1 L+O R+lO 1 Z SlOOO FMAX M3
Program section repeat 1 Approach
starting
lnfeed in Y axis Program section
point for “left side”
is executed
41 times
Retract spindle axis Approach starting point for “right side”
1.5 L Z+20 FMAX 16 L X+120 Y-l Program section repeat 2
lnfeed in Y axis Program section 26 L Z+20 FMAX M2 27 END PGM 90007685
is executed
Retract spindle axis, jump to start of program
MM Programming
Modes
41 times
Program
Jumping another program
to main
Calls
You can call another program which is stored in the control from any machining This allows you to create your own fixed cycles with parametric programming. Program the call with a “PGM CALL” key.
program
Calling criteria
The program to be called cannot contain MO2 or M30. In the called program, do not program back to the original program (creates an endless loop). Only one BLK FORM can exist.
Process
The control executes main program 1 until CALL PGM 28. Then a jump is made to main program 28. Main program end.
28 is executed
from beginning
a jump
/I
to BEGIN
Then a return jump is made to main program 1. Main program 1 is resumed with the block following the program call.
87 CALL
PGM
1 MM
1 BEGIN 0 m;m
PGM 28 MM
70 END
PGM 28 MM
0
PGM 28
0
0
0 END PGM 1 MM
Example
1 Call with a separate
CALL PGM 10 Example
2
line
The program to be called can also be specified with a cycle definition. The call then functions like a fixed cycle.
Call e.g. via M99 (see Other Cycles, Cycle 12)
CYCL DEF 12.0PGM CALL CYCL DEF 12.1PGM 20
HEIDENHAIN TNC 2500B
prograrn
Programming
Modes
Page P 65
0
Standard Cycles Introduction, Overview
Standard
cycles
To facilitate programming, frequently recurring machining sequences (drilling and milling jobs) and certain coordinate transformations are preprogrammed as standard cycles.
Machine builder cycles
The machine manufacturer can own programs as cycles in the cycles can be called under the 68 to 99. the machine more information.
Selecting a cycle
After pressing the “CYCLE DEF” key, data for the cycles shown to the right can be entered and also any programmed cycles can be selected. The desired cycle can be selected with the vertical cursor keys or with “GOT0 0”.
Defining a cycle
also store his control. These cycle numbers manufacturer for
Cycle
1 2 17 3 4 5 12
Pecking Tapping Rigid tapping Slot milling Pocket milling Circular pocket Program call
: 0 0 0 0 0
14 15 6 16
Contour geometry Pilot drilling Rough-out Contour milling
0 0 0
Cycles must be called after moving the tool to the appropriate position - only then will the last defined cycle be executed.
No.
Cycle
There are three ways to call a cycle:
i 10
The cycle definitions can be entered after pressing “ENT”.
in the dialog i E ‘El s iT
Calling a fixed cycle
l
With a separate
M99
l
Via the miscellaneous function M99. “CYCL CALL” and M99 are only effective blockwise and must therefore be reprogrammed for every execution.
M89
l
Page P 66
CYCL CALL block
Via the miscellaneous
M89 M89 Coordinate transformations
Effective after call
No.
function
11
QE zi
M89 (depending
9
on machine
transformations
Dwell time
parameters)
and the dwell time are effective immediately
Programming
Modes
0
Datum shift Mirror image Rotating the coordinate system Scaling
is effective modally, i.e. the last programmed cycle is called at every subsequent IS cancelled or cleared by M99 or by CYCL CALL.
Coordinate changed.
Effective immediately
positioning
and rernain effective until
block.
Fixed Cycles Preparatory Prerequisites
Dimensions
measures
The following must be programmed cycle call (e.g. M99).
before a
l
Tool call: to specify the spindle spindle speed
axis and the
l
Positioning block to the starting position in the plane with miscellaneous function for specifying the rotating direction of the spindle
l
Cycle definition
l
Posittoning
(CYCL DEF)
the spindle
axis
In the cycle definition, dimensions for the tool axes are to be entered incrementally, referenced to the tool position at cycle call. The “incremental” key does not have to be pressed! All infeeds must have the same sign (usually negative).
Selecting a cycle
Initiate the dialog
Search for the cycle by name: Select the desired cycle
CYCL DEF 1 PECKING
Confirm
cycle.
01
CYCL DEF 1 PECKING
0
Select the cycle Iby its number: Enter the cycle number with “GOT0 0” Confirm
Entering values
cycle.
Enter all values as requested and confirm entry with “ENT”. You must respond to every dialog query by entering a value!
Programming
Modes
Page P 67
Fixed Cycles Cycle 1: Pecking
The cycle
Input
A hole is drilled with multiple infeeds, lowed by a complete retraction.
data
each fol-
lnfeed value signs: - for negative working direction + for positive working direction
l l
All infeeds
must have the same sign.
Setup clearance (starting position)
A: distance between tool tip and workpiece surface.
Total hole depth B: distance piece surface and the bottom the drill taper). Pecking
depth
between the workof the hole (tip of
C: the infeed per cut
Dwell time: the time the tool remains tom of the bore hole for chip breaking.
at the bot-
Feed rate F: traversing speed of the tool during infeed in mm per minute.
l
l
l
l
l
l
Advanced stop distance
Drilling and retraction are performed alternately until the programed total hole depth is reached. After the dwell time at the hole bottom, the tool is retracted to the starting position in rapid traverse.
The advanced stop distance computed by the control: l
l
Page P 68
The tool must be positioned to the setup clearance with a separate block, before the cycle call. The tool drills from the starting position to the first pecking depth at the programmed feed rate. After reaching the first pecking depth the tool is retracted in rapid traverse FMAX to the starting position and advanced again to the first pecking depth, minus the advanced stop distance t. The tool then advances by another infeed at the programmed feed rate, returns again to the starting position etc.
t is automatically
For a total hole depth up to 30 mm: t = 0.6 mm; For a total hole depth over 30 mm: t = total hole depth/50, whereby the maximum advanced stop distance is limited to t,,, = 7 mm.
Programming
Modes
Fixed Cycles Cycle 1: Pecking
Defining the cycle
Operating
mode
Initiate the dialog
CYCL DEF 1 PECKING
Select the cycle.
I
I
q
SET UP CLEARANCE ?
Specify setup clearance Enter the sign correctly (normally positive) Confirm
TOTAL HOLE DEPTH ?
cl
entry
Specify hole depth Enter the sign correctly (normally negative) Confirm
u
PECKING DEPTH ?
Specify pecking
cl
cl
HEIDENHAIN TNC 25008
I
total hole depth
Programming
and pecking
Modes
of the
entry
Enter the feed rate for pecking Confirm
The signs for setup clearance,
entry
Enter the dwell time at the bottom hole (zero for no dwell time) Confirm
FEED RATE ? F =
depth
Enter the sign correctly (normally negative) Confirm
DWELL TIME IN SECS. ?
entry
entry
depth are all the same (normally
I
negative)!
Page P 69
Fixed Cycles Cycle 1: Pecking
Remarks
l
The total hole depth can be programmed equal to the pecking depth. The tool then traverses in one work step to the programmed depth (e.g. for centering).
l
The the will the
l
If the specified pecking depth is greater than the total hole depth, drilling is only performed to the programmed total hole depth.
pecking depth need not be a multiple of total depth. In the last work step, the tool only be advanced the remaining distance to programmed hole depth.
The above also applies to other fixed cycles.
Example
Drill 2 holes with the standard
pecking
TOOL DEF 1 L+O R3 TOOL CALL Z S200 The definition
CYCL CYCL CYCL CYCL CYCL CYCL
DEF DEF DEF DEF DEF DEF
occupies
r
cycle.
Tool definition and call 6 program
1.0 PECKING 1.1 SET UP -2 1.2 DEPTH -20 1.3 PECKG -10 1.4 DWELL 2 1.5 F 80
blocks Setup clearance Total depth Pecking depth Dwell time Feed rate
L
Page P 70
L X+20 Y+30 ROFMAX M3
Pilot positioning,
L Z+2 FMAX M99
lSt hole, cycle call
L X+80 Y+50 FMAX M99
2”d hole, cycle call
Programming
spindle
Modes
on
HEIDENHAIN TNC 2500B
Fixed Cycles Cycle 2: Tapping with floating tap holder
The cycle
The thread is cut in one operation. A floating tap holder is required for tapping. It must compensate for the tolerances between the feed rate, speed and the tool geometry as well as spindle run out after the position is reached. Spindle speed override is inactive after a cycle call; the feed rate override is only active over a limited range (set by the machine manufacturer via machine parameters).
Input
data
Setup clearance A: distance between tool tip (starting position) and workpiece surface (standard value: approx. 4 x thread pitch). The preceding sign depends on the working direction. Total hole depth B (= thread length): distance between workpiece surface and end of thread. The signs for setup clearance and total hole depth are the same (usually negative). Dwell time: enter either the time between tool, or 0. This time is machine-dependent.
Feed rate/ thread pitch
Feed rate F: traversing Determining the required F=SxP F: feed rate S: spindle speed P: thread pitch
Y///l///d
reversing
speed of the tool during
the direction
of spindle
rotation
and retracting
tapping.
feed rate:
The thread pitch is determined indirectly of the cycle (see “Cutting data”).
by the spindle
speed specified
in the tool call and the feed rate
Once the tool has reached the total hole depth, the direction of spindle rotation is reversed within a time period set by machine parameters. At the end of the programmed dwell time, the tool is retracted to the starting position. The spindle direction is reversed again in the retracted position. Input
Analogous
to “Pecking”.
Example
Tap an M6 hole with 0.75 mm pitch at 100 rpm.
TOOL DEF 1 L+O R3 TOOL CALL 1 Z SlOO The definition
occupies
Tool definition and call 5 program
blocks.
CYCL DEF 2.0 TAPPING SET UP -3 Setup clearance DEPTH -20 Thread depth Dwell time DWELL 0.4 F 15 Feed rate L X+50 Y+20 ROFMAX M3 Pilot positioning, L Z+3 FMAX M99 Cycle call
HEIDENHAIN TNC 25008
the
Programming
spindle
Modes
right
Page P 71
Fixed Cycles Cycle 17: Rigid tapping The cycle
Threads are cut without a floating tap holder in one or - if necessary - several es (example: removing chips in a blind hole). Rigid tapping offers the following advantages over tapping using a floating tap holder: l Higher machining speeds possible l Repeated tapping of the same thread; repetitions are made possible by means of a spindle orientation referenced to the 0’ positron during cycle call l Simpler input data l Increased usable traverse range of the spindle axis
Input
data
Setup clearance (starting position) ing sign depends
A: distance between tool tip and workpiece surface. Precedon the working direction.
Thread depth B: distance between workpiece surface and end of thread. The signs for setup clearance and the thread depth are always the same (usually negative). Pitch C: thread pitch. The preceding pitch + = right-hand thread pitch - = left-hand thread
sign differentiates
between
right-hand
and left-hand
threads
Feed rate
The control calculates the feed rate F from the active spindle speed S and the pitch P (F = S x P). If spindle speed override is activated during tapping, the feed rate is automatically adjusted.
Input
Similar to the pecking
Example
Producing
a right-hand
cycle (cycle 1)
M6 thread
with 0.75 mm pitch at 100 rpm:
TOOL DEF 1 L+O R3 TOOL CALL 1 Z SlOO The definition
CYCL CYCL CYCL CYCL
DEF DEF DEF DEF
occupies
4 program
blocks
17.0RIGID TAPPING 17.1 SET UP -10 17.2DEPTH -30 17.3 PITCH +0.75
The control and the machine rigid tapping.
Page P 72
Tool definition Tool call
Setup clearance Thread depth Thread pitch
must be specially
Programming
prepared
Modes
by the machine
manufacturer
to enable
HEIDENHAIN TNC 25008
Fixed Cycles Cycle 3: Slot milling
The cycle
The slot milling cycle is a combined finishing cycle.
roughing/
The slot is parallel to one axis of the current coordinate system (rotation with cycle 10, if desired). Tool required
The cycle requires a center-cut end mill. The cutter diameter must be slightly smaller than the slot width.
Input
Setup clearance (starting position)
data
A: distance between tool tip and workpiece surface.
Milling depth B: (= slot depth): distance between work surface and bottom of slot. Pecking depth C: penetrating tool into the workpiece.
distance
of the
The signs for setup clearance, milling depth and pecking depth are all the same (usually negative).
r Feed rate for pecking: tool during penetration.
traversing
speed of the
IS’ side length D: slot length (finished size). Sign depends on the first direction of cut parallel to the longitudinal axis of the slot. 2”d side length E: slot width, the tool radius (finished size). Feed rate: traversing machining plane.
Roughing process
l
l
l
Finishing process
maximum
4 times
speed of the tool in the
The tool penetrates the work from the starting position. Subsequent milling is in the longitudinal direction of the slot. After downfeed at the end of the slot, milling is in the opposite direction. The procedure is repeated until the programmed milling depth is reached.
The control advances the tool in a semicircle at the bottom of the slot by the remaining finishing depth and down-cut mills the contour (with M3) The tool is subsequently retracted in rapid traverse to the setup clearance. If the number of infeeds was odd, the cutter returns along the slot at the setup clearance to the starting position in the main plane.
Programming
Modes
I
Page P 73
Fixed Cycles Cycle 3: Slot milling A horizontal slot with length 50 mm and width 10 mm as well as a vertical slot with length 80 mm and width 10 mm are to be milled.
Example
0 BEGIN PGM SLOTS MM 1 BLK FORM 0.1 Z X+0 Y-t0 Z-40 2 BLK FORM 0.2 X+100 Y+lOO Z+O
3 TOOL DEF 1 L+O R+4 4 TOOL CALL 1 Z S1800 5 L Z+50 ROFMAX
Cycle definition
Starting
position
Page P 74
6 CYCL DEF 3.0 SLOT MILLING 7 CYCL DEF 3.1 SET UP -2 8 CYCL DEF 3.2 DEPTH -20 9 CYCL DEF 3.3 PECKG -5 F80 10 CYCL DEF 3.4 X-50 11 CYCL DEF 3.5 Y+10 12 CYCL DEF 3.6 F120
Definition of the horizontal slot Setup clearance Milling depth Pecking depth, feed rate for pecking Length of slot and first milling direction Slot width Feed rate
13 L X+76 Y+15 ROFMAX M3 14 L Z+2 ROFlOOOM99
Approach starting position without compensation, taking the tool radius into in the longitudinal direction of the slot; spindle on Pilot positioning in Z, cycle call
15 CYCL DEF 3.0 SLOT MILLING 16 CYCL DEF 3.1 SET UP -2 17 CYCL DEF 3.2 DEPTH -20 18 CYCL DEF 3.3 PECKG -5 F80 19 CYCL DEF 3.4 Y-t80 20 CYCL DEF 3.5 X+10 21 CYCL DEF 3.6 F120 22 L X+20 Y+14 ROFMAX M99
Definition of the vertical slot Setup clearance Milling depth Pecking depth, feed rate for pecking Slot length and first milling direction Slot width Feed rate Approach starting position, cycle call
23 L Z+50 ROFMAX M2 24 END PGM SLOTS MM
Retract in tool axis End of program
Programming
Modes
(-)
(+)
HEIDENHAIN TNC 2500B
Fixed Cycles Cycle 4: Rectangular The cycle
The rectangular cycle.
Tool required
The cycle requires a center-cut drilling at the pocket center.
pocket milling
milling cycle is a roughing
end mill, or pilot
The tool determines the radius at the pocket corners. There is no circular movement in the pocket corners. Position
Input
The pocket sides are parallel to the coordinate system axis; the coordinate system may have to be rotated (see Cycle 10: Rotating the coordinate system).
data
Setup clearance A: distance between tool tip (starting position) and workpiece surface. Milling depth B (= pocket depth): distance between workpiece surface and bottom of pocket. Pecking depth C: amount by which the tool penetrates the workpiece. The signs for setup clearance, milling depth and pecking depth are all the same (usually negative). Feed rate for pecking F,: traversing speed of the tool at penetration. lSt side length D: pocket length parallel to the first main axis of the machining plane. The sign is always positive. 2”d side length E: pocket width; the sign is always positive. Feed rate F2: traversing speed of the tool in the machining plane. Direction Climb DR+:
of the milling
path:
milling (down cut) counterclockwise, down-cut with M3
Conventional milling (up cut) DR-: clockwise, up-cut milling
FMAX
milling
100
with M3
Starting position
The starting position S (pocket center) must be approached without radius compensation in a preceding positioning block.
Process
l
l
The tool penetrates the work from the starting position (pocket center). The cutter then follows the programmed path at feed rate F2.
The starting direction of the cutter is the positive axis direction of the longer side, i.e. if this longer side is parallel to the X axis, the cutter starts in the positive X direction. The cutter always starts in the positive Y direction on square pockets.
HEIDENHAIN TNC 2500B
I
Programming
Modes
I
Page P 75
The milling direction depends on the programming (here, DR+). The maximum stepover is k. The process is repeated until the programmed milling depth is reached. On completion, the tool is withdrawn to the start in.g position.
Stepover k is computed by the control to the following formula:
according
k=FxR k: stepover F: the overlap factor specified by the machine manufacturer (depends upon a machine parameter, see index General Information, MOD Functions, parameters) R: cutter radius
55 + s 15
80 100
;;1.
TOOL DEF 1 L+O R5 TOOL CALL 1 Z S200
Example
4.0 POCKET MILLING 4.1 SET UP -2 4.2 DEPTH -30 4.3 PECKG -10 F 80 CYCL DEF 4.4 X+80 CYCL DEF 4.5 Y+40 CYCL DEF 4.6 F 100 DR+
The definition occupies 7 program blocks Setup clearance Milling depth Pecking depth Feed rate for pecking lSt side length of the pock.et 2”d side length of the pocket Feed rate and rotating dirlection of the cutter path
L X+60 Y+35 RO FMAX M3
Pilot positioning spindle on
in X, Y,
L Z+2 FMAX M99
Pilot positioning cycle call
in Z,
CYCL CYCL CYCL CYCL
Page P 76
DEF DEF DEF DEF
Programming
Modes
HEIDENHAIN TNC 2500B
Fixed Cycles Cycle 5: Circular pocket milling The cycle
The circular cycle.
Tool required
The cycle requires a center-cut end mill or pilot drilling at the pocket center S.
Input
Setup clearance A: distance between tool tip (starting position) and workpiece surface. Milling depth B (= pocket depth): distance between workpiece surface and bottom of pocket. Pecking depth C: amount by which the tool penetrates the workpiece.
data
pocket milling
cycle is a roughing
The signs for setup clearance, milling depth and pecking depth are all the same (usually negative). Feed rate for pecking F,: traversing speed of the tool at penetration. Circle radius R: radius of the circular pocket. Feed rate Fp: traversing speed of the tool in the machining plane. Direction of the milling path: Climb milling (down cut) DR+: counterclockwise, down-cut with M3 Conventional milling (up cut) DR-: clockwise, up-cut milling
milling
with M3
Starting position
The starting position S (pocket center) must be approached without radius compensation in a preceding positioning block.
Process
l
The tool penetrates the work from the starting position (pocket center) at the “feed rate for pecking”.
l
The cutter then follows the programmed spiral path at feed rate F2. The direction of the path depends upon the programming (here, DR+).
The starting l l l
direction
of the cutter is for the
IF2
XY plane the Y-t direction, ZX plane the X+ direction, YZ plane the Z+ direction.
The maximum stepover is the value k (see Rectangular Pocket Milling cycle). The process is repeated until the programmed milling depth is reached. When milling is completed, to the starting position.
the tool is withdrawn
Programming
Modes
I
Page P 77
Fixed Cycles Cycle 5: Circular pocket milling A circular pocket with radius 35 mm and depth 20 mm is to be milled at position X+60 Y+50.
Example
TOOL DEF 1 L+O RlO TOOL CALL 1 Z S200
CYCL CYCL CYCL CYCL
Page P78
DEF DEF DEF DEF
5.0 ClRCULAR POCKET 5.1 SET UP -2 5.2 DEPTH -20 5.3 PECKG -6 F 80 CYCL DEF 5.4 RADIUS 35 CYCL DEF 5.5 FlOO DR-
Setup clearance Milling depth Pecking depth Feed rate for pecking Circle radius Milling feed rate and direction
L X+60 Y+50 ROFMAX MO3
Pilot positioning
in X and Y
L Z-t2 FMAX M99
Starting
in Z, cycle call
Programming
Modes
position
of the cutter path
HEIDENHAIN TNC 25006
SL Cycles Fundamentals
CYCL DEF 14 CONTOUR GEOMETRY
The group of cycles that we categorize as SL cycles is designed for efficient programming and milling of contours with one or more tools. The contour can be composed of several overlapping subcontours which are defined in separate subprograms.
i CYCL DEF 15 PILOT DRILLING
The term SL cycles is derived from the characteristic Subcontour List of cycle 14: The control superimposes the separate contours to form a single whole. The programmer need not calculate the points of intersection!
CYCL DEF 6 ROUGH-OUT
The subcontours are defined in the form of subprograms Cycle 14, Contour geometry, is more or less a list of the corresponding label numbers and can store up to 12 islands or pockets. Each subcontour is programmed as a closed pattern.
CYCL DEF 16 CONTOUR MILLING
To be able to work with several tools, the machining task is described data or feed values; those are entered in the individual cycles: Cycle Cycle Cycle
in cycle 14 ltiithout
tool-specific
15 Pilot drilling (if required) 6 Rough-out 16 Contour milling (finishing)
M2 Subprograms of the individual subcontours Scheme of a program with SL cycles
Each subprogram must specify whether RL or RR radius compensation applies and in which direction the contour is to be machined. The control deduces from these data whether the specific subprogram describes a pocket or an island. The control The control
recognizes recognizes
a pocket if the tool path lies inside the contour. an island if the tool path lies outside the contour.
Please be sure to run a graphic simulation was computed by the control as desired.
before executing
All coordinate
in programming
transformations
are allowed
Not all of the SL cycles are always
/
to see whether
the contour
the contours.
required
For easier familiarization, the following examples progressively to the full range of functions.
HEIDENHAIN l-NC 2500B
a program
Programming
begin with only the rough-out
Modes
cycle and then proceed
I
Page P 79
SL Cycles Cycle 14: Contour geometry Cycle 6: Rough-out The label numbers (subprograms) of the subcontours are specified in cycle 14. Up to 12 label numbers can be entered. The TNC computes the intersections of the resulting contour from the subcontours. Cycle 14 is immediately effective after definition (this cycle cannot be called). The list of subcontours in cycle 14 should begin with a pocket.
Cycle 14 Contour geometry
PA cl D
A
H,
B =
B
I’OCketS
C, D = Islands
5 CYCL DEF 14.0 CONTOUR GEOM.
Example
6 CYCL DEF 14.1 CONTOUR LABEL 11/ 12/ 13
The definition occupies up to 3 program blocks 11, 12 and 13 define the The subprograms complete contour in the example.
Cycle 6 Rough-out
Cycle 6 specifies the cutting path and partitioning. It must be called, and can be executed separately.
Tool required
Cycle 6 requires a center-cut end mill (IS0 1641) if no pilot drilling e&y jump over contours and plunge to the milling depth.
Input
Setup clearance (A), milling depth (B), pecking depth (C) are incremental with the same signs (usually negative).
data
Feed rate for pecking: tool at penetration (Fl).
traversing
Finishing allowance: allowance ing plane (positive value) (D).
speed of the in the machin-
Rough-out angle: roughing out direction relative to the reference axis of the machining plane.
is desired
and if the tool must repeat-
1
FMAX
a
Fl
a
F2
Feed rate: traversing speed of the tool in the machining plane (F2). The tool must be positioned at the setup clearance (A) before the cycle call.
16 CYCL DEF 6.0 ROUGH-OUT 17 CYCL DEF 6.1 SET UP -2 DEPTH -20 18 CYCL DEF 6.2 PECKG -10 ALLOW +l F40 19 CYCL DEF 6.3 ANGLE +0 F60
Example
Page P 80
Programming
Setup clearance Milling depth Pecking depth Feed rate for penetration and finishing Rough-out angle Feed rate in the machining plane
Modes
allowance
HEIDENHAIN TNC 2500B
SL Cycles Cycle 6: Rough-out
Process
The tool IS automatrcally positioned over the first penetration point (with finishing allowance). It may be necessary to pilot position the tool before the call to prevent collision. The tool penetrates at the feed rate for pecking.
Milling the contour
After reaching the first pecking depth, the tool mills the first subcontour at the programmed milling feed rate with the finishing allowance. At the penetration point, the tool is advanced to the next pecking depth. This process is repeated until the programmed milling depth is attained. Further subcontours are milled in the same manner.
Clearing the surface
The surface is then roughed out. The feed direction corresponds to the programmed rough-out angle and can be set, so the resulting cuts are as long as possible with few cutting movements. The stepover equals the tool radius. Clearing out can be performed with multiple downfeeds. The tool is retracted end of the cycle.
to the setup clearance
-D!l
‘d
FMAX
at the
D = Finishing allowance E = Stepover a = Rough-out angle Sequence contour milling/ surface machining
Climb/ conventional
A machine parameter determines whether the contour is milled first and then surface machined or vice versa. In the same way is specified whether contour milling or roughing out is performed continuously over all infeeds, or for each infeed in the specified sequence.
a = O"
A machine parameter also determines whether the contour is milled conventionally or by climb cutting (see index General Information, MOD Functions, parameter MP 7420).
a=90°
-.-. -‘‘LD.-.-
-ld 7, 2
I
Begin with contour milling
HEIDENHAIN TNC 2500B
I
Programming
Modes
Begin with surface cl’earing
I
Page P 81
SL Cycles Roughing-out
a rectangular
Task
Interior machining 5 mm
PGM 7206
0 BEGIN PGM 1 BLK FORM 2 BLK FORM 3 TOOL DEF 4 TOOL CALL 5 L Z+lOO RO
7206 MM 0.1 Z X+0 Y+O Z-40 0.2 X+100 Y+lOO Z+O 1 L-t0 R+5 1 Z S 111 FMAX MO3
6 CYCL 7 CYCL 8 CYCL 9 CYCL 10 CYCL 11 CYCL
14.0 CONTOUR GEOM. 14.1 CONTOUR LABEL 1 6.0 ROUGH-OUT 6.1 SET UP -2 DEPTH -20 6.2 PECKG -8 FlOO ALLOW 6.3 ANGLE +0 F500
DEF DEF DEF DEF DEF DEF
12 L X+40
I
with a center-cut
end mill, tool radius
“List” of contour subprograms Definition for “rough-out” +0
Pilot positioning,
M99
MO2
creates a contour
corners,
Blank min. point Blank max. point Tool definition Tool call
cycle call
Retract, return jump to start of program Contour
LBL 1 L X+40 Y+60 RL L X+15 RND R12 L Y+20 RND R12 L x+70 RND R12 L Y+60 RND R12 L X+40 LBL 0 END PGM 7206 MM
PGM 7207
Page P 82
pocket with rounded
Y-t50 Z+2 RO FMAX
13 L Z-t20 FMAX 14 15 16 17 18 19 20 21 22 23 24 25 26
of rectangular
subprogram
From radius compensation RL and counterclockwise machining direction, the control deduces a pocket.
island with identical
Programming
dimensrons.
Modes
I
HEIDENHAIN TNC 2500B
SL Cycles Roughing-out
Exterior 5 mm.
Task
machining
a rectangular
of rectangular
island with rounded
island
corners,
with a center-cut
end mill, tool radius
L
0 BEGIN PGM 7207 MM 1 BLK FORM 0.1 Z X+0 Y+O Z-40 2 BLK FORM 0.2 X+100 Y+lOO Z+O 3 TOOL DEF 1 L+O R+5 4 TOOL CALL 1 Z S 111 5 L Z+lOO ROFMAX MO3 6 CYCL DEF 14.0 CONTOUR GEOM. 7 CYCL DEF 14.1 CONTOUR LABEL 2 / 1 8 CYCL DEF 6.0 ROUGH-OUT 9 CYCL DEF 6.1 SET UP -2 DEPTH -20 10 CYCL DEF 6.2 PECKG -8 FlOO ALLOW +0 11 CYCL DEF 6.3 ANGLE +0 F500 12 L X+40 Y+50 Z+2 ROFMAX M99 13 L Z+20 FMAX MO2 14 LBL 1 15 L X+40 Y+60 RR 16 L X+15 17 RND R12 18 L Y+20 19 RND R12 20 L x+70 21 RND R12 22 L Y+60 23 RND R12 24 L X+40 25 LBL 0 26 LBL 2 27 L X-5 Y-5 RL 28 L x+105 29 L Y+105 30 L x-5 31 L Y-5 32 LBL 0 33 END PGM 7207MM
PGM 7207
PGM 7206
HEIDENHAIN TNC 2500B
creates a contour
pocket with identical
Programming
Modes
Blank Tool
“List” of contour subprograms Definition for “rough-out”
Pilot positioning,
(sequence!)
cycle call
Retract, return jump to start of program From radius compensation RR and the counterclockwise machining direction, the control deduces an island.
Auxiliary pocket to externallly limit the machined surface
dimensions.
Page P 83
SL Cycles Overlaps Overlapping pockets and islands
Pockets and Islands can be overlapped (superimposed). The resulting contour is computed by the TNC. The area of a pocket can for example be enlarged by an another pocket or reduced island.
Starting position
by an
Machining begins at the starting position of the first contour label of cycle 14. The starting positions should be located as far as possible from the superimposed contours. If the subcontours are always defined in the same working direction, then for example with a positive working direction pockets can be easily recognized by the ‘XL” compensation, and islands by the “RR”.
Page P 84
Programming
Modes
SL Cycles Overlapping
pockets
Task
Interior machining
PGM 7208
0 BEGIN PGM 7208MM 1 BLK FORM 0.1 Z X+0 Y+O Z-40 2 BLK FORM 0.2 X+100 Y+lOO Z+O 3 TOOL DEF 2 L+O R+3 4 TOOL CALL 2 Z S 100 5 L Z+200 ROFMAX 6 L X+50 Y+50 FMAX MO3
of overlapping
pockets
with a center-cut
end mill, tool radius 3 mm.
Blank, tool axis Tool
Pilot position
X and Y, spindle
on
7 CYCL DEF 14.0 CONTOUR GEOM. 8 CYCL DEF 14.1 CONTOUR LABEL 1/ 2
“List” of contour
subprograms
9 CYCL DEF 6.0 ROUGH-OUT 10 CYCL DEF 6.1 SET UP -2 DEPTH -10 11 CYCL DEF 6.2 PECKG -10 F500 ALLOW +0 12 CYCL DEF 6.3 ANGLE +0 F500
Definition
13 L Z+2 ROFMAX M99
Setup clearance
14 L Z+200 ROFMAX MO2
Retract return jump to start of program
for “rough-out”
Z, cycle call
Machining begins with the first contour label defined in block 8! The first pocket must begin outside the second pocket.
Note
HEIDENHAIN TNC 2500B
Programming Modes
Page P85
SL Cycles Overlapping
Points of intersection
pockets
The pocket elements A and B overlap each other. They are programmed as full circles. Since the control automatically computes the points of intersection Sl and S2, these points need not be programmed.
1.5LBL 1 16 L X+10 Y+50 RL 17 cc x+35 Y+50 18 C X+10 Y+50 DR+ 19 LBL 0
A
Left pocket
B
Right pocket
1
20 LBL 2 21 L X+90 Y+50 RL
22 CCX+65 Y+50 23 CX+9OY+50 DR+ 24 LBL 0
25 END PGM 7208 MM Depending on the control or the surface.
Execution
Contour
Page P 86
edge is machined
setup (machine
parameters),
first
machining
begins
Surface is machined
Programming
Modes
either with the contour
first
HEIDENHAIN TNC 25008
edge
SL Cycles Overlapping “Sum”
area
pockets
Both areas (element A and element B) along with the common overlapping area are to be machined. l A and B must be pockets. 0 the first pocket (in cycle 14) must begin outside the second.
16 LBL 1 17 L X+10 Y+50 RL
18 ccx+35 Y+50 19 C X+10 Y+50 DR+ 20 LBL 0 21 LBL 2
22 L X+90 Y+50 RL 23 CCX+65 Y+50 24 CX+9OY+50 DR+
I
1
--
25 LBL 0 0 A and 0 B are the starting contour labels. “Difference” area
Area A is to be machined overlapped by B:
without
points of the
the portion
A must be a pocket and B an island. A must begin outside of B.
l l
15 LBL 1 16 L X+10 Y-t50 RL 17 cc x+35 Y+50 18 C X+10 Y+50 DR+ 19 LBL 0 20 LBL 2 21 L X+90 Y+50 RR
22 CC X+65 Y-t50 23 CX+9OY+50 DR+ 24 LBL 0
An Island can also reduce several pocket areas. The starting points of the pocket contours must all be outside the island.
“Intersecting” area
Only the area overlapped is to be machined. l l
commonly
by A and B
A and B must be pockets. A must begin inside of B.
15 LBL 1 16 L X+60 Y+50 RL 17 cc x+35 Y+50 18 C X+60 Y+50 DR+ 19 LBL 0 20 LBL 2 21 L X+90 Y+50 RL
i
22 CCX+65 Y+50 23 CX+9OY+50 DR+ 24 LBL 0
HEIDENHAIN TNC 25006
Programming
Modes
Page P 87
SL Cycles Overlapping
Expanding PGM 7208
“Sum”
area
islands
7 CYCL DEF 14.0 CONTOUR GEOM. 8 CYCL DEF 14.1 CONTOUR LABEL 1 / 2 / 5
An island always requires = pocket (here, LBL 5).
25 LBL 5 26 L X+5 Y+5 RL 27 L X+95 28 L Y+95 29 L X+5 30 L Y+5 31 LBL 0
A pocket can also reduce several island areas. This pocket must begin instde the first island. The starting points of the remaining intersected island contours must be outside the pocket.
an additional
outer limit
Both areas (element A and element B) along with the common overlapping area are to remain unmachined. l A and B must be islands. l The first island must begin outside the second.
16 LBL 1 17 L X+10 Y+50 RR 18 cc x+35 Y+50 19 C X+10 Y+50 DR+
20 LBL 0 21 LBL 2 22 L X+90 Y+50 RR F500
23 CCX+65 Y+50 24 CX+9OY+50 DR+ 25 LBL 0 “Difference” area
Area tion l A l A
0 A, 0 B are the starting
points of the subcontours.
A is to remain unmachined except that poroverlapped by B. must be an island and B a pocket. must begin outside of B.
15 LBL 1 16 L X+10 Y+50 RR 17 cc x+35 Y+50 18 C X+10 Y+50 DR+
19 LBL 0 20 LBL 2 21 L x+40 Y+50 RL
22 CC X+65 Y+50 23 CX+4OY+50 DR+ 24 LBL 0
“Intersecting” area
Only the area overlapped commonly remains unmachined. l A and B must be islands. l A must begin inside of B.
by A and B
15 LBL 1
16 L X+60 Y+50 RR 17 cc x+35 Y+50 18 C X+60 Y+50 DR+ 19 LBL 0 20 LBL 2 21 L X+90 Y+50 RR
22 CCX+65 Y+50 23 CX+9OY+50 DR+ 24 LBL 0
Page P 88
Programming
Modes
HEIDENHAIN TNC 25008
SL Cycles Overlapping
Task
Main 7209
pockets and islands
Interior machining of overlapping pockets and islands with a center-cut Islands are located within a pocket area.
PGM
0 BEGIN PGM 7209 MM 1 BLK FORM 0.1 Z X+0 Y+O Z-40 2 BLK FORM 0.2 X+100 Y+lOO Z+O 3 TOOL DEF 2 L+O R+3 4 CYCL DEF 14.0 CONTOUR GEOM. 5 CYCL DEF 14.1 CONTOUR LABEL 6 LBL 10 7TOOLCALLOZS0 8 L Z+20 RO FMAX 9 L X-20 Y-20 FMAX 10 LBL 0 11 STOP MO6 12 TOOL CALL 2 Z S 100 13 14 15 16 17 18 19 20
CYCL CYCL CYCL CYCL L Z-r-2 CYCL CALL L Z+20
PGM 7209
HEIDENHAIN TNC 2500B
1/ 2 / 3 / 4
DEF 6.0 ROUGH-OUT DEF 6.1 SET UP -2 DEPTH -10 DEF 6.2 PECKG -5 F500 ALLOW DEF 6.3 ANGLE +0 F500 RO FMAX CALL MO3 LBL 10 RO FMAX MO2 is an expansion
elements
+0
of PGM 7208: the interior
Programming
List of contour
end mill, tool radius 3 mm
Modes
islands are added
(subprograms
3 and 4)
Page P 89
SL Cycles Overlapping
pockets and islands
The entire contour is composed of the elements A and B, i.e. two overlapping pockets and C and D, i.e. two islands within these pockets.
Contour subprograms for PGM 7209
21 LBL 1 22 L X+35 Y+25 RL
1 I
23 CCX+35 Y+50 24 C X+35 Y+25 DR+ 25 LBL 0 26 LBL 2 27 L X+65 Y+25 RL
28 CC X+65 Y+50 29 CX+65 Y+25 DR+ 30 LBL 0 31 LBL 3 32 L X+35 Y-t42 RR 33 L x+43 34 L Y+58 35 L X+27 36 L Y+42 37 L x+35 38 LBL 0 39 LBL 4 40 L X+65 Y+42 RR 41 L x+73 42 L X+65 Y+58 43 L X+57 Y+42 ti 44 L X+65 45 LBL 0 46 END PGM 7209MM Execution
Machining
of the contour
A
Left pocket
B
Right pocket
I
edges
Square
D
Triangular
Surface
r
Programming
C
Modes
machining
island
island
(unfinished)
SL Cycles Cycle 15: Pilot drilling The cycle
Pilot drill the cutter infeed points at the starting points of the subcontours, compensated by the finishing allowance. For closed contour sequences resulting from multiple superimposed pockets and islands, the infeed point is the starting point of the first subcontour. This cycle must be called!
0 Cutter infeed point Input
data
The input values are identical to pecking; finishing allowance in addition.
enter a
Finishing allowance: allowance for drilling (positive value), effective in the working plane. The sum of the tool radius and the finishing allowance should be the same for pilot drilling and roughing-out.
y
0 R .
The tool must be at the setup clearance calling the cycle!
!
before
s
------T
D = Finishing allowance R = Tool radius Process
The tool is automatically positioned over the first infeed point, offset by the allowance. The tool may have to be pilot positioned to prevent collision! The drilling process is identical “pecking” (cycle 1).
to the fixed cycle
Subsequently, the tool is positioned over the second infeed point at the programmed setup clearance, and the drilling procedure is repeated.
Example
HEIDENHAIN TNC 2500B
18 CYCL DEF 15.0PILOT DRILL 19 CYCL DEF 15.1 SET UP -2 DEPTH -20 20 CYCL DEF 15.2PECKG -10 ALLOW +l F40
Programming
Setup clearance Drilling depth Pecking depth Feed rate for infeed and finishing
Modes
allowance Page P 91
SL Cycles Cycle 16: Contour milling The cycle
Cycle 16 “contour contour pocket.
milling”
is used for finishing
(finishing)
the
The cycle can also be generally used to mill contours made up of subcontours. This offers the following benefits: l contour intersections are computed, l collisions are avoided. Tool required
The cycle requires
a center cutting
tool.
The cycle must be called! The setup clearance A, milling depth B and pecking depth C are identical to pecking. The signs must be the same (normally negative).
Input
Feed rate for pecking: tool traversing speed at infeed (Fr). Rotating direction for contour milling: milling direction along the pocket contour (island contours: opposite milling direction). For the following directions, M3 means DR+: down-cut milling for pocket and island, DIG: up-cut milling for pocket and island. Feed rate: tool traversing speed in the machining plane ( F2).
data
The tool must be at the setup clearance to the cycle call.
a I
FMPX FI F2
-
(A) prior
The tool is automatically positioned over the first contour pornt. Beware of collisions with clamping devices! The tool then penetrates the workpiece at the programmed feed rate to the first pecking depth. After reaching the first pecking depth, the tool mills the first contour at the programmed feed rate in the specified rotating direction. At the infeed point, the tool is advanced to the next pecking depth. The procedure is repeated until the programmed milling depth is attained. The next subcontours are milled in the same manner.
Process
+
r y,
P = Programmed contour (pocket) D = Finishing allowance from cycle 6 rough-out
25 CYCL DEF 16.0 CONTOUR MILLG. 26 CYCL DEF 16.1 SET UP -2 DEPTH -20 27 CYCL DEF 16.2 PECKG -10 DR- F60 F40
Example
Page P 92
Programming
Setup clearance Milling depth Pecking depth Feed rate for infeed, milling direction feed rate in the working plane Modes
and
SL Cycles Machining with sever-al tools The follovving scheme Illustrates the applrcation of the SL cycles pilot drilling, rough-out, and coiltour milling in one program: List of contour subprograms
Cycle definition: CYCL DEF 14.0 CONTOUR No call!
GEOM.
Drilling Define and call the drill Cycle defrnrtron: CYCL DEF 15.0 PILOT Pilot positioning, Cycle call!
Rough-out
DRILL
Define and call the roughing ‘cutter Cycle definition. CYCL DEF 6.0 ROUGH-OUT Pilot positioning, Cycle call!
Finishing Define and call the finishing Cycle definition: CYCL DEF 16.0 CONTOUR Pilot positioning, Cycle call!
cutter MILLG.
STOP MO2 Contour subprograms
Subprograms
for the subcontours
Programming
Modles i
IPage P 93
.-
SL Cycles Machining with several tools
Task
Overlapping
pockets
Interior machining Main PGM
7210
with islands.
with pilot drilling,
roughing,
0 BEGIN PGM 7210 MM 1 BLK FORM 0.1 Z X+0 Y+O Z-40 2 BLK FORM 0.2 X+100 Y+lOO Z+O 3 TOOL DEF 1 L+O R+2.2 4 TOOL DEF 2 L+O R+3 5 TOOL DEF 3 L+O R+2.5 6 CYCL DEF 14.0 CONTOUR GEOM. 7 CYCL DEF 14.1 CONTOUR LABEL 8 LBL 10 9TOOLCALLOZS0 10 L Z+20 RO FMAX 11 L X-20 Y-20 RO FMAX 12 LBL 0
finishing.
Drill Roughing cutter Finishing cutter l/2/3/4 Tool change
13 14 15 16 17 18 19 20
STOP TOOL CYCL CYCL CYCL L Z+2 CYCL CALL
MO6 CALL 1 Z S 100 DEF 15.0 PILOT DRILL DEF 15.1 SET UP -2 DEPTH -20 DEF 15.2 PECKG -5 F500 ALLOW RO FMAX CALL MO3 LBL 10
21 22 23 24 25 26 27 28 29
STOP TOOL CYCL CYCL CYCL CYCL L Z+2 CYCL CALL
MO6 CALL 2 Z S 100 DEF 6.0 ROUGH-OUT DEF 6.1 SET UP -2 DEPTH -20 DEF 6.2 PECKG -5 FlOO ALLOW DEF 6.3 ANGLE +0 F500 RO FMAX CALL MO3 LBL 10
30 31 32 33 34 35 36 37 38
STOP MO6 TOOL CALL 3 Z S 500 CYCL DEF 16.0 CONTOUR MILLG. CYCL DEF 16.1 SET UP -2 DEPTH -20 CYCL DEF 16.2 PECKG -5 FlOO DR- F500 L Z+2 RO FMAX CYCL CALL MO3 CALL LBL 10 L Z+20 RO FMAX MO2
Pilot drilling +2
Roughing-out +2
Finishing
Retract and return jump
PGM 7210 builds upon PGM 7209: The main program The contour
Page P 94
section
subprograms
is expanded
by the cycle definitions
1 to 4 are identical
Programming
and calls for pilot drilling
to those in PGM 7209
Modes
and are to be added
and finishing after block 38.
HEIDENHAIN TNC 2500B
Coordinate Overview
The following mations: 7.0 8.0 10.0 11 .O
Original
Transformations
cycles serve for coordinate
transfor-
Datum shift Mirror image Rotation Scaling
With the help of coordinate transformations, a program section can be executed as a variant of the “original”. In the following descriptions, subprogram 1 is always the “original” subprogram (identified by the grey background).
datum shift
mirror image
rotatron
scaling
L Immediate activation
Duration activation
Every transformation
of
End of activation
A coordinate
is immediately
transformation
HEIDENHAIN TNC 2500B
remains
You can cancel coordinate l
Cycle definition
l
Programming parameters);
for basic condition
CYCL
program
or cancelled.
and aborting program with “GOT0 0”.
transformations
of miscellaneous
being called
valid until it is changed
Its effect is not impaired by interrupting gram is restarted from another location
0 Selecting another “single block”.
Error message
valid - without
in the following
run. This is also true when
the same pro-
ways:
(e.g.: scaling factor 1.0);
functions
MO2 or M30, or END PGM
with “PGM NR” in the operating
(depen’ding
mode program
on the machine
run “full sequence”
or
INCOMPLETE
This error message is displayed if a fixed cycle is called after defining a transformation but no machining cycle was defined. Otherwise the control executes the fixed cycle which was last defined.
Programming
Modes
Page P 95
Coordinate Transformations Cycle 7: Datum shift
The cycle
You can program a datum shift (also called a zero offset) to any point within a program. The manually set absolute workpiece datum remains unchanged. Thus, identical machining steps (e.g. subprograms) can be executed-at different positions on the workpiece without having to reenter the program section each time.
Combining with other coordinate transformations
If a datum shift is to be combined with other transformations, the shift has to be made before the other transformations!
Effect
For a datum shift definition, only the coordinates of the new datum are to be entered. An active datum shift is displayed in the status field. All coordinate inputs then refer to the new datum.
Incremental/ absolute
1
In the cycle definition the coordinates can be entered as absolute or incremental dimensions:
Cancelling the shift
l
Absolute: The coordinates of the new datum refer to the manually set workpiece datum. Refer to the center figure.
l
Incremental: The coordinates of the new datum refer to the last valid datum, which can itself be shifted. Refer to the lower figure.
A datum shift is cancelled by entering the datum shift XO/YO/ZO Only the “shifted” axes have to be entered. CYCL CYCL CYCL
DEF 7.0 DATUM DEF 7.1 X+0 DEF 7.2 Y+O
SHIFT Absolute
Incremental
Page P 96
Programming
Modes
datum
shift
datum shift
’
Coordinate Transformations Cycle 7: Datum shift Selecting the cycle
Entering the value
Initiate the dialog
or
CYCL
DEF 7 DATUM
SHIFT
?
SHIFT
Confirm
0
X
the selected
Select the axis. Enter the coordrnates the new datum.
0
cycle.
of
0Y :
The datum shift is possible 5 axes.
in all
When shifting in several axes, only confirm entry after entering all the coordinates!
Example
A machining a) referred
task is to be carried out as a subprogram to the set datum
b) additionally
referred
TOOL TOOL
DEF 1 LO R5 CALL 1 Z S200
CALL
LBL
CYCL CYCL CYCL
DEF 7.0 DATUM DEF 7.1 X+40 DEF 7.2 Y-t60
CALL
LBL
CYCL CYCL CYCL
DEF 7.0 DATUM DEF 7.1 X+0 DEF 7.2 Y+O
and
to the shifted datum X+4O/Y+60.
1
Without
1
L Z+50 FMAX
X+O/Y+O
datum
shift 0
SHIFT
With datum
shift 0
SHIFT Datum shift reset
MO2
Subprogram LBL 1 L X-10 L Z+2 L Z-5 L X+0 L Y+20 L x+25 L x+30 L Y+O L x+0 L X-10 L Z+2 LBL 0
HEIDENHAIN TNC 25008
Y-10 RO FMAX FMAX FlOO Y+O RL F500
MO3
Y+lS
Y-10 FMAX
RO
Programming
Modes
I
Page P 97
Coordinate Transformations Cycle 8: Mirror image
The cycle
The direction of an axis is reversed when it is mirrored. The sign is reversed for all coordrnates of this axis. The result is a mirror image of a progammed contour or of a hole pattern. Mirroring is only possible in the machining plane. You can mirror In one axis or both axes simultaneously.
Activation
The mirror image is immediately valid upon definition. The mirrored axes can be recognized by the highlighted axis designations In the status drsplay for the datum shift. Mirroring is performed at the current datum. The datum must therefore be shifted to the required position before a “mirror image” cycle definition.
Mirrored axes
Enter the axis or axes to be mirrored. The tool axis cannot be mirrored.
Climb and conventional milling
Mirroring one axis: The rotating direction is changed with the coordinate signs, so climb milling becomes conventional and vice versa. The milling direction remains unchanged for fixed cycles. Mirroring two axes: The contour which was mirrored in one axis is mirrored a second time - in the other axis. The direction of rotation and e.g. climb milling remains the same.
X I--- -
0
0 ---..
/’ i \
\
\ \
\ \~~
,’
/’ i\ \\ ‘-(GiK? 0
‘\\\ /I 0 ---l’
WY
Y
X, Y = Axes to be mirrored Datum position
Cancelling the mirror image
1. If the datum is on the part contour, only mirrored across the axis.
the part is
2. If the datum also moved!
the part is
is outside
the contour,
The mirror image cycle is cancelled by entering the mirror image cycle and responding to the dralog query “mirror image axis” with “NO ENT”: CYCL CYCL
Page P 98
i
DEF 8.0 MIRROR DEF 8.1
IMAGE
3,D Programming
Modes
HEIDENHAIN TNC 2500B
Coordinate Transformations Cycle 8: Mirror image Selecting the cycle
MIRROR
Example
IMAGE
AXIS
clX Enter the axis to be mirrored, e.g. X. Enter the second axis to be mirrored if applicable, e.g. Y. Confirm the axes and always terminate the Input with “END 0”.
?
A program section (subprogram 1) IS to be executed once - at position X+O/Y+O, and also mirrored once in X at posrtion X+7O/Y+60. TOOL TOOL
DEF 1 L+O R5 CALL 1 Z S200
CALL
LBL
1 REP
Not mirrored Mirrored execution sequence
CYCL CYCL CYCL
DEF 7.0 DATUM DEF 7.1 X+70 DEF 7.2 Y+60
CYCL CYCL CALL
DEF 8.0 MIRROR DEF 8.1 X LBL 1
IMAGE
CYCL CYCL CYCL CYCL CYCL
DEF DEF DEF DEF DEF
MIRROR DATUM X+0 Y+O
8.0 8.1 7.0 7.1 7.2
L Z+50 FMAX Subprogram:
LBL 1 L X-10 L Z+2 L Z-5 L X+0 L Y+20 L xi-25 L x+30 L Y+O L x+0 L X-10 L Z+2 LBL 0
SHIFT
:
Datum shift 0
Mirror
image 0
Subprogram
call
IMAGE
Reset mirror
image
SHIFT
Cancel datum
MO2
Y-10 RO FMAX FMAX FlOO Y+O RL F200
HEIDENHAIN TNC 25008
shift
Retract, return jump
MO3
y+15
Y-10 FMAX
RO
For correct machining according to the drawing, shown in the above execution be retained!
Note
0
Programming
It IS absolutely
Modes
necessary
that the sequence
of cycles
Page P 99
Coordinate Transformations Cycle 10: Coordinate system rotation The cycle
The coordinate system can be rotated in the machining plane about the current datum In a program.
Activation
Rotation is effective without being called and is also active in the operating mode “Positioning with MDI”.
Rotation
To rotate the coordinate system, you only have to enter the rotation angle ROT.
Planes
XY plane: YZ plane: ZX plane:
+X axis = O” (standard) +Y axis = O” +Z axis = O”
All coordinate inputs following the rotation are then referenced to the rotated coordinate system. The rotation angle is entered Input range: -360” to +360” mental).
Activating the rotation
CYCL CYCL
DEF 10.0 ROTATION DEF 10.1 ROT+35
The active rotation the status display. Cancelling the rotation
Page P 100
angle is Indicated
A rotation is cancelled angle O”. CYCL CYCL
in degrees (“). (absolute or incre-
DEF DEF
by entering
by “ROT” in
the rotation
10.0 ROTATION 10.1 ROT+0
Programming
Modes
,
Coordinate Transformations Cycle 10: Coordinate system rotation
Selecting the cycle
Initiate the dialog CYCL
DEF 10 ROTATION
ROTATION
ANGLE
Confirm
?
Enter the rotation 0
I
HEIDENHAIN TNC 2500B
angle.
entry.
A program section (subprogram 1) is to be executed: once based on datum X+O/Y+O, a second trme based on datum X+70 Y+60.
TOOL TOOL
DEF 1 LO R5 CALL 1 Z S200
CALL
LBL
CYCL CYCL CYCL
DEF 7.0 DATUM DEF 7.1 X+70 DEF 7.2 Y+60
CYCL CYCL
DEF 10.0 ROTATION DEF 10.1 ROT+35
2. Rotation 0
CALL
LBL
3. Subprogram
CYCL CYCL
DEF 10.0 ROTATION DEF 10.1 ROT 0
Reset rotation
CYCL CYCL CYCL
DEF 7.0 DATUM DEF 7.1 X+0 DEF 7.2 Y-t0
Cancel datum
L Z+200
Subprogram
cycle.
Incremental/absolute? Confirm
Example
the selected
I
Non-rotated SHIFT
Rotated execution.
The associated
SHIFT
MO2
subprogram
0
Sequence:
1. Datum shift 0
1
FMAX
execution
call
shift
Return jump to first block of the main program
(see cycle 7, Datum shift) is programmed
Programming
Modes
after M02.
Page P 101
Coordinate Transformations Cycle 11: Scaling ’
The cycle
Contours can be enlarged or reduced with this cycle. This permits generation of contours geometrically similar to an original without reprogramming, and also use of shrinkage and growth allowances. Scaling is effective machine parameters plane or in the three General Information, parameters).
depending on the specified - either in the machining main axes (see index MOD Functions,
Activation
Scaling is effective immediately, without being called. Scaling factors greater than 1 result in magnification, factors between 0 and 1 result in reduction.
SCL factor
The scaling factor SCL (scaling) is entered to magnify or reduce a contour. The control applies this factor to all coordinates and radii either in the machining plane or (depending on MP 7410; see Index General Information, MOD Functions, parameters) in all three axes X, Y and Z. The factor also affects dimensions in cycles. Input range: 0.000001
Datum
position
to 99.999999.
It is helpful to locate the datum on an edge of the subcontour. This way, the datum of the coordinate system is retained during a reduction or magnification as long as it is not subsequently moved or if the move is programmed before the scaling factor.
Activating scaling
CYCL DEF 11.0 SCALING CYCL DEF 11.1 SCL 0.8
Cancelling scaling
The scaling cycle is cancelled
by entering
l------L
the factor 1 in the scaling cycle:
CYCL DEF 11.0 SCALING CYCL DEF 11.1 SCL 1.0
Programming
_----._--_ ----Yq -4 L ‘-----It
Modes
Coordinate Transformations Cycle 11: Scaling
Selecting the cycle
Initiate the dialog :ycle.
FACTOR ?
Enter the scaling factor. Confirm
Example
~
entry.
A program section (subprogram 1) is to be executed one time based on the manually set datum X+O/Y+O, and one time based on X+6O/Y+70 with the scaling factor 0.8.
TOOL DEF 1 L-t0 R5 TOOL CALL 1 Z S200
Subprogram
HEIDENHAIN TNC 2500B
CALL LBL 1
Execution
in original
CYCL DEF 7.0 DATUM CYCL DEF 7.1 X+60 CYCL DEF 7.2 Y+70
Execution
with scaling factor. Sequence:
CYCL DEF 11.0 SCALING CYCL DEF 11.1 SCL 1.0
2. Define scaling factor 0
CALL LBL 1
3. Call subprogram
CYCL DEF 11.0 SCALING CYCL DEF 11.1 SCL 1.0 CYCL DEF 7.0 DATUM CYCL DEF 7.1 X+0 CYCL DEF 7.2 Y+O L Z+200 FMAX MO2
Cancel transformations
The corresponding
subprogram
size 0
1. Shift datum 0
(scaling
factor effective)
Retract, return jump
(see cycle 7, Datum shift) is programmed
Programming
Modes
after MO2
1
Page P 103
Other Cycles Cycle 9: Dwell time
The cycle
In a program which is being run, the next block will be executed only after the end of the programmed dwell time. Modal conditions, such as spindle rotation, are not affected.
Activation
The dwell cycle is valid immediately tion, without being called.
upon defini-
CYCL DEF 9.0 DWELL TIME CYCL DEF 9.1 DWELL 0.500 Possible applications
For example, chip breaking can easily be programmed with a dwell cycle after every drilling step.
Input
The dwell time is specified In seconds. Input range: 0 to 30000 s (A 8.3 hours)
range
Cycle definition
or
Initiate the dialog
CYCL DEF 9.0 DWELL TIME
Confirm
DWELL TIME IN SECS. ?
cl
Enter desired Confirm
Page P 104
Programming
Modes
the selected
cycle.
dwell time, in seconds.
entry.
I
HEIDENHAIN TNC 25008
Other Cycles Cycle 12: Program call
The cycles
Machining procedures that you have programmed - such as special drillrng cycles, curve milling, or geometry modules - can be created as callable main programs and be used like fixed cycles. They can be called from any program with a cycle call. They can thus help speed up programming and improve safety, since you are using proven modules.
Cycle 12 PGM CALL
A callable
program
defined
as a cycle becomes
in essence
a fixed cycle.
It can be called with
CYCL CALL (separate
block) or
M99
(blockwise)
M89
(modally)
or
Initiate the dialog Entering the cycle selection
0
PROGRAM NUMBER ?
Example
The callable
program
50 is to be called from program
Program
number
5
Program :
BEGIN PGM 5 MM
CYCL DEF 12.0 PGM CALL CYCL DEF 12.1 PGM 50
Definition: “Program 50 is a cycle”
L X+20 Y+50 FMAX M99
Call program
50
EtiD PGM’5 MM Cross-reference Drilling with chip breaking
A realistic example of a program programming PGM 7445): 1. Subprogram
1 is written
call with cycle 12 can be taken from the drilling
separately
as PGM 7444
(without
1 is deleted
in the main program
Programming
e.g. 7445.
7445.
4. Instead of CALL LBL 1, write in PGM 7445: CYCL DEF 12 PGM CALL 7444, and M99 in a subsequent
HEIDENHAIN TNC 25006
(Parameter
LBL 1 or LBL 0)
2. PGM 7444 now exists as a callable, additional drilling procedure. This PGM can remain stored in the control and be called by any other program, 3. Subprogram
example
Modes
positioning
block.
Page P 105
Other Cycles Cycle 13: Oriented The cycle
spindle stop
The control can address the machine tool spindle as a 4 or 5’h axis and turn it to a certain angular position. Applications: l
l
Activation Ml9
Tool changing systems with defined change position for tool. Orientation of the transmitter/receiver window of the TS 511 3D-touch probe system from HEIDENHAIN.
The cycle - if provided on the machine - is executed through M19. The spindle orientation is activated either through l machine parameter or l cycle 13: spindle orientation. If the cycle spindle will been set in information builder.
Input
range
Cycle definition
is called without prior definition, the be oriented to an angle which has the machine parameters. Further is available from the machine tool
The angle of orientation Input range: 0 to 360”. Input resolution: 0.V.
is entered
according
to the reference
axis of the working
plane
Initiate dialog
ORIENTATION
Example
CYCL CYCL
Page P 106
ANGLE
?
Enter new angle for spindle.
DEF 13.0 ORIENTATION DEF 13.1 ANGLE 45
Programming
Modes
HEIDENHAIN TNC 2500B
Parametric programming
Parametric Overview
Programming
Parametric programming of the control enormously such as:
expands the capabilities and offers features
0 Variable drilling programs Processing of mathematical curves (e.g.: sine wave, ellipse, parabola, hyperbola) l Programs for machining families of parts l 3D programming for mold making l
Basic functions
The mathematical and logical functions the right are available for programming.
listed at
Computation time
The time required for one computing step depending on the workload on the processor can reach the millisecond range. For this reason, very many computations and very small displacements may cause the machine axes to be halted. In this case you have to make a compromise between high surface definition (many computations, small displacements) and efficient machining.
Variable addresses with parameters
The program data shown at the right can be kept variable by using the 0 parameters: Enter a 0 parameter instead of a specific number.
FN FN FN FN FN
0: 1: 2: 3: 4:
ASSIGN ADDITION SUBTRACTION MULTIPLICATION DIVISION
FN FN FN FN
5: 6: 7: 8:
SQUARE ROO’T SINE COSINE ROOT-SUM OF SQUARES
FN 9: FN 10: FN 11: FN 12:
IF IF IF IF
EQUAL, JU:MP UNEQUAL, JUMP GREATER, JUMP LESS, JUMP
FN 13: FN 14:
ANGLE ERROR
Nominal
positions
Inch dimensions
HEIDENHAIN TNC 2500B
value for 021 must be computed or be defined before it IS called.
Programs using parameters as jump address (e.g. GOT0 LBL 010) are not to be switched from mm to inches or vice versa, because the contents of the 0 parameters are also converted during switchover, which would result in false jump addresses.
Programming
Modes
L X+Q21
Y+Q22
Circle data
CC XtQl Y+Q2 C X+IQIO Y+Q20 CT XtQll Y+Q21 RND Ql CR XtQ21 Y+Q22
Feed rate
F QlO
Tool data
TOOL TOOL
Example for variable positioning: instead of L X+20.25 you write L X+Q21 The parameter in the program
CODE
Conditional Cycle data
jump
R Q62
DEF 1 L+Ql R 42 CALL QS Z S Q6
IF+QlO GT+O GOT0 LBL Q30 CYCL DEF 1.0 PECKING SET LJP -Ql/DEPTH -42 PECK.G -Q3 DWELL Q4lF QS
I
Page P 107
Parametric Selection
Selecting basic functions
After pressing the associated
Defining parameters
A parameter
Programming
“Q”, the functions can be selected function number and “ENT”.
is designated
by the letter 0 and any number
Specific numerical values (contents) cal and logical functions. Parameter programmed. Starting
either with the vertical cursor
between
keys or with “GOT0
q “,
0 and 99.
can be allocated to the parameter contents can also have a negative
either directly or with mathematisign. Positive signs need not be
Parameters must be defined before they can be used. When program run is started, all parameters are automatically assigned the value 0 if machine parameter MP 7300 = 0. If the parameters are to be assigned values before program start, set MP 7300 = 1. The parameter values are then not deleted at program start. Examples
of defined
parameters:
Ql = +1.5 Q5 = +Ql Q9 = +Ql * +Q5 Notation
The notation corresponds to the standard computer format: The operands and the operator are on the right, the desired a mathematical operation and not as an equation! Here also use the “ENT” key to continue
Example
The following
multiplication
the dialog within
result on the left. Consider one program
the entire line as
line.
is to be entered:
QlO = Q5 . 1.7 Initiate the dialog
FN 0: = ASSIGN
Select multiplication (operation).
or
I
PARAMETER NUMBER FOR RESULT?
Parameter
FIRST VALUE OR PARAMETER?
IS’ operand
SECOND VALUE OR PARAMETER?
2”d operand.
for result. (parameter).
-i
FN 3: QlO = +Q5 * +1.7
010 is assigned
Page P 108
the result when
Finished
the operation
Programming
is executed;
Modes
the contents
prog?i
of Q5 are retained.
I
Parametric Programming Algebraic functions FN 0: Assignment
This function assigns a parameter either a numerical value or another parameter. The assignment
FN 1: Addition
FN 2: Subtraction
FN 3: Multiplication
FN 4: Division
root
Sign for operands
FN 1: 417 = +Q2 + +5
This function defines a certain parameter to be the difference between two parameters, two numbers or one parameter and one number.
FN 2: Qll = +5 - +Q34
This function defines a certain parameter to be the product of two parameters, two numbers or one parameter and one number.
FN 3: Q21= +Ql * +60
This function defines a certain parameter to be the quotient of two parameters, two numbers or one parameter and one number.
FN 4: 412 = +Q2 DIV +6:!
Q17 417 417 417
Qll Qll Qll Qll
Parameters
with negative
= = = =
+5 + +7 +5 + -412 -44 + +QS +Q17 + +Q17
+5 - +7 +5 - -Q12 +Q4 - +QS +Qll - -4111
+5 * +5 * +Q4 +Q21
+7 -Q12 * -Q8 * +Q21
417 = +5 DIV +7 Q17 = t-5 + DIV -Q12 Q17 = t-Q4 DIV +Q8
FN 5: Q98 = SQRT +2
This function defines a certain parameter to be the square root of one parameter or one number. The operand must be positive.
Qll
= = = =
421 = 421 = Q21= Q21=
by 0 is not permitted!
498 = SQRT +Q12 Q98 = SQRT -470
signs can be used in equations.
= +5 - -434
E.G. subtraction
HEIDENHAIN TNC 2500B
Q5 = +Q12 Q5 = -Q13
to an equal sign.
This function defines a certain parameter to be the sum of two parameters, two numbers or one parameter and one number.
Division
FN 5: Square
corresponds
Example:
FN 0: Q5 = +65.432
can be obtained
from an addition
Programming
and vice versa. This also applies
Modes
I
for other operations.
Page P 109
Parametric Programming Trigonometric functions
Basics of trigonometry
A circle with radius c is divided symmetrically into four quadrants 0 to 6 by the two axes X and Y. If the radius c forms the angle a with the X-axis, the two components a and b of the right-angled triangle depend upon angle a.
Defining the trigonometric functions
sin a =
opposite side a hypotenuse = c
or a = c
sin a
cos a =
adjacent side b hypotenuse = c
or b = c
cos a
sin a tan a =-----== cos a
According
Length of one side
opposite adjacent
side side
to the Pythagorean
=-
a b
theorem:
c2 = a2 + b2 or c = I&%?
Table for preceding
Angle
FN 6: Sine
A parameter is defined as the sine of an angle, whereby the angle can be a number or a parameter (unit of measurement of the angle: degrees). 044 = sin 011
FN 6: Q44 = SIN + Qll A parameter is defined as the cosine of an angle, whereby the angle can be a number or a parameter (unit of measurement of the angle: degrees). 081 = cos 011
FN 7: Cosine
FN 7: QSl = cos + Qll A parameter is computed as the square root of the sum of squares of two numbers or parameters (LEN = length).
FN 8: Root sum of squares
03 = JQ452
+ 30*
FN 8: Q3 = +Q45 LEN+30
Page P 110
Programming
Modes
sign .and angle range
0”
90”
180”
.I
I
I
270° I
360’= I
Parametric Programming Trigonometric functions Angles from line segments or trigonometric functions
According to the definitions of the angular functions, either the angular functions sin a and cos a, or the lengths of sides a and b can be used to determine tan a: tan
a=-=-
sin a cos a
a b
The angle a is therefore sin a a = arc tan ~ = arc tan a cos a b
Unambiguous angle
If the value of sin a or the side a is known, possible angles always result: Example:
two
sin a = 0.5 a, = +30” and a2 = +150°
To determine angle a unambiguously, the value for cos a or side b is required. If this value is known, an unambiguous angle a is the result: Example:
sin a = 0.5 and cos a = 0.866 a = +30° , sin a = 0.5 and cos a = -0.866 a=+150°
FN 13: Angle
This function assigns a parameter the angle from a sine and cosine function, or from the two legs of the right-angled triangle. tana=-=-=p
sin a cos a
a = arc tan
a b
-5 8.66
-5 8.66
L-1
FN 13: Qll = -5 ANG +8.66
HEIDENHAIN TNC 2500B
Programming
Modes
Page P 111
Parametric Programming Conditional/unconditional
IF: IF-THEN jump
With the parameter functions FN 9 to FN 12, you can compare one parameter with another parameter or with a given number (e.g. a maximum value).
jumps
23 42 = 30 50 24 LBL 25 Ql = Ql + 1
+
Depending on the result of this comparison, a jump to a certain label in the program can be programmed (conditional jump): If the programmed IF condition is fulfilled, a jump is performed; if the condition is not fulfilled, the next block (following IF .) will be executed. Program
call
If you write a program call behind the called program label, a jump can be made to another program. (Program calls are for example PGM CALL or cycle 12).
27 L 2200 28 L x-20 Y-20
MO2
Examples:
Decision
Equation FN9: =
FN 9: IF + Ql EQU + 360 GOT0 LBL 30
A parameter is equal to a value or a second meter, e.g. Ql = 42 or in the example: 01 has the value 360.000.
Inequalities FN 10: +=
FN 10: IF + Ql NE + 42 GOT0 LBL 2
A parameter is not equal to a value or a second parameter, e.g. Ql + 42
FN 11:
>
FN 11: IF + Ql GT + 360 GOT0 LBL 17
A parameter is greater than a value or a second parameter, e.g. Ql > Q2. Also possible: greater thain zero, i.e. positive.
FN 12:
<
FN 12: IF + Ql LT + Q2 GOT0 LBL 3
A parameter is less than a value or a second parameter, e.g. Ql < Q2. Also possible: less than zero, i.e. negative.
Unconditional jumps
Abbreviations
Page P 112
.You can also program
unconditional
jumps
criteria :
to a label with the parameter
Example:
Decision
FN 9: IF 0 EQU 0 GOT0 LBL 30
The condition unconditional
EOU: NE: GT: LT:
equal to not equal to greater than less than
Programming
Modes
functions
para-
FN 9 to FN 12.
criterion : is always fulfilled, i.e. an jump is performed.
Parametric Programming Special functions
FN 14: Error code
You can call error messages and dialog texts of the machine manufacturer FN 14. To call, enter the error code number between 0 and 499. The error message terminates program run. The program must be restarted after the error has been corrected. The messages
are allocated
Error code 0
as follows:
Screen display
299
ERROR
0 . . . ERROR
299
PLC ERROR 01. . PLC ERROR 99 (or dialog determined by the machine
tool manufacturer).
483
DIALOG 1 . . . 83 (or dialog determined
by the machine
tool manufacturer)
484 .._ 499
PARAMETER (or dialog determined
15 . . . 0 by the machine
tool manufacturer)
300 400
from the PLC EPROM with
399
Example: FN 14: ERROR
0100
- 0107
= 100
The control can transfer Q parameter QIOO to 0107 are used for this.
values from the integrated
0108 Tool radius
The control always stores the tool radius of the last called tool in parameter 0108. Thus, the active tool radius can be used for the radius compensation in parameter computations and comparisons.
0109 Tool axis
The control stores the current Different machines alternately On these machines it is helpful this makes program branching
PLC to a NC program.
tool axis in parameter 0109: use the X,Y or Z axis as the tool axis. when the current tool axis can be requested in cycles possible.
Current tool axis
I Parameter
no tool axis called
I 0109 = -1
X axis is called
a09
=
0
Y axis is called
0109 =
1
Z axis is called
0109 =
2
Programming
Modes
The parameters
in the machining
program;
Page P 113
Parametric programming Special functions
0110 Spindle on/off
The value in parameter
0110 specifies
the last M function
M function
Qlll Coolant on/off
0110 = -1
MO3 spindle
on clockwise
QIIO =
0
MO4 spindle
on counterclockwise
I 0110 =
1
M05, if MO3 was previously
issued
a10
=
2
M05, if MO4 was previouslv
issued
CD10 =
3
0111 indicates
whether
the coolant
was switched
Meaning: switched
on
1 Qlll
=
1
MO9 coolant
switched
off
1 Qlll
=
0
0112 contains the overlap factor for pocket milling parameters, MP 7430).
(see index General
can be used to advantage
in milling
Parameter Q113 specifies whether the NC program at the highest programming with PGM CALL) contains mm or inch dimensions.
Parameters for programmable probing function: 0115 to 0118
program
Meaning:
1 Parameter
mm dimensions
IQ113 =
0
inch dimensions
0113 =
1
MOD
prograrns
level (in cases of sub-
Parameters 0115 to Q118 contain the uncompensated position measurements (i.e. length and radius of the stylus are neglected) that were acquired with the programmable probing function “surface = datum”: Measurement:
Parameter
X axis
0115
Y axis
Page P 114
Information,
1 Parameter
The overlap factor for pocket milling
0113 mm/inch dimensions
rotation:
on or off.
MO8 coolant
Parameter Functions,
of spindle
I Parameter
no M spindle function
Parameter
0112 Overlap factor
issued for the direction
I
0116
Z axis
1 0117
4’h axis
1 0118
Programming
Modes
Parametric Programming Example: Bolt-hole circle
Task
A bolt-hole circle is to be drilled ing cycle in the XY plane.
Example
Radius R of the bolt-hole
using the peck-
circle:
43 = 35 mm. Number
n of bore holes:
44 = 12. X coordinate
of the bolt circle center:
Ql = 50 mm. Y coordinate
of the bolt circle center:
Q2 = 50 mm.
Program Asg values
Computation
= = = =
Ql Q2 43 44
+50 +50 +35 +12
TOOL
DEF / TOOL
CYCL
DEF PECKING
Select and load drilling
FNO:
QlO = +0
Set starting
FN4:
414 = +360 DIV+Q4
Compute
angle increment
Approach
setup clearance
L Z+2 RO FMAX CC X+Ql
Execution
Center in X Center in Y Bolt circle radius Number of bore holes
FNO: FNO: FNO: FNO:
Define and call tool
CALL
MO3
cycle
angle
and switch
on spindle
Y+Q2
LP PR 43 PA+QlO
FMAX
Is’ bore
M99
Start of loop Angle
increment
Further bores If not all holes are drilled, jump to the start of the loop.
L Z+50
HEIDENHAIN TNC 2500B
RO FMAX
End of program
MO2
Programming
Modes
Page P 115
Parametric Programming Example: Drilling with chip breaking
Example
Interruptable drilling procedure with automatic approach to the setup clearance and raising of the tool to break the chip for longer tool life.
Main
BEGIN Ql=-1
program
Q2 43 44 QS Q6
= = = = =
PGM
-40 -5 +0.5 +200 +o
TOOL TOOL
DEF 1 L+O R2.5 CALL 1 Z S200
L X+20
Y+50 RO FMAX
CALL LBL 1 L Z+300 FMAX Subprogram Drilling procedure
7445 MM Setup clearance (incremental) Depth (incremental) lnfeed (incremental) Dwell time Drilling feed rate Work surface (absolute)
MO2
Define tool Call tool, spindle speed MO3 Approach drilling position Drilling End of main program
1: Setup clearance (absolute) Current work surface (absolute) Final drilling depth (absolute) Approach setup clearance in rapid traverse Compute (new) drilling depth Compute (new) chip breaking height Drilling depth would not be attained Drilling Chip breaking Another drilling
step required?
Drill directly to final depth Clear base of bore Return to setup clearance
END PGM
Page P 116
7445 MM
Programming
Modes
Parametric
Programming
Example: Ellipse as an SL cycle Programming of a mathematical illustrated with an ellipse.
curve will be
Geometry
An ellipse is defined according to the following formula (parameter form of the ellipse): X = a cos a Y = b . sin a a and b are referred to as the semiaxes of the ellipse. Starting at 0’ (02 = starting angle a,) and increasing a in small increments (Ql = incremental angles Aa) to 360” (Q3 = end angle a,). a multitude of points on an ellipse results. If these points are connected by short straight lines (see machining program, block 38), a closed contour is produced.
Process
The machining direction of the ellipse (counterclockwise) and the selected radius compensation RL produce an inside contour (pocket). The contour is contained in the subprogram with program section repeat.
Roughing
out
Error message
With the SL cycle “Contour”, you can write a parameter program as an SL subprogram and execute this with the SL cycle “rough-out” by selecting an appropriate incremental angle. TOO
MANY
SUBCONTOURS
If the incremental angle (Aa = QO) selected for roughing out is too small, the control calculates too many short straight lines, which are interpreted as excessive subcontours.
Remedy
A relatively large incremental angle (e.g. 00 = loo) suffices for roughing out.
Finishing
For subsequent finishing, the subprogram is executed in the conventional manner with a finer incremental angle (e.g. 01 = I’).
Note
This program works with only one tool. It can be expanded to use a roughing cutter for “roughing out” and a finishing cutter for “finishing”. Also, a center-cut end mill (IS0 1641) is required or cycle 15 is to be applied for pilot drilling.
HElDENHAlN TNC 2500B
Programming Modes
/
Page P 117
Parametric Programming Example: Ellipse as an SL cycle
0 BEGIN Parameter definition
Roughing
PGM
94152500
MM Incremental angle Aa for contour Incremental angle Aa for contour Starting angle a, End angle a,“’ Semiaxis a Semiaxis b X coordinate for the datum shift Y coordinate for the datum shift Setup clearance Z Pecking depth Z
1 FN 0: QO = +lO 2 FN 0: Ql = +l 3 FN 0: Q2 = +0 4 FN 0: 43 = +370 5 FN 0: Q4 = +45 6 FN 0: Q5 = +25 7 FN 0: 46 = +50 8 FN 0: Q7 = +50 9 FN 0: Q8 = +2 10 FN 0: Q9 = -5
out
Finishing
11 12 13 14 15 16 17 18 19 20
BLK FORM 0.1 Z X+0 Y+O Z-10 BLK FORM 0.2 X+100 Y+lOO Z+O TOOL DEF 2.5 L+O R+5 TOOL CALL 25 Z SlOOO L Z+50 RO FMAX M6 L Z+QS RO FMAX M3 FN: 0 414 = 42 CYCL DEF 7.0 DATUM CYCL DEF 7.1 X+Q6 CYCL DEF 7.2 Y+Q7
21 22 23 24 25 26 27
CYCL CYCL CYCL CYCL CYCL CYCL CYCL
28 29 30 31
FN 0: QO = +Ql FN 0: Q14 = 42 L Z+Q9 FlOO CALL LBL 2
DEF DEF DEF DEF DEF DEF CALL
32 L Z+50
Subprogram with program section repeat
14.0 CONTOUR GEOM. 14.1 CONTOUR LABEL2 6.0 ROUGH-OUT 6.1 SET UP -Q8 DEPTH +Q9 6.2 PECKG -5 FlOO ALLOW t-2 6.3 ANGLE +45 FlOO
angle for counter
Define subprogram 2 - as contour label SL cycle rough-out (for more information, see SL Cycles)
Cycle call
RO FMAX
Copy incremental angle for finishing Copy starting angle for counter Drove tool to milling depth Z Call subprogram 2 Retract spindle axis, jump to start of program
M2
33 LBL 2 34 FN 7: QlO = COS+Q2 35 FN 6: Qll = SIN+QZ 36 FN 3: Q12 = +QlO * +Q4 37 FN 3: Q13 = +Qll * +QS 38 L X+Q12 Y+Q13 RL F200 39FNl:Q =+Q ++QO 40 FN 12: IF +Q LT +Q3 GOT0 41 LBL 0 42 END PGM
Copy starting Datum shift
roughing finishing
94152500
*I End angle a, is greater
Computation of the X and Y positions elliptical path
on the
Feed rate for finishing Increase angle If angle not attained, jump to LBL 2
LBL 2
MM
than 360°, so the contour
is safely completed
with the cutter
If only the curve of the ellipse is to be milled, lines 1 and 21 - 27 are not needed. Line 30 (drive tool to milling depth Z) is inserted behind line 38.
Modified program
Page P 118
Programming
Modes
HEIDENHAIN TNC 2500B
Parametric Programmina Example:
u
Sphere
Task
Program 7513 machines sphere using concentric the horizontal plane.
Geometry
The size and location entered.
a convex segment circular movements
of the sphere
You obtain a hemisphere
when
Starting 3D angle End 3D angle Starting plane angle End plane angle
=oo = 9o” = 0” = 360”
01 02 06 07
of a in
can be
you select:
Cutting conditions
Cutting is performed during both the advance return movements. The following can be selected: 3D angle increment 03 Downfeed rate 011 Milling feed rate 012
Note
When selecting the 3D incremental angle, you have to make a compromise between the desired surface quality and the machining time. Small 3D incremental angles must be selected for high surface quality, but they require correspondingly long machining times.
Tool required
A spherical
Asg values
0 BEGIN PGM 1 FN 0 : Ql = 2 FN 0 : 42 = 3 FN 0 : Q3 = 4 FN 0 : 44 = 5 FN 0 : Q5 = 6 FN 0 : Q6 = 7 FN 0 : 47 = 8 FN 0 : QS = 9 FN 0 : Q9 = 10 FN 0 : QlO 11 FN 0 : Qll 12 FN 0 : Q12
cutter is used for finishing.
7816 MM +lO +55 +2 +50 +55 +300 +20 +50 +50 = -40 = +lOO = +500
Blank
13 BLK FORM 14 BLK FORM
Tool
15 TOOL 16 TOOL
Change/ Start position
17 L Z+lOO RO F9999 MO6 18 TOOL CALL 1 Z S 800
Subprogram
call
19 CALL
and
0.1 Z X+0 0.2 X+100
Starting 3D angle End 3D angle 3D incremental angle Sphere radius Setup clearance in Z Starting plane angle End plane angle X sphere center Y sphere center Z sphere center Downfeed rate Milling feed rate
c=,
F 012
Y+O Z-50 Y+lOO Z+O
DEF 1 L+O R-t5 CALL 0 Z S 0
LBL 2
20 L Z+lOO F9999 MO2 Roughing
HEIDENHAIN TNC 2500B
If roughing
is required,
an end mill can be used with a correspondingly
Programming
Modes
larger sphere
I
radius (04)
Page P 119
Parametric Programming Example: Sphere
Setting starting
the values
Starting position
Program
loop
21 LBL 2 22 CYCL DEF 7.0 DATUM 23 CYCL DEF 7.1 X+QS 24 CYCL DEF 7.2 Y+Q9 25 CYCL DEF 7.3 Z+QlO 26 CCX+OY+O 27 FN 0 : 420 = +Ql 28 FN 1 : Q31= +Q4 + +Q108 29 CALL LBL 3 30 LP PR+Q17 PA+Q6 ROF9999 MO3 31 L Z+Q5 32 L Z+Q15 FQll 33 PA+Q7 DR+ FQ12
Move datum to the sphere
Set circle center Starting and current 3D angle Compensate sphere radius (with tool radius) Compute starting position Approach starting positiorr Approach setup clearance Plunge cut at downfeed rate Circle segment to plane eindangle
34 LBL 1 35 FN 1 : Q20 = +Q20 + +Q3 36 FN 11 : IF +Q20 GT +Q2 GOT0 LBL 99 37 CALL LBL 3 38 L Z+Q15 FQll 39 LP PR+Q17 PA 420 FQ12 40 PA+Q6 DR- ROFQ12 41 FN 1 : 420 = +Q20 + +Q3 42 FN 11 : IF +Q20 GT +Q2 GOT0 LBL 99 43 CALL LBL 3 44 L Z+QlS FQll 45 LP PR+Q17 PA Q20 ROFQ12 46 PA+Q7 DR+ ROFQ12 47 FN 12 : IF +Q20 LT +Q2 GOT0 LBL 1
3D angle increment If condition* is fulfilled, then jump to end Position computation Pilot positioning for withdrawal Return to plane starting angle 3D angle increment If condition* is fulfilled, then jump to end Position computation Pilot positioning Arc to plane end angle If condition* is fulfilled, then jump to start of loop
48 LBL 99 49 L Z+Q5 ROF9999 50 CYCL DEF 7.0 DATUM 51 CYCL DEF 7.1 X+0 52 CYCL DEF 7.2 Y+O 53 CYCL DEF 7.3 Z+O 54 LBL 0
End
Position computations
Finished, retract Reset datum
Computations
55 LBL 3
Z components
57 FN 3 56 6 : Ql5 Q14 = +Q14 SIN +Q20 * +Q31 1 58 FN 7 : Q16 = COS +Q20 59 FN 3 : Q17 = +Q16 * +Q31 60 LBL 0 61 END PGM 7816 MM
Radius components
* Condition: Computation values
015: 017: 020: Q31: Q108:
Cycle
The program
sphere
center
Current Z height Current radius (polar radius) Current 3D angle Compensated contour radius Current tool radius
if current 3D angle 020 is greater than or less than end 3D angle 02, then jump to
can be used as a cycle:
1. Subprogram 2 (blocks 21 to 53) is written as a separate program. 2. Lines 21 and 54 are not required. Subprogram 3 (blocks 55 to 60) is written in place of block 29. 3. The must only write the surrounding program (blocks 1 to 20) and then call the cycle in block 19 (PGM CALL).
Page P 120
Programming
Modes
Parametric
Programming
Example: Sphere Machining sections of a hemisphere
Program 7816 can also be used to machine 3D angles. The graphics
always shows
the typical
sections
of a hemisphere
section for a cylindrical
Roughing End mill, R = 12 mm, 3D angle increment 4O
by limiting
the plane angles
end mill.
Finishing Spherical cutter, R = 3 mm, 3D angle increment lo
Hemisphere: 3D angle 0” to 90” Plane angle 0” to 360’
3D angle 00 to 900 Plane angle -60’ to 20’
3D angle IO0 to 55O Plane angle -60” to 20’
HEIDENHAIN TNC 2500B
Programming
Modes
Page P 121
and
Programmed Overview
Probing
The programmable probing function allows you to perform measurements before or during machining. For example, the surfaces of cast parts with different heights can be probed, so that the correct depth is always attained during subsequent machining. In addition, thermally-induced position deviations of the machine can be determined at selected time intervals and compensated.
Process
First, pilot position in rapid traverse while maintaining the setup clearance (machine parameter). Then probe with the probing axis at the measuring feed rate, transfer the probing position and retract to the setup clearance in rapid traverse. If the stylus is not deflected before reaching the maximum probing depth (machine parameter), the probing operation is aborted.
Initiate the diaput
POSITION
VALUE
All coordinates
?
of the pilot position
or incremental
Example
The probe is first to be pilot positioned to X-IO, Y+20 and Z-20, and then probing axis in positive direction. The probed result (X position) is to be stored in QIO.
Program
TOOL L Z+200
Q115 to Q118
CALL
begun with the X
0 Z SO
RO FMAX
TCH PROBE
0.0 REF.PLANE
TCH PROBE
0.1 X-10
0115 to 0118 contain
Tool change
MO6
Probing with the X axis in positive directron, measuring result in QIO Pilot positioning 010 contains the compensated X axis measurement after probing
QlO X+
Y+20 Z-20
the actual, uncompensated
Programming
position
values for X, Y, Z etc. after probing
Modes
Programmed Probing Example: Measuring length and an’de Task
A height (from the probing points 0 and 0) and an angle (from the probing points 0 and 6) are to be measured with parameter programming.
35
10
Main program: Definition of probing points (pilot positioning)
0 BEGIN
PGM
3DPROBE
Measure
Measure
length
angle
MM
1 FN 0: Qll = +20 2 FN 0: Q12 = t-50 3 FN 0: Q13 = +lO
Probing point 0 X, Y, Z coordrnates pilot positioning
4 FN 0: 421 = t-20 5 FN 0: Q22 = +15 6 FN 0: 423 = +0
Probing
7 FN 0: Q31= +20 8 FN 0: Q32 = +15 9 FN 0: 433 = -10
Probing point 0 Z coordinate 033 valid for probing point @
10 FN 0: Q41 = +50 11 FN 0: 442 = +lO
Probing
12 TOOL CALL 0 Z 13 L Z-t100 RO FlOOO M6
for
point 0
point 6
Retract, insert probe system
14 15 16 17 18 19
TCH PROBE TCH PROBE L Y+Q22 TCH PROBE TCH PROBE CALL LBL 1
0.0 REF.PLANE QlO Z0.1 X+Qll Y+Q12 Z+Q13
20 21 22 23 24
TCH TCH TCH TCH CALL
0.0 0.1 0.0 0.1
PROBE PROBE PROBE PROBE LBL 2
0 Probe Approach 0 Probe
0.0 PROBE Q20 Z0.1 X+Q21 Y+Q22 Z+Q23
auxiliary
Call subprogram REF.PLANE 430 Y+ X+Q31 Y+Q32 Z+Q33 REF.PLANE Q40 YX+Q41 Y+Q42 Z+Q33
point
1
0 Probe 8 Probe Call subprogram
25 STOP
2
Check result parameter (see index “Machine Operating Modes”, chapter “Program run”, Checking/Changing the 0 Parameters) Retract, jump to start of program
26 L Z+lOO RO FlOOO M2
HEIDENHAIN TNC 2500B
100
Programming
Modes
Programmed Example:
Probing
Measuring
Subprogram 1: measure length
27 LBL 1 28 FN 2: Ql = +Q20 - +QlO 29 LBL 0
Subprogram 2: measure angle
30 LBL 2 31 FN 2: Q34 = +Q40 - +Q30 32 FN 2: 435 = +Q41 - +Q31 33 FN 13: 42 = +Q34 ANG+Q35 34FNl:Q2=-360++Q2 35 LBL 0 36 END PGM 3DPROBE MM
Page P 124
/
Programming
length and angle
Modes
Measured
height
Measured
angle
in parameter
in parameter
01.
02.
Digitizing Overview
3D Contours
HEIDENHAIN diqitizinq software enables vou to reduce a three-dimensional Dart rnodel into discrete diaital information 6y scanning it with the TS’120 triggering 3D touch probe. Thanks .to the ability of this ” software to immediately access the position control loop of the TNC control, a series of 3 to 5 positions or more can be measured per second, depending on the machine. At a programmed point interval of 1 mm this results in scanning speeds of 180 to 300 mm/min (7 to 12 ipm).
Technical prerequisites
The following a 3D contour system :
components are required to digitize with the HEIDENHAIN touch probe
- TS 120 triggering 3D touch probe - Option for “digitizing with TS 120” - External data storage medium: HEIDENHAIN FE 401 floppy disk unit or PC (IBM or IBM compatible) with HEIDENHAIN data transfer software TNC.EXE - Evaluation software
0%!E!l TNC
0
PC
The control must be specially touch probe system.
prepared
by the machine
tool builder
to enable
the use of the 3D
The digitized positions are output in straight-line blocks in HEIDENHAIN format over the RS-232.C/V.24 data interface. Shorter programs can be stored in the FE 401 floppy disk unit, while longer programs must be stored in a PC. Evaluation software for PCs (positive/negative forms, tool radius compensation etc.) is now being developed. Through the digitizing process, however, NC programs are immediately produced which are usable without additional evaluation if the cutter radius is equal to the probing ball radius,.
Limitations
HEIDENHAIN TNC 2500B
- The scanning Programming - Only the main - Basic rotation inactive when
I
cycles are programmed in the HEIDENHAIN conversational programming language. in IS0 is not planned. axes X, Y, Z may be used in the scanning cycles (no parallel axes U, V, W). and coordinate transformation (datum shift, mirror image, rotation, scaling) must be the scanning cycles are called.
Programming
Modes
I
Page P 125
Digitizing 3D Contours Defining the scanning range
The digitizing
functions
comprise
TOUCH PROBE 5.0: RANGE TOUCH PROBE 6.0: MEANDER TOUCH PROBE 7.0: CONTOUR
Axis MIN point MAX point
NAME
Clearance
three cycles:
LINES
With the scanning cycle RANGE, a cuboid is defined by entering coordinates of two points, the minimum point (MIN) and the maximum point (MAX). The contour to be scanned lies within this space. This range is programmed FORM, but with additional name and the clearance
PGM
the following
r
similarly to the BLK input of a program height.
The program name (max. 8 characters) - which is also the file name for the external memory - indicates the NC program in which the measured positions are stored in the form of straight-line blocks. The program name must be entered. If different names are assigned in several range definitions within one scanning program, then a corresponding number of NC programs will automatically be generated for storage of the measured positions.
height
Page P 126
Input of a height, scanned.
I
in absolute
dimensions,
Programming
at which
Modes
the stylus cannot collide with the contour
to be
Digitizing 3D Contours Defining the scanning range
Initiate dialog TOUCH PGM
Select the RANGE cycle and enter.
PROBE 5.0: RANGE
NAME
MIN
z Cl
TCH PROBE AXIS ?
Enter axis parallel to touch probe, e.g. Z. X coordinate
MIN. POINT RANGE ?
Y coordinate Z coordinate
MAX X coordinate
MAX. POINT RANGE ?
Y coordinate Z coordinate
CLEARANCE HEIGHT
1 TCH PROBE 5.0 RANGE 2 TCH PROBE 5.1 PGM NAME: 12345678 3 TCH PROBE 5.2 Z X+0.000 z+o.ooo Y+O.OOO 4 TCH PROBE 5.3 X+100.000 Y+100.000 2+40.000 5 TCH PROBE 5.4 HEIGHT: +60.5
Display
HEIDENHAIN TNC
Enter the clearance
CLEARANCE HEIGHT ?
2500B
Programming
Modes
Page P 127
height
Digitizing 3D Contours Line-by-line digitizing
The MEANDER scanning cycle digitizes a 3D contour in a meandering pattern (in a series of parallel lines) within the RANGE which was previously defined.
Starting position
The starting point is approached automatically with an approach logic Z to clearance height, then X, Y. The starting point coordinates are obtained from the definition of the RANGE scanning cycle: X, Y: from the MIN corner z: clearance height
Approaching the contour
From the starting point 0 the touch probe moves in negative direction (Z-) toward the contour surface. At the first , the position 0 is stored.
Scanning
The touch probe moves in positive line while probing the surface in the probe vals (PP INT). The actual point intervals smaller than the programmed intervals ing on the machine parameters).
Ascending, descending contour
If the control recognizes an ascending or descending contour, the probe retracts in the vertical direction (normal to the current position). The length of the path of retraction In normal direction is referred to as TRAVEL.
direction point intercan be (depend-
At the positive end of the range 0 the touch probe moves by the programmed line spacing (L.SPAC) in the positive column direction 0. The touch probe This procedure The contour
Page P 128
now moves in negative is repeated
is departed
line direction
back to the negative
end of the range 0
line by line until the entire range is scanned. automatically
through
Programming
retraction
Modes
to the clearance
height.
HEIDENHAIN TNC 2500B
Digitizing 3D Contours Defining the MEANDER
scanning
cycle
Initiate dialog TOUCH
Select the MEANDER enter.
PROBE 6.0: MEANDER
clX
LINE DIRECTION
LIMIT IN NORMAL LINES DIRECTION ? LINE SPACING ?
c! El
MAX. PROBE POINT INTERVAL ?
cycle and
Key in the line direction, e.g. X, and enter.
Enter the travel, e.g. 0.5, and confirm entry. Enter the line spacing, e.g. 0.5, and confirm entry. Enter the point spacing, e.g. 0.5, and confirm entry.
0 BEGIN PGM 1 MM 1 TCH PROBE 5.0 RANGE 2 TCH PROBE 5.1 PGM NAME: 12345678 3 TCH PROBE 5.2 Z X+0.000 Y+O.OOO z+o.ooo 4 TCH PROBE 5.3 X+100.000 Y+100.000 2+40.000 5 TCH PROBE 5.4 HEIGHT: +60.5 6 TCH PROBE 6.0 MEANDER 7 TCH PROBE 6.1 DIRECTN: X 8 TCH PROBE 6.2 TRAVEL: 0.5 L.SPAC: 0.5 PP INT 0.5 9 END PGM 1
HEIDENHAIN TNC 25006
Programming
Modes
Page P 129
Digitizing 3D Contours Level-by-level digitizing
The CONTOUR LINES cycle scans a 3D contour by circling around the model in a series of upwardly successive levels within the RANGE which was previously defined.
Starting position
The starting point 0 is approached automatically with an approach logic Z to clearance height, then X, Y. The starting point coordinates are obtained as follows: X, Y: input in the CONTOUR LINES cycle Z: from the MIN point given in the RANGE cycle
Approaching the contour
From the starting point 0 the touch probe moves in the programmed direction (here Y+) toward the contour surface. At the first , the position 0 is stored (lst touch point = target point for the respective contour line).
Y t
The touch probe moves in the programmed direction of the starting axis along the contour while the probe positions are digitized in the programmed point interval (PP INT). The actual point interval may be less than the programmed interval (depending on the machine parameters).
Scanning
Once the first level has been rounded, i.e. the probe has returned to the first probe point 0, the probe is raised by the line spacing (L.SPAC) to the next level (0). This process is repeated until the range limit has been reached.
Departing the contour
The contour
is departed
For the CONTOUR
Time
limit
Page P 130
automatically
LINES scanning
through
retraction
to the safety clearance
cycle, the RANGE cycle must be defined
@
as follows:
l
In the touch probe axis (e.g. Z axis) the Z MAX point coordinates should be smaller than the maximum Z coordinate of the contour by at least the radius of the ball tip of the touch probe stylus.
l
In the working plane the range should of the touch probe stylus.
If the first probe point (0) is not reached ed with an error message.
Programming
be larger than the contour
within
the programmed
Modes
by at least the radius of the ball tip
time, the digitizing
process
is terminat-
HEIDENHAIN TNC 2500B
Digitizing 3D Contours Defining the CONTOUR LINES scanning cycle
Initiate dialog TOUCH
PROBE 7.0: CONTOUR
Select CONTOUR
LINES
LINES and
TIME LIMIT ? STARTING POINT ? Y+lOO, and confirm
entry.
AXIS AND DIRECTION OF APPROACH ? STARTING PROBE AXIS AND DIRECTN ?
and confirm
LIMIT IN NORMAL LINES DIRECTION ? LINE SPACING ?
n
MAX. PROBE POINT INTERVAL ?
Example
HEIDENHAIN TNC 2500B
entry.
Enter travel, e.g. 0.5, and confirm entry. Enter line spacing, e.g. 0.5, and confirm entry. Enter point interval, e.g. 0.5, and confirm entry.
0 BEGIN PGM 2 MM 1 TCH PROBE 5.0 RANGE 2 TCH PROBE 5.1 PGM NAME: 12345678 3 TCH PROBE 5.2 Z X+0.000 Y+O.OOO z+2.000 4 TCH PROBE 5.3 X+100.000 Y+100.000 z+10.000 5 TCH PROBE 5.4 HEIGHT: +60.5 6 TCH PROBE 7.0 CONTOUR LINES 7 TCH PROBE 7.1 TIME: 200 x+50.000 Y+100.000 8 TCH PROBE 7.2 ORDER: Y+/X+ 9 TCH PROBE 7.3 TRAVEL: 0.5 LSPAC: 0.5 PP INT: 0.5 10 END PGM 2 MM
Programming
Modes
Page P 131
Digitizing Executing
3D Contours a program with digitized
positions
An additional short program section permits the scanned program stored by the FE 401 floppy disk unit or by a computer to be executed without radius compensation (170) or any other changes, provided that the tool radius is equal to the effective ball tip radius of the 30 touch probe.
If a milling cutter with a different will result!
Program
of a 3D contour
digitized
radius is used, an incorrect
with the CONTOUR
0 BEGIN PGM 1 MM 1 L Z+O FMAX 2 L X+0 Y-25 FMAX 3 L x+0 Y-8.849 4 L X+2.003 Y-8619 29 L 30 L 31 L 32 L
LINES scanning
Starting Starting
X-1.808 Y-8.669 x+0 Y-8.85 Z+l X+0 Y-6.292 X+2.004 Y-5.965
or a contour
with oversize
cycle.
point in Z point in X, Y
New contour
53 L X+0 Y-6.293 54 L X+0 Y-25 FMAX 55 L Z+40 FMAX 56 END PGM 1 MM Before this program
contour
line
End point = starting point in X, Y End point = clearance height in Z
can be run, the following
short program
must be entered
and executed:
0 BEGIN PGM 2 MM 1 TOOL DEF 1 L+30 R+5
Tool definition: The tool radius must equal the radius of the ball tip of the 3D touch probe stylus as determined during calibration.
2 TOOL CALL 1 Z S 2250
Tool call
3 L ROF525 MO3
No radius compensation, with clockwise rotation
4LMxy
M function determined by the machine tool manufacturer with which the tool, feed rate and direction of spindle rotation remain modally effective - even if a new program is selected.
feed rate, spindle
5 END PGM 2 MM
Page P 132
Programming
Modes
HEIDENHAIN TNC 2500B
on
Digitizing 3D Contours Error messages
WRONG
AXIS
The touch calibration
FAULTY
PROGRAMMED
probe axis in the RANGE scanning of the touch probe system.
RANGE
cycle is not the same as the touch probe axis used for
DATA
- A MIN coordinate value is larger than or equal to the corresponding MAX coordinate value in the RANGE scanning cycle. - One or more coordinates in the RANGE scanning cycle are outside of the software limit switch range. - The RANGE scanning cycle was not defined before calling the MEANDER or CONTOUR LINES scanning cycle.
MIRRORING NOT PERMIlTED ROTATION NOT PERMIlTED SCALING FACTOR NOT PERMIlTED Mirroring, scanning
RANGE
rotation or scaling cycle IS called.
factor is active when
the RANGE,
MEANDER
beyond the borders
CYCL-PARAMETER
INCORRECT
of the range during
The programmed travel, line spacing or probe (only possible via O-parameter programming).
TOUCH
POINT
point spacing
probing,
i.e. the 3D contour
is negative
STYLUS
WRONGLY
START
INCORRECT
point coordinate
DOUBLE
LIMIT
and depar-
the beginning
of the scanning
cycle
DEFINED point coordinates
TIME
in the CONTOUR
is outside
LINES scanning
of the range in the starting
cycle is assigned
to the touch
probe axis.
PROGRAMMED
point coordinates
in the CONTOUR
LINES
scanning
cycle were both assigned
to the same
EXCEEDED
During the CONTOUR LINES programmed time limit.
HEIDENHAIN TNC 25008
during
One of the starting probe axis.
POSITION
to the 3D contour
IN
The stylus is not at rest position
The starting axis.
mm
INACCESSIBLE
ALREADY
The starting
lies partially out-
or larger than 65,535
- occurred during approach before the range was reached. - In the CONTOUR LINES cycle no occurred between approach ture from the range.
AXIS
LINES
EXCEEDED
The probe moved side of the range.
PLANE
or CONTOUR
scanning
cycle the first point of the line was not returned
Programming
Modes
to within
Page P 133
the
Teach-In Transferring
Tool compensation
tool compensation
Position values (coordinates) acquired via “Transfer actual position” contain the length and radius of compensation for the tool in use.
Therefore it is advisable when programmrng with “Transfer actual position” to enter the correct radius compensation (RL, RR or R+, R-) and use L = 0 and R = 0 in the tool definition.
values
1. Tool definition 3 TOOL
DEF
in the machining
program
1 L+O R+O
2. Tool definition
in the central tool file
Tl L+O R+O
If the tool breaks or another tool is selected instead of the original, then a different length and radius can be taken into . The new compensation are differences: Radius compensation
R = R2-RI R = R3-R, R = RI = R2 = R3 =
R=O
values for the tool radius
radius compensation for tool radius of the original tool radius of a new tool tool radius of a new tool
the tool definition tool 0 0 0
The compensation for the new tool length is also determined (see Tool definition, Transferring tool lengths). The new compensations
Page P 134
R= -...
or
The compensation R can be positive or negative, depending inserted tool is larger (+) or smaller (-) than the original tool.
Length compensation
R= +...
are entered
in the tool definition
Programming
Modes
on whether
the tool radius of the newly
as the difference
of the original
to the originally
used tool
tool (R = 0, L = 0)
HEIDENHAIN TNC 2500B
Teach-In Transferring
Transfer actual position
Application possibilities
B L
Actual Positions to Program
The actual tool position can be transferred to the machining program with the “Transfer actual position” key.
In this way you can transfer: positions l tool dimensions (see Tool Definition) l
or
or
Process
Traverse the tool to the desired
position
Open a program block (e.g. for a straight line) in the “Programming and editing” operating mode. Select the axis from which the actual value is to be transferred. This axis position is transferred “Transfer actual position” key.
by pressing
PROGRRHMING m 4 TOOL
END
the
FIND CALL
PGM
EDITING 1 s
2 126
55
------------------_------------RCTL. z1 :95%:: l 23,254 84,000
I
Move the axis or axes via the axis keys.
Example
Input
Initiate the dialog COORDINATES
? Terminate input.
RADIUS FEED
COMP.: RATE
a/RR/NO
COMP.
Enter the radius compensation if needed. Enter the feed rate, if needed, confirm entry.
?
?F =
MISCELLANEOUS
FUNCTIONS
Enter miscellaneous
M ?
You can skip dialog queries “END 0”.
HEIDENHAIN TNC 2500B
Programming
position
Modes
function
and if needed.
with “NO ENT” or
Page P 135
Test Run
In the “Test run” operating mode, a machining program is checked for the following errors without machine movement: l l l l l
TEST
Overrunning the traversing range of the machine Exceeding the spindle speed range Illogical entries, e.g. redundant input of one axis Failure to comply with elementary programming rules e.g. cycle call without a cycle definition Certain geometrical incompatibilities
0
RUN
BEGIN
666
FORM Y-70 2 8LK FORM y+70 __________----___--------------1
ELK
RCTL.
Testing the program
PGM
X 2
+ +
0.1
MM 2
X-85 2-30 X+85 2+0
0.2
49,2S8 15,321
Y
+
q +
23,254 84,000
Initiate the dialog
number
;fer the block up to vvhich the test is to run.
or
:te program.
No apparent errors
If the program contains no apparent errors, the program reached, or a jump is made back to the start of program
STOP/MO6
If a STOP or MO6 was programmed, pressing the “NO ENT” key.
Error
If an error is found, the program test is stopped. The error is usually located block. An error message is displayed on the screen. The program
Page P 136
test runs until the entered block number if no STOP or MO6 was programmed.
the test can be continued
test can be halted with the “STOP”
Programming
key and aborted
Modes
by entering
a new block number
at any time
is
or by
in or before the stopped
Test Graphics
GRAPHICS Machining programs can be simulated graphically and checked in the “Program run” operating modes “Full sequence” and “Single block”, if a blank has been previously defined (BLK FORM).
GRAPHICS
More information on the definition of the blank can be found in the section Program Selection, Blank form definition. SELECTIONxENT
GRAPHICS
After selecting a program, the “menu” shown at the right is displayed by pressing the GRAPHICS “MOD” key twice.
FAST 3D-VIEW
IMRGE
PLAN
VIEW
/ DRTA -
ENO=NOENT PROCESSING
__
One of the versions of the graphic presentations can be selected with the vertical cursor keys and entered with the “ENT” key. The graphic simulation or internal started with the “START” key.
computation
is
Fast data image processing
With “Fast data image processing” only the current block number is displayed on the screen and the internal computing also indicated by an asterisk (* = control is started). When the program has been processed, the “machrned” workpiece can be displayed in plan view, view in three planes or 3D view.
Plan view with depth indication
The workpiece center is shown in the plan view with up to 7 different shades: the lower the darker.
View three
The workpiece is shown - like in drafting plan view and two sections.
in planes
The sectional keys.
planes can be moved
- with a
via the cursor
The view in three planes can be switched from the German to the American projection standard via a machine parameter. A symbol (in conformance to IS0 6433) indicates the type of projection:
HEIDENHAIN TNC 2500B
Programming
Modes
Page P 137
Test Graphics
GRAPHICS 3D view
The program view. The with The L = A =
is simulated
In a three-dimensional
displayed workpiece can be rotated by 90’ each activation of the horizontal cursor keys. orientation is indicated by an angle. o” l= 180“ 9o” r = 270°
If the height to side proportion is between 0.5 and 50, the type of display can be changed with the vertical cursor keys. You can switch between a scaled and non-scaled view. The short height or side is shown with a better resolution in the nonscaled view. The dimensions of the angle indicator change to a show the disproportron.
Magnifying
Selecting sectional
You can magnify a detail of the displayed work with the “MAGI\]” key. A wire model with a hatched surface appears next to the graphic. This marks the sectional plane. You can select a different horizontal cursor keys.
sectional
Trimming
You can trim the selected section with the horizontal
plane or cancel the cursor keys.
Transferring the detail
Once the desired detail is displayed, select the dialog “TRANSFER DETAIL = ENT” with the vertrcal cursor keys and confirm with the “ENT” key.
Magnification
the plane
The “remaining workpiece” screen with “MAGN”.
plane with the
is displayed
on the
Another graphic simulation of the magnified detail can be executed in the plan view, the view in three planes or the 3D view via the “START” key.
Programming
Modes
MAGN
Test Graphics
GRAPHICS You can revert to the blank with the “BLK FORM” key and restart simulation with “START”.
Tips
The “3D view” and “View in three planes” require extensive computing. For long programs, we therefore recommend displaying the workpiece with “Fast data image processing” or in the quicker “Plan view with depth indication” first, and then switching to the “3D view” or the “View in three planes”.
Displaying
details
Tool call
The following
aids are available
if fine details are to be examined:
l
Trim the blank and magnify
l
Restrict the blank detail to the section
One “TOOL Specifying
in an additional
program
run
of interest,
CALL” must be programmed the spindle
graphic
prior to the first axis movement
axis in the BLK FORM definition
to designate
does not suffice for the graphic
the tool axis. program
Both entries for the axis must be the same. If the tool axis is not given, an error message
HEIDENHAIN TNC 2500B
Programming
appears
Modes
after starting
the graphics.
Page P 139
run.
External Data Transfer General information The control has one data interface following standard: . RS-232-C
for read-in
or output
Standard data transfer for the HEIDENHAIN ME magnetic * (no longer
External programming
The data format complies
with the
(ISO)
The data interface can function in two different manners: Blockwise transfer for the HEIDENHAIN FE 401 Floppy Disk Unit and compatible
Device adaptation
of programs.
computers
tape unit*, or for a printer, punch, reader, etc
in production)
The TNC can be adapted to various peripheral devices via machine parameters, which can be accessed as parameters. The settings for three different peripheral devices are permanently stored in the TNC (selectable via “MOD”): l
FE = for HEIDENHAIN
l
ME = for HEIDENHAIN
l
EXT = external devices. Interface defined by the machine manufacturer or via machine HEIDENHAIN device such as a printer, computer, etc.
Programs
FE 401 Floppy Disk Unit. ME magnetic
can also be written
Observe the programming
tape unit. parameters
to connect
externally.
rules in this manual
and the following
At the start of program grammed.‘)
l
After the end of program block, CR LF or LF or CR FF or FF’) and also ETX (Control grammed. Any character can be substituted for ETX.
l
Spaces
l
Zeroes between
l
During
read-in
and after every program
instructions.
l
between
a non-
single words
can be omitted.
single words
can be omitted.
of NC programs,
comments
block, CR LF or LF or CR FF or FF must be pro-
that are marked
C) must be pro-
with “*” or “;” are overread.
‘) CR, LF at the start of program and CR, LF or LF or FF after every block are not required transfer”. This function is assumed by the control characters.
Programming
Modes
I
for “blockwise
HEIDENHAIN TNC 25008
External Data Transfer Transfer menu Read-in/ read-out
Transfer
Machining programs can be read-out or read-in by the control. For example, the “Read-in program” display on the control means: data is entered from the floppy disk station and received by the control. Program transfer in the “Programming and editing” operating mode must be initiated from the control.
menu
The transfer mode is selected via a menu, which offers different read-in and read-out alternatives.
PROGRAMMING
AND EDITING
PROGRAM DIRECTORY READ-IN ALL PROGRAMS READ-IN PROGRAM OFFERED READ-OUT SELECTED PROGRAM READ-OUT ALL PROGRAMS Selections
Read-in
to the TNC
Read-out
from the TNC
PROGRAM DIRECTORY
READ-OUT SELECTED PROGRAM
The list of program numbers on the data medium is displayed. The programs are not transferred.
A single, selected
program
is read-out.
READ-OUT ALL PROGRAMS The entire NC program
memory
is read-out.
READ-IN ALL PROGRAMS All programs ium.
are read-in
from the data med-
READ-IN PROGRAM OFFERED The programs are offered in the sequence in which they were externally stored and, if desired, can be read-in.
READ-IN SELECTED PROGRAM A single, selected
program
is read-in.
Interrupting the data transfer
A started data transfer can be interrupted on the TNC by pressing After interruption of the data transfer, the following error message
Transfer TNC - TNC
Data can also be transferred
HEIDENHAIN TNC 2500B
the “END 0” key. appears:
PROGRAM INCOMPLETE
directly
between
Programming
two controls.
Modes
The receiving
control
must be started first
Page P 141
External Data Transfer Connecting cable/Pin assignment K-232-C HEIDENHAIN devices
Transmission
cable
for
LE
Cable adapter on the machine length max. 17 m
RS-232-C Cable adapter Id.-Nr. 239 758 01
Id.-Nr. 239760
ME
* 25 pole flange socket LE 2500: X25
HEIDENHAINstandard cable
The RS-232-C
data interface
has a different
pin layout at the LE and at the adapter
block.
PC Non-HEIDENHAIN devices * /;;;;;;;\
Cable for ,~;m~lDENHAIN
RS-232-C adapter block
LE Cable adapter at the machine
* 25 pole flange socket LE 2500: X25
Recommended pin layout for nonHEIDENHAIN devices
CHASSIS TRANSMIT
DATA
RECEIVE
DATA
REOUEST TO SEND CLEAR
TO SEND
DATA SET READY SIGNAL DATA TERMINAL
K-232-C DCl/DC3 Page P 142
data transfer protocol
Programming
with
Modes
READY
External Data Transfer Peripheral devices
Adaptation
The control
interface
HEIDENHAIN devices
HEIDENHAIN operation:
FE, ME
The adaptation for FE or ME can be selected via “MOD”. The transfer rate can be altered for the FE 401 B.
Connections
In built-in controls, peripheral devices can usually be connected or another accessible location on the machine.
Non-HEIDENHAIN devices
Non-HEIDENHAIN
devices
device which
are mated with the TNC controls
devices
must be individually
adapted.
l
Adapting
l
Setting
the peripheral
The suitable
especially
standard
easy to put Into
cable can be ordered.
via a cable adapter
on the operating
This also includes: effective by selecting
EXT.
device, e.g. via switches,
the baud rates for both devices. the data transfer
Please :
I
is to be connected.
and are therefore
0 Adapting the control via machine parameters. These settings are stored after input and are automatically
0 Wiring
HEIDENHAIN TNC 2500B
must be set for the specific
cable.
Both sides must be set identically. You should always document the settings!
Programming
Modes
I
Page P 143
External
Data Transfer
HEIDENHAIN FE 401 Floppy Disk Unit Preparing the FE *)
Connect the FE to the mains, plug in the data cable, switch on, insert floppy disk in the upper drive, select the baud rate if necessary. Please note when writing a diskette: 0 You must format the diskette before writing the first time. l
Setting
the TNC
Do not write-protect
for
the diskette.
Select at the TNC
RS-232-C INTERFACE =
Continue K-232-C
pressing until INTERFACE appears
Continue appears.
pressing
Terminate
Examples for using the FE Read-out selected program
until the ‘FE setting
the MOD operating
mode.
Select
READ-OUT SELECTED PROGRAM
Confirm the function.
OUTPUT = ENT/END = NOENT Select the program,
e.g. program
14.
Output the program.
EXTERNAL DATA OUTPUT
The FE is started and stopped transfer.
OUTPUT = ENT/END = NOENT
The next program
number
after program
is then highlighted
Select and output the next program terminate output. Very important!
Read-in selected program
or
Select Confirm
READ-IN SELECTED PROGRAM
Cl
PROGRAM NUMBER =
the function
Enter the number,
read-in
EXTERNAL DATA INPUT The FE generally like an ME.
functions
with “blockwise
*) The entire range of functions
Page P 144
transfer”
and can be switched
for the FE is described
Programming
Modes
in the operating
over on the rear to operate
manual for the FE.
HEIDENHAIN TNC 2500B
External Data Transfer Non-HEIDENHAIN devices EXT
After setting the TNC data interface
to EXT. the following
modes
can be selected
via machine
parameter:
Standard data transfer for printer, reader, puncher etc. Blockwise computer.
transfer
for
To transfer data from the control to non-HEIDENHAIN parameters. The transfer
Resetting the TNC to EXT
rate is set via the MOD function
devices, the control
Continue pressing until RS-232-C interface appears.
Select at the TNC
Continue appears.
pressing
Terminate
For standard the control:
data transfer
MP 5030 = 0 (standard
until the EXT setting
the MOD operating
(e.g. to a printer), you only have to enter the following data transfer
MP 5020 = e.g. 168 (data format) (see External Data Transfer, Machine Blockwise transfer
by machine
BAUD RATE.
RS-232-C INTERFACE
Standard data transfer
must be adapted
machine
mode.
parameters
is selected). parameters).
For “blockwise transfer” from a computer, transfer software is required, e.g. the data transfer from HEIDENHAIN for personal computers. For this operating mode, you must set the following machine parameters: MP 5030 = 1 (blockwise
transfer
at
software
is selected)
MP 5020 = e.g. 168 (data format). The following machine parameters determine the control character (for description see External Data Transfer, Machine parameters) and are valid for the data transfer software from HEIDENHAIN. If different transfer software is used, the machine parameters must be adapted correspondingly. MP 5010 = 515 MP 5010.1 = 17736 MP 5010.2 = 16712 MP 5010.3 = 279 MP 5010.4 = 5382 MP 5010.5 = 4 When using the transfer software from HEIDENHAIN, above machine parameters need not be entered. Adapting to non-HEIDENHAIN devices
Compare the Interface descriptions Then proceed as follows:
is normally
set to “FE”. Then the
of both devices
l
Determine the common settings (data format, baud rate) The peripheral device is usually set via internal switches.
l
Determine
l
Plug in the data transfer
l
Plug in the power
0 Switch
HEIDENHAIN TNC 2500B
the data interface
the pin layout for the data transfer
cable, and wire the cable.
cable
cord of the peripheral
device
on the power
l
Start the transfer
l
Select the transfer
software
on computers,
If required.
menu on the TNC with the “EXT” key and start the desired
Programming
Modes
transfer.
Page P 145
External Data Transfer Machine parameters The following settings To select the machine MP 5010 Control characters for blockwise transfer
are only effective when operating the data interface In the “EXT” operating mode. parameters, see index General Information, MOD Functions, parameters.
T
I
MP
Bit
Function
5010.0
0 7 8 _.. 15
ETX or any ASCII character. STX or any ASCII-character.
5010.1
0
7
8
15
H or any for data E or any for data
ASCII input ASCII input
0
7
8
15
H or any for data A or any for data
ASCII character. It is sent in the command output prior to the program number. ASCII character. It is sent in the command output after the program number.
0
7
8
15
0
7
5010.2
5010.3
5010.4
8 .., 15
5010.5
0
7
Input values” Character Character
for end of program. for start of program.
character. It is sent in the command prior to the program number. character. It is sent in the command after the program number.
block block block
ETB and SOH: 279
ACK or substitute character (decimal positive acknowledgement. It is sent is correctly received. NAK or substitute character (decimal negative acknowledgement. It is sent IS incorrectly transferred.
ACK and NAK: 5382
code 1-47): when the data block code l-47): when the data block
EOT or substitute character (decimal code l-47) is sent at the end of the data transfer.
End of program: Start of program:
software
EOT: 4
from HEIDENHAIN
of bit
Significance
of bit
6
5
4
3
2
1
0
128
64
32
16
8
4
2
1
0
0
0
0
0
0
1
1
15
14
13
12
11
10
9
8
512
256
32768
Enter 0 or 1 accordingly Determine
Page P 146
input value:
00000011 00000010
7
Enter 0 or 1 accordingly Bits 8 - 15
and one tor the start
BINARY code BINARY code
ETX STX
Bits 0 - 7 Significance
H and A: 16712
block
MP 5010.0 This defines one character frorr the ASCII character code for the end of program of program for external programming. ASCII characters l-47 are accepted. “End of program” is sent at “standard data interface” and “blockwise transfer”. “Start of program” is only sent at “blockwise transfer”.
Example:
H and E: 17736
ETB or substitute character (decimal code l-47) is sent at the end of the command block. SOH or substitute character (decimal code l-47) is sent at the beginning of the command block.
The input values apply for the data transfer
Determining bit significance MP 5010.0
ETX and STX: 515
16384 0
8192 0
0
2048 0
1024 0
0
1
The Input value for MP 5010.0 IS thus 515.
1 2 + 512 515
Programming
4096
Modes
HEIDENHAIN TNC 2500B
0
External Data Transfer Machine parameters
The data format and the type of transfer stop are determined wise transfer”. 0 is entered for standard data interface. MP 5020 Data format
r
Function
Bit
Input
7 or 8 data bits
0
+
Block Check Character
(BCC)
Transfer stop due to RTS
1 2
Transfer stop due to DC3 Character or odd Character Number
parity even
bits (ASCII code with = parity) bits (ASCII code with = 0 and gth bit = parity)
+ +
0 + any BCC character 2 + BCC character no control
+ +
0 + inactive 4 + active
+ +
0 + inactive 8 --f active
1 -
character -
8
+ O- even + 16+odd + 0 - not required + 32 + required
parity required
32
of stop bits 1 2 1 1
l/2 Stop bits Stop bits bit 6: + 64 Stop bit bit 7: + 128 Stop bit value to be entered
Notes on bit 1
Bit 1 is only set for “block-
Input values
0 + 7 data 8’h bit 1 + 8 data gfh bit
+
by MP 5020.
Input value does not contain the significance 2: The BCC can accept an arbitrary character (also control
character)
128
for MP 5020
in “blockwise
169
transfer”
Input value contains the significance 2: If the computation of the BCC during “blockwise transfer” results in a number less than 20 HEX” (control character), then a “space” character (20 HEX) is additionally sent prior to ETB. In this case, the BCC is always greater than 20 HEX and therefore not a control character. I) HEX = Hexadecimal
Example of value determination
Standard
7 data bits (ASCII code wii.h 7 bits, even parity) Transfer stop due to DC3, 1 stop bit
data format:
Bits 0 - 7 Significance
of bit
7
6
5
4
3
2
1
0
128
64
32
16
8
ZIE 4
2
1
1
0
1
0
1
0
0
0
Enter 0 or 1 accordrngly After adding the significances, In our example: 168.
MF 5030 Operating mode of the interface
HEIDENHAJN TNC 250OB
you obtain the input value for machine
parameter
5020.
Operating mode data interface RS-232-C This parameter determines the function of the data interface. 0 ” “standard 1 ” “blockwise
I
data inter-face” (normally for printer, reader, puncher) transfer” (normally for computer link)
Programming
Modes
I
Page P 147
Miscellaneous Miscellaneous
functions
functions
with predetermined
Ml3
Spindle
on clockwise/coolant
Ml4
Spindle
on counterclockwise/coolant
M30
like MO2
MS9
Vacant miscellaneous or Cycle call, modal (depends on machine
MS9
M
function.
on
l
on
l
function
l
P63
l
P69
l
parameters)
M90
Constant path speed on inside corners uncompensated corners
M91
in the positioning block: Coordinates refer to the scale reference
and
l
P55
l
P58
l
P58
L
M92
in the positioning block: Coordinates refer to a position defined manufacturer (machine datum), e.g. tool change position
point by the machine
L
M93
Reserved
M94
Reduce the display
M95
Reserved
l
M96
Reserved
l
M97
Path offset on outside corners: Intersection instead of tangential
l
c
M98
Blockwise
M99
Cycle call effective
of the rotary axis to a value under
end of path offset blockwise
360’
P31
l
l
P56
l
P57
l
P69
circle
Program
Diaitiation key
example:
I
milling
Example values
Function
I I
Program
number,
BEGIN PGM 729 MM
mm/inch
/ ,
Blank definition: spindle Minimum point Maximum point
Z
axis
x+0
Y+O z-40
x+100 Y+lOO z+o
Tool definition Tool number Tool length Tool radius
TOOL DEF 1 L-l-0 R 7.5
Tool call Tool number Spindle axis (e.g. Z), speed
TOOL CALL 1 2 s 100
(S)
i
Lzl L
Tool change Retract tool axis, length compensated, Radius uncompensated, rapid traverse,
i tool change
L z-t200 ROFMAX MO6
( I
L?l L
L x-20 Y-20
Starting position: Approach the workpiece No radius compensation, rapid traverse, Spindle rotates to the right
ROFMAX MO3
( ( I
[Bi L
Move tool axis to working
L
depth
Z-20
i I
[s’i L
Machine the work, approach 1st contour point with radius compensation, machining feed rate
L x+0 Y-k0 RL F200
‘MACHIRIING .
L3
Last contour point (with radius compensation)
t IB)
After machining Retract in the machining plane Deselect radius compensation, spindle
L
L x-t-o Yt-0 RL I
stop
L x-20 Y-20 RO F500 MO5
I I
Retract the spindle axis, Return jump to the 1st block
L
Z+200 MO2
I I
+ F!!!
. HEIDENHAIN
253
588
20
10
10191
H
Printed
!n
Subject
to alteration
Related Documents 3m3m1z
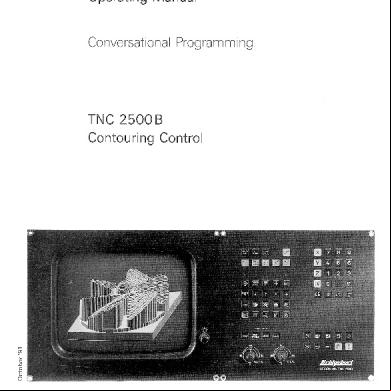
Heidenhain 2500b Hand Book 47644m
December 2019 49
Heidenhain Programming 4k55i
June 2021 0
Manual Heidenhain 6c4e4x
December 2019 55
Parametrizado Heidenhain 5l4w3v
July 2022 0
Heidenhain Dibujos 4f6q1k
April 2020 41