Technical Service Information Bulletin.pdf 371y14
This document was ed by and they confirmed that they have the permission to share it. If you are author or own the copyright of this book, please report to us by using this report form. Report 3b7i
Overview 3e4r5l
& View Technical Service Information Bulletin.pdf as PDF for free.
More details w3441
- Words: 29,531
- Pages: 141
Technical Service Information Bulletin December 16, 2004
Introduction
SENSOR INSPECTION FOR AIR CONDITIONING SYSTEM Models:
’90 – Current All Models
This service bulletin contains inspection procedures to more precisely confirm proper operation of the following temperature sensors of the air conditioning system. Follow the procedures in this service bulletin when inspecting these sensors. These contents will be reflected in future repair manuals. S Room Temperature Sensor S Ambient Temperature Sensor S Air Duct Sensor S Evaporator Temperature Sensor S Solar Sensor S Room Humidity Sensor
Applicable Vehicles
Warranty Information
S All 1990 – Current model year Lexus vehicles.
OP CODE
DESCRIPTION
TIME
OFP
T1
T2
N/A
Not Applicable to Warranty
–
–
–
–
Lexus s ASE Certification
Page 1 of 12
HEATING & AIR CONDITIONING
AC005-04
Title:
SENSOR INSPECTION FOR AIR CONDITIONING SYSTEM – AC005-04 Inspection Procedure
December 16, 2004
1. Inspect Room Temperature Sensor. A. Measure the sensor resistance. Resistance Value at 77°F (25°C)
1700 +/– 85Ω
NOTE: S Even slightly touching the sensor may change the resistance value. Be sure to hold the connector of the sensor. S When measuring, the sensor temperature must be the same as the ambient temperature.
HINT: As the temperature increases, the resistance decreases.
Page 2 of 12
TEMPERATURE °F (°C)
SPECIFICATION kΩ
50 (10)
3.00 to 3.73
Resistance kΩ 4.0
59 (15)
2.45 to 2.88
3.5
68 (20)
1.95 to 2.30
3.0
77 (25)
1.60 to 1.80
86 (30)
1.28 to 1.47
1.5
95 (35)
1.00 to 1.22
1.0
104 (40)
0.80 to 1.00
0.5
113 (45)
0.65 to 0.85
0.0
122 (50)
0.50 to 0.70
131 (55)
0.44 to 0.60
140 (60)
0.36 to 0.50
2.5 2.0
32 (0)
Max
Min 68 (20)
104 (40)
Temperature °F (°C)
140 (60)
SENSOR INSPECTION FOR AIR CONDITIONING SYSTEM – AC005-04 Inspection Procedure (Continued)
December 16, 2004
2. Inspect Ambient Temperature Sensor. A. Measure the sensor resistance according to the selected graph (specification). Resistance Value at 77°F (25°C)
1700 +/– 85Ω
NOTE: S Even slightly touching the sensor may change the resistance value. Be sure to hold the connector of the sensor. S When measuring, the sensor temperature must be the same as the ambient temperature.
HINT: As the temperature increases, the resistance decreases. TEMPERATURE °F (°C)
SPECIFICATION kΩ
50 (10)
3.00 to 3.73
Resistance kΩ 4.0
59 (15)
2.45 to 2.88
3.5
68 (20)
1.95 to 2.30
3.0
77 (25)
1.60 to 1.80
86 (30)
1.28 to 1.47
1.5
95 (35)
1.00 to 1.22
1.0
104 (40)
0.80 to 1.00
0.5
113 (45)
0.65 to 0.85
0.0
122 (50)
0.50 to 0.70
131 (55)
0.44 to 0.60
140 (60)
0.36 to 0.50
2.5 2.0 Max
Min 32 (0)
68 (20)
104 (40)
140 (60)
Temperature °F (°C)
Page 3 of 12
SENSOR INSPECTION FOR AIR CONDITIONING SYSTEM – AC005-04 Inspection Procedure (Continued)
December 16, 2004
3. Inspect Air Duct Sensor. A. Measure the sensor resistance according to the table and graph (specification). NOTE: S Even slightly touching the sensor may change the resistance value. Be sure to hold the connector of the sensor. S When measuring, the sensor temperature must be the same as the ambient temperature.
HINT: As the temperature increases, the resistance decreases.
Page 4 of 12
TEMPERATURE °F (°C)
SPECIFICATION kΩ
50 (10)
9.48 to 10.49
59 (15)
7.50 to 8.28
68 (20)
5.95 to 6.57
77 (25)
4.77 to 5.25
86 (30)
3.85 to 4.21
95 (35)
3.12 to 3.40
104 (40)
2.53 to 2.79
113 (45)
2.06 to 2.30
122 (50)
1.69 to 1.91
131 (55)
1.39 to 1.59
140 (60)
1.15 to 1.33
Resistance kΩ 15.0
10.0
5.0
Max
Min
0.0 32 (0)
68 (20)
104 (40)
140 (60)
Temperature °F (°C)
176 (80)
SENSOR INSPECTION FOR AIR CONDITIONING SYSTEM – AC005-04 Inspection Procedure (Continued)
December 16, 2004
4. Inspect Evaporator Temperature Sensor.
Select the appropriate graph (specification) using the following table. NOTE: Please inspect the sensors for model years not indicated by this bulletin, according to the instructions in the applicable repair manual. MODEL
MODEL YEAR
ES 300
PART NUMBER
GRAPH
1992 – 2001
88625–33070
2
2002 – 2003
88625–17130
2
2003
88625–33170
3
GS 300
1993 – 1997
88625–3A020
2
GS 300/400/430
1998 – 2002
88625–3A120
2
GX 470
2003 – 2005
Thermistor No. 1
88625–35050
3
Thermistor No. 2
88625–16210
2
IS 300
2000 – 2001
88625–48010
2
1990 – 1992
88625–32040
2
1993 – 1994
88625–50100
2
1995 – 2000
88625–50140
2
LS 430
2001 – 2005
88625–50160
2
LX 450
1996 – 1997
88625–60060
2
ES 300/330
LS 400
LX 470 RX 300
1998 – 2000
Thermistor No. 2
88625–60140
2
1998 – 2002
Thermistor No. 1
88625–60130
2
2003 – 2005
88625–47011
2
1998 – 2003
88625–48010
2
88625–48050
1
88625 48060 88625–48060
3
88625–32040
2
2004 RX 330 SC 300/400
COMMENTS
2004 – 2005 1991 – 2000
CBU CBU NAP
Page 5 of 12
SENSOR INSPECTION FOR AIR CONDITIONING SYSTEM – AC005-04 Inspection Procedure (Continued)
December 16, 2004
A. Measure the sensor resistance according to the selected graph (specification). NOTE: S Even slightly touching the sensor may change the resistance value. Be sure to hold the connector of the sensor. S When measuring, the sensor temperature must be the same as the ambient temperature.
HINT: As the temperature increases, the resistance decreases.
Graph 1: TEMPERATURE °F (°C)
SPECIFICATION kΩ
14 (–10)
7.30 to 9.10
23 (–5)
5.65 to 6.95
32 (0)
4.40 to 5.35
41 (5)
3.40 to 4.15
50 (10)
2.70 to 3.25
59 (15)
2.14 to 2.58
68 (20)
1.71 to 2.05
77 (25)
1.38 to 1.64
86 (30)
1.11 to 1.32
Resistance kΩ 12.0 11.0 10.0 9.0 8.0 7.0 6.0 5.0 4.0 3.0 2.0 1.0 0.0 –4 (–20)
Max Min 32 (0)
68 (20)
104 (40)
Temperature °F (°C)
Graph 2: TEMPERATURE °F (°C)
SPECIFICATION kΩ
14 (–10)
7.40 to 9.20
23 (–5)
5.65 to 7.00
32 (0)
4.35 to 5.40
41 (5)
3.40 to 4.20
50 (10)
2.68 to 3.30
59 (15)
2.10 to 2.60
68 (20)
1.66 to 2.10
77 (25)
1.32 to 1.66
86 (30)
1.05 to 1.35
Resistance kΩ 10.0 9.0 8.0 7.0 6.0 5.0 4.0 3.0 2.0 1.0 0.0 –4 (–20)
Max Min 32 (0)
68 (20)
Temperature °F (°C)
Page 6 of 12
104 (40)
SENSOR INSPECTION FOR AIR CONDITIONING SYSTEM – AC005-04 Inspection Procedure (Continued)
December 16, 2004
Graph 3: TEMPERATURE °F (°C)
SPECIFICATION kΩ
14 (–10)
8.00 to 10.00
23 (–5)
6.15 to 7.65
32 (0)
4.75 to 5.85
41 (5)
3.70 to 4.55
50 (10)
2.91 to 3.55
59 (15)
2.32 to 2.80
68 (20)
1.85 to 2.22
77 (25)
1.48 to 1.77
86 (30)
1.20 to 1.43
Resistance kΩ 12.0 11.0 10.0 9.0 8.0 7.0 6.0 5.0 4.0 3.0 2.0 1.0 0.0 –4 (–20)
Max Min 32 (0)
68 (20)
104 (40)
Temperature °F (°C)
Page 7 of 12
SENSOR INSPECTION FOR AIR CONDITIONING SYSTEM – AC005-04 Inspection Procedure (Continued)
December 16, 2004
5. Inspect Solar Sensor. Four types of solar sensors are used on Lexus vehicles depending on the vehicle specifications. The inspection procedure for each type of sensor differs from the others. Select the appropriate inspection procedure from the table below according to vehicle specifications and perform the inspection. EQUIPPED WITH AUTOMATIC LIGHT CONTROL SYSTEM
A/C SYSTEM WITH RIGHT/LEFT INDEPENDENT TEMPERATURE CONTROL
INSPECTION PROCEDURE
No
No
A
No
Yes
B
Yes
Yes
C
Yes
No
D
Procedure A: a. Disconnect the solar sensor connector.
Lock
b. Measure the resistance between terminals 1 and 2 of the solar sensor under the following conditions: S Cover the sensor with a cloth to avoid direct light. S Expose the sensor to light from a distance of 300 mm (11.81 in.) or less with an inspection light. NOTE: S Terminal 1 of the sensor is always on the right, when the lock is facing up. S When using an analog tester, connect the positive (+) lead to terminal 2 and negative (–) lead to terminal 1 of the solar sensor.
HINT: If the light is weak, the sensor may not react. Be sure to use an incandescent light for an inspection light.
Standard:
Page 8 of 12
CONDITION
SPECIFICATION
When the sensor is covered with a cloth (to avoid direct light)
Infinite ohms
When the sensor is exposed to light
Less than infinite resistance
SENSOR INSPECTION FOR AIR CONDITIONING SYSTEM – AC005-04 Inspection Procedure (Continued)
December 16, 2004
Procedure B: a. Disconnect the solar sensor connector.
Lock
b. Measure the resistance between terminals 2 and 3 of the solar sensor under the following conditions: S Cover the sensor with a cloth to avoid direct light. S Expose the sensor to light from a distance of 300 mm (11.81 in.) or less with an inspection light. NOTE: When using an analog tester, connect the positive (+) lead to terminal 3 and negative (–) lead to terminal 2 of the solar sensor.
HINT: If the light is weak, the sensor may not react. Be sure to use an incandescent light for an inspection light.
Standard: CONDITION
SPECIFICATION
When the sensor is covered with a cloth (to avoid direct light)
Infinite ohms
When the sensor is exposed to light
Less than infinite resistance
Page 9 of 12
SENSOR INSPECTION FOR AIR CONDITIONING SYSTEM – AC005-04 Inspection Procedure (Continued)
December 16, 2004
Procedure C: a. Turn the ignition switch ON. b. Measure the voltage between terminals TSR (+) and CLTE (–) of the connector under the following conditions:
TSR
S Cover the sensor with a cloth to avoid direct light.
CLTE
S Expose the sensor to light from a distance of 300 mm (11.81 in.) or less with an inspection light. HINT: S If the light is weak, the sensor may not react. Be sure to use an incandescent light for an inspection light. S Do not disconnect the solar sensor connector.
Standard: CONDITION
SPECIFICATION
When the sensor is covered with a cloth (to avoid direct light)
Below 0.8 V
When the sensor is exposed to light
4.3 +/– 0.3 V
c. Measure the voltage between terminals TSL (+) and CLTE (–) of the connector under the following conditions:
TSL
S Cover the sensor with a cloth to avoid direct light. S Expose the sensor to light from a distance of 300 mm (11.81 in.) or less with an inspection light.
CLTE
HINT: S If the light is weak, the sensor may not react. Be sure to use an incandescent light for an inspection light. S Do not disconnect the solar sensor connector.
Standard:
Page 10 of 12
CONDITION
SPECIFICATION
When the sensor is covered with a cloth (to avoid direct light)
Below 0.8 V
When the sensor is exposed to light
4.3 +/– 0.3 V
SENSOR INSPECTION FOR AIR CONDITIONING SYSTEM – AC005-04 Inspection Procedure (Continued)
December 16, 2004
Procedure D: a. Turn the ignition switch ON. b. Using the tester, measure the voltage between terminals TSD (+) and CLTE (–) of the connector under the following conditions: S Cover the sensor with a cloth to avoid direct light.
TSD
CLTE
S Expose the sensor to light from a distance of 300 mm (11.81 in.) or less with an inspection light. HINT: S If the light is weak, the sensor may not react. Be sure to use an incandescent light for an inspection light. S Do not disconnect the solar sensor connector.
Standard: CONDITION
SPECIFICATION
When the sensor is covered with a cloth (to avoid direct light)
Below 0.8 V
When the sensor is exposed to light
4.3 +/– 0.3 V
Page 11 of 12
SENSOR INSPECTION FOR AIR CONDITIONING SYSTEM – AC005-04 Inspection Procedure (Continued)
December 16, 2004
6. Inspect Room Humidity Sensor. Measure the humidity and output voltage of the humidity sensor when the sensor is installed on the vehicle and the temperature at the humidity sensor position (room temperature sensor position) is 77°F (25°C). If the output voltage is within the specifications according to the graph and table below, the sensor is normal.
VO
GND
HINT: For the inspection procedure of the room temperature sensor, refer to “Room Temperature Sensor Inspection Procedure” in this bulletin.
A. Turn the ignition switch to the ON position. B. Measure the voltage between terminal VO (3) and GND (2) of the room humidity sensor. C. Measure the humidity and voltage when the room temperature (humidity sensor position) is 77°F (25°C). According to the result, determine whether the sensor is normal or not. HUMIDITY (% RH)
OUTPUT VOLTAGE AT 77°F (25°C)
10
0.70 to 1.08 V
20
0.72 to 1.57 V
30
1.13 to 1.95 V
40
1.61 to 2.24 V
50
1.99 to 2.46 V
60
2.26 to 2.66 V
70
2.48 to 2.85 V
80
2.68 to 3.04 V
90
2.87 to 3.05 V
Resistance kΩ 3.50 3.00 2.50 2.00
Page 12 of 12
Max 1.50 1.00 Min 0.50 0.00 32 (0)
68 (20)
104 (40)
140 (60)
176 (80)
Temperature °F (°C)
212 (100)
Technical Service Information Bulletin July 13, 2005
Introduction
Applicable Vehicles
Warranty Information
Maintenance, Cleaning & Use
WINDSHIELD WIPER BLADE MAINTENANCE AND CLEANING Models:
’98 – ’06 All Models
The following procedures are recommended to maintain windshield wiper blade performance.
S 1998 – 2006 model year Lexus vehicles.
OP CODE
DESCRIPTION
TIME
OFP
T1
T2
N/A
Not Applicable to Warranty
–
–
–
–
Recommendations for Windshield Wiper Maintenance, Cleaning, and Use: 1. Scheduled Maintenance S Check wiper rubber blades every 4 – 6 months or 7,500 miles for wear, cracking, and contamination. S Clean glass and rubber wiper blades if blades are not clearing glass adequately. If this does not correct the problem, then replace the rubber elements. 2. Cleaning Procedure S Wiper Rubber: Bugs, dirt, sap, and road grime on blades will cause streaking. Clean wiper rubber of road and environmental debris using cloth or paper towel soaked with windshield washer fluid or mild detergent. S DO NOT USE fuel, kerosene, or petroleum based products to clean rubber wiper blades. S Windshield: Bugs, sap, road grime, and car wash wax treatments decrease wiper performance. S Rinse windshield with water and apply non–abrasive cleaner, such as Bon–Ami (www.faultless.com), with a sponge. NOTE: Make sure to use plenty of water with all powder based cleaners so the glass is not scratched.
Lexus s ASE Certification
Page 1 of 2
BODY
BO004-05
Title:
WINDSHIELD WIPER BLADE MAINTENANCE AND CLEANING – BO004-05 Maintenance, Cleaning & Use (Continued)
July 13, 2005
3. Contributors to Poor Performance/Decreased Rubber Blade Life (require rubber replacement) S Dusty areas cause the rubber edge to wear quickly. S Sand and salt used for road conditioning during winter causes the edge to wear quickly, so areas with significant snowfall require more frequent wiper replacement. S Heat and time cause the rubber to become excessively “permanent set,” so the rubber does not turn over, resulting in streaking and/or unwiped areas on the glass. S Rubber is easily cut or torn while using ice scrapers on the glass. S Rubber can be torn when pulling blades off a frozen windshield. S Using wipers instead of an ice scraper to remove frost and ice from the windshield during a car warm up can dull, nick, or tear the rubber. S Banging wiper on the glass to remove ice & snow can cause the blade to bend and rubber to come out of the blade providing the potential to scratch the glass. S Ice forms in wiper blade pin ts, which causes streaking and unwiped areas. To remove ice from pin ts, compress the blade and rubber with your hand to loosen the frozen ts. To prevent this condition, use winter blades with a rubber cover.
Page 2 of 2
Technical Service Information Bulletin
SEAT BELT EXTENDER Models:
’03 – ’05 Model Year
September 29, 2004
BODY
BO009-04
Title:
TSIB REVISION NOTICE: S December 9, 2005: The “Rear Seat Belt Extender Applications” section has been updated. In the Part Number Information table, the part numbers for series Q–6 have been updated. S June 28, 2005: In the “Rear Seat Belt Extender Applications” section, the series number for the ’05 ES 330 has been updated to R–7. Previous versions of this TSIB should be discarded. Introduction
Lexus customers who find it necessary to increase the length of their seat belts may obtain Seat Belt Extenders at no cost through their local Lexus dealer.
Seat Belt
S The extender is available in 6 inch, 9 inch, 12 inch, 15 inch, and 18 inch lengths. S The extender is available only in black. S Owners are informed of the Seat Belt Extender availability through the Lexus Owner’s Manual included in each vehicle.
Extender
The customer (individual requiring the extender) must visit a Lexus dealership to have the required measurements made and to complete the Seat Belt Extender Worksheet. The worksheet will allow the proper fitting and selection of a Seat Belt Extender for the customer. The dealership personnel should then determine the applicable part number and place an order through Dealer Daily. The dealership service department should complete the affixed Seat Belt Extender Customer Information Label on the part and review the “Owner Instruction Sheet” with the customer. The dealership should give a copy of the completed worksheet to the customer and keep the original in the customer’s file. To assure utmost owner satisfaction, it is recommended that a dealership designate one person to coordinate all activities related to the Seat Belt Extender issue. It is recommended that dealerships do NOT stock Seat Belt Extenders due to the need for proper fitting to individual customers. This bulletin contains the following information: Procedure and Sample Label . . . . . . . . . . Page Application Charts . . . . . . . . . . . . . . . . . . . . Page Part Number Information . . . . . . . . . . . . . . Page Owner Instructions . . . . . . . . . . . . . . . . . . . Page Seat Belt Extender Worksheet . . . . . . . . . Page Applicable Vehicles Warranty Information
2 3 4 5 6
S 2003 – 2005 model year Lexus vehicles. OP CODE
DESCRIPTION
TIME
OFP
T1
T2
N/A
Not Applicable to Warranty
–
–
–
–
Lexus s ASE Certification
Page 1 of 6
SEAT BELT EXTENDER: ’03–’05 MODEL YEAR – BO009-04 Revised
Procedure
September 29, 2004
1. Customer requests a Seat Belt Extender from dealer. 2. Dealer verifies the need for a Seat Belt Extender and obtains a current copy of this TSIB and copies the Worksheet. 3. Dealer measures the customer and completes the Worksheet. Dealer determines the correct part number and places an order for the part through Dealer Daily. 4. Dealer receives Seat Belt Extender and calls the customer to check the fit of the part. 5. If the Seat Belt Extender fit is good, dealership personnel completes the Customer Information Label on the part, explains usage of the part, and gives the customer a copy of the completed Worksheet. 6. Dealer places copy of the completed Worksheet in the customer’s records. DEALER
MEASURE CUSTOMER & COMPLETE WORKSHEET
PLACE ORDER THROUGH DEALER DAILY
PARTS SUPPLY SHIP SEAT BELT EXTENDER TO DEALER
DEALER
TEST FIT CUSTOMER WITH PART
COMPLETE LABEL AND ADVISE CUSTOMER
OWNER
RECEIVE COPY OF WORKSHEET & USE EXTENDER
FILE WORKSHEET IN CUSTOMER RECORDS
Sample Seat Belt Extender Customer Information Label
CAUTION THIS SEAT BELT EXTENDER IS TO BE USED ONLY BY: ON VEHICLE: VIN: SEATING POSITION: USE BY OTHERS, OR IN ANOTHER SEATING POSITION, OR IN ANOTHER VEHICLE COULD REDUCE SEAT BELT RESTRAINT IN AN ACCIDENT AND RESULT IN PERSONAL INJURY.
Page 2 of 6
September 29, 2004
SEAT BELT EXTENDER: ’03–’05 MODEL YEAR – BO009-04 Revised Front Seat Belt Extender Applications
FRONT SEAT – EXTENDER APPLICATION MODEL
’05
’04
’03
ES 300
–
–
R–5
ES 330
R–6
R–6
–
GS 300
R–3
R–3
R–3
GS 430
R–3
R–3
R–3
GX 470
K–6
K–6
K–6
K–6
K–6
K–6
LS 430
R–3
R–3
R–3
LX 470
K–6
K–6
K–6
RX 300
–
–
R–5
RX 330
R–7
R–7
–
SC 430
R–3
R–3
R–3
’05
’04
’03
ES 300
–
–
R–5
ES 330
R–7
R–5
–
K–5
K–5
K–5
K–5
K–5
K–5
GX 470
K–5
K–5
K–5
IS 300
R–5
R–5
R–5
R–3
R–3
R–3
K–5
K–5
K–5
–
–
R–5
R–6 or Q–5 R–5
R–6 or Q–5 R–5
IS 300
Rear Seat Belt Extender Applications
TYPE
All Models
REAR SEAT – EXTENDER APPLICATION MODEL
GS 300 GS 430
LS 430 LX 470 RX 300
TYPE
All Models
RH, LH All Models
RX 330
RH, LH
SC 430
All Models
– R–5
NOTE: The extender must NOT be used for the center rear seat belt.
Page 3 of 6
SEAT BELT EXTENDER: ’03–’05 MODEL YEAR – BO009-04 Revised Part Number Information
PART NUMBER PREFIX: 73399– SERIES
Page 4 of 6
September 29, 2004
LENGTH 6 INCH
9 INCH
12 INCH
15 INCH
18 INCH
R–3
–50010
–50020
–50030
–50040
–50050
R–5
–16060
–16070
–16080
–16090
–16100
R–6
–35110
–35120
–35130
–35140
–35150
R–7
–48010
–48020
–48030
–48040
–48050
N–6
–20160
–20170
–20180
–20190
–20200
K–5
–35010
–35020
–35030
–35040
–35050
K–6
–35060
–35070
–35080
–35090
–35100
Q–5
–AE010
–AE020
–AE030
–AE040
–AE050
Q–6
–AE061
–AE071
–AE081
–AE091
–AE101
SEAT BELT EXTENDER: ’03–’05 MODEL YEAR – BO009-04 Revised Owner Instructions
September 29, 2004
Failure to follow the recommendations indicated below could result in reduced effectiveness of the seat belt restraint system in case of vehicle collision, causing personal injury. If your seat belt cannot be fastened securely because it is not long enough, a personalized Seat Belt Extender is available from your Lexus dealer free of charge. Please visit your local Lexus dealer so that the dealer can order the proper required length extender. Bring the heaviest coat you expect to wear for proper measurement and selection of length. Additional ordering information is available at your Lexus dealer. When the Seat Belt Extender is provided for rear seat positions (with automatic locking retractor), make sure that the retractor is locked when in use. To connect the extender to the seat belt, insert the tab into the seat belt buckle so that the buckle-release buttons of the extender and the seat belt are both facing outward as shown. You will hear a click when the tab locks into the buckle. When not in use, remove the extender and store in the vehicle for future use.
Seat Belt Release
Seat Belt Extender
CAUTION: On vehicles equipped with SRS – Occupant Classification System (OCS)*, it is critical that the extender tab be buckled into the buckle AFTER the occupant sits down in the seat. Leaving extender installed in the buckle before sitting down will cause the OCS to be in the “airbag off” or disarmed state. *
OCS will enable or disable the enger front and side airbags based on enger weight and seat belt latch position classifying the enger as a child or adult.
CAUTION: When using the Seat Belt Extender, observe the following. Failure to follow these instructions could result in reduced effectiveness of the seat belt restraint system in case of vehicle accident, increasing the chance of personal injury. S Never use the Seat Belt Extender if you can COMFORTABLY fasten the seat belt without it. S The Seat Belt Extender must never be used with any child safety seats. S that the extender provided for you may not be safe when used on a different vehicle, for another person or for a different seating position than the one originally intended.
Page 5 of 6
SEAT BELT EXTENDER WORKSHEET PLEASE COPY THIS ORIGINAL WORKSHEET FOR EACH EXTENDER NEEDED CAUTIONS: S To minimize the chance and/or severity of injury in an accident, the Seat Belt Extender must only be used: 1 By the person for whom it was provided. 2 In the seat position for which it was provided. S The Seat Belt Extender must never be used with any child safety seats. S When the Seat Belt Extender is provided for rear seat positions (with automatic locking retractor), make sure the retractor is locked when extender belt is in use. DEALER DEALER CODE
SEAT BELT EXTENDER APPLICATION
DEALER NAME
APPLICANT
APPLICANT NAME
ADDRESS
ADDRESS
CITY & STATE EMPLOYEE NAME
MODEL YEAR
ZIP
CITY & STATE
BODY TYPE
SEATING POSITION
ZIP
PHONE
VEHICLE IDENTIFICATION NUMBER
DIRECTIONS FOR DETERMINING PROPER EXTENDER LENGTH 1. 2.
Place the seat in the position the applicant normally uses. With the applicant in the seat, wearing the thickest coat expected to be worn, pull belt all the way out and try to buckle belt. S If belt latches into buckle and feels comfortable against upper chest area, an extender is not needed. S If belt does not buckle, continue with Step 3. S If buckle latches but belt has no slack remaining, continue with Step 3. 3. Measure distance between applicant’s navel and seat belt buckle (Dimension A) and enter on Worksheet. 4. With belt all the way out, measure distance between latch tip and buckle tip (Dimension B) and enter on Worksheet. NOTE: If belt latches but there is no slack enter zero as Dimension B. 5. Subtract Dimension B from Dimension A and record number in Check Number box on Worksheet. 6. Seat Belt Extender length is Dimension B rounded up to next extender length (without exceeding Check Number). NOTE: If extender length exceeds Check Number, an extender cannot be provided to the customer.
CAUTION: On vehicles equipped with SRS — Occupant Classification System (OCS), it is critical that the extender tab be buckled into the buckle AFTER the occupant sits down in the seat. Leaving extender installed in the buckle before sitting down will cause the OCS to be in the “airbag off” or disarmed state. Dimension A: NAVEL TO BUCKLE
Buckle
Navel
Dimension B: LATCH TO BUCKLE
Latch
A
B
Buckle
SEAT BELT EXTENDER CALCULATION DIMENSION A:
DIMENSION B:
CHECK NUMBER:
SEAT BELT EXTENDER AUTHORIZATION S The same Seat Belt Extender can be used for right and left seating applications. Each Seat Belt Extender will have a label identifying the owner, VIN and seating position. S Applicant’s Signature: Date: (Actual of Seat Belt Extender) Page 6 of 6
Technical Service Information Bulletin November 9, 2005
REAR BUCKLE EASE OF USE IMPROVEMENT Models:
’05 ES 330
TSIB REVISION NOTICE: S November 10, 2005: The second Op Code has been updated in Warranty Information (Combo A for “Opposite Side”). Previous versions of this TSIB should be discarded. Introduction
Applicable Vehicles Production Change Information
The rear seat belt buckle tether strap has been modified to improve the ease of use for the customer. S 2005 model year ES 330 vehicles produced BEFORE the Production Change Effective VINs shown below. MODEL
PART NAME
Belt Assembly, RR Seat Inner w/ CTR, RH ES 330 Belt Assembly, RR Seat Inner w/ CTR, LH
Parts Information
PREVIOUS PART NUMBER
PART NUMBER
PRODUCTION CHANGE EFFECTIVE VIN
73470–33040–A0
JTHBA30G955128105
73470–33040–B0
JTHBA30G455128366
73470–33040–C0
JTHBA30G855128774
73480–33130–A0
JTHBA30G955128220
73480–33130–B0
JTHBA30G755128247
73480–33130–C0
JTHBA30G755128409
CURRENT PART NUMBER
PART NAME
QTY
B lt Assembly, Belt A bl RR Seat S t Inner I w// CTR RH CTR,
1
B lt A Belt Assembly, bl RR S Seatt IInner w// CTR LH CTR,
1
73470–33040–A0 73470–33040–B0 73470–33040–C0 73480–33130–A0
Same
73480–33130–B0 73480–33130–C0 Warranty Information
OP CODE
DESCRIPTION
TIME
711511
R & R Rear Seat Belt Buckle
0.4
Combo A
Opposite Side
0.2
OFP
T1
73470–33040–#0 73480–33130–#0
T2
9A 99
Applicable Warranty*: This repair is covered under the Lexus Powertrain Warranty. This warranty is in effect for 72 months or 70,000 miles, whichever occurs first, from the vehicle’s in-service date. * Warranty application is limited to correction of a problem based upon a customer’s specific complaint.
Lexus s ASE Certification
Page 1 of 9
BODY
BO011-05
Title:
REAR BUCKLE EASE OF USE IMPROVEMENT – BO011-05 Revised Parts Identification
Repair Procedure
Previous Part
November 9, 2005
New Part
HINT: Use the same procedure for the LH side and RH side.
NOTE: For removal of rear seat, refer to the Technical Information System (TIS), 2005 model year ES 330 Repair Manual: Seat: Rear Seat Assy: Overhaul.
1. Remove the rear seat cushion assembly. 2. Remove the rear seatback assembly. 3. Remove the rear door opening trim weatherstrip LH. 4. Remove the rear door opening trim weatherstrip RH. 5. Remove the roof side garnish inner LH. 6. Remove the roof side garnish inner RH. 7. Remove the center stop lamp assembly (without sun shade). 8. Remove the child restraint seat tether anchor cover.
Page 2 of 9
REAR BUCKLE EASE OF USE IMPROVEMENT – BO011-05 Revised Repair Procedure (Continued)
November 9, 2005
9. Remove the rear seat shoulder belt cover. Using a screwdriver, disengage the 12 claws and remove the 3 rear seat shoulder belt covers. HINT: Tape the screwdriver tip before use.
: Claw
10. Remove the package tray trim assembly. A. Remove the 2 bolts and release the floor anchors of the seat belts.
Page 3 of 9
REAR BUCKLE EASE OF USE IMPROVEMENT – BO011-05 Revised Repair Procedure (Continued)
November 9, 2005
B. Without Sun Shade: Disengage the 6 claws and 2 clips and remove the package tray trim assembly.
: Claw : Clip
C. With Sun Shade: Disengage the 2 clips and remove the package tray trim assembly.
: Clip
11. Remove the rear seat center belt assembly RH. Remove the bolt holding the retractor and disengage the claws of the stopper to remove the rear seat center belt assembly RH.
Page 4 of 9
REAR BUCKLE EASE OF USE IMPROVEMENT – BO011-05 Revised Repair Procedure (Continued)
November 9, 2005
12. Install the rear seat center belt assembly RH. A. Check the degree of tilt when the ELR begins to lock. Check that the belt does NOT lock at less then 15r of tilt in any direction but locks at over 45r of tilt when gently moving the installed retractor.
Unlock
45°
Lock
B. Install the retractor of the rear seat center belt assembly RH and torque the bolt. Torque: 42 NSm (420 kgfScm, 31 ftSlbf)
C. Check the ELR lock. Check that the belt locks when pulled out quickly. D. Check the fastening function for the child restraint system. NOTE: Check should be done with the assembly installed.
a. Check that the belt cannot be pulled out any more but can be rewound after being pulled out. b. Check that the belt can be pulled out and rewound after being fully rewound.
Page 5 of 9
REAR BUCKLE EASE OF USE IMPROVEMENT – BO011-05 Revised Repair Procedure (Continued)
November 9, 2005
E. Install the floor anchor of the rear seat center belt assembly RH with the bolt facing the arrow mark on the plate toward the front of the vehicle. Torque: 42 NSm (420 kgfScm, 31 ftSlbf) NOTE: Ensure that the anchor does NOT run into any protrusions on the floor .
Protrusion Front
Protrusion
F. Check the ELR lock. Check that the belt locks when pulled out quickly. 13. Remove the rear seat center belt assembly LH. Remove the bolt and remove the rear seat center belt assembly LH.
Page 6 of 9
REAR BUCKLE EASE OF USE IMPROVEMENT – BO011-05 Revised Repair Procedure (Continued)
November 9, 2005
14. Install the rear seat center belt assembly LH. A. Check the degree of tilt when the ELR begins to lock. Check that the belt does NOT lock at less then 15r of tilt in any direction but locks at over 45r of tilt when gently moving the installed retractor.
Unlock
45°
Lock
B. Install the retractor of the rear seat center belt assembly LH and torque the bolt. Torque: 42 NSm (420 kgfScm, 31 ftSlbf)
C. Check the ELR lock. Check that the belt locks when pulled out quickly. D. Check the fastening function for the child restraint system. NOTE: Check should be done with the assembly installed.
a. Check that the belt cannot be pulled out any more but can be rewound after being pulled out. b. Check that the belt can be pulled out and rewound after being fully rewound.
Page 7 of 9
REAR BUCKLE EASE OF USE IMPROVEMENT – BO011-05 Revised Repair Procedure (Continued)
November 9, 2005
E. Install the floor anchor of the rear seat center belt assembly LH with the bolt facing the arrow mark on the plate toward the front of the vehicle. Torque: 42 NSm (420 kgfScm, 31 ftSlbf) NOTE: Ensure that the anchor does NOT run into any protrusions on the floor .
Protrusion Front
Protrusion
F. Check the ELR lock. Check that the belt locks when pulled out quickly. 15. Install the package tray trim assembly. A. Without Sun Shade: Engage the 6 claws and 2 clips to install the package tray trim assembly.
: Claw : Clip
Page 8 of 9
REAR BUCKLE EASE OF USE IMPROVEMENT – BO011-05 Revised Repair Procedure (Continued)
November 9, 2005
B. With Sun Shade: Engage the 2 clips to install the package tray trim assembly.
: Clip
16. Reinstall the seat cushions in the reverse order of removal. 17. Dispose of the old seat belt appropriately. For proper disposal procedures, refer to TIS, 2005 model year ES 330 Repair Manual: Seat Belt: Rear Seat Belt: Disposal.
Page 9 of 9
CENTER CONSOLE LATCH IMPROVEMENT
Technical Service Information Bulletin
Models:
’02 – ’05 ES 300 & ES 330
December 22, 2004
Introduction
Applicable Vehicles
For improved durability, the center console door lock opener for ES 300 and ES 330 vehicles are now made from metal, instead of the previous plastic material. This improved lock is available as a service part and will not require replacement of the entire console lid.
S 2002 – 2005 model year ES 300 and ES 330 vehicles produced BEFORE the Production Change Effective VINs shown below.
Production Change Information
Parts Information
Warranty Information
BODY
BO012-04
Title:
PLANT
PRODUCTION CHANGE EFFECTIVE VIN
Tsutsumi
JTHBA30G#50024455
Kanto
JTHBA30G#55077938
PREVIOUS PART NUMBER
CURRENT PART NUMBER
PART NAME
QTY
58908–32050
58908–32020
Lock Assembly, Console Compartment Door
1
OP CODE
DESCRIPTION
TIME
OFP
BD4024
Replace Center Console Lock
0.2
58908–32050
T1
T2
62 12
Applicable Warranty*: This repair is covered under the Lexus Comprehensive Warranty. This warranty is in effect for 48 months or 50,000 miles, whichever occurs first, from the vehicle’s in-service date. * Warranty application is limited to correction of a problem based upon a customer’s specific complaint.
Lexus s ASE Certification
Page 1 of 1
Technical Service Information Bulletin November 10, 2005
SEAT COVER REPLACEMENT FOR SIDE AIRBAG EQUIPPED VEHICLES Models:
’97 – ’06 All Lexus Models
TSIB UPDATE NOTICE: The information contained in this TSIB supercedes TSIB No. BO004-98. TSIB No. BO004-98 is now obsolete and should be discarded. Introduction
Beginning in 1997, Lexus introduced side airbags for the LS 400. Starting with 1998, all Lexus vehicles are equipped with side airbags as standard equipment. Lexus does NOT recommend replacement of original seat covers* with non-Lexus leather or other seat cover materials due to the following: S Seat covers NOT recommended by Lexus may affect side airbag performance, in general or in part, during an accident. S Modifications that negatively affect side airbag performance can result in severe occupant injuries. S Seat covers are an integral part of this safety system. Replacing original seat covers* with non-Lexus leather or other seat cover materials may compromise the effectiveness of this safety system. S The design of the seat is complex, integrating safety and strength with comfort and luxury. *NOTE: Lexus original seat covers that were NOT designed for side airbag equipped seats cannot be used due to the effect on proper airbag performance.
Lexus strongly discourages modifying original equipment seats that have side airbags. Additionally, Lexus strongly advises against the installation or use of aftermarket seat covers, which could impair the performance of the side airbags in the event of an accident.
Applicable Vehicles
Warranty Information
S All 1997 – 2006 model year Lexus vehicles.
OP CODE
DESCRIPTION
TIME
OFP
T1
T2
N/A
Not Applicable to Warranty
–
–
–
–
Lexus s ASE Certification
Page 1 of 1
BODY
BO012-05
Title:
Technical Service Information Bulletin February 16, 2005
Introduction
M.I.L. ON" DTC P0031, P0051, P2238, AND/OR P2241 Models:
’04 – ’05 ES 330
Under certain driving conditions, some 2004 and 2005 model year ES 330 vehicles may exhibit a M.I.L. “ON” with at least one of the following DTCs: S P0031 (Oxygen Sensor Heater Control Circuit Low [Bank 1, Sensor 1]) S P0051 (Oxygen Sensor Heater Control Circuit Low [Bank 2, Sensor 1]) S P2238 (Oxygen Sensor Pumping Current Circuit Low (for A/F Sensor) [Bank 1, Sensor 1]) S P2241 (Oxygen Sensor Pumping Current Circuit Low (for A/F Sensor) [Bank 2, Sensor 1]) The A/F sensor manufacturing process and the Engine Control Module (ECM) (SAE term: Powertrain Control Module/PCM) logic have been modified to improve these conditions. NOTE: S Version 12.01a or later Diagnostic Tester software is required to perform this procedure. S Before proceeding, the ECM (PCM) calibration has NOT been updated by checking for the Authorized Modifications Label (shown in step 2 of the Repair Procedure).
Applicable Vehicles
Production Change Information
Warranty Information
S 2004 model year ES 330 vehicles. S 2005 model year ES 330 vehicles produced BEFORE the Production Change Effective VIN shown below.
MODEL
PRODUCTION CHANGE EFFECTIVE VIN
2005 ES 330
JTHBA30G*55086805
OP CODE
DESCRIPTION
TIME
OFP
EG4029
Recalibrate ECM (PCM) Engine, R & R Both A/F Sensors
1.6
89661–33A40 89661–33A41 89661–33B30
T1
T2
8A 99
Applicable Warranty*: This repair is covered under the Lexus Federal Emissions Warranty. This warranty is in effect for 96 months or 80,000 miles, whichever occurs first, from the vehicle’s in-service date. * Warranty application is limited to correction of a problem based upon a customer’s specific complaint.
Lexus s ASE Certification
Page 1 of 4
ENGINE
EG003-05
Title:
M.I.L. “ON” DTC P0031, P0051, P2238, AND/OR P2241 – EG003-05 Parts Information
February 16, 2005
PREVIOUS PART NUMBER
CURRENT PART NUMBER
PART NAME
QTY
89467–33110
Same
Sensor, Air Fuel Ratio, Rear (Bank 1)
1
89467–33100
Same
Sensor, Air Fuel Ratio, Front (Bank 2)
1
N/A
00451–00001–LBL
Authorized Modifications Label
1
NOTE: Authorized Modification Labels may be ordered in packages of 25 from the Materials Distribution Center (MDC) through Dealer Daily Dealer Materials System or by calling the MDC at 1–800–622–2033.
Required SSTs
SPECIAL SERVICE TOOLS (SSTs)
Lexus Diagnostic Tester Kit*
12 Megabyte Diagnostic Tester Program Card with version 12.01a Software (or later)* *
PART NUMBER
QUANTITY
01001270
1
01002593-005
1
Essential SSTs.
NOTE: Additional Diagnostic Tester Kits, Program Cards, or other SSTs may be ordered by calling SPX/OTC at 1-800-933-8335.
Calibration Identification Chart
ENGINE
3MZ–FE
ECM (U)
PREVIOUS CALIBRATION ID
NEW CALIBRATION ID
Main
33350000 33350100 33360000
33360100
Sub
53334000
53340000
NOTE: S Although the calibration description in the Calibration Update Wizard and on the Diagnostic Tester reads “04 ES 330,” these calibrations apply to 2004 and 2005 model year ES 330 vehicles produced before the Production Change Effective VIN shown on page 1 of this TSIB. S 2004 model year ES 330 vehicles, which have been flash reprogrammed using the procedures in this TSIB, will contain upgraded 2005 model year OBD II logic. Refer to the 2005 model year ES 330 Repair Manual information on the Technical Information System (TIS) when checking Powertrain Diagnostic Trouble Codes (DTCs) on 2004 model year vehicles that have been reprogrammed.
Page 2 of 4
M.I.L. “ON” DTC P0031, P0051, P2238, AND/OR P2241 – EG003-05 Repair Procedure
February 16, 2005
1. Replace both Bank 1, Sensor 1 and Bank 2, Sensor 1 air fuel ratio sensors. 2. Check for the Authorized Modifications Label affixed to the vehicle in the location shown in Figure 1. Confirm if ECM (PCM) calibration has been updated. If not the latest ECM (PCM) calibration — go to step 3.
Replacement ECM (PCM) Part Number THE FOLLOWING MODIFICATIONS HAVE BEEN MADE: Calibration ID(s)
89661–33A40 33360100, 53340000 THESE MODIFICATIONS HAVE BEEN APPROVED AS APPROPRIATE BY EPA AND CARB DEALER CODE: DATE: CHANGE AUTHORITY: TSIB EG003–05
Dealer Code
Date Completed
TSIB Number
Figure 1. Location of Authorized Modifications Label on 2004 ES 330
Page 3 of 4
M.I.L. “ON” DTC P0031, P0051, P2238, AND/OR P2241 – EG003-05 Repair Procedure (Continued)
February 16, 2005
3. Connect the Diagnostic Tester to the vehicle and select CURRENT ECU CAL from the ECU REPROGRAM MAIN MENU. Determine the vehicle’s current ECU calibration (see Figure 2). – The sample screen prints seen below are the 12.01a software version and may differ from subsequent software versions.
A
B
ECU REPROGRAM MAIN MENU
CURRENT ECU CAL
1: GET CAL FROM PC 2: CURRENT ECU CAL 3: UPDATE ECU CAL 4: CAL ON TESTER 5: CLEAR CAL DATA
CALIBRATION ID 33350000 53334000
Figure 2. Determining Current ECU Calibration
NOTE: S If Calibration ID matches “Previous Calibration ID” as shown in Calibration Identification Chart on page 2, proceed with flash reprogramming. S If Calibration ID matches “New Calibration ID” as shown in Calibration Identification Chart, this vehicle has already been programmed. Refer to TIS for diagnostic procedures applicable to any stored DTCs.
4. If ECU calibration ID is not the same as the “New Calibration ID” listed previously, proceed to Flash Reprogram ECM (PCM). 5. Flash Reprogram ECM (PCM) A. Follow the procedures outlined in TSIB No. SS001–01, “ECU Flash Reprogramming Process,” and flash the ECM (PCM) with the new calibration file update. B. Enter the required information on the Authorized Modifications Label and affix it to the vehicle at the location shown in Figure 1 (page 3). The Authorized Modifications Label is available through the MDC, P/N 00451–00001–LBL. 6. Follow the procedures outlined in TSIB No. EG012–04, “Entering VIN During ECM (PCM) Replacement and/or DTC P0630,” and write the VIN to the ECM (PCM). 7. The repair is complete. Test drive vehicle to confirm normal operation.
Page 4 of 4
Technical Service Information Bulletin
M.I.L. ON" DTC P0346 Models:
’04 – ’05 ES 330
March 15, 2005
Introduction
Under certain driving conditions, some 2004 and 2005 model year ES 330 vehicles may exhibit a M.I.L. “ON” with the following DTC: S P0346 (Camshaft Position Sensor “A” Circuit Range/Performance [Bank 2]) The Engine Control Module (ECM) (SAE term: Powertrain Control Module/PCM) logic have been modified to change this condition. NOTE: S Version 12.01a or later Diagnostic Tester software is required to perform this procedure. S Before proceeding, the ECM (PCM) calibration has NOT been updated by checking for the Authorized Modifications Label (shown in step 1 of the Repair Procedure).
Applicable Vehicles
Production Change Information
Warranty Information
S 2004 model year ES 330 vehicles. S 2005 model year ES 330 vehicles produced BEFORE the Production Change Effective VIN shown below.
MODEL
PRODUCTION CHANGE EFFECTIVE VIN
2005 ES 330
JTHBA30G*55086805
OP CODE
DESCRIPTION
TIME
OFP
EG5013
Recalibrate ECM (PCM) Engine
0.8
89661–33A40 89661–33A41 89661–33B30
T1
T2
8A 99
Applicable Warranty*: This repair is covered under the Lexus Federal Emissions Warranty. This warranty is in effect for 96 months or 80,000 miles, whichever occurs first, from the vehicle’s in-service date. * Warranty application is limited to correction of a problem based upon a customer’s specific complaint.
Lexus s ASE Certification
Page 1 of 4
ENGINE
EG006-05
Title:
M.I.L. “ON” DTC P0346 – EG006-05 Parts Information
March 15, 2005
PREVIOUS PART NUMBER
CURRENT PART NUMBER
PART NAME
QTY
N/A
00451–00001–LBL
Authorized Modifications Label
1
NOTE: Authorized Modification Labels may be ordered in packages of 25 from the Materials Distribution Center (MDC) through Dealer Daily Dealer Materials System or by calling the MDC at 1–800–622–2033.
Required SSTs
SPECIAL SERVICE TOOLS (SSTs)
Lexus Diagnostic Tester Kit*
12 Megabyte Diagnostic Tester Program Card with version 12.01a Software (or later)* *
PART NUMBER
QUANTITY
01001270
1
01002593-005
1
Essential SSTs.
NOTE: Additional Diagnostic Tester Kits, Program Cards, or other SSTs may be ordered by calling SPX/OTC at 1-800-933-8335.
Calibration Identification Chart
ENGINE
3MZ–FE
ECM (U)
PREVIOUS CALIBRATION ID
NEW CALIBRATION ID
Main
33350000 33350100 33360000
33360100
Sub
53334000
53340000
NOTE: S Although the calibration description in the Calibration Update Wizard and on the Diagnostic Tester reads “04 ES 330,” these calibrations apply to 2004 and 2005 model year ES 330 vehicles produced before the Production Change Effective VIN shown on page 1 of this TSIB. S 2004 model year ES 330 vehicles, which have been flash reprogrammed using the procedures in this TSIB, will contain upgraded 2005 model year OBD II logic. Refer to the 2005 model year ES 330 Repair Manual information on the Technical Information System (TIS) when checking Powertrain Diagnostic Trouble Codes (DTCs) on 2004 model year vehicles that have been reprogrammed.
Page 2 of 4
M.I.L. “ON” DTC P0346 – EG006-05 Repair Procedure
March 15, 2005
1. Check for the Authorized Modifications Label affixed to the vehicle in the location shown in Figure 1. Confirm if ECM (PCM) calibration has been updated. If not the latest ECM (PCM) calibration — go to step 2.
Replacement ECM (PCM) Part Number THE FOLLOWING MODIFICATIONS HAVE BEEN MADE: Calibration ID(s)
89661–33A40 33360100, 53340000 THESE MODIFICATIONS HAVE BEEN APPROVED AS APPROPRIATE BY EPA AND CARB DEALER CODE: DATE: CHANGE AUTHORITY: TSIB EG006–05
Dealer Code
Date Completed
TSIB Number
Figure 1. Location of Authorized Modifications Label on 2004 ES 330
Page 3 of 4
M.I.L. “ON” DTC P0346 – EG006-05 Repair Procedure (Continued)
March 15, 2005
2. Connect the Diagnostic Tester to the vehicle and select CURRENT ECU CAL from the ECU REPROGRAM MAIN MENU. Determine the vehicle’s current ECU calibration (see Figure 2). – The sample screen prints seen below are the 12.01a software version and may differ from subsequent software versions.
A
B
ECU REPROGRAM MAIN MENU
CURRENT ECU CAL
1: GET CAL FROM PC 2: CURRENT ECU CAL 3: UPDATE ECU CAL 4: CAL ON TESTER 5: CLEAR CAL DATA
CALIBRATION ID 33350000 53334000
Figure 2. Determining Current ECU Calibration
NOTE: S If Calibration ID matches “Previous Calibration ID” as shown in Calibration Identification Chart on page 2, proceed with flash reprogramming. S If Calibration ID matches “New Calibration ID” as shown in Calibration Identification Chart, this vehicle has already been programmed. Refer to TIS for diagnostic procedures applicable to any stored DTCs.
3. If ECU calibration ID is not the same as the “New Calibration ID” listed previously, proceed to Flash Reprogram ECM (PCM). 4. Flash Reprogram ECM (PCM) A. Follow the procedures outlined in TSIB No. SS001–01, “ECU Flash Reprogramming Process,” and flash the ECM (PCM) with the new calibration file update. B. Enter the required information on the Authorized Modifications Label and affix it to the vehicle at the location shown in Figure 1 (page 3). The Authorized Modifications Label is available through the MDC, P/N 00451–00001–LBL. 5. Follow the procedures outlined in TSIB No. EG012–04, “Entering VIN During ECM (PCM) Replacement and/or DTC P0630,” and write the VIN to the ECM (PCM). 6. The repair is complete. Test drive vehicle to confirm normal operation.
Page 4 of 4
Technical Service Information Bulletin
RADIATOR CAP INSPECTION Models:
All Models
March 28, 2005
Introduction
Applicable Vehicles
Required Equipment
The procedure for inspecting the radiator cap has been revised. Please refer to the following procedures when inspecting the radiator cap on all Lexus models.
S All Lexus models.
MANUFACTURER
Snap–On/Sun SVTS262A (or equivalent)
EQUIPMENT
QTY
Cooling System Tester (Radiator Cap Tester)
1
NOTE: Additional Lexus Approved Dealer Equipment may be ordered by calling Lexus Approved Dealer Equipment at 1–800–368–6787.
Warranty Information
OP CODE
DESCRIPTION
TIME
OFP
T1
T2
N/A
Not Applicable to Warranty
–
–
–
–
Lexus s ASE Certification
Page 1 of 7
ENGINE
EG007-05
Title:
RADIATOR CAP INSPECTION – EG007-05 Required SSTs
ITEM NO.
March 28, 2005
SPECIAL SERVICE TOOLS (SSTs)
PART NUMBER
QTY
DRW**
1
Radiator Cap Test Set*
09230–00030–02
1
7
2
Radiator Cap Test Set (Small)*
09230–00020–02
1
7
* Essential SSTs. ** Refers to drawer number in SST Storage System.
NOTE: Additional SSTs may be ordered by calling SPX/OTC at 1-800-933-8335.
Radiator Cap Identification Procedure
1. Use the illustration below to identify the vehicle’s radiator cap type and kPa rating. 2. Proceed to the required inspection procedure for the radiator cap and kPa rating. Radiator Cap Identification
kPa Rating
N–Cap
Page 2 of 7
Compact Cap
Plastic Cap
RADIATOR CAP INSPECTION – EG007-05 Radiator Cap Inspection Procedure
Type: N–cap, 88 kPa
March 28, 2005
N–Cap: 88 kPa
1. Remove coolant and any foreign material on rubber points “A,” “B,” and “C.” 2. Check that points “A,” “B,” and “C” are not deformed, cracked, or swollen.
A
3. Check that points “C” and “D” are not stuck together.
D
B C
4. Apply engine coolant to points “B” and “C” before using the radiator cap tester. S Radiator Cap Tester: Snap–On/Sun P/N SVTS262A (or equivalent) 5. Before installing the radiator cap tester, use the applicable radiator cap adaptor provided in the following SST kits in conjunction with the radiator cap tester: S SST P/N 09230–00030–02 (09231–10080–01) or 09230–00020–02 (09231–10060–01) 6. When using the radiator cap tester, tilt it more than 30 degrees.
Radiator Cap Tester
7. Pump the radiator cap tester several times, and check the maximum pressure. Pumping speed: 1 pump/second HINT: Stop pumping when the valve opens and read the gauge. The gauge must be within the standard values listed below when the pressure valve opens. The cap is considered OK when the pressure holds steady or falls very slowly, but holds within the standard values listed below for one minute.
30° or more Radiator Cap
Specification: VALVE OPENING PRESSURE
SPECIFIED CONDITION
Standard value (for brand–new cap)
74.0 to 103.0 kPa (0.75 to 1.05 kgf/cm2, 10.7 to 14.9 psi)
Minimum standard value (for in–service cap)
59 kPa (0.60 kgf/cm2, 8.53 psi)
If the maximum pressure is less than the minimum standard value, replace the radiator cap sub–assembly.
Page 3 of 7
RADIATOR CAP INSPECTION – EG007-05 Radiator Cap Inspection Procedure (Continued)
Type: N–cap, 108 kPa
March 28, 2005
N–Cap: 108 kPa
1. Remove coolant and any foreign material on rubber points “A,” “B,” and “C.” 2. Check that points “A,” “B,” and “C” are not deformed, cracked, or swollen.
A
3. Check that points “C” and “D” are not stuck together.
D
B C
4. Apply engine coolant to points “B” and “C” before using the radiator cap tester. S Radiator Cap Tester: Snap–On/Sun P/N SVTS262A (or equivalent) 5. Before installing the radiator cap tester, use the applicable radiator cap adaptor provided in the following SST kits in conjunction with the radiator cap tester: S SST P/N 09230–00030–02 (09231–10080–01) or 09230–00020–02 (09231–10060–01) 6. When using the radiator cap tester, tilt it more than 30 degrees.
Radiator Cap Tester
7. Pump the radiator cap tester several times, and check the maximum pressure. Pumping speed: 1 pump/second HINT: Stop pumping when the valve opens and read the gauge. The gauge must be within the standard values listed below when the pressure valve opens. The cap is considered OK when the pressure holds steady or falls very slowly, but holds within the standard values listed below for one minute.
30° or more Radiator Cap
Specification: VALVE OPENING PRESSURE
SPECIFIED CONDITION
Standard value (for brand–new cap)
93.3 to 122.7 kPa (0.95 to 1.25 kgf/cm2, 13.5 to 17.8 psi)
Minimum standard value (for in–service cap)
78.5 kPa (0.80 kgf/cm2, 11.38 psi)
If the maximum pressure is less than the minimum standard value, replace the radiator cap sub–assembly.
Page 4 of 7
RADIATOR CAP INSPECTION – EG007-05 Radiator Cap Inspection Procedure (Continued)
Type: Compact Cap, 88 kPa
March 28, 2005
Compact Cap: 88 kPa
1. Remove coolant and any foreign material on rubber points “A,” “B,” and “C.” 2. Check that points “A” and “B” are not deformed, cracked, or swollen. 3. Check that points “B” and “C” are not stuck together.
A
B C
4. Apply engine coolant to point “B” before using the radiator cap tester. S Radiator Cap Tester: Snap–On/Sun P/N SVTS262A (or equivalent) 5. Before installing the radiator cap tester, use the applicable radiator cap adaptor provided in the following SST kits in conjunction with the radiator cap tester: S SST P/N 09230–00030–02 (09231–10080–01) or 09230–00020–02 (09231–10060–01) 6. When using the radiator cap tester, tilt it more than 30 degrees.
Radiator Cap Tester
7. Pump the radiator cap tester several times, and check the maximum pressure. Pumping speed: 1 pump/second HINT: Stop pumping when the valve opens and read the gauge. The gauge must be within the standard values listed below when the pressure valve opens. The cap is considered OK when the pressure holds steady or falls very slowly, but holds within the standard values listed below for one minute.
30° or more Radiator Cap
Specification: VALVE OPENING PRESSURE
SPECIFIED CONDITION
Standard value (for brand–new cap)
74.0 to 103.0 kPa (0.75 to 1.05 kgf/cm2, 10.7 to 14.9 psi)
Minimum standard value (for in–service cap)
59 kPa (0.60 kgf/cm2, 8.53 psi)
If the maximum pressure is less than the minimum standard value, replace the radiator cap sub–assembly.
Page 5 of 7
RADIATOR CAP INSPECTION – EG007-05 Radiator Cap Inspection Procedure (Continued)
Type: Compact Cap, 108 kPa
March 28, 2005
Compact Cap: 108 kPa
1. Remove coolant and any foreign material on rubber points “A,” “B,” and “C.” 2. Check that points “A” and “B” are not deformed, cracked, or swollen. 3. Check that points “B” and “C” are not stuck together.
A
B C
4. Apply engine coolant to point “B” before using the radiator cap tester. S Radiator Cap Tester: Snap–On/Sun P/N SVTS262A (or equivalent) 5. Before installing the radiator cap tester, use the applicable radiator cap adaptor provided in the following SST kits in conjunction with the radiator cap tester: S SST P/N 09230–00030–02 (09231–10080–01) or 09230–00020–02 (09231–10060–01) 6. When using the radiator cap tester, tilt it more than 30 degrees.
Radiator Cap Tester
7. Pump the radiator cap tester several times, and check the maximum pressure. Pumping speed: 1 pump/second HINT: Stop pumping when the valve opens and read the gauge. The gauge must be within the standard values listed below when the pressure valve opens. The cap is considered OK when the pressure holds steady or falls very slowly, but holds within the standard values listed below for one minute.
30° or more Radiator Cap
Specification: VALVE OPENING PRESSURE
SPECIFIED CONDITION
Standard value (for brand–new cap)
93.3 to 122.7 kPa (0.95 to 1.25 kgf/cm2, 13.5 to 17.8 psi)
Minimum standard value (for in–service cap)
78.5 kPa (0.80 kgf/cm2, 11.38 psi)
If the maximum pressure is less than the minimum standard value, replace the radiator cap sub–assembly.
Page 6 of 7
RADIATOR CAP INSPECTION – EG007-05 Radiator Cap Inspection Procedure (Continued)
Type: Plastic Cap, 108 kPa
March 28, 2005
Plastic Cap: 108 kPa
1. Remove coolant and any foreign material on O–ring “A.” 2. Check that O–ring “A” is not deformed, cracked, or swollen. 3. Apply engine coolant to O–ring “A” and rubber point “B” before using the radiator cap tester.
B
S Radiator Cap Tester: Snap–On/Sun P/N SVTS262A (or equivalent)
A
4. Before installing the radiator cap tester, use the applicable radiator cap adaptor provided in the following SST kits in conjunction with the radiator cap tester: S SST P/N 09230–00030–02 (09231–10080–01) or 09230–00020–02 (09231–10060–01) 5. When using the radiator cap tester, tilt it more than 30 degrees.
Radiator Cap Tester
6. Pump the radiator cap tester several times, and check the maximum pressure. Pumping speed: 1 pump/second 30° or more
HINT: Stop pumping when the valve opens and read the gauge. The gauge must be within the standard values listed below when the pressure valve opens. The cap is considered OK when the pressure holds steady or falls very slowly, but holds within the standard values listed below for one minute.
Radiator Cap
Specification: VALVE OPENING PRESSURE
SPECIFIED CONDITION
Standard value (for brand–new cap)
93.3 to 122.7 kPa (0.95 to 1.25 kgf/cm2, 13.5 to 17.8 psi)
Minimum standard value (for in–service cap)
78.5 kPa (0.80 kgf/cm2, 11.38 psi)
If the maximum pressure is less than the minimum standard value, replace the radiator cap sub–assembly.
Page 7 of 7
Technical Service Information Bulletin October 14, 2004
Introduction
Applicable Vehicles
MAIN BEARING JOURNAL DIAMETER STAMPING LOCATION REVISION Models:
’04 – ’05 ES 330 & RX 330
The main bearing journal diameter stamp location has been changed on some 2004 and 2005 model year vehicles with 3MZ–FE engines. The stamping on the front of the block has been discontinued. Review this TSB for the stamping location.
S 2004 – 2005 model year ES 330 and RX 330 vehicles meeting the following specifications: S 3MZ–FE equipped vehicles with engine serial numbers starting after 0138096.
Warranty Information
OP CODE
DESCRIPTION
TIME
OFP
T1
T2
N/A
Not Applicable to Warranty
–
–
–
–
Lexus s ASE Certification
Page 1 of 2
ENGINE
EG011-04
Title:
MAIN BEARING JOURNAL DIAMETER STAMPING LOCATION REVISION – EG011-04 Main Bearing Location
October 14, 2004
Cylinder Block Main Journal Bearing Diameter Location Underside of Cylinder Block ( Surface with Oil Pan No. 1)
Front of Cylinder Block Previous Location (Discontinued)
Current Location
Front
HINT: If replacing a bearing, replace it with one that has the same number. If the number of the bearing cannot be determined, select the correct bearing by adding together the numbers imprinted on the cylinder block and crankshaft, then refer to the table on the bottom of this page for the appropriate bearing number. The No. 1 and No. 4 journal bearings have 5 standard bearing sizes, marked 3, 4, 5, 6, and 7 accordingly. The No. 2 and No. 3 journal bearings have 5 standard bearing sizes, marked 1, 2, 3, 4, and 5 accordingly.
No. 3
No. 4
No. 3 No. 4
No. 2 No. 2 No. 1
No. 1
Number Mark
Number Mark
Number Mark
Cylinder Block + Crankshaft =
0 to 5
6 to 11
12 to 17
18 to 23
24 to 28
Replacement Bearing
3
4
5
6
7
EXAMPLE: Cylinder block imprinted number mark is “06.” Crankshaft imprinted number mark is “08.” 6 + 8 = 14 Select the bearing marked “5.” Page 2 of 2
Technical Service Information Bulletin October 14, 2004
ENTERING VIN DURING ECM (PCM) REPLACEMENT AND/OR DTC P0630 Models:
All ’04 – ’06 Models
TSIB REVISION NOTICE: S June 3, 2005: Content has been updated to include 2004 and 2006 model year vehicles. Step 4 of the VIN Write Procedure (page 2) and step 3 of the VIN Read Procedure (page 3) have been clarified to include RX 400h vehicles. Previous versions of this TSB should be discarded. Introduction
All 2005 and subsequent model year Lexus vehicles have the VIN (Vehicle Identification Number) stored in the Electronic Control Module (ECM) (SAE term: Powertrain Control Module/PCM) non–volatile memory. The VIN is accessible on the data stream using the Lexus Diagnostic Tester and can also be written to a new ECM (PCM) using a “VIN Read/Write” utility. Service ECMs (supply parts) are shipped without the VIN; therefore, as part of the ECM (PCM) replacement procedure, the VIN must be written to the replacement ECM (PCM) using the Diagnostic Tester utility function. Failure to write the VIN to the ECM (PCM) will result in a M.I.L. “ON” condition and set DTC P0630: VIN Not Programmed or Mismatch – ECM (PCM). It is very important to to enter the VIN on these vehicles. Vehicles with missing VINs are subject to failing some state and local vehicle emissions Inspection and Maintenance programs. NOTE: 2004 model year vehicles which have been flash reprogrammed may contain updated 2005 model year OBD II logic. These vehicles will require VIN entry into the ECM (PCM) after reprogramming.
Applicable Vehicles
Warranty Information
S 2004 model year vehicles that have been flash reprogrammed. S All 2005 – 2006 model year vehicles.
OP CODE
DESCRIPTION
TIME
OFP
T1
T2
N/A
Not Applicable to Warranty
–
–
–
–
Lexus s ASE Certification
Page 1 of 3
ENGINE
EG012-04
Title:
ENTERING VIN DURING ECM REPLACEMENT AND/OR DTC P0630 – EG012-04 Revised Required SSTs
ITEM NO.
SPECIAL SERVICE TOOLS (SSTs)
October 14, 2004
PART NUMBER
QTY
DRW**
LEX220036
1
8
01002744
1
8
Lexus Diagnostic Tester Kit* 1
NOTE: S All components from this kit/set are required S 12 Megabyte Diagnostic Tester Program Card (P/N 01002593–005) with version 12.2a Software (or later) is required CAN Interface Module Kit*
2
NOTE: S All components from this kit/set are required
* Essential SSTs. ** Refers to drawer number in SST Storage System.
NOTE: Additional Diagnostic Tester Kits, CAN Interface Modules, Program Cards, or other SSTs may be ordered by calling SPX/OTC at 1-800-933-8335.
VIN Write Procedure
To write a VIN to a replacement ECM (PCM), use the following process: 1. Confirm the VIN. It is located on the front left of the instrument . 2. Connect the Diagnostic Tester to DLC3. 3. Turn the ignition switch and Diagnostic Tester switch ON. 4. All vehicles except RX 400h: Select from the Diagnostic Tester menus: DIAGNOSIS, ENHANCED OBDII, VIN, and VIN WRITE.
Input a new VIN
If you want to clear the VIN, press [NO] key.
PRESS [ENTER]
RX 400h vehicles: Select from the Diagnostic Tester menus: DIAGNOSIS, OBD/MOBD, HV ECU, VIN, and VIN WRITE. 5. Write the VIN in accordance with the Diagnostic Tester display. 6. Compare the VIN displayed on the Diagnostic Tester with the VIN on the instrument . If these are not the same, write the VIN again after turning the ignition switch OFF.
WRITING COMPLETE The following VIN has been written.
The DTCs have been erased correctly.
PRESS [ENTER]
Page 2 of 3
ENTERING VIN DURING ECM REPLACEMENT AND/OR DTC P0630 – EG012-04 Revised VIN Read Procedure
1. Connect the Diagnostic Tester to DLC3. 2. Turn the ignition switch and Diagnostic Tester switch ON. 3. All vehicles except RX 400h: Select from the Diagnostic Tester menus: DIAGNOSIS, ENHANCED OBDII, VIN, and VIN READ. RX 400h vehicles: Select from the Diagnostic Tester menus: DIAGNOSIS, OBD/MOBD, HV ECU, VIN, and VIN READ.
October 14, 2004
VIN Is Displayed
********************************* [ VIN ] *********************************
PRESS [EXIT]
4. Check the VIN displayed on the Diagnostic Tester. HINT: For further explanations, refer to the Technical Information System (TIS), appropriate model repair manual: Diagnostics: SFI System: Registration.
Page 3 of 3
M.I.L. ON" DTC P0171, P0174, P2195, OR P2197 Models:
’05 – ’06 ES 330
November 17, 2005 Introduction
Under certain driving conditions, some 2005 and 2006 model year ES 330 vehicles may exhibit a M.I.L. “ON” condition with at least one of the following DTCs: S S S S
P0171 P0174 P2195 P2197
(System Too Lean [Bank 1]) (System Too Lean [Bank 2]) (Oxygen [A/F] Sensor Signal Stuck Lean [Bank 1, Sensor 1]) (Oxygen [A/F] Sensor Signal Stuck Lean [Bank 2, Sensor 1])
The Air Fuel (A/F) sensor manufacturing process has been improved to correct this condition. The following repair procedures should be used to properly diagnose and repair the affected vehicles.
Applicable Vehicles
Production Change Information
Parts Information
S 2005 – 2006 model year ES 330 vehicles produced BEFORE the Production Change Effective VIN shown below.
MODEL
ENGINE
PRODUCTION CHANGE EFFECTIVE VIN
ES 330
3MZ–FE
JTHBA3#G#65148433
MODEL
ES 330
Warranty Information
ENGINE
PREVIOUS PART NUMBER
CURRENT PART NUMBER
PART NAME
QTY
89467–33100
Same
Sensor, Air Fuel Ratio (Bank 1)
1
89467–33110
Same
Sensor, Air Fuel Ratio (Bank 2)
1
3MZ FE 3MZ–FE
OP CODE
DESCRIPTION
TIME
OFP
895131
R & R A/F Sensor
0.6
89467–33100 89467–33110
T1
T2
8A 71
Applicable Warranty*: This repair is covered under the Lexus Comprehensive Warranty. This warranty is in effect for 48 months or 50,000 miles, whichever occurs first, from the vehicle’s in-service date. * Warranty application is limited to correction of a problem based upon a customer’s specific complaint.
Lexus s ASE Certification
Page 1 of 2
ENGINE
Technical Service Information Bulletin
EG019-05
Title:
M.I.L. “ON” DTC P0171, P0174, P2195, OR P2197 – EG019-05 Required SSTs
ITEM NO.
SPECIAL SERVICE TOOLS (SSTs)
November 17, 2005
PART NUMBER
QTY
DRW**
LEX220036
1
8
01002744
1
8
Lexus Diagnostic Tester Kit* 1
NOTE: S All components from this kit/set are required S 12 Megabyte Diagnostic Tester Program Card (P/N 01002593–005) with version 13.0a Software (or later) is required CAN Interface Module Kit*
2
NOTE: S All components from this kit/set are required
* Essential SSTs. ** Refers to drawer number in SST Storage System.
NOTE: Additional Diagnostic Tester Kits, CAN Interface Modules, Program Cards, or other SSTs may be ordered by calling SPX/OTC at 1-800-933-8335.
Repair Procedure
DTC P0171 or P0174 Refer to the Technical Information System (TIS), 2005 or 2006 model year ES 330 Repair Manual: Diagnostics: SFI System (3MZ–FE): P0171, P0174. NOTE: Only replace the A/F sensor indicated by the M.I.L. “ON” DTC(s).
DTC P2195 or P2197 Refer to TIS, 2005 or 2006 model year ES 330 Repair Manual: Diagnostics: SFI System (3MZ–FE): P2195, P2197. NOTE: Only replace the A/F sensor indicated by the M.I.L. “ON” DTC(s).
Page 2 of 2
Technical Service Information Bulletin
ENGER AIRBAG INDICATOR LAMP Models:
’04 – ’05 ES 330 & RX 330
February 22, 2005
Introduction
The enger airbag indicator lamp may switch from ON to OFF for front seat engers weighing approximately less than 100 pounds, depending on their seating position. It is important for the front seat engers to know that proper operation of the advanced frontal airbag system is highly dependent on the pressure placed on the seat bottom. Situations that add or subtract sensed weight can result in occupant misclassification. To minimize this situation: S Check seating posture. – engers should be seated upright with their back against the seatback and feet on the floor. S Check loading conditions. – Extra weight from items such as bags or groceries or toys hanging on the seatback can add to the sensed weight of the front seat enger. – A rear seat enger lifting the front seat with their legs, objects placed under the front seat, or the front seatback in with the rear seat can subtract from the sensed weight of the front seat enger. If the enger airbag indicator lamp continues to switch ON to OFF after checking the above conditions, perform the following repair procedure. NOTE: The safest place for children is in the rear seat. Please note that Lexus recommends that you NEVER install a rear–facing child restraint in the front enger seat, even if the enger “Airbag OFF” lamp is illuminated. Please refer to the Owner’s Manual for additional details.
Applicable Vehicles
Warranty Information
S 2004 – 2005 model year ES 330 and RX 330 vehicles produced BEFORE the Production Change Effective VINs shown on the following page.
OP CODE
DESCRIPTION
TIME
OFP
T1
T2
EL4014
R & R Occupant Detection ECU
0.7
89952–33010 89952–48010
8A
74
Applicable Warranty*: This repair is covered under the Lexus Comprehensive Warranty. This warranty is in effect for 48 months or 50,000 miles, whichever occurs first, from the vehicle’s in-service date. * Warranty application is limited to correction of a problem based upon a customer’s specific complaint.
Lexus s ASE Certification
Page 1 of 2
ELECTRICAL
EL002-05
Title:
ENGER AIRBAG INDICATOR LAMP – EL002-05 Production Change Information
MODEL
PLANT
DRIVETRAIN
Tsutsumi
ES 330
Kanto TMK
RX 330 TMMC
Parts Information
February 22, 2005
JTHBA30G#55068000
2WD
JTJGA3#U#50046500
4WD
JTJHA3#U#50076003
2WD
2T2GA3#U#5C021700
4WD
2T2HA3#U#5C046800
CURRENT PART NUMBER
89952–33010
89952–33011
Required SSTs
JTHBA30G#50024130
2WD
PREVIOUS PART NUMBER
89952–48010
PRODUCTION CHANGE EFFECTIVE VIN
89952–48011
PART NAME
QTY
1 Occupant Detection Computer
SPECIAL SERVICE TOOLS (SSTs)
Lexus Diagnostic Tester Kit*
12 Megabyte Diagnostic Tester Program Card with version 12.01a Software (or later)*
1
PART NUMBER
QUANTITY
01001270
1
01002593-005
1
00002–09077–01
1
Occupant Seat Weight Set*
*
Essential SSTs.
NOTE: Additional Diagnostic Tester Kits, Program Cards, or other SSTs may be ordered by calling SPX/OTC at 1-800-933-8335. Repair Procedure
1. Unfasten enger seat and rock the assembly back providing access to the underside of the seat. For information to unfasten the enger seat, refer to the Technical Information System (TIS): 2004 – 2005 model year ES 330 or RX 330 Repair Manual: Seat: Front Seat Assembly LH: Overhaul. 2. Disconnect the negative terminal of the vehicle battery. 3. Disconnect electrical connectors from Occupant Detection ECU. 4. Remove and replace the Occupant Detection ECU. 5. Reinstall the seat assembly. For more information, refer to TIS: 2004 – 2005 model year ES 330 or RX 330 Repair Manual: Seat: Front Seat Assembly LH: Overhaul. Torque: 36.8 NSm (375 kgfScm, 27 ftSlbf)
6. Reconnect the negative terminal of the vehicle battery. 7. Perform Zero Point Calibration and Sensitivity Check following prompts in the Diagnostic tool found under the Occupant Detect menu item (refer to TSIB No. EL007–03, “Occupancy Classification System Calibration (DTC B1150 & B1650).” 8. Reinitialize systems affected by the disconnection of the vehicle battery. Page 2 of 2
PAINT STAINS UNDER RAPGARD
Technical Service Information Bulletin
Models:
’02 – ’06 All Models
January 31, 2003
TSIB REVISION NOTICE: S May 11, 2005: Applicable Vehicles has been updated to include 2004 – 2006 model years. The previous TSB should be discarded. Introduction
On some vehicles, when Rapgardt is removed, the paint may have a stained appearance under the clear coat. These stains should not be considered a defect in the paint (clear coat or color coat). Wrinkles in the Rapgardt sometimes trap water and cause the paint to stain from the trapped moisture, especially on horizontal surfaces, such as the hood, roof, and trunk. Stains can be removed by heating the stained surface to remove the trapped moisture.
Stains
Applicable Vehicles
Warranty Information
S 2002 – 2006 model year vehicles, all models.
OP CODE
DESCRIPTION
TIME
OFP
BD1055
Remove Paint Stain Under Rapgardt
0.6
53301–#####
T1
T2
67 99
Applicable Warranty*: This repair is covered under the Lexus Comprehensive Warranty. This warranty is in effect for 48 months or 50,000 miles, whichever occurs first, from the vehicle’s in-service date. * Warranty application is limited to correction of a problem based upon a customer’s specific complaint.
Lexus s ASE Certification
Page 1 of 2
PAINT
PA001-03
Title:
PAINT STAINS UNDER RAPGARDt – PA001-03 Revised Required Tools & Material
Repair Procedure
January 31, 2003
TOOLS & MATERIALS
QUANTITY
Infrared Lamp or Heat Gun
1
Aluminum Foil or Damp Cloth
1
Thermometer
1
1. Use the aluminum foil or damp cloth to cover plastic/rubber parts that are near the stain. 2. Apply heat to the stain using an infrared lamp or heat gun. NOTE: Apply heat for 5 – 10 minutes at 158rF – 176rF (70rC – 80rC). Do NOT allow the surface to become hotter than 176rF (80rC). Measure the temperature with a thermometer.
3. After applying heat for 5 minutes, examine the area to determine if the stain has been removed. If the stain still exists, continue to apply heat and re–examine the stain 5 minutes later.
Page 2 of 2
Technical Service Information Bulletin January 12, 2005
Introduction
IRON PARTICLE RUST CONTAMINATION REPAIR Models:
’94 – Current
The purpose of this bulletin is to provide information regarding the proper procedures to clean vehicles that may have been subjected to contamination by airborne iron particles such as rail dust. S 1994 – Current model year Lexus vehicles.
Applicable Vehicles Required Tools & Materials
TOOLS & MATERIALS
QUANTITY
Auto Magicr Special Cleaner Concentratet #713*
1
Rubber Gloves, Aprons, Boots Eye Protection
As Needed
Sponges or Wash Mitts Pail or Bucket *
Condition
Inspection
the main office of Auto Wax Company Inc. (1–800–826–0828 or www.automagic.biz) to find a local source for Auto Magicr Special Cleaner Concentrate.t
During rail transportation or extended storage near industrial areas, vehicles may occasionally be subjected to contamination by airborne iron particles shed from railroad tracks, train wheels, exposure to heavy machinery facilities, grinding, welding, etc. This type of contamination can be identified by the presence of small red or brown particles on the paint surface. These particles are often difficult to see on dark color paints, but can be easily felt when brushing a hand across horizontal body surfaces such as hood, roof, or deck lid. CAUTION: Because of the abrasiveness of these small iron particles, polishing or buffing procedures should not be attempted to repair the paint surface of an affected vehicle. This will result in further paint damage and detract from vehicle appearance.
Repair
Warranty Information
Washing the affected paint surfaces with Auto Magicr Special Cleaner Concentratet is the recommended method to dislodge embedded iron particles and remove the surrounding rust stains. The correct usage of Auto Magicr Special Cleaner Concentratet is described in this bulletin.
OP CODE
DESCRIPTION
TIME
OFP
T1
T2
N/A
Not Applicable to Warranty
–
–
–
–
Lexus s ASE Certification
Page 1 of 2
PAINT
PA001-05
Title:
IRON PARTICLE RUST CONTAMINATION REPAIR – PA001-05 General Precautions
January 12, 2005
WARNING: Auto Magicr Special Cleaner Concentratet is a corrosive material. Appropriate personal protection equipment must be worn to protect persons performing the contamination removal procedure. Please refer to the precautions on the product prior to use.
CAUTION: Consult local or state regulations regarding the handling, use, and disposal of Auto Magicr Special Cleaner Concentratet prior to use. Under no circumstances should contamination removal be performed in direct sunlight or contamination removal solution be allowed to dry on vehicle surfaces, as staining of plastic, rubber, or painted parts may result.
Repair Procedure
1. Move vehicle out of direct sunlight. Initially rinse with cool water then wash with liquid car wash detergent. Rinse again thoroughly with fresh water. 2. Dilute the mixture to a 1:8 ratio for painted surfaces. Use the recommended dilution ratio when applying to any other surface. Apply the diluted cleaner concentrate so that it evenly covers the affected area. Use an appropriate mitt or sponge to agitate the surface. 3. Thoroughly rinse vehicle with fresh water. 4. Inspect vehicle carefully both visually and by feel to determine if all iron particles have been removed. Repeat the wash several times if necessary to achieve complete removal. 5. Dry vehicle with a soft terry cloth towel and apply a non–abrasive, non–silicone glaze to obtain a high–gloss finish.
Page 2 of 2
Technical Service Information Bulletin July 16, 2004
Introduction
WHEEL FILM FOR BRAKE ROTOR RUST PREVENTION Models:
All Models with Wheel Film
To prevent brake rotor rust from forming during transportation and storage, wheel film will be adopted instead of using a cardboard type anti–rust cover. The purpose of the wheel film is to protect the disc brake rotor from weather elements and initial rust before the vehicle is delivered to the customer. Consequently, the film should remain on the wheel as long as possible. NOTE: S Retain the wheel film on the disc wheel during vehicle display and storage. S Do not remove the wheel film right away at Pre–Delivery Service (PDS) if the vehicle will be stored after PDS. S Remove the wheel film just prior to delivery to customers.
Features of Wheel Film: Material: Polyethylene Color: Transparent
Wheel Film
Applicable Vehicles
Warranty Information
S All Models with wheel film.
OP CODE
DESCRIPTION
TIME
OFP
T1
T2
N/A
Not Applicable to Warranty
–
–
–
–
Lexus s ASE Certification
Page 1 of 2
PRE–DELIVERY SERVICE
PD001-04
Title:
WHEEL FILM FOR BRAKE ROTOR RUST PREVENTION – PD001-04 Removal Procedure
July 16, 2004
Firmly hold the outer end of the wheel film to pull it off.
NOTE: S If film adhesive residue is found on the disc wheel, remove it with a soft cloth dipped in ethyl alcohol (ethanol). Do not use thinner to remove the adhesive residue. S When the wheel film is removed below an ambient temperature of 0rC (32rF), it is possible that the film may tear. For ease of film removal in cold conditions, please warm the film above 0rC (32rF) using one of the following methods: – Splash (hot) water on the wheel film. – Warm wheel film with cotton cloth soaked in hot water. – Warm wheel film with heat gun. Be sure not to overheat the film and wheel. – Warm wheel film by infrared heater (lamp) for paint. Be sure not to overheat the film and wheel. – Warm wheel film by steam car wash. – Park vehicle indoors (e.g. garage, etc.) for an extended period of time.
Disposal Procedure
Introduction Schedule
Please follow local laws for disposal. Polyethylene film will not generate harmful gasses when it is burned.
MODEL (FRONT & REAR)
2003 1
GS 430/300 GX 470
SC 430
2
3
4
5
6
7
8
9
10
11
12
1
2
3
4
5
6
7
8
9
10
11
12
Beginning January 2005 JAPAN
LX 470 RX 330
2004
PLANT
Beginning January 2005 Beginning January 2005
TMMC JAPAN
This is a tentative schedule. There is a possibility that the introduction timing may be delayed on some models.
Page 2 of 2
Technical Service Information Bulletin August 26, 2003
Introduction
Applicable Vehicles
Contents
Warranty Information
PRE-DELIVERY SERVICE (PDS) INFORMATION FOR ES 330 Models:
’04 ES 330
The following items need to be performed during Pre–Delivery Service (PDS) on 2004 model year ES 330 vehicles.
S 2004 model year ES 330 vehicles.
ITEM NO.
SUBJECT
PAGE
1
D.C.C. Fuse Installation During PDS
2
2
Removal of Front Emergency Towing Eyelet and Installation of Towing Eyelet Hole Cover (Performed at Port)
3
3
Front License Plate Mounting Bracket Installation
4
4
Initialization of Moon Roof
5
5
Initial Calibration of Com
6
6
Installation of Rubber Body Plugs
9
OP CODE
DESCRIPTION
TIME
OFP
T1
T2
N/A
Not Applicable to Warranty
–
–
–
–
Lexus s ASE Certification
Page 1 of 9
PRE–DELIVERY SERVICE
PD002-03
Title:
PRE–DELIVERY SERVICE (PDS) INFORMATION FOR ES 330 – PD002-03
August 26, 2003
ITEM NO. 1:
D.C.C. FUSE INSTALLATION DURING PDS
Introduction
The D.C.C. fuse has been removed at the assembly plant to reduce parasitic current draw in transit and storage.
Installation Procedure
The removed D.C.C. fuse (30 A) is stored in the blank space of the Junction Block in the engine compartment. The D.C.C. fuse must be reinstalled during Pre–Delivery Service (PDS) in the dealership as shown below.
Junction Block
Remove This Fuse Install D.C.C. Fuse (30 A) Here (Original Location)
NOTE: S Removing the D.C.C. fuse cuts off power sources relating to the Dome, ECU–B and RAD No. 1 fuses. S If the vehicle is stored in the dealership for a long period of time after PDS, disconnect the negative battery terminal to prevent battery discharge. Refer to TSIB PG009–02 for battery maintenance information.
Page 2 of 9
PRE–DELIVERY SERVICE (PDS) INFORMATION FOR ES 330 – PD002-03
ITEM NO. 2: Installation Procedure
August 26, 2003
REMOVAL OF FRONT EMERGENCY TOWING EYELET AND INSTALLATION OF TOWING EYELET HOLE COVER (PERFORMED AT PORT) 1. Remove the emergency towing eyelet from the front bumper by turning counterclockwise. NOTE: If it is hard to loosen the emergency towing eyelet, use a steel bar.
Emergency Towing Eyelet
2. Place the removed emergency towing eyelet in the tool tray in the luggage compartment.
3. Install the front towing eyelet hole cover which is stored in the glove box onto the front bumper as shown in the diagram.
Page 3 of 9
PRE–DELIVERY SERVICE (PDS) INFORMATION FOR ES 330 – PD002-03
August 26, 2003
ITEM NO. 3:
FRONT LICENSE PLATE MOUNTING BRACKET INSTALLATION
Introduction
The front license plate bracket and two self tapping screws are included in the luggage compartment.
Installation Procedure
1. Aligning the holes “A” of the mounting bracket with the dimples on the front bumper cover, mark the location of the holes “B” on the front bumper cover. NOTE: S Holes “A” are used for installation of the mounting bracket to the bumper cover. S Holes “B” are used for installation of the front license plate to the mounting bracket.
Mark And Drill Holes
Dimples Mounting Bracket
A
B
2. Drill two relief holes with a diameter of 12 mm (0.47 in.) at the marks on the front bumper cover to prevent the license plate retaining bolt end from ing the cover. NOTE: Do not drill the dimples on the front bumper cover.
3. Install the mounting bracket to the front bumper cover using the two self tapping screws. Install the front license plate to the mounting bracket using bolts of the following dimensions: Length: less than 25 mm (0.98 in.) Diameter: 6.0 mm (0.24 in.) Pitch: 1.0 mm (0.04 in.)
Page 4 of 9
Tapping Screws
B
A
PRE–DELIVERY SERVICE (PDS) INFORMATION FOR ES 330 – PD002-03
August 26, 2003
ITEM NO. 4:
INITIALIZATION OF MOON ROOF
Introduction
The moon roof is controlled by the sliding roof ECU which detects and memorizes the moon roof position by counting pulses of its motor from the fully tilt–up position as the start position. Once the battery terminal has been disconnected and reconnected, the sliding roof ECU does not detect and memorize the moon roof position, resulting in no functions of the “one–touch tilt up and down,” “one–touch slide open and close” and “jam protection.” Please initialize the moon roof position after reconnecting the battery terminal as outlined below.
Initialization Procedure
1. Turn the ignition switch to the “ON” position. 2. Push and hold the moon roof switch to the “TILT– UP” side until the moon roof tilts all the way up and then tilts down slightly (approximately 10 mm at rear end). 3. Check for proper operation of the “One–touch slide open and close” and “One–touch tilt up and down” functions by pushing the switch briefly to the “SLIDE OPEN” and “TILT UP” positions.
Approx. 10 mm
NOTE: Jam protection function becomes effective through the above initialization procedure.
Page 5 of 9
PRE–DELIVERY SERVICE (PDS) INFORMATION FOR ES 330 – PD002-03
August 26, 2003
ITEM NO. 5:
INITIAL CALIBRATION OF COM
Introduction
The com indicates the direction that the vehicle is heading by detecting the direction and strength of the earth’s magnetic field and processing this data using the com sensor and microcomputer. Detection of the direction and strength of the earth’s magnetic field varies according to the area in which the vehicle is used and is affected by the residual magnetism of the vehicle. For this reason, the geographic direction displayed may also deviate from the direction determined by the earth’s magnetic field according to the area in which the vehicle is used. Therefore, please perform the initial calibration of the com in your dealership prior to delivery to customers.
Com
“COMP” Switch
Page 6 of 9
PRE–DELIVERY SERVICE (PDS) INFORMATION FOR ES 330 – PD002-03
ITEM NO. 5: Com Calibration Procedure
August 26, 2003
INITIAL CALIBRATION OF COM (Continued) 1. Turn the ignition switch to the “ON” position and check that the direction (N, NE, E, SE, S, SW, W, NW) appears on the com display. NOTE: Pushing the “COMP” switch turns on or off the com display.
2. Push the “COMP” switch for approximately 3 seconds until the zone number (1 – 15) appears on the display. Then push the switch to select the number of the zone where the vehicle is located. See the map below for zone reference.
North America
Hawaii: 5 Puerto Rico: 10 A. Samoa: 5 Guam: 8 Saipan: 8 Taiwan: 9 Korea: 10
Page 7 of 9
PRE–DELIVERY SERVICE (PDS) INFORMATION FOR ES 330 – PD002-03
ITEM NO. 5:
INITIAL CALIBRATION OF COM (Continued)
Com Calibration Procedure (Continued)
3. Check that the direction appears several seconds after adjustment.
August 26, 2003
4. Start the engine and push the switch for about 6 seconds until “C” appears on the display.
5. Drive the vehicle slowly at 5 mph, or less, in a circle until the direction is displayed. If there is not enough space to drive in a circle, drive around the block until the direction is displayed.
After driving in circles 1 to 3 times, calibration is complete with the direction shown on the display.
NOTE: S Do not perform calibration of the com in a place where the earth’s magnetic field is subject to interference by artificial magnetic fields (underground parking, under a steel tower, between buildings, roof parking, near a railroad crossing, near a large vehicle, etc.) S During calibration, do not operate electric systems (moon roof, power windows, etc.) as they may interfere with the calibration. Page 8 of 9
PRE–DELIVERY SERVICE (PDS) INFORMATION FOR ES 330 – PD002-03
August 26, 2003
ITEM NO. 6:
INSTALLATION OF RUBBER BODY PLUGS
Introduction
The ES 330 is provided with front and rear torque box holes to tie down the vehicle by wire or carrier truck transportation.
Installation Procedure
Four (4) rubber body plugs are included in the glove compartment at the assembly plant. Install them into the two (2) front and two (2) rear torque box holes during Pre–Delivery Service (PDS). NOTE: If the rubber body plugs are not securely installed, road (tire) noise will transfer to the vehicle interior through the torque box holes and rust could occur inside the torque boxes by water entry.
Front Torque Box Hole
Front
Rear Torque Box Hole
Front
Page 9 of 9
POWER SYSTEM INITIALIZATION DURING PDS Models:
’05 All Lexus Models
February 11, 2005
Introduction
The following is a list of the vehicle systems (Power Window, Sliding Roof, Tire Pressure Warning System, etc.) that need initialization during Pre–Delivery Service (PDS) and the TSIB numbers containing details on initializing each specific system. NOTE: Items in RED also need to be initialized any time the battery has been disconnected.
Applicable Vehicles
’05 MY Power System Initialization Table
Warranty Information
S All 2005 model year Lexus vehicles.
INTIALIZATION SYSTEM ITEMS MODEL NAME
COM
POWER WINDOW
POWER BACK DOOR
SLIDING ROOF
TIRE PRESSURE WARNING SYSTEM DIRECT
INDIRECT
VGRS
SEAT
ES 330
PD002-03
-
-
PD002-03
-
-
-
-
GS 430/300
PG007-00
-
-
-
-
-
-
-
GX 470
PG017-02
-
PG016-02
PD005-03
-
-
-
IS 300
PG022-01
-
-
-
-
-
-
-
LS 430
PG009-01
-
-
-
-
PD003-03
-
PG010-00
LX 470
PG007-00
-
-
-
-
-
PG011-02
-
RX 330
PD005-04
PD003-04
PD002-04
PD004-04
-
PD006-04
-
-
SC 430
PG010-01
-
-
-
PG006-01
-
-
PG005-03
OP CODE
DESCRIPTION
TIME
OFP
T1
T2
N/A
Not Applicable to Warranty
–
–
–
–
Lexus s ASE Certification
Page 1 of 1
PRE–DELIVERY SERVICE
Technical Service Information Bulletin
PD010-05
Title:
Technical Service Information Bulletin
DCC FUSE INSTALLATION DURING PDS Models:
’05 – ’06 ES 330
August 22, 2005
Introduction
Applicable Vehicles Installation Procedure
The DCC fuse has been removed at the assembly plant to reduce parasitic current draw in transit and storage. S 2005 – 2006 model year ES 330 vehicles. The removed DCC fuse (30A) is stored in the blank space of the Junction Block in the engine compartment. The DCC fuse must be reinstalled during Pre-Delivery Service (PDS) in the dealership as shown below.
Junction Block
Remove This Fuse Install DCC Fuse (30A) Here (Original Location)
NOTE: S Removing the DCC fuse cuts off power sources relating to the DOME, ECU–B, and RAD No. 1 fuses. S If the vehicle is stored in the dealership for a long period of time after PDS, disconnect the negative (–) battery terminal to prevent battery discharge. Refer to TSIB No. PG009–02, “Battery Maintenance for In-Stock Vehicles & Pre-Delivery,” for battery maintenance information.
Warranty Information
OP CODE
DESCRIPTION
TIME
OFP
T1
T2
N/A
Not Applicable to Warranty
–
–
–
–
Lexus s ASE Certification
Page 1 of 1
PRE-DELIVERY SERVICE
PD032-05
Title:
Technical Service Information Bulletin August 22, 2005
Introduction
INITIALIZATION OF MOON ROOF DURING PDS Models:
’05 – ’06 ES 330
The moon roof is controlled by the sliding roof ECU, which detects and memorizes the moon roof position by counting pulses of its motor from the fully “TILT-UP” position as the start position. Once the battery terminal has been disconnected and reconnected, the sliding roof ECU does not detect and memorize the moon roof position, resulting in no functions of the “one-touch tilt up and down,” “one-touch slide open and close,” and “jam protection.” Initialize the moon roof position after reconnecting the battery terminal as outlined below. NOTE: Any time the battery terminal has been disconnected, initialize the moon roof after reconnecting the battery terminal.
Applicable Vehicles Initialization Procedure
S 2005 – 2006 model year ES 330 vehicles.
1. Turn the ignition switch to the “ON” position. 2. Push and hold the moon roof switch to the “TILT-UP” side until the moon roof tilts all the way up and then tilts down slightly (approximately 10 mm [0.39 in.] at rear end). 3. Check for proper operation of the “one-touch slide open and close” and “one-touch tilt up and down” functions by pushing the switch briefly to the “SLIDE OPEN” and “TILT-UP” positions.
Approx. 10 mm
NOTE: Jam protection function becomes effective through the above initialization procedure.
Warranty Information
OP CODE
DESCRIPTION
TIME
OFP
T1
T2
N/A
Not Applicable to Warranty
–
–
–
–
Lexus s ASE Certification
Page 1 of 1
PRE-DELIVERY SERVICE
PD033-05
Title:
Technical Service Information Bulletin August 22, 2005
Introduction
INITIAL CALIBRATION OF COM DURING PDS Models:
’05 – ’06 ES 330
The com indicates the direction that the vehicle is heading by detecting the direction and strength of the Earth’s magnetic field and processing this data using the com sensor and microcomputer. Detection of the direction and strength of the Earth’s magnetic field varies according to the area in which the vehicle is used and is affected by the residual magnetism of the vehicle. For this reason, the geographic direction displayed may also deviate from the direction determined by the Earth’s magnetic field according to the area in which the vehicle is used. Perform the initial calibration of the com in your dealership prior to delivery to customers.
Com
“COMP” Switch
Applicable Vehicles
Warranty Information
S 2005 – 2006 model year ES 330 vehicles.
OP CODE
DESCRIPTION
TIME
OFP
T1
T2
N/A
Not Applicable to Warranty
–
–
–
–
Lexus s ASE Certification
Page 1 of 3
PRE-DELIVERY SERVICE
PD034-05
Title:
INITIAL CALIBRATION OF COM DURING PDS – PD034-05 Com Calibration Procedure
August 22, 2005
1. Turn the ignition switch to the “ON” position and check that the direction (N, NE, E, SE, S, SW, W, NW) appears on the com display. NOTE: Pushing the “COMP” switch turns the com display ON or OFF.
2. Push the “COMP” switch for approximately 3 seconds until the zone number (1 – 15) appears on the display. Then push the switch to select the number of the zone where the vehicle is located. See the map below for zone reference.
North America
Hawaii: 5 Puerto Rico: 10 A. Samoa: 5 Guam: 8 Saipan: 8 Taiwan: 9 Korea: 10
Page 2 of 3
INITIAL CALIBRATION OF COM DURING PDS – PD034-05 Com Calibration Procedure (Continued)
August 22, 2005
3. Check that the direction appears several seconds after adjustment. 4. Start the engine and push the switch for about 6 seconds until “C” appears on the display.
5. Drive the vehicle slowly at 5 mph (8 km/h), or less, in a circle until the direction is displayed. If there is not enough space to drive in a circle, drive around the block until the direction is displayed.
After driving in 1 to 3 circles, calibration is complete with the direction shown on the display.
NOTE: S Do NOT perform calibration of the com in a place where the Earth’s magnetic field is subject to interference by artificial magnetic fields (underground parking, under a steel tower, between buildings, roof parking, near a railroad crossing, near a large vehicle, etc.) S During calibration, do NOT operate electric systems (moon roof, power windows, etc.) as they may interfere with the calibration.
Page 3 of 3
Technical Service Information Bulletin August 25, 2005
Introduction
Applicable Vehicles
Installation Procedure
INSTALLATION OF RUBBER BODY PLUGS DURING PDS Models:
’05 – ’06 ES 330
The ES 330 is equipped with front and rear torque box holes to tie down the vehicle during transportation. Rubber body plugs need to be installed during Pre-Delivery Service (PDS).
S 2005 – 2006 model year ES 330 vehicles.
Four (4) rubber body plugs are included in the glove compartment at the assembly plant. Install them into the two (2) front and two (2) rear torque box holes located under the vehicle on both sides. NOTE: If the rubber body plugs are NOT securely installed, road (tire) noise will transfer to the vehicle interior through the torque box holes and rust could occur inside the torque boxes by water entry.
Front Torque Box Hole
Rear Torque Box Hole
Front
Front
Warranty Information
OP CODE
DESCRIPTION
TIME
OFP
T1
T2
N/A
Not Applicable to Warranty
–
–
–
–
Lexus s ASE Certification
Page 1 of 1
PRE-DELIVERY SERVICE
PD035-05
Title:
Technical Service Information Bulletin August 25, 2005
Introduction
Applicable Vehicles
Warranty Information
Installation Procedure
FRONT LICENSE PLATE MOUNTING BRACKET INSTALLATION Models:
’05 – ’06 ES 330
The ES 330 front license plate mounting bracket and two self-tapping screws are placed in the luggage compartment of the vehicle at the assembly plant. For states that require a front license plate, install the bracket and bolts on the bumper cover during Pre-Delivery Service (PDS) according to the following procedure.
S 2005 – 2006 model year ES 330 vehicles.
OP CODE
DESCRIPTION
TIME
OFP
T1
T2
N/A
Not Applicable to Warranty
–
–
–
–
1. Aligning the holes “A” of the mounting bracket with the dimples on the front bumper cover, mark the location of the holes “B” on the front bumper cover. NOTE: S Holes “A” are used for installation of the mounting bracket to the bumper cover. S Holes “B” are used for installation of the front license plate to the mounting bracket.
Mark and Drill Holes
Dimples Mounting Bracket
A
B
B
A
2. Drill two relief holes with a diameter of 12 mm (0.47 in.) at the marks on the front bumper cover to prevent the license plate retaining bolt end from ing the cover. NOTE: Do not drill the dimples on the front bumper cover.
Lexus s ASE Certification
Page 1 of 2
PRE-DELIVERY SERVICE
PD036-05
Title:
FRONT LICENSE PLATE MOUNTING BRACKET INSTALLATION – PD036-05 Installation Procedure (Continued)
3. Install the mounting bracket to the front bumper cover using the two self-tapping screws. 4. Install the front license plate to the mounting bracket using bolts of the following dimensions: Length: Less than 25 mm (0.98 in.) Diameter: 6.0 mm (0.24 in.) Pitch: 1.0 mm (0.04 in.)
Page 2 of 2
Tapping Screws
August 25, 2005
Technical Service Information Bulletin August 26, 2005
Introduction
Applicable Vehicles
Warranty Information
Installation Procedure
FRONT EMERGENCY TOWING EYELET & EYELET HOLE COVER Models:
’05 – ’06 ES 330
The 2005 – 2006 model year ES 330 is shipped with a front emergency towing eyelet. Follow the procedure below to remove the eyelet and save for customer use.
S 2005 – 2006 model year ES 330 vehicles.
OP CODE
DESCRIPTION
TIME
OFP
T1
T2
N/A
Not Applicable to Warranty
–
–
–
–
1. Remove the emergency towing eyelet from the front bumper by turning counterclockwise. NOTE: If it is hard to loosen the emergency towing eyelet, use a steel bar.
Emergency Towing Eyelet
Lexus s ASE Certification
Page 1 of 2
PRE-DELIVERY SERVICE
PD037-05
Title:
FRONT EMERGENCY TOWING EYELET & EYELET HOLE COVER – PD037-05 Installation Procedure (Continued)
2. Place the emergency towing eyelet in the tool tray in the luggage compartment.
3. Install the front towing eyelet hole cover, which is stored in the glove box, onto the front bumper as shown in the illustration.
Page 2 of 2
August 26, 2005
Technical Service Information Bulletin
VOLUME 4 INFORMATION Models:
All Models
January 1, 1999
Introduction
Lexus Technical Service Information Bulletins (TSIBs) continue to be one of the most current sources of technical information available. To ensure complete access to this reference source, use the following steps: S Volume Four will begin with 1999 Technical Service Information Bulletins. S Place this bulletin along with all 1999 TSIBs into the new binders received with this bulletin. S Label this new binder “Volume Four“ using the labels provided with the binder. S Additional copies of 1994 through 1999 TSIBs are available to all Lexus Dealerships through the Non–Parts System (MDC NPM System) by using the following Part Number designation:
TSB Part Number Prefix TSB Chapter Code Chapter Code Sequence Number Year 00216 Related TSIB Part Numbers
– EG 001 – 99
MATERIAL DESCRIPTION
PART NUMBER
1999 TSIB Binder complete with all bulletins issued to date
VOL4
New TSIB Binder and tabs only
00216–00001
Lexus s ASE Certification
Page 1 of 1
PRODUCT GENERAL INFORMATION
PG001–99
Title:
Technical Service Information Bulletin
REPLACEMENT CERTIFICATION LABELS Models:
All Models
January 18, 2002
TSB UPDATE NOTICE: The information contained in this TSIB updates PG015–01 dated May 4, 2001. Revised text is red and underlined. The changes will take place February 1, 2002. Introduction
Replacement Certification Labels (vinyl label affixed to driver’s door or door post) may be available from Lexus providing the request meets one of the criteria listed below. Certification Label Location MFD.BY:TOYOTA MOTOR CORPORATION DATE 10/01 GVWR: 2247KG (3040LB) GAWR: FRT 1379KG (3040LB) WITH P225/70R16 TIRES 16X6 1/2JJ RIMS AT 210 KPA (30PSI) COLD RR 1153KG (2540LB) WITH P225/70R16 TIRES. 16X6 1/2JJ RIMS AT 210 KPA (30PSI) COLD THIS VEHICLE CONFORMS TO ALL APPLICABLE FEDERAL MOTOR VEHICLE SAFETY, BUMPER, AND THEFT PREVENTION STANDARDS IN EFFECT ON THE DATE OF MANUFACTURE SHOWN ABOVE. JT0XX00X0X0000000 MPV MCU10L–AWPGKA C/TR 8P4/LB00 A/TM –01A/ U140E MADE IN JAPAN NO. 736
Applicable Vehicles Certification Label Criteria
S All Lexus vehicles. 1. The vehicle is in an accident and the label is damaged or is attached to a part that will be replaced during the repair. NOTE: S Processing a new label will be delayed significantly if the original certification label is not available. S A replacement label MAY NOT be available if the vehicle is more than 5 years old and the old label does not accompany this request.
2. The label is stolen. Procurement Procedure
To request a replacement label, complete a copy of the form on the back of this bulletin. Your dealer parts will be billed $25.00 for each replacement of a damaged or stolen label. NOTE: All replacement labels for damaged and/or stolen vehicles are subject to approval by the Technical Compliance Department. If you have any specific questions, (310) 468–3390.
Warranty Information
OP CODE
DESCRIPTION
TIME
OPN
T1
T2
N/A
Not Applicable to Warranty
–
–
–
–
Lexus s ASE Certification
Page 1 of 2
PRODUCT GENERAL INFORMATION
PG002-02
Title:
APPLICATION FOR REPLACEMENT CERTIFICATION LABEL
REASON FOR REPLACEMENT ACCIDENT DAMAGE STOLEN OTHER
MFD.BY:TOYOT AMOTOR CORPORATION DATE10/01 GVWR:2247KG(3040LB) GAWR:FRT1379KG(3040LB)WITHP225/70R16TIRES 16X6 1/2JJ RIMS AT 210 KPA(30PSI)COLD RR 1153KG(2540LB)WITHP225/70R16TIRES. 16X6 1/2JJ RIMS AT 210 KPA(30PSI)COLD THISVEHICLECONFORMSTOALLAPPLICABLE FEDERALMOTORVEHICLESAFETY, BUMPER, AND THEFTPREVENTIONSTANDARDS IN EFFECT ON THE DATEOFMANUFACTURESHOWNABOVE. JT0XX00X0X0000000 MPV MCU10L–AWPGKA C/TR8P4/LB00 A/TM–01A/ U140E MADE IN JAPAN NO.736
REASON/EXPLANATION
ATTACH ORIGINAL LABEL HERE
PLEASE PROVIDE CORRECT VIN
NOTE: Original label MUST accompany this application or order will be significantly delayed.
DEALER INFORMATION DEALER CODE: DEALER NAME: ADDRESS: STREET ADDRESS
CITY, STATE, ZIP CODE
TELEPHONE:
(
)
AREA CODE, TELEPHONE NUMBER
: FIRST NAME, LAST NAME
MAIL (DO NOT FAX) THE COMPLETED REQUEST FORM WITH THE OLD LABEL TO: TOYOTA MOTOR SALES, U.S.A. INC. TECHNICAL COMPLIANCE DEPARTMENT, S207 19001 S. WESTERN AVENUE TORRANCE, CA 90509–2991
Technical Service Information Bulletin March 2, 2005
Introduction
TIRE POSITIONING BEFORE NEW VEHICLE DELIVERY Models:
’05 – ’06 All Lexus
During the manufacturing process, tire characteristics are measured. Tires are then mounted on the vehicle as matched sets to help reduce conditions such as pulling or drifting. If the wheels are replaced or refinished before vehicle delivery, it is important that the tires remain on the vehicle in the same location and in the same direction of rotation. Please refer to the following procedure to ensure that the original tires stay in the same location on the vehicle.
Applicable Vehicles
Installation Procedure
S All 2005 – 2006 model year Lexus vehicles.
1. Mark the tire installation position on the inward facing tire sidewall. Example: Front Right = FR, Front Left = FL, Rear Right = RR, Rear Left = RL 2. Install the original tires on the new or refinished wheels with the marked side facing inwards. 3. Place the tire/wheel assemblies on the vehicle in the marked positions. NOTE: Torque the wheel nuts to the proper torque value in sequence.
Warranty Information
OP CODE
DESCRIPTION
TIME
OFP
T1
T2
N/A
Not Applicable to Warranty
–
–
–
–
Lexus s ASE Certification
Page 1 of 1
PRODUCT GENERAL INFORMATION
PG002-05
Title:
Technical Service Information Bulletin
REPLACEMENT VIN PLATES Models:
All Models
January 18, 2002
TSB UPDATE NOTICE: The information contained in this TSIB updates PG016–01 dated May 4, 2001. Revised text is red and underlined. The changes will take place February 1, 2002. Introduction
Replacement VIN plates (metal plates riveted to dashboard) may be available from Lexus providing the request meets the criteria listed below.
VIN Plate Location
Applicable Vehicles Replacement VIN Plate Criteria
S All Lexus vehicles. S The vehicle is in an accident and the plate is damaged. NOTE:
The original plate to be replaced MUST accompany the request. NOTE: If a plate is stolen, be sure to the State Police or your State’s Department of Motor Vehicles (DMV). In most cases the State DMV will issue a unique number so that the original number can be included on stolen vehicle listings. If this is the case, a replacement plate is NOT available from Lexus. However, the original VIN, NOT the state issued VIN, must be used on all warranty claims. Procurement Procedure
To request a replacement plate, complete a copy of the form on the back of this page. Note that the damaged VIN plate MUST accompany the request form. Your dealer parts will be billed $25.00 for each replacement of a damaged plate. NOTE: All replacement plates for damaged and/or stolen vehicles are subject to approval by the Technical Compliance Department. If you have any specific questions, (310) 468–3390.
Warranty Information
OP CODE
DESCRIPTION
TIME
OPN
T1
T2
N/A
Not Applicable to Warranty
–
–
–
–
Lexus s ASE Certification
Page 1 of 2
PRODUCT GENERAL INFORMATION
PG003-02
Title:
APPLICATION FOR REPLACEMENT VIN PLATE
REASON FOR REPLACEMENT ACCIDENT DAMAGE OTHER REASON/EXPLANATION
PLEASE PROVIDE CORRECT VIN
ATTACH DAMAGED PLATE HERE
DEALER INFORMATION DEALER CODE: DEALER NAME: ADDRESS: STREET ADDRESS
CITY, STATE, ZIP CODE
TELEPHONE:
(
)
AREA CODE, TELEPHONE NUMBER
: FIRST NAME, LAST NAME
MAIL (DO NOT FAX) THE COMPLETED REQUEST FORM WITH THE OLD PLATE TO: TOYOTA MOTOR SALES, U.S.A. INC. TECHNICAL COMPLIANCE DEPARTMENT, S207 19001 S. WESTERN AVENUE TORRANCE, CA. 90509–2991
Technical Service Information Bulletin September 12, 2002 Introduction
BATTERY MAINTENANCE FOR IN-STOCK VEHICLES & PRE-DELIVERY Models:
All Models & Model Years Through Current
A battery in a stored vehicle is subject to conditions that can reduce its performance and life. These conditions include storage period, temperature, parasitic drain, and battery load. Because of these factors, battery inspection and maintenance are required in order to ensure proper operation and optimal battery life. As a matter of policy, Lexus does not provide battery warranty coverage for discharged and/or failed batteries due to lack of maintenance; it is the dealer’s responsibility to maintain the specified state of charge of the vehicle’s battery while in stock and assure proper state of charge at delivery. To eliminate customer service concerns due to an undercharged battery during the first few weeks of ownership, all dealers should check battery state of charge and recharge, if necessary, just prior to delivery (i.e., within 48 hours of delivery). This new procedure will improve the new vehicle ownership experience by greatly reducing the risk of having a low performance battery concern due to extended storage periods and/or short engine run times prior to the vehicle sale.
S All models and model years through current.
Applicable Vehicles
Required Tools & Material
SPECIAL SERVICE TOOLS (SSTs)
MICROPRO 815 Digital Battery Analyzer (Essential SST)*
*
MANUFACTURER
PART NUMBER
Midtronics
00002–MP815–T
This SST can be ordered through SPX/OTC by calling 1–800–933–8335.
NOTE: MICROPRO 815 Digital Battery Analyzer should be periodically updated through the Technical Information System (TIS) for new vehicle models. For detailed information, please see TSIB SS002–02, “Midtronics Battery Tester Software Update.”
Warranty Information
OP CODE
DESCRIPTION
TIME
OFP
T1
T2
N/A
Not Applicable to Warranty
–
–
–
–
Lexus s ASE Certification
Page 1 of 4
PRODUCT GENERAL INFORMATION
PG009-02
Title:
BATTERY MAINTENANCE FOR IN–STOCK VEHICLES & PRE–DELIVERY – PG009-02 Recommended Equipment
TOOLS & EQUIPMENT
September 12, 2002
MANUFACTURER
PART NUMBER
Fast Battery Charger**
Associated
ASE6003
Fast Battery Charger**
Christie
CAPPDQ
** These tools can be ordered through the Lexus Approved Dealer Equipment program by calling 1–800–368–6787.
NOTE: The “Fast Battery Chargers” listed above have been tested and approved by Lexus. These state–of–the–art “smart” chargers were designed to charge batteries at an accelerated rate, without the possibility of damage. Using non–microprocessor controlled battery chargers for fast charging purposes can damage the battery. Inspection Procedure
All vehicles are to be inspected according to the procedures listed below using the MICROPRO 815 battery tester no more than 48 hours prior to customer vehicle delivery. PRIOR TO TESTING: If necessary, remove battery surface charge by turning on high beam headlights for 60 seconds, then let battery voltage recover for one minute.
1. Connect test clamps to battery. (Display will show four zeros indicating a good connection). 2. For cold battery (<32rF) or after charge test, press TEST MODE key until appropriate test is selected. 3. Input battery stock number. NOTE: Stock number must be used for warranty cases because you cannot read the warranty code if CCA/CA rating is input.
4. Press STK#/Code key to start test. NOTE: Stock numbers are listed on the reference card located in the tester’s cover. Stock numbers can also be referenced on TIS. The TIS listings will always have up–to–date information. Stock number location in TIS: 1. Go to TIS Home Page. 2. Click on “Diagnostics.” 3. Click on “Midtronics Battery Tester Software.” 4. Click on “Stock Number Chart.”
Page 2 of 4
BATTERY MAINTENANCE FOR IN–STOCK VEHICLES & PRE–DELIVERY – PG009-02 Inspection Procedure (Continued)
September 12, 2002
5. Read STATE OF CHARGE and BATTERY CONDITION. a. If battery is at 75% STATE OF CHARGE or greater, release vehicle to new owner. b. If battery is less than 75% STATE OF CHARGE proceed to Battery Service Procedure.
Battery Service Procedure
Follow the procedures below according to the BATTERY CONDITION results. BATTERY CONDITION: “Good return to service” (less than 75% State of Charge) Charge battery using one of the recommended chargers indicated above (or equivalent) following the Quick Charge instructions accompanying that machine. BATTERY CONDITION: “Charge and return to service” Charge battery using one of the recommended chargers indicated above (or equivalent) following the Quick Charge instructions accompanying that machine. BATTERY CONDITION: “Charge and retest” The battery must be Quick Charged and retested using the After charge test mode. Carry out the service according to the result of the retest. BATTERY CONDITION: “Replace” The battery must be replaced. Press the STK#/CODE key to show the warranty code for the repair order and for the Warranty Battery Label.
Battery Replacement
If a vehicle battery needs to be replaced for a warrantable condition, make sure to complete a Warranty Battery Label and affix it to the failed battery for proper warranty parts and claim processing. Please include the Vehicle Identification Number and warranty code on the Warranty Battery Label.
WARRANTY BATTERY LABEL ETIQUETA PARA BATERIA DE GARANTIA (Please Print / Llénese con Letra de Molde Por Favor)
Dealer Code Código de Agencia
Vehicle Identification Number (VIN) Número de Identificación de Vehículo (NIV)
Repair Order No. No. de Orden de Reparación
Veh. Date of First Use Fecha de Primer Uso del Veh.
08/02
Repair Date Fecha de Reparación
Failure Code Código de Falla
Original Install Date Fecha de Instalación Original (Svc. part replacement only/ solamente para el reemplazo de partes de servicio)
Battery Mos. In Svc. Número de meses que Batería está en servicio
00404–BTTRY–LABEL
Page 3 of 4
BATTERY MAINTENANCE FOR IN–STOCK VEHICLES & PRE–DELIVERY – PG009-02 Recommended Battery Maintenance
September 12, 2002
In addition to this new pre–delivery battery test, a monthly battery inspection is still required for stored vehicles. If your dealership is located in an area subject to extreme temperatures (hot or cold), periodic maintenance may need to be performed more frequently. To reduce parasitic battery drain for vehicles in storage for one week or more, the negative battery cable should always be disconnected to reduce battery discharge. When the negative battery cable is reconnected, please check and reset electrical components such as the clock, radio, etc. NOTE: For your reference, the electrical system is made inoperative by removing the appropriate fuse indicated in the Electrical Wiring Diagram.
Page 4 of 4
Technical Service Information Bulletin March 11, 2005
FAILURE TO INITIALIZE CAN INTERFACE MODULE Models:
’04 – ’05 Applicable Models
TSIB REVISION NOTICE: S June 23, 2005: The “Required SSTs” section has been updated. The previous TSIB should be discarded. Introduction
If the Diagnostic Tester fails to initialize CAN–based communication with on–board vehicle controllers, a damaged cable or inoperative CAN Interface Module may be at fault. This bulletin provides test procedures to check the integrity of the Diagnostic Tester cables and the CAN Interface Module.
Applicable Vehicles
S 2004 – 2005 model year CAN–equipped vehicles including 2004 model year LS 430 and 2005 model year GX 470 and LS 430.
Warranty Information
OP CODE
DESCRIPTION
TIME
OFP
T1
T2
N/A
Not Applicable to Warranty
–
–
–
–
Lexus s ASE Certification
Page 1 of 6
SPECIAL SERVICE TOOLS
SS001-05
Title:
FAILURE TO INITIALIZE CAN INTERFACE MODULE – SS001-05 Revised Required SSTs
ITEM NO.
1
SPECIAL SERVICE TOOLS (SSTs)
Diagnostic Tool Set*
March 11, 2005
PART NUMBER
QTY
DRW**
LEX220036
1
8
01002744
1
8
Four (4) components from this kit/set are required: COMPONENT(S) OF KIT/SET
S Tester (P/N 02002019) S 12 Megabyte Program Card Kit (P/N 01002593–005) with version 12.2a Software (or later) S 14/26 Pin DLC Cable (P/N 02001637) S 14 Pin DLC Self Test Adapter (P/N 02001607)
2
CAN Module Kit*
COMPONENT(S) OF KIT/SET
NOTE: S All components from this kit/set are required S Module box cannot be ordered separately S J1962 OBD2–II (CAN DLC) (P/N 02003180)
* Essential SSTs. ** Refers to drawer number in SST Storage System.
NOTE: Additional Diagnostic Tool Sets, CAN Module Kits, Program Cards, or other SSTs may be ordered by calling SPX/OTC at 1-800-933-8335.
Page 2 of 6
FAILURE TO INITIALIZE CAN INTERFACE MODULE – SS001-05 Revised Diagnostic Procedure
March 11, 2005
Failure to initialize CAN–based communications between the Diagnostic Tester and on–board vehicle controllers can be caused by the following issues: S The 14/26 Pin DLC cable is damaged, causing an open communication circuit. S The DLC cable is damaged, causing an open communication circuit. S The CAN Interface Module is damaged. S The vehicle’s CAN Communication System has a fault, requiring further vehicle diagnostics. NOTE: The Diagnostic Tester may operate properly in other modes such as OBD/MOBD and CARB OBDII with a damaged cable or CAN module.
Figure 1
14/26 Pin DLC Cable (P/N 02001637)
CAN Interface Module Only
J1962 OBD2–II Cable (CAN DLC) Only (P/N 02003180)
J1962 OBD2–II Cable & CAN Interface Module (P/N 01002744) NOTE: To lengthen the Diagnostic Tester cable life, do not wrap the cable around the tester, or hold the tester only by the cable.
Page 3 of 6
FAILURE TO INITIALIZE CAN INTERFACE MODULE – SS001-05 Revised Diagnostic Procedure (Continued)
March 11, 2005
To determine the cause of communication error, perform the following steps: 1. Using the Diagnostic Tester, perform the CAN MODULE VERSION self test. Select DIAGNOSIS/SETUP/SELF TEST and perform the following screen flow. NOTE: Before performing test, confirm that the Diagnostic Tester, 14/26 Pin DLC cable, and CAN Interface Module are all securely connected.
Figure 2
SELF TEST MENU 1: DISPLAY/LEDs 2: KEYBOARD 3: SOUND 4: MEMORY 5: DATA LINK 6: AUTOPROBE 7: RS232 8: INST PORT 9: SYSTEM INFO 0: CAN MODULE VER
INITIALIZING CAN INTERFACE PLEASE WAIT.
OK
NG
Toyota CAN VIM 1.0
CAN VIM did not respond
PRESS [EXIT]
Press [ENTER]
SELF TEST Result:
OK
NG
SELF TEST FAILED: CAN VIM did not respond. Go to step 2.
SELF TEST ED: Go to step 3. This response verifies the CAN module and the 14/26 Pin DLC cable are OK.
Page 4 of 6
FAILURE TO INITIALIZE CAN INTERFACE MODULE – SS001-05 Revised Diagnostic Procedure (Continued)
March 11, 2005
2. Perform the Data Link Self Test (Figure 3). Figure 3
SELF TEST MENU 1: DISPLAY/LEDs 2: KEYBOARD 3: SOUND 4: MEMORY 5: DATA LINK 6: AUTOPROBE 7: RS232 8: INST PORT 9: SYSTEM INFO
The Data Link Self Test Adapter (P/N 02001607) is included in the Lexus Diagnostic Tool Set (P/N LEX220036)
DATA LINK SELF–TEST
Install Data Link Self–Test Adapter to the end of the Data Link Cable
Press [ENTER]
DATA LINK SELF–TEST Now testing the data link. To test cable integrity, please flex cable repeatedly. (15–20 seconds) Press [EXIT] to QUIT
OK
NG
DATA LINK SELF–TEST
DATA LINK SELF–TEST **FAILED** FAILED SDL 1
ED
Check Self–Test Adapter Installation Press [EXIT]
PRESS [EXIT]
DATA LINK SELF TEST Result:
OK
DATA LINK TEST FAILED: NG
Replace 14/26 Pin DLC cable (P/N 02001637).
DATA LINK TEST ED: Replace CAN Interface Module (P/N 01002744).
Page 5 of 6
FAILURE TO INITIALIZE CAN INTERFACE MODULE – SS001-05 Revised Diagnostic Procedure (Continued)
March 11, 2005
3. Inspect the J1962 OBD2–II cable (CAN DLC). A. Disconnect the CAN Interface Module from the J1962 OBD2–II cable (CAN DLC). A small Phillips screwdriver is required to separate the CAN Interface Module from the J1962 OBD2–II cable. B. Test the J1962 OBD2–II cable (CAN DLC) for continuity. Figure 4 CABLE TEST J1962 OBD2–II Cable (P/N 02003180)
Pin 5 to Pin 15
Pin 15 to Pin 22
J1962 OBD2–II Cable (CAN DLC) Test Result:
OK
NG
(More than 6 Ω) Replace the J1962 OBD2–II cable (CAN DLC, P/N 02003180).
Suspect vehicle side problem. Refer to the Technical Information System (TIS): applicable model year Repair Manual: Diagnostics: CAN Communication System: Problem Symptoms Table: Check CAN Bus Line. NOTE: If the Diagnostic Tester successfully communicates with another CAN–equipped vehicle, suspect vehicle side problem.
Page 6 of 6
Technical Service Information Bulletin August 26, 2002
IMMOBILIZER KEY CODE RESET Models:
Applicable ES 300, GS 430, GS 300, IS 300, & LX 470
TSIB REVISION NOTICE: S August 26, 2005: The model years for each model have been specifically defined in the “Applicable Vehicles” section. The “Required SSTs” section has been updated. S February 11, 2003: Model years for LX 470 revised to apply to 2001 and 2002 only. S August 26, 2002: ES 300, GS 300, and IS 300 models added. Model years for GS 430 and LX 470 vehicles expanded to include 2002 and later. Diagnostic Tester software in Required Tools & Material updated to version 9.01a (or later). Previous versions of this TSIB should be discarded. Introduction
Immobilizer Reset is a new feature that allows the registration of a new Master Key even if all original Master Keys are lost. Once the Immobilizer system is reset, all previously ed keys will be erased.
Applicable Vehicles
*
MODEL YEAR
MODEL
ENGINE MODEL
2001 – 2005*
GS 430
3UZ–FE
2001 – 2002*
LX 470
2UZ–FE
2002 – 2003*
ES 300
1MZ–FE
2002 – 2005*
GS 300
2JZ–GE
2002 & Later*
IS 300
2JZ–GE
Immobilizer Key Code Reset procedure is not available for prior model years.
NOTE: Refer to TIS (Technical Information System) for the most current applicable vehicle information.
Parts Information
Warranty Information
PREVIOUS PART NUMBER
CURRENT PART NUMBER
PART NAME
N/A
Model Specific
Replacement Key (Master or Sub)
OP CODE
DESCRIPTION
TIME
OFP
T1
T2
N/A
Not Applicable to Warranty
–
–
–
–
Lexus s ASE Certification
Page 1 of 6
SPECIAL SERVICE TOOLS
SS002-01
Title:
IMMOBILIZER KEY CODE RESET – SS002-01 Revised Required SSTs
ITEM NO.
SPECIAL SERVICE TOOLS (SSTs)
August 26, 2002
PART NUMBER
QTY
DRW**
LEX220036
1
8
01002744
1
8
Lexus Diagnostic Tester Kit* 1
NOTE: S All components from this kit/set are required S 12 Megabyte Diagnostic Tester Program Card (P/N 01002593–005) with version 13.0a Software (or later) is required CAN Interface Module Kit*
2
NOTE: S All components from this kit/set are required
* Essential SSTs. ** Refers to drawer number in SST Storage System.
NOTE: Additional Diagnostic Tester Kits, CAN Interface Modules, Program Cards, or other SSTs may be ordered by calling SPX/OTC at 1-800-933-8335.
Function Description
The Immobilizer Reset function is a 5-step process: 1. Using the Diagnostic Tester, retrieve a “Seed Number” through the OBD/MOBD Immobilizer function. S A “Seed Number” is a unique number provided by the Diagnostic Tester and validated by TIS (Technical Information System) in order to return a code. 2. Using TIS, select Immobilizer Reset, and complete the request form to retrieve a “code Number.” S A “code Number” is a unique number required by the Diagnostic Tester to reset the ECU allowing it to accept a new Master Key. 3. Enter the “code Number” received from TIS into the Diagnostic Tester. 4. Confirm successful Immobilizer reset and new Master Key registration. 5. any additional customer keys.
Page 2 of 6
IMMOBILIZER KEY CODE RESET – SS002-01 Revised Key Code Reset Procedure
August 26, 2002
NOTE: Ensure that the Diagnostic Tester is equipped with the latest version of software (13.0a or later).
Connect the Diagnostic Tester to DLC3 and turn ignition ON. 1. Using the Diagnostic Tester, follow the screen flows below to retrieve the “Seed Number.” (DO NOT DISCONNECT the Diagnostic Tester from the vehicle during this process.) FIGURE 2. DIAGNOSTIC TESTER SCREEN FLOW
A
B
C
*APPLICATION SELECT*
FUNCTION SELECT FOR NORTH AMERICA
OBD/MOBD MENU
1: DIAGNOSIS 2: CUSTOMIZE 3: ECU REPROGRAM
1: 2: 3: 4: 5: 6: 7: 8: 9: 0:
OBD/MOBD ENHANCED OBD II CARB OBD II BREAK-OUT BOX NVH AUTOPROBE O2 RPM CHECK SNAPSHOT REVIEW SETUP GAS ANALYSIS
1: 2: 3: 4: 5: 6:
CODES (ALL) ENGINE AND ECT ABS / VSC CCS IMMOBILIZER SRS AIRBAG
D
E
F
DIAGNOSTIC MENU IMMOBILIZER
KEY CODE UTILITY
KEY CODE RESET
1: CURRENT DATA 2: TROUBLE DATA
1: KEY REGISTRATION 2: KEY CODE ERASURE 3: AUTO REG CLOSURE
4: KEY CODE UTILITY
CONFIRM – Master Key is in ignition. – ignition is ON. NOTE: If ignition is OFF, then EXIT to OBD/MOBD Menu.
9: KEY CODE RESET *
G
H
KEY CODE RESET
KEY CODE RESET
This Function will RESET the ed Key Code.
SEED NUMBER
999999
DO YOU WISH TO CONTINUE RESETTING?
Please input SEED NUMBER into TIS
PRESS [YES] OR [NO]
PRESS [ENTER]
PRESS [ENTER]
NOTICE: S Do NOT turn the ignition OFF. S Do NOT disconnect the Diagnostic Tester.
* Option “9: KEY CODE RESET” will not appear if your present vehicle does not the key code reset functions.
Page 3 of 6
IMMOBILIZER KEY CODE RESET – SS002-01 Revised Key Code Reset Procedure (Continued)
August 26, 2002
2. Using TIS, select Immobilizer Reset, and complete the request form to retrieve a “code Number.” A. Click on Diagnostics. B. Click on Immobilizer Reset. FIGURE 3. SELECTING IMMOBILIZER RESET ON TIS
A B
C. Read the instructions on the screen and click on Continue. (See Figure 4 below.) FIGURE 4. IMMOBILIZER RESET INSTRUCTIONS ON TIS
C
Page 4 of 6
IMMOBILIZER KEY CODE RESET – SS002-01 Revised Key Code Reset Procedure (Continued)
August 26, 2002
D. Complete the request form and enter the “Seed Number” from the Diagnostic Tester. Click on Submit (Figure 5). NOTE: All fields must be completed. FIGURE 5. REQUEST FORM ON TIS
D E. TIS will now return the code that needs to be entered into the Diagnostic Tester. NOTE: The code given by TIS is only valid for one Immobilizer Reset Event.
FIGURE 8. RECEIVING CODE FOR DIAGNOSTIC TESTER
E
Page 5 of 6
IMMOBILIZER KEY CODE RESET – SS002-01 Revised Key Code Reset Procedure (Continued)
August 26, 2002
3. Using the numbered keys (0–9) on the Diagnostic Tester, enter the “code Number” received from TIS. (See Figure 7 below.) Press ENTER to clear all ed key codes. NOTE: Key Code Reset takes approximately 16 minutes.
FIGURE 7. CODE ENTRY SCREEN FLOW
A
B
C
KEY CODE RESET
KEY CODE RESET
KEY CODE RESET
Please insert CODE NUMBER from TIS
**NOW RESETTING** If the key was in the IG cylinder, do not remove it.
RESET COMPLETE
CODE NUMBER
000414
If the engine starts, this key code is ed correctly.
Remaining Time <16> Min.
PRESS [ENTER]
PRESS [ENTER]
4. Confirm successful Immobilizer reset and new Master Key registration by starting the vehicle. NOTE: If the vehicle starts, the new Master Key code is ed correctly. If the vehicle does not start, perform the Immobilizer Reset function again.
5. All previously ed key codes have been erased except the Master Key used during “Key Code Reset.” any additional customer keys by using “Key Registration.” Each key will start the engine if ed correctly. S Please refer to TSIB No. SS006–99, “Scantool Immobilizer Key Code Utility,” for additional detail on this procedure. FIGURE 8. KEY REGISTRATION
A KEY CODE UTILITY 1: KEY REGISTRATION 2: KEY CODE ERASURE 3: AUTO REG CLOSURE
9: KEY CODE RESET
Page 6 of 6
(See TSIB No. SS006–99)
Technical Service Information Bulletin November 28, 2005
Introduction
Applicable Vehicles
Test Disc Specifications
Warranty Information
CD SKIP VERIFICATION USING LEXUS MASTER CD Models:
’01 – ’06 All Models
Lexus has developed a master CD to be used for customer complaints of the CD player skipping or CD player cannot read disc. This disc has been specially manufactured to test the performance of the Lexus CD players. Using this master CD will confirm that the radio exceeds Lexus’ specification for CD player performance.
S 2001 – 2006 model year Lexus vehicles.
TRACKS
DEFECT
MUSIC
TRACK TIME
1
None
Minuetto
3:15
2
0.8 mm Black Dot
2ème Gymnopédie
2:32
3
0.6 mm Black Dot
Overture Minature
3:02
4
None
Marche
2:36
5
None
Claire de Lune
3:09
6
None
Nocturne
3:12
7
0.4 mm Scratch
Danse de la Fée Dragée
2:28
8
0.6 mm Scratch
Danse Arabe
2:29
9
0.8 mm Scratch
Fantanisie-Improptu
2:51
10
1.0 mm Scratch
Hungarian Dance No. 5
2:02
11
None
Prelude
3:38
12
None
Maiden’s Prayer
3:15
13
Fingerprint 65 um
Valse des Fleurs
3:08
14
None
1ère Gymnopedie
2:54
15
Fingerprint 75 um
Danse Des Mirlitons
2:06
OP CODE
DESCRIPTION
TIME
OFP
T1
T2
N/A
Not Applicable to Warranty
–
–
–
–
Lexus s ASE Certification
Page 1 of 2
SPECIAL SERVICE TOOLS
SS003-05
Title:
CD SKIP VERIFICATION USING LEXUS MASTER CD – SS003-05 Required SSTs
ITEM NO.
SPECIAL SERVICE TOOLS (SSTs)
November 28, 2005
PART NUMBER
QTY
DRW**
00002–07130–SCD
1
22
Lexus Master CD* 1
NOTE: S All components from this kit/set are required
* Essential SSTs. ** Refers to drawer number in SST Storage System.
NOTE: Additional SSTs may be ordered by calling SPX/OTC at 1-800-933-8335.
Repair Procedure
1. Make sure the vehicle is stationary during the test. 2. Insert a compact disc (NOT the Lexus Master CD) to make sure the radio can accept and eject the disc without damaging it. 3. Check the Lexus Master CD for any unintended scratches or dirt. Wipe away dirt using a glass cleaning cloth. If the disc is damaged, order a replacement master CD. 4. Insert the Lexus Master CD and change to track number 9. 5. Play the track for one minute. A. If skips are heard, replace the CD player. B. If NO skips are heard, the CD player is working normally. Check the customer’s CDs for scratches or other damage to the discs. Confirm that the customer is using a pre-recorded CD, NOT CD-Rs or CD-RWs as they may NOT have been burned properly. NOTE: S Tracks 1 – 8 and 11 – 14 are reference tracks. They can be used, but the conditions are less severe than track 9. Do NOT use tracks 10 and 15. S Track 9 (0.8 mm scratch) is much more severe than the Lexus engineering specification in order to ensure customer satisfaction. If the customer’s radio es this test, a replacement radio will NOT improve the performance. S This disc has been specially manufactured with a physical defect for the purposes of testing the CD player’s performance. It is NOT possible to make copies of this disc that can be used to test the CD player’s performance.
Page 2 of 2
July 6, 2001
DIAGNOSTIC TESTER IMMOBILIZER FUNCTIONS Models:
Applicable ES 330, GS 300, GS 430, GX 470, LS 430, LX 470, RX 330, & SC 430
TSIB REVISION NOTICE: S August 26, 2005: The model years for each model have been specifically defined in the “Applicable Vehicles” section. The following vehicles have been added to the “Applicable Vehicles” section: ES 330, GS 300, GS 430, and RX 330. The “Required SSTs” section has been updated. S January 9, 2003: GX 470 and LX 470 have been added to Applicable Vehicles. The “Required SSTs” section has been updated to the current version software. Screen flows revised (screen C and D) in Figures 1 (screen C and D), 2 (screen C), 3 (screen C), 4 (screen C and G), and 9 (screen A). S The information contained in this TSIB supercedes the original SS005–01. Previous versions of this TSIB should be discarded. Introduction
The Diagnostic Tester incorporates for Immobilizer system service. This bulletin covers the following Immobilizer functions available using the Diagnostic Tester: S Transponder Key Type S Transponder Code Registration S Transponder Code Erasure S Transponder ECU Reset S Transponder ECU Replacement S Engine ECU Replacement NOTE: The available functions and procedures for the models listed in this TSIB differ slightly from previous models and other Immobilizer systems currently in use on Lexus vehicles.
Warranty Information
OP CODE
DESCRIPTION
TIME
OFP
T1
T2
N/A
Not Applicable to Warranty
–
–
–
–
Lexus s ASE Certification
Page 1 of 14
SPECIAL SERVICE TOOLS
Technical Service Information Bulletin
SS005-01
Title:
DIAGNOSTIC TESTER IMMOBILIZER FUNCTIONS – SS005-01 Revised Applicable Vehicles
July 6, 2001
MODEL YEAR
MODEL
ENGINE MODEL
2001 & Later
LS 430
3UZ–FE
2002 & Later
SC 430
3UZ–FE
GX 470
2003 & Later
2UZ–FE
LX 470 ES 330
2004 & Later
3MZ–FE
RX 330
2006
GS 300 (w/o Smart Key)
3GR–FSE
GS 430 (w/o Smart Key)
3UZ–FE
NOTE: Refer to TIS (Technical Information System) for the most current applicable vehicle information.
Parts Information
Required SSTs
PREVIOUS PART NUMBER
CURRENT PART NUMBER
PART NAME
N/A
Model Specific
Replacement Transponder Key (Master or Sub)
ITEM NO.
SPECIAL SERVICE TOOLS (SSTs)
PART NUMBER
QTY
DRW**
LEX220036
1
8
01002744
1
8
Lexus Diagnostic Tester Kit* 1
NOTE: S All components from this kit/set are required S 12 Megabyte Diagnostic Tester Program Card (P/N 01002593–005) with version 13.0a Software (or later) is required CAN Interface Module Kit*
2
NOTE: S All components from this kit/set are required
* Essential SSTs. ** Refers to drawer number in SST Storage System.
NOTE: Additional Diagnostic Tester Kits, CAN Interface Modules, Program Cards, or other SSTs may be ordered by calling SPX/OTC at 1-800-933-8335.
Page 2 of 14
DIAGNOSTIC TESTER IMMOBILIZER FUNCTIONS – SS005-01 Revised Function Description
July 6, 2001
1. Transponder Key Type Before any Immobilizer functions are performed, the type of transponder key that you are attempting to use for the service operation. Some functions may only be performed with a ed Master Key. 2. Transponder Code Registration This function allows the registration of additional transponder keys (Master or Sub) using a ed Master Key. 3. Transponder Code Erasure This function allows the to erase all the transponder keys except the ed Master Key used during this function. 4. Transponder ECU Reset This function allows the registration of a new Master Key even if all original Master Keys are lost. Once the Immobilizer system is reset, all previous ed keys will be erased. 5. Transponder ECU Replacement When the Transponder ECU is replaced, the transponder keys must be ed to the new ECU, auto registration closed, and ECU communication completed. 6. Engine ECU Replacement When the Engine ECU is replaced, ECU communication must be completed to synchronize an encrypted security code between the engine and Transponder ECUs.
Page 3 of 14
DIAGNOSTIC TESTER IMMOBILIZER FUNCTIONS – SS005-01 Revised Operation Procedure TRANSPONDER KEY TYPE
July 6, 2001
1. Transponder Key Type Before any Immobilizer functions are performed, the type of transponder key that you are attempting to use for the service operation. Some functions may only be performed with a ed Master Key. A. Insert the current key into the ignition cylinder and turn to the ON position. HINT: The Immobilizer key blanks are preconfigured as Master or Sub Keys. Master Key blanks cannot be ed as Sub Keys nor can Sub Key blanks be ed as Master Keys. Also, the flat key is now enabled as a full function Master Key that must be ed.
B. Follow the screen flow in Figure 1 to determine the key type. C. Key type and registration status will be indicated on the Immobilizer data list (Figure 1, screen E). S “MATCH” = The key in the ignition cylinder matches this key type. S “NOMATCH” = The key in the ignition cylinder does NOT match this key type. FIGURE 1. TRANSPONDER KEY IDENTIFICATION
A
B
C
FUNCTION SELECT
OBD/MOBD MENU
DIAGNOSTIC MENU IMMOBILIZER
1: 2: 3: 4: 5: 6: 7: 8: 9: 0:
OBD/MOBD ENHANCED OBD II CARB OBD II BREAK OUT BOX NVH AUTOPROBE O2 RPM CHECK SNAPSHOT REVIEW SETUP GAS ANALYSIS
D SELECT DATA ALL DATA
Page 4 of 14
1: 2: 3: 4: 5: 6: 7: 8: 9:
CODES (ALL) ENGINE AND ECT TIRE PRES WARN ABS / VSC CCS AIR CONDITIONER IMMOBILIZER SRS AIRBAG GATEWAY
E KEY SW . . . . . . . . . . . . . . . . . ON IG SW . . . . . . . . . . . . . . . . . . . ON IMMOBILIZER . . . . . . . . UNSET PERMIT (START) . . . . . . . . . . OK RESPONSE . . . . . . . . . . . . . . OK FRAME . . . . . . . . . . . . . . . . . . OK SERIAL NUMBER . . . . . . . . . OK ENCRYPT CODE . . . . . . . . . . OK STATUS . . . . . . . . . . . . . . . . . . OK BCC . . . . . . . . . . . . . . . . . . . . . OK SUB KEY . . . . . . . . . NOMATCH MASTER KEY . . . . . . . . MATCH REGIST SUB CODE . . . . . . . . 1 REGIST MAS CODE . . . . . . . . 2 REG CODE SPACE . . NOT FUL
1: 2: 3: 4: 5:
DATA LIST DTC INFO ACTIVE TEST SNAPSHOT ID UTILITY
DIAGNOSTIC TESTER IMMOBILIZER FUNCTIONS – SS005-01 Revised Operation Procedure (Continued) TRANSPONDER CODE REGISTRATION
July 6, 2001
2. Transponder Code Registration This function allows the normal registration of additional transponder keys (Master or Sub) using a ed Master Key. NOTE: This function requires the use of one ed Master Key. The use of a Sub Key will NOT complete Transponder Code Registration. Attempting registration of additional keys with only a Sub Key will result in errors and incomplete registration.
HINT: The Immobilizer key blanks are preconfigured as Master or Sub Keys. Master Key blanks cannot be ed as Sub Keys nor can Sub Key blanks be ed as Master Keys. Also, the flat key is now enabled as a full function Master Key that must be ed.
A. Insert a ed Master Key into the ignition cylinder and turn to the ON position. B. Follow the screen flow in Figure 2 to new Master or Sub keys. It is possible to up to 5 Master Keys and 3 Sub Keys. C. Be sure to follow the instructions on key insertion, ignition ON/OFF and key removal exactly as described on the Diagnostic Tester. HINT: The security indicator light reveals the following information: S Always ON and NO key in IG* = Transponder ECU in Auto Registration mode S Blinking and NO key in IG = Normal operation S Blinking Code 21 = Transponder Code Registration failed S Blinking Code 22 = Attempt was made to an already ed Transponder Code Blinks 1.8 sec
0.2 sec
Code 2–1 0.25 sec
0.25 sec
0.5 sec
1 sec
Code 2–2 0.25 sec
0.25 sec
1 sec
0.5 sec
* Immediately after the transponder ECU is installed, the security indicator will blink.
Page 5 of 14
DIAGNOSTIC TESTER IMMOBILIZER FUNCTIONS – SS005-01 Revised Operation Procedure (Continued) TRANSPONDER CODE REGISTRATION
FIGURE 2. REGISTRATION OF ADDITIONAL TRANSPONDER KEY
B
C
OBD/MOBD MENU
DIAGNOSTIC MENU IMMOBILIZER
A FUNCTION SELECT 1: 2: 3: 4: 5: 6: 7: 8: 9: 0:
OBD/MOBD ENHANCED OBD II CARB OBD II BREAK OUT BOX NVH AUTOPROBE O2 RPM CHECK SNAPSHOT REVIEW SETUP GAS ANALYSIS
1: 2: 3: 4: 5: 6: 7: 8: 9:
CODES (ALL) ENGINE AND ECT TIRE PRES WARN ABS / VSC CCS AIR CONDITIONER IMMOBILIZER SRS AIRBAG GATEWAY
1: 2: 3: 4: 5:
DATA LIST DTC INFO ACTIVE TEST SNAPSHOT ID UTILITY
F
D
E
ID UTILITY IMMOBILIZER
THIS FUNCTION WILL THE TRANSPONDER CODE.
1: TRANSP CODE REG 2: TRANSP CODE ERS
Do you wish to continue the registration?
9: TRANSP CODE RESET
PRESS [YES] OR [NO]
Remaining Time: [120] Seconds
G
H
I
Please remove the Master Key from the IG cylinder within 20 seconds. Then press [ENTER]
Please insert the New Key into the IG cylinder within 10 seconds. DO NOT TURN IG ON
Remaining Time: [20] Seconds
J THE TRANSPONDER CODE WAS ED CORRECTLY.
Remaining Time: [10] Seconds
K Please insert a Master Key and turn the IG to ON. If the ignition is already ON, please turn it OFF and back to ON.
PRESS [ENTER]
Page 6 of 14
July 6, 2001
PRESS [ENTER]
Please remove the Master Key from the IG cylinder, insert it again, and turn the IG ON within 120 seconds. Then press [ENTER]
**NOW ING** Please wait.
[60] Seconds
DIAGNOSTIC TESTER IMMOBILIZER FUNCTIONS – SS005-01 Revised Operation Procedure (Continued) TRANSPONDER CODE ERASURE
July 6, 2001
3. Transponder Code Erasure This function allows the to erase all the transponder keys except the ed Master Key used during this function. NOTE: This function requires the use of one ed Master Key. The use of a Sub Key will NOT complete Transponder Code Erasure.
A. Insert a ed Master Key into the ignition cylinder and turn to the ON position. B. Follow the screen flow in Figure 3 below to erase all Master or Sub keys, except the ed Master Key used for this procedure. FIGURE 3. ERASING TRANSPONDER CODES
A
B
C
FUNCTION SELECT
OBD/MOBD MENU
DIAGNOSTIC MENU IMMOBILIZER
1: 2: 3: 4: 5: 6: 7: 8: 9: 0:
OBD/MOBD ENHANCED OBD II CARB OBD II BREAK OUT BOX NVH AUTOPROBE O2 RPM CHECK SNAPSHOT REVIEW SETUP GAS ANALYSIS
1: 2: 3: 4: 5: 6: 7: 8: 9:
CODES (ALL) ENGINE AND ECT TIRE PRES WARN ABS / VSC CCS AIR CONDITIONER IMMOBILIZER SRS AIRBAG GATEWAY
1: 2: 3: 4: 5:
DATA LIST DTC INFO ACTIVE TEST SNAPSHOT ID UTILITY
D
E
F
ID UTILITY IMMOBILIZER
This function will ERASE ALL TRANSPONDER CODES except the Master key in the IG cylinder.
Please remove the Master Key from the IG cylinder, insert it again, and turn the IG ON within 120 seconds. Then press [ENTER]
1: TRANSP CODE REG 2: TRANSP CODE ERS
DO YOU WISH TO CONTINUE ERASING? 9: TRANSP CODE RESET
PRESS [YES] OR [NO]
G
H
***NOW ERASING*** WARNING: Master Key must be removed from IG cylinder within 10 seconds or erasure will not complete. Remaining Time: [10] Seconds
Remaining Time: [120] Seconds
ALL TRANSPONDER CODES EXCEPT THE INSERTED MASTER KEY’S TRANSPONDER CODE WERE ERASED.
PRESS [ENTER]
Page 7 of 14
DIAGNOSTIC TESTER IMMOBILIZER FUNCTIONS – SS005-01 Revised Operation Procedure (Continued) TRANSPONDER ECU RESET
July 6, 2001
4. Transponder ECU Reset This function allows the registration of a new Master Key even if all original Master Keys are lost. Once the Immobilizer system is reset, all previous ed keys will be erased. Use a new transponder Master Key to complete Transponder ECU Reset.
Immobilizer Reset The Immobilizer Reset function is a 4-step process: A. Using the Diagnostic Tester, retrieve a “Seed Number” through the OBD/MOBD Immobilizer function. S A “Seed Number” is a unique number provided by the Diagnostic Tester and validated at TMS in order to return a code. B. Using the TIS (Technical Information System) workstation, select Immobilizer Reset, and complete the request form to retrieve a “code Number.” S A “code Number” is a unique number required by the Diagnostic Tester to reset the ECU allowing it to accept a new Master Key. C. Enter the “code Number” received from TIS into the Diagnostic Tester, any additional customer keys, and close auto registration mode. D. Confirm successful Immobilizer reset and new Master Key registration.
Page 8 of 14
DIAGNOSTIC TESTER IMMOBILIZER FUNCTIONS – SS005-01 Revised Operation Procedure (Continued) TRANSPONDER ECU RESET
July 6, 2001
A. Connect the Diagnostic Tester to DLC3 and turn ignition ON. a. Using the Diagnostic Tester, retrieve a “Seed Number” through the OBD/MOBD Immobilizer function. b. Follow each step outlined in Figure 4. FIGURE 4. RETRIEVING A SEED NUMBER
A
B
C
FUNCTION SELECT
OBD/MOBD MENU
DIAGNOSTIC MENU IMMOBILIZER
1: 2: 3: 4: 5: 6: 7: 8: 9: 0:
OBD/MOBD ENHANCED OBD II CARB OBD II BREAK OUT BOX NVH AUTOPROBE O2 RPM CHECK SNAPSHOT REVIEW SETUP GAS ANALYSIS
D
1: 2: 3: 4: 5: 6: 7: 8: 9:
CODES (ALL) ENGINE AND ECT TIRE PRES WARN ABS / VSC CCS AIR CONDITIONER IMMOBILIZER SRS AIRBAG GATEWAY
E
ID UTILITY IMMOBILIZER 1: TRANSP CODE REG 2: TRANSP CODE ERS
Please open the Driver’s Door.
1: 2: 3: 4: 5:
DATA LIST DTC INFO ACTIVE TEST SNAPSHOT ID UTILITY
F This function will RESET the TRANSPONDER CODE. DO YOU WISH TO CONTINUE RESETTING?
9: TRANSP CODE RESET
PRESS [ENTER]
PRESS [YES] [YES] OR [NO]
G SEED NUMBER
999999
NOTICE: S Do NOT turn the ignition OFF S Do NOT disconnect the Diagnostic Tester from the vehicle.
Please insert SEED NUMBER into TIS PRESS [ENTER]
Page 9 of 14
DIAGNOSTIC TESTER IMMOBILIZER FUNCTIONS – SS005-01 Revised Operation Procedure (Continued) TRANSPONDER ECU RESET
B. Using the TIS workstation, select Immobilizer Reset, and complete the request form to retrieve a “code Number.” a. Click on Diagnostics. b. Click on Immobilizer Reset. FIGURE 5. SELECTING IMMOBILIZER RESET ON TIS
a b
c. Read the instructions on the screen and click on Continue. (See Figure 6 below.) FIGURE 6. IMMOBILIZER RESET INSTRUCTIONS ON TIS
c
Page 10 of 14
July 6, 2001
DIAGNOSTIC TESTER IMMOBILIZER FUNCTIONS – SS005-01 Revised Operation Procedure (Continued) TRANSPONDER ECU RESET
July 6, 2001
d. Complete the request form and enter the “Seed Number” from the Diagnostic Tester. Click on Submit (Figure 7). NOTE: All fields must be completed. FIGURE 7. REQUEST FORM ON TIS
d e. TIS will now return the code that needs to be entered into the Diagnostic Tester. NOTE: The code given by TIS is only valid for one Immobilizer Reset Event.
FIGURE 8. RECEIVING CODE FOR DIAGNOSTIC TESTER
e
Page 11 of 14
DIAGNOSTIC TESTER IMMOBILIZER FUNCTIONS – SS005-01 Revised Operation Procedure (Continued) TRANSPONDER ECU RESET
July 6, 2001
C. Using the numbered keys (0–9) on the Diagnostic Tester, enter the “code Number” received from TIS into the Diagnostic Tester (see Figure 9 below). Press ENTER to clear all ed transponder codes except the Master key in the ignition cylinder. NOTE: S During the reset process do not remove the key from the ignition. S This step takes approximately 16 minutes.
FIGURE 9. CODE ENTRY
A
B
C
Please insert CODE NUMBER from TIS
**NOW RESETTING**
RESETTING SUCCEEDED
If the key was in the IG cylinder, do not remove it.
All TRANSPONDER CODES were successfully reset.
Remaining Time <16> Min.
If a key remains in the IG cylinder, please remove it.
CODE NUMBER
000414
PRESS [ENTER]
D Master Keys and Sub key may be ed by inserting keys into IG. *INSERT KEYS NOW*
PRESS [ENTER]
PRESS [ENTER]
E To turn off auto– matic registration, insert a Master key and cycle IG 5 times within 10 seconds. [HINT] On automatic registration mode, the security indicator remains on unless a key is in the IG cylinder.
PRESS [ENTER]
S Following a reset, the Transponder ECU is in auto registration mode. S Auto registration mode allows 3 Master Keys and one Sub Key to automatically. S To additional keys, remove the Master Key currently in the ignition. Insert keys (Master or Sub) into the ignition cylinder without turning the ignition on or off – simply insert and remove. (See Figure 9, screen D.) NOTE: S If 4 keys are ed at this time, auto registration mode is automatically closed. S If less than 4 keys are ed at this time, auto registration mode must be closed manually by cycling the ignition ON/OFF more than 5 times in 10 seconds. (See Figure 9, screen E.) S If more than 4 keys need to be ed, use Transponder Code Registration.
Page 12 of 14
DIAGNOSTIC TESTER IMMOBILIZER FUNCTIONS – SS005-01 Revised Operation Procedure (Continued) TRANSPONDER ECU RESET
TRANSPONDER ECU REPLACEMENT
July 6, 2001
D. that keys are ed correctly by starting the engine with each newly ed key. NOTE: S If the vehicle starts, the new key code was ed correctly. S If the vehicle does not start with any key, perform the Immobilizer Reset function again. S If only one of the ed keys will not start the vehicle, attempt to the key again following the Transponder Code Registration procedure (page 5 of this bulletin).
5. Transponder ECU Replacement When the Transponder ECU is replaced, the transponder keys must be ed, auto registration closed, and ECU communication completed. A. Replacement transponder ECUs are in auto registration mode. This allows transponder keys to automatically as they are inserted into the ignition cylinder. It is possible to automatically 3 Master Keys, and 1 Sub Key. NOTE: S If 4 keys are ed at this time, auto registration mode is closed. S If less than 4 keys are ed at this time, auto registration mode must be closed manually by cycling the ignition ON/OFF more than 5 times in 10 seconds. S If more than 4 keys need to be ed, use Transponder Code Registration procedure (page 5 of this bulletin).
B. Once auto registration mode is closed, ECU Communication must be performed between the transponder ECU and the Engine ECU. Complete ECU communication using the following steps: a. Insert ed Master Key into the ignition cylinder. b. Turn ignition ON (engine OFF). c. Short Tc and CG terminals of DLC3 using Diagnosis Check Wire (SST 09843–18040 or equivalent) and leave for 30 minutes. (See Figure 10.) FIGURE 10. DLC3 SST 09843–18040 Tc = Pin 13 CG = Pin 4
16
15
14
13
12
11
10
9
8
7
6
5
4
3
2
1
View of Connector Is From enger Compartment
d. After 30 minutes, turn ignition OFF and remove check wire from DLC3 e. Start the vehicle to confirm successful ECU communication. NOTE: If ECU communication is not completed correctly, the engine will not start and DTC B2799 will be set. DTC B2799 will be cleared after engine starts correctly.
Page 13 of 14
DIAGNOSTIC TESTER IMMOBILIZER FUNCTIONS – SS005-01 Revised Operation Procedure (Continued) TRANSPONDER ECU REPLACEMENT
July 6, 2001
HINT: The security indicator light reveals the following information: S Always ON and NO key in IG* = Transponder ECU in Auto Registration mode S Blinking and NO key in IG = Normal operation S Blinking Code 21 = Transponder Code Registration failed S Blinking Code 22 = Attempt was made to an already ed Transponder Code Blinks 1.8 sec
0.2 sec
Code 2–1 0.25 sec
0.25 sec
Code 2–2
1 sec
0.25 sec
0.5 sec
0.25 sec
1 sec
0.5 sec
* Immediately after the transponder ECU is installed, the security indicator will blink.
ENGINE ECU REPLACEMENT
6. Engine ECU Replacement When the Engine ECU is replaced, ECU communication must be completed. ECU Communication must be performed between the transponder ECU and the Engine ECU. Complete ECU communication using the following steps: A. Insert ed Master Key into the ignition cylinder. B. Turn ignition ON (engine OFF). C. Short Tc and CG terminals of DLC3 using Diagnosis Check Wire (SST 09843–18040 or equivalent) and leave for 30 minutes. (See Figure 11.) FIGURE 11. DLC3 SST 09843–18040 Tc = Pin 13 CG = Pin 4
16
15
14
13
12
11
10
9
8
7
6
5
4
3
2
1
View of Connector Is From enger Compartment
D. After 30 minutes, turn ignition OFF and remove check wire from DLC3 E. Start the vehicle to confirm successful ECU communication. NOTE: If ECU communication is not completed correctly, the engine will not start and DTC B2799 will be set. DTC B2799 will be cleared after engine starts correctly.
Page 14 of 14
STEERING INTERMEDIATE SHAFT NOISE Models:
’03 ES 300, ’04 – ’05 ES 330
April 29, 2005
Introduction
Some customers may hear and feel a clunk, pop, or knock type noise when turning the steering wheel left or right. A new intermediate shaft has been developed to address this concern.
Steering Column Intermediate Shaft
Applicable Vehicles
S 2003 model year ES 300 vehicles. S 2004 model year ES 330 vehicles. S 2005 model year ES 330 vehicles produced BEFORE the Production Change Effective VINs shown below.
Production Change Information
Warranty Information
MODEL
PRODUCTION CHANGE EFFECTIVE VIN
ES 330
JTHBA30G#55098506
OP CODE
DESCRIPTION
TIME
OFP
T1
T2
ST4008
R & R Steering Intermediate Shaft
0.9
45220–33200
91
19
Applicable Warranty*: This repair is covered under the Lexus Comprehensive Warranty. This warranty is in effect for 48 months or 50,000 miles, whichever occurs first, from the vehicle’s in-service date. * Warranty application is limited to correction of a problem based upon a customer’s specific complaint.
Lexus s ASE Certification
Page 1 of 2
STEERING
Technical Service Information Bulletin
ST001-05
Title:
STEERING INTERMEDIATE SHAFT NOISE – ST001-05 Parts Information
Repair Procedure
April 29, 2005
PREVIOUS PART NUMBER
CURRENT PART NUMBER
PART NAME
QTY
45220–33200
45220–33240
Intermediate Shaft Assembly
1
Prior to removing the steering intermediate shaft, make sure the steering wheel and front wheels remain stationary. Once the intermediate shaft is removed, do NOT allow the steering wheel to spin freely. For information on replacing the steering intermediate shaft assembly, refer to the Technical Information System (TIS): 2003 – 2004 model year ES 330 Repair Manual: Steering Column: Steering Column Assy: Overhaul.
Page 2 of 2
Technical Service Information Bulletin December 21, 2001
REPAIR MANUAL SUPPLEMENT: VEHICLE PULLING TO ONE SIDE Models:
All ’02 – ’06 Model
TSIB REVISION NOTICE: S October 5, 2005: 2003 – 2006 model years have been added to Applicable Vehicles. A note has been added to the illustration in step 3. S March 1, 2002: OP Codes updated in Warranty Information. All previous versions of this TSIB should be discarded. Introduction
This bulletin contains general vehicle pulling diagnosis and repair procedures along with specific information to help correct pulling complaints. This information supplements Repair Manual procedures when the symptoms are: S The driver holds the steering wheel without exerting steering effort while driving straight ahead, and the vehicle drifts to the right or the left. S While driving straight ahead, the driver has to steer either to the right or the left to maintain straight driving.
Applicable Vehicles
Warranty Information
S 2002 – 2006 model year Lexus vehicles.
OP CODE
DESCRIPTION
TIME
ST1004
Preliminary Check & Road Test
0.6
Combo A
Switch Front Tire/Wheel & Road Test
0.5
Combo B
Reverse the Front One Side Tire
0.7
Combo C
Check Front Wheel Alignment
1.2
Combo D
Adjust Front Wheel Alignment
0.7
Combo E
Adjust Camber Setting
0.7
420091
Dismount and Mount Tire and Balance Wheel and Tire Assembly
0.5
Combo A
Each additional Wheel
0.3
OPN
T1
T2
45046 09020 45046–09020 31 99
42611–48030 42611 48030
NOTE: Above combination codes A, B, D and E include road test time. Applicable Warranty*: This repair is covered under the Lexus Comprehensive Warranty. This warranty is in effect for 12 months or 20,000 miles, whichever occurs first, from the vehicle’s in-service date. * Warranty application is limited to correction of a problem based upon a customer’s specific complaint.
Lexus s ASE Certification
Page 1 of 11
STEERING
ST004-01
Title:
REPAIR MANUAL SUPPLEMENT: VEHICLE PULLING TO ONE SIDE – ST004-01 Revised Contents
December 21, 2001
This bulletin is divided into the following sections: Wheel Alignment and Tire Characteristics . . . . . . . . . . . . . . . . . . . . . . . . . . . . Pages 2–3 Repair Procedure Flow Chart . . . . . . . . . . . . . . . . . . . . . . . . . . . . . . . . . . . . . . . . Page 4 Repair Procedures 1. Important Notice . . . . . . . . . . . . . . . . . . . . . . . . . . . . . . . . . . . . . . . . . . . . . Page 5 2. Troubleshooting . . . . . . . . . . . . . . . . . . . . . . . . . . . . . . . . . . . . . . . . . . . . . Pages 5–6 3. Vehicle Pulling Caused by Wheel Alignment . . . . . . . . . . . . . . . . . . . Pages 6–7 4. Vehicle Pulling Caused by Tire Conicity . . . . . . . . . . . . . . . . . . . . . . . Pages 7–9 5. Camber Adjustment Method . . . . . . . . . . . . . . . . . . . . . . . . . . . . . . . . . . Pages 9–10
Page 2 of 11
REPAIR MANUAL SUPPLEMENT: VEHICLE PULLING TO ONE SIDE – ST004-01 Revised Wheel Alignment & Tire Characteristics
December 21, 2001
1. Relationship Between Wheel Alignment and Vehicle Pulling to One Side When the cross camber or caster of the front wheel alignment is large, it can cause vehicle pulling.
WHEEL ALIGNMENT
DIRECTION OF VEHICLE PULLING
Camber
Vehicle pulls in direction of wheel with large camber value
Caster
Vehicle pulls in direction of wheel with small caster value
CAMBER
Straight–Ahead Driving
CASTER
Direction of Pull
Front P’
T’
P
T
a’ a Caster Trail (Large)
Caster Trail (Small) O
F
O’
F’
P, P’: Driving Force a, a’: Steering Axes O, O’: Center of Tire–Road Area F, F’: Reactive Force
If the cross camber or caster is within the specified range (30’ or less), noticeable vehicle pulling will not occur due to side-to-side differences in camber or caster. NOTE: On a flat road, if the cross camber or caster is 30’ or less and the steering wheel is held without exerting steering effort for 100 m (109 yards) when driving at 100 km/h (62 mph), the alignment–induced drift distance is approximately 0.5 m (1.64 ft).
Page 3 of 11
REPAIR MANUAL SUPPLEMENT: VEHICLE PULLING TO ONE SIDE – ST004-01 Revised Wheel Alignment & Tire Characteristics (Continued)
December 21, 2001
2. Relationship Between Tire Characteristics and Vehicle Pulling to One Side When radial tires are rotating, they have the characteristic of generating force in the lateral direction between the tire and the road surface. This lateral force is comprised of two factors: S Ply–steer, which changes direction according to the rotation direction of the tires. S Conicity, which is generated in a fixed direction regardless of the tire rotation direction. If these lateral forces are too strong, vehicle pulling will occur. A. Ply–Steer Lateral force due to ply-steer is produced by the construction of the belts inside the tire tread. With radial tires, the wire of the belt is slanted as shown in the illustration below. Thus, it is in the lateral direction that tire tread easily changes shape (stretches), and lateral force is generated between the tire and the road surface in the lateral direction. Rotation Direction
Easily–Stretched Direction
Wire Ply–Steer (Direction of Force Generation Varies According to Tire Rotation)
Belt
NOTE: Lateral force from ply-steer prevents vehicle drift caused by road slant, so in many cases lateral force to the right is provided for left-handed steering vehicles.
B. Conicity Conicity is lateral force resulting from uneven formation of the left and right sides of the tire. The direction the lateral force is exerted depends on the hardness of the side walls and the difference in height between the left/right sides of the tire.
Hard Part
Conicity (Direction Is Fixed Regardless of Direction of Tire Rotation)
NOTE: S In the case of vehicle pulling caused by tires, the lateral force which is exerted as a result of conicity has the greatest effect. On a flat road, if the steering wheel is held without exerting steering effort for 100 m (109 yards) when travelling at 100 km/h (62 mph), the vehicle may drift as much as 1.5 m (5 ft). S When vehicle pulling is due to conicity, the amount of drift can be reduced and the direction of drift can be changed by changing the location of the tire or reversing the tire when installing it on the wheel. Page 4 of 11
REPAIR MANUAL SUPPLEMENT: VEHICLE PULLING TO ONE SIDE – ST004-01 Revised Repair Procedure Flow Chart
December 21, 2001
START
Preliminary Check S Tire Pressure S Vehicle height S Brake Dragging
NO Is there steering off center?
*ROAD TEST Does the vehicle lead/pull? YES
NO COMPLETE
YES Adjust front tie rods. See TSIB ST002–01
YES
Are the tires uni–directional type? NO
NO ROAD TEST Does the vehicle still lead/pull?
Cross switch front tire and wheel assemblies (left & right)
YES
Choose the position of front tire & wheel assemblies where there is least amount of pull.
YES
Does the vehicle lead/pull in the same direction as before? NO
YES
Check front wheel alignment. Is it within specification?
NO
Is the lead/pull stronger than before?
NO
YES
Reverse the front left side tire and rebalance it.
Adjust front wheel alignment.
ROAD TEST Does the vehicle still lead/pull? NO
ROAD TEST Does the vehicle still lead/pull? YES
YES
Does the vehicle lead/pull to the left?
COMPLETE
YES
NO
Increase right front camber and decrease left front camber until lead/pull is eliminated.
NO
NO
NOTE: Do not exceed 1r of cross camber. Do not exceed adjustment range.
Increase left front camber and decrease right front camber until lead/pull is eliminated.
ROAD TEST Does the vehicle still lead/pull?
YES
your regional office.
* Select a flat road where the vehicle can be driven in a straight line for 100 meters at a constant speed of 35 mph. Please confirm safety and set the steering wheel to its straight position. Drive the vehicle in a straight line for 100 meters at a constant speed of 35 mph without exerting steering effort on the steering wheel. (1) The vehicle goes straight but the steering wheel has some angle. (2) The vehicle doesn’t go straight.
STEERING OFF CENTER
STEERING PULL
Page 5 of 11
REPAIR MANUAL SUPPLEMENT: VEHICLE PULLING TO ONE SIDE – ST004-01 Revised Repair Procedures
December 21, 2001
1. IMPORTANT NOTICE Before repairing vehicle pulling to one side, it is necessary to clearly identify the cause of the pulling condition. Frequently, the cause of the vehicle pulling to one side is diagnosed as wheel alignment. However, the actual cause may be lateral force generated by the tires. Performing wheel alignment when tire force is the cause could result in the wheel alignment being set at a value outside of specifications. This would then cause other problems such as uneven tire wear, etc. 2. Troubleshooting First determine whether vehicle pulling to one side is caused by a wheel alignment problem or tire characteristics, then decide which repairs to make. A. Perform the following checks and correct as necessary. a. Check tires for size, wear and for proper inflation pressure. b. Check whether the vehicle is noticeably tilted backward/forward or left/right. NOTE: Tilting of the vehicle produces a left–right difference in the camber and caster and can cause vehicle pulling to one side.
c. Check brakes for dragging. B. Confirm problem symptoms. With the customer accompanying you, drive the vehicle to confirm if the customer’s complaint involves vehicle pulling to one side or steering wheel off center. If the problem is steering wheel off center, adjust the front tie rods on the vehicle. Refer to Lexus TSIB ST002–01. Also check the direction of vehicle pulling and the extent of the pulling. C. Decide if vehicle pulling is due to wheel alignment or tires. a. Switch the left and right front tires (If the tires are non–unidirectional). b. Conduct a drive test to check whether the direction that the vehicle pulls has changed.
Page 6 of 11
SYMPTOM
PROBABLE CAUSE
CORRECTIVE ACTION
No change in vehicle pulling condition
Front wheel alignment
Proceed to Repair Procedure 3. Vehicle pulling caused by Wheel Alignment (Page 6)
Vehicle pulling eliminated
Tire conicity
Repair complete. Vehicle Pulling Caused by Tire Conicity (Page 3 and 6)
Vehicle pulling direction is reversed
Tire conicity
Proceed to Repair Procedure 4. Vehicle Pulling Caused by Tire Conicity (Page 7)
REPAIR MANUAL SUPPLEMENT: VEHICLE PULLING TO ONE SIDE – ST004-01 Revised Repair Procedures (Continued)
December 21, 2001
Helpful hints to determine cause of vehicle pulling: S The direction of lateral force from tire conicity becomes reversed when the left and right tires are switched. Therefore, if the pulling direction changes when the tires are switched, it can be concluded that vehicle pulling is caused by tire conicity. ORIGINAL TIRE POSITIONS Vehicle Pulling Direction (Right)
TIRES SWITCHED
Lateral Force by Conicity
The Vehicle is Pulled to the Right by the Lateral Force Exerted to the Right.
Vehicle Pulling Direction (Left)
Lateral Force by Conicity
The Direction of the Tires Which Exerted Lateral Force to the Right has Been Changed, so the Tires Now Exert Lateral Force to the Left and the Vehicle Now Pulls to the Left.
S If the pulling direction does not change after the front tires are switched, the cause of vehicle pulling is not tire conicity. In this case, the likely cause is a front wheel alignment condition. 3. Vehicle Pulling Caused by Wheel Alignment When it is determined by troubleshooting that the vehicle pulling to one side is caused by wheel alignment, perform repairs according to the following procedure. Vehicle Pulling to One Side
Check Front Wheel Alignment
Not Within Specification
Within Specification
Adjust Front Wheel Alignment
Road Test
OK
Within Specification But Vehicle Pulls
Vehicle Still Pulls
Adjust Cross Camber to Eliminate Vehicle Pulling NOTE: Do not exceed 1r of cross camber.
Page 7 of 11
REPAIR MANUAL SUPPLEMENT: VEHICLE PULLING TO ONE SIDE – ST004-01 Revised Repair Procedures (Continued)
December 21, 2001
WHEN VEHICLE PULLS TO LEFT
WHEN VEHICLE PULLS TO RIGHT
Increase right front camber and decrease left front camber until vehicle pulling is eliminated
Increase left front camber and decrease right front camber until vehicle pulling is eliminated
NOTE: S Keep the cross camber within 1r or less. S Keep the camber of each wheel within specifications (+/–45’ of center value). S If adjustment exceeds the specifications, uneven tire wear will result.
4. Vehicle Pulling Caused by Tire Conicity When it is determined by troubleshooting that the vehicle pulling to one side is caused by tire conicity, perform repairs according to the following procedures. Indication of Tire Conicity as a Cause: When the front tires are switched, the pulling direction changes. Proceed to STEP 1.
STEP 1: Remove the front left tire from the wheel and reverse the tire. Then perform a road test and check for change in the pulling direction. HINT: By performing this operation, it can be checked whether the left or right tire exerts a stronger lateral force. Either tire can be reversed. Shown here is an example of the left tire reversed.
If Vehicle Pulls in the Same Direction: Go to STEP 2. The lateral force generated by the right front tire is greater than the left tire, so the vehicle is pulling due to the lateral force of the right tire. ORIGINAL TIRE POSITIONS Vehicle Pulling Direction
LEFT TIRE REVERSE INSTALLATION Vehicle Pulling Direction (Same Direction)
Reversed
Lateral Force by Conicity (Smaller)
Page 8 of 11
Lateral Force by Conicity (Larger)
Lateral Force by Conicity (Smaller)
Lateral Force by Conicity (Larger)
REPAIR MANUAL SUPPLEMENT: VEHICLE PULLING TO ONE SIDE – ST004-01 Revised Repair Procedures (Continued)
December 21, 2001
If Vehicle Pulls in the Opposite Direction: Go to STEP 2. The lateral force generated by the left front tire is greater than the right tire, so the vehicle is pulling due to the lateral force of the left tire. ORIGINAL TIRE POSITIONS
LEFT TIRE REVERSE INSTALLATION
Vehicle Pulling Direction
Vehicle Pulling Direction (Opposite Direction) Reversed
Lateral Force by Conicity (Larger)
Lateral Force by Conicity (Smaller)
Lateral Force by Conicity (Larger)
Lateral Force by Conicity (Smaller)
If Vehicle Pull Is Eliminated: Repair Is Now Complete.
The lateral force generated by the left and right front tires is virtually the same, so the lateral force is neutralized and the vehicle travels straight ahead. The repair operation is now completed. STEP 2: Rotate the larger lateral force front tire with the rear tire and check the change in the vehicle pulling.
NOTE: By shifting the front tire with the larger lateral force to the rear, the vehicle pulling level is usually reduced.
If Vehicle Is Still Pulling: Go to STEP 3.
If Vehicle Pull Is Eliminated: Repair Is Now Complete.
Page 9 of 11
REPAIR MANUAL SUPPLEMENT: VEHICLE PULLING TO ONE SIDE – ST004-01 Revised Repair Procedures (Continued)
December 21, 2001
STEP 3: Adjust cross camber to eliminate vehicle pulling. HINT: If the tires are placed in the positions they were in during tire rotation when the least amount of vehicle pulling occurred, wheel alignment can be performed with a minimal amount of adjustment. WHEN VEHICLE PULLS TO LEFT
WHEN VEHICLE PULLS TO RIGHT
Increase right front camber and decrease left front camber until vehicle pulling is eliminated
Increase left front camber and decrease right front camber until vehicle pulling is eliminated
NOTE: S Keep the cross camber within 1r or less. S Keep the camber of each wheel within specifications (+/–45’ of center value). S If adjustment exceeds the specifications, uneven tire wear will result.
5. Camber Adjustment Method NOTE: After the camber has been adjusted, inspect the toe–in. NOTE: The method of camber adjustment differs for different models, so please refer to the repair manual of the vehicle involved. (This is a sample from the RX 300 Repair Manual).
A. Remove the front wheels and ABS speed sensor clamp. B. Remove the two nuts on the lower side of the shock absorber. C. Coat the threads of the nuts with engine oil. D. Temporarily install the two nuts. E. Adjust the camber by pushing or pulling the lower side of the shock absorber in the direction in which the camber adjustment is required. F. Tighten the nuts. Torque: 210 NSm (2,150 kgfScm, 155 ftSlbf)
Page 10 of 11
1 2
REPAIR MANUAL SUPPLEMENT: VEHICLE PULLING TO ONE SIDE – ST004-01 Revised Repair Procedures (Continued)
December 21, 2001
G. Install the front wheels. Torque: 103 NSm (1,050 kgfScm, 76 ftSlbf) H. Check the camber. NOTE: Adjusting value for the set bolts is 6’ – 30’ (0.1r – 0.5r). When making an adjustment of more than 45’, replace the upper and lower steering knuckle set bolts with the adjusting bolts. If the camber is not within the specification, use the table shown to estimate how much additional camber adjustment will be required, and select the appropriate camber adjusting bolt.
I.
Follow steps 5–a through 5–h again. Between steps 5–b and 5–c, exchange one or two selected bolts.
HINT: When exchanging the two bolts, exchange one bolt each time.
If Vehicle Pull Is Eliminated: Repair Is Now Complete.
If Vehicle Is Still Pulling: Your Regional Office For Further Assistance.
Page 11 of 11
Technical Service Information Bulletin
ECM RESET MEMORY FUNCTION Models:
’98 – ’05 Applicable Models
May 5, 2003
TSIB REVISION NOTICE: December 20, 2004: Applicable Vehicles section has been updated and modified, 2004 and 2005 model years added; and Reset Procedure 2 has been revised. Previous versions of this TSIB should be discarded. Introduction
Whenever an automatic transmission is replaced, overhauled or individual components are replaced, use this procedure to erase Engine Control Module (ECM, SAE term: Powertrain Control Module, PCM) “Learned Values” and minimize subsequent performance concerns. CAUTION: Failure to follow the following procedure may lengthen the time to readjust the “Learned Values,” potentially resulting in performance concerns.
Applicable Vehicles
Refer to Reset Procedure 1 for the following vehicles with Electronically Controlled Automatic Transmissions: S 1999 – 2003 model year ES 300 and RX 300 vehicles. S 2003 – 2005 model year GX 470 vehicles. S 2004 – 2005 model year RX 330 vehicles. Refer to Reset Procedure 2 for the following vehicles with Electronically Controlled Automatic Transmissions: S 1998 – 2005 model year GS 430/400/300, LS 430/400, LX 470, and SC 430/400/300 vehicles. S 2001 – 2005 model year IS 300 vehicles.
Warranty Information
OP CODE
DESCRIPTION
TIME
OFP
T1
T2
N/A
Not Applicable to Warranty
–
–
–
–
Lexus s ASE Certification
Page 1 of 3
TRANSMISSION & CLUTCH
TC002-03
Title:
RESET MEMORY FUNCTION – TC002-03 Revised Required SSTs
May 5, 2003
SPECIAL SERVICE TOOLS (SSTs)
PART NUMBER
QUANTITY
Lexus Diagnostic Tester Kit*
01001270
1
CAN Interface Module Kit*
01002744
1
01002593-005
1
12 Megabyte Diagnostic Tester Program Card with version 12.01a Software (or later)* *
Essential SSTs.
NOTE: Additional Diagnostic Tester Kits, CAN Interface Modules, Program Cards or other SSTs may be ordered by calling SPX/OTC at 1-800-933-8335.
Reset Procedure 1
1. Connect the Lexus Diagnostic Tester to the vehicle. 2. Reset the ECM (PCM). Refer to the procedures below.
A
B
*APPLICATION SELECT*
FUNCTION SELECT FOR NORTH AMERICA 1: OBD/MOBD 2: ENHANCED OBD II 3: CARB OBD II 4: BREAK–OUT BOX 5: NVH 6: AUTOPROBE 7: 02 RPM CHECK 8: SNAPSHOT REVIEW 9: SETUP 0: GAS ANALYSIS
1: DIAGNOSIS 2: CUSTOMIZE 3: ECU REPROGRAM
D RESET MEMORY NOTICE DO NOT USE THIS FUNCTION UNLESS INSTRUCTED BY REPAIR MANUAL. ONLY USE AFTER REPLACING THE ENGINE, AUTO TRANS, OR ECM ON CERTAIN VEHICLES.
E RESET MEMORY EXECUTING THIS FUNCTION WILL RESET THE LEARNED VALUES IN THE ECM. DO YOU WISH TO RESET THE ECM? [YES] to CONTINUE [YES] [NO] to EXIT
C DIAGNOSTIC MENU ENGINE 1: DATA LIST 2: DTC INFO 3: ACTIVE TEST 4: SNAPSHOT 5: SYSTEM CHECK 6: 6: RESET RESET MEMORY MEMORY 7: MONITOR STATUS 8: CHECK MODE
F RESET MEMORY RESETTING COMPLETE
PRESS [ENTER]
3. Start the engine and warm it up to normal operating temperatures before test–driving. 4. Perform a thorough test drive with several accelerations from a stop with “light throttle” application until proper transmission shifting is verified.
Page 2 of 3
RESET MEMORY FUNCTION – TC002-03 Revised Reset Procedure 2
May 5, 2003
1. Disconnect the negative battery cable for 5 minutes. 2. Reconnect battery cable. 3. Start the engine and warm it up to normal operating temperatures before test–driving. 4. Perform a thorough test drive with several accelerations from a stop with “light throttle” application until proper transmission shifting is verified.
Page 3 of 3
Technical Service Information Bulletin August 4, 2003
ECM CALIBRATION: SHIFT FEELING ENHANCEMENT Models:
’02 – ’03 ES 300 & ’04 – ’05 ES 330
REVISION NOTICE: S April 1, 2005: 2004 – 2005 model year ES 330 vehicles have been added to Applicable Vehicles. Introduction and Note have been updated on page 1. Calibration Identification Chart has been updated to include ES 330 calibration IDs. S August 6, 2003: There has been a change in Warranty Time. Previous versions of this TSIB should be discarded. Introduction
To improve the transmission shift feeling during specific operating modes, the Engine Control Module (SAE term: Powertrain Control Module/PCM) calibration has been revised. These improvements include: S Reduced downshift lag when accelerating at speeds from 10 to 20 mph. S Less gear hunting when driving on/off accelerator pedal at 20 to 30 mph (for example: during heavy rush–hour traffic). S Improved response rate during heavy acceleration from a stop. NOTE: S Version 12.01a or later Diagnostic Tester software is required to perform this procedure. S Before proceeding, the ECM (PCM) calibration has NOT been updated by checking for the Authorized Modifications Label (shown in step 1 of the Repair Procedure). S Harsh ATM shifting may result if any Repair Procedure steps are omitted (specifically steps 2 and 4 of “Flash Reprogram ECM” on page 6).
Applicable Vehicles
Warranty Information
S 2002 – 2003 model year ES 300 vehicles. S 2004 – 2005 model year ES 330 vehicles.
OP CODE
EG5017
DESCRIPTION
Recalibrate ECM Engine & Transmission
TIME
OFP
0.9
89666–3325# 89666–3344# 89661–33B3# 89661–33A4#
T1
T2
26 99
Applicable Warranty*: This repair is covered under the Lexus Federal Emissions Warranty. This warranty is in effect for 96 months or 80,000 miles, whichever occurs first, from the vehicle’s in-service date. * Warranty application is limited to correction of a problem based upon a customer’s specific complaint.
Lexus s ASE Certification
Page 1 of 6
TRANSMISSION & CLUTCH
TC004-03
Title:
ECM CALIBRATION: SHIFTING ENHANCEMENT – TC004-03 Revised Parts Information
August 4, 2003
PREVIOUS PART NUMBER
CURRENT PART NUMBER
PART NAME
QTY
N/A
00451–00001–LBL
Authorized Modifications Label
1
NOTE: Authorized Modification Labels may be ordered in packages of 25 from the Materials Distribution Center (MDC) through Dealer Daily Dealer Materials System or by calling the MDC at 1–800–622–2033.
Required SSTs
SPECIAL SERVICE TOOLS (SSTs)
PART NUMBER
QTY
DRW**
CAN Interface Module Kit*
01002744
1
8
Lexus Diagnostic Tester Kit*
01001270
1
8
01002593-005 (Component of 01001270)
1
12 Megabyte Diagnostic Tester Program Card with version 12.01a Software (or later)* * Essential SSTs. ** Refers to drawer number in SST Storage System.
NOTE: Additional Diagnostic Tester Kits, CAN Interface Modules, Program Cards, or other SSTs may be ordered by calling SPX/OTC at 1-800-933-8335.
Page 2 of 6
ECM CALIBRATION: SHIFTING ENHANCEMENT – TC004-03 Revised Calibration Identification Chart
MODEL
ECM (U)
PREVIOUS CALIBRATION ID
NEW CALIBRATION ID
Main
33323000 33323100 33323200 33341000 33341100 33341200 33341300 33341400
33387000
Sub
53314000 53314100 53314200 53328000 53328100 53328200 53328300 53328400
53343000
Main
33350000 33350100 33360000 33360100
33360200
Sub
53334000 53340000
53340100
2002 – 2003 ES 300
2004 – 2005 ES 330
August 4, 2003
NOTE: S 2004 model year ES 330 vehicles, which have been flash reprogrammed using the procedures in this TSIB, will contain upgraded 2005 model year OBD II logic and will require VIN input. Refer to the 2005 model year ES 330 Repair Manual information on the Technical Information System (TIS) when checking Powertrain Diagnostic Trouble Codes (DTCs) on 2004 model year ES 330 vehicles that have been reprogrammed. S 2002 model year ES 300 vehicles, which have been flash reprogrammed using the procedures in this TSIB, will contain upgraded 2003 model year OBD II logic. Refer to the 2003 model year ES 300 Repair Manual information on the Technical Information System (TIS) when checking Powertrain Diagnostic Trouble Codes (DTCs) on 2002 model year ES 300 vehicles that have been reprogrammed.
Page 3 of 6
ECM CALIBRATION: SHIFTING ENHANCEMENT – TC004-03 Revised Repair Procedure
August 4, 2003
1. Check for the Authorized Modifications Label affixed to the vehicle in the location shown in Figure 1. Confirm if ECM (PCM) calibration has been updated. If not the latest ECM (PCM) calibration — go to step 2.
Replacement ECM (PCM) Part Number THE FOLLOWING MODIFICATIONS HAVE BEEN MADE: Calibration ID(s)
89666–33441 33387000, 53343000 THESE MODIFICATIONS HAVE BEEN APPROVED AS APPROPRIATE BY EPA AND CARB DEALER CODE: CHANGE AUTHORITY:
Dealer Code
DATE:
TSIB TC004–03
TSIB Number
Figure 1. Location of Authorized Modifications Label on 2002 and 2003 ES 300
Page 4 of 6
Date Completed
ECM CALIBRATION: SHIFTING ENHANCEMENT – TC004-03 Revised Repair Procedure (Continued)
August 4, 2003
2. Connect the Diagnostic Tester to the vehicle and select CURRENT ECU CAL from the ECU REPROGRAM MAIN MENU. Determine the vehicle’s current ECU calibration (see Figure 2). – The sample screen prints seen below are the 12.01a software version and may differ from subsequent software versions.
A
B
ECU REPROGRAM MAIN MENU
CURRENT ECU CAL
1: GET CAL FROM PC 2: CURRENT ECU CAL 3: UPDATE ECU CAL 4: CAL ON TESTER 5: CLEAR CAL DATA
CALIBRATION ID 33341300 53328300
Figure 2. Determining Current ECU Calibration
NOTE: S If Calibration ID matches “Previous Calibration ID” as shown in Calibration Identification Chart on page 3, proceed with flash reprogramming. S If Calibration ID matches “New Calibration ID” as shown in Calibration Identification Chart, this vehicle has already been programmed. Refer to TIS for diagnostic procedures applicable to any stored DTCs.
3. If ECU calibration ID is not the same as the “New Calibration ID” listed previously, proceed to Flash Reprogram ECM (PCM). 4. Flash Reprogram ECM (PCM) Follow the procedures outlined in Lexus TSIB No. SS001–01, “ECU Flash Reprogramming Process,” and flash the ECM (PCM) with the new calibration file update. NOTE: If the “Check Engine” light is ON when the ignition is turned back on to begin the reprogramming process, a scan tool cable problem exists. Refer to TSIB No. SS001–01, “ECU Flash Reprogramming Process.”
Page 5 of 6
ECM CALIBRATION: SHIFTING ENHANCEMENT – TC004-03 Revised Repair Procedure (Continued)
August 4, 2003
5. Reset the ECM (PCM) learned values using the diagnostic tester. Refer to the procedures below. – The sample screen prints seen below are the 12.01a software version and may differ from subsequent software versions. NOTE: Failure to reset the ECM (PCM) memory will result in continued ATM shifting complaints.
A
B
*APPLICATION SELECT*
FUNCTION SELECT FOR NORTH AMERICA 1: OBD/MOBD 2: ENHANCED OBD II 3: CARB OBD II 4: BREAK–OUT BOX 5: NVH 6: AUTOPROBE 7: 02 RPM CHECK 8: SNAPSHOT REVIEW 9: SETUP 0: GAS ANALYSIS
1: DIAGNOSIS 2: CUSTOMIZE 3: ECU REPROGRAM
D RESET MEMORY NOTICE DO NOT USE THIS FUNCTION UNLESS INSTRUCTED BY REPAIR MANUAL. ONLY USE AFTER REPLACING THE ENGINE, AUTO TRANS, OR ECM ON CERTAIN VEHICLES.
E RESET MEMORY EXECUTING THIS FUNCTION WILL RESET THE LEARNED VALUES IN THE ECM. DO YOU WISH TO RESET THE ECM? [YES] to CONTINUE [YES] [NO] to EXIT
C DIAGNOSTIC MENU ENGINE 1: DATA LIST 2: DTC INFO 3: ACTIVE TEST 4: SNAPSHOT 5: SYSTEM CHECK 6: 6: RESET RESET MEMORY MEMORY 7: MONITOR STATUS 8: CHECK MODE
F RESET MEMORY RESETTING COMPLETE
PRESS [ENTER]
Figure 3. ECM (PCM) Learned Values Reset
6. Follow the procedures outlined in TSIB No. EG012–04, “Entering VIN During ECM (PCM) Replacement and/or DTC P0630,” and write the VIN to the ECM (PCM). 7. Start the engine and warm it up to normal operating temperature before test–driving. 8. Test drive vehicle to confirm proper vehicle operation. 9. Enter the required information on the Authorized Modifications Label and affix it to the vehicle at the location shown in Figure 1 (page 4). The Authorized Modifications Label is available through the MDC, P/N 00451–00001–LBL. 10. Calibration update is complete. NOTE: S Select unleaded gasoline with an Octane Rating of 91 (Research Octane Number 96) or higher for optimum engine performance. S The effect of the new calibration may become more apparent after several days of driving as the ECM (PCM) ”learned values” are re–established from the customer’s driving.
Page 6 of 6
Introduction
SENSOR INSPECTION FOR AIR CONDITIONING SYSTEM Models:
’90 – Current All Models
This service bulletin contains inspection procedures to more precisely confirm proper operation of the following temperature sensors of the air conditioning system. Follow the procedures in this service bulletin when inspecting these sensors. These contents will be reflected in future repair manuals. S Room Temperature Sensor S Ambient Temperature Sensor S Air Duct Sensor S Evaporator Temperature Sensor S Solar Sensor S Room Humidity Sensor
Applicable Vehicles
Warranty Information
S All 1990 – Current model year Lexus vehicles.
OP CODE
DESCRIPTION
TIME
OFP
T1
T2
N/A
Not Applicable to Warranty
–
–
–
–
Lexus s ASE Certification
Page 1 of 12
HEATING & AIR CONDITIONING
AC005-04
Title:
SENSOR INSPECTION FOR AIR CONDITIONING SYSTEM – AC005-04 Inspection Procedure
December 16, 2004
1. Inspect Room Temperature Sensor. A. Measure the sensor resistance. Resistance Value at 77°F (25°C)
1700 +/– 85Ω
NOTE: S Even slightly touching the sensor may change the resistance value. Be sure to hold the connector of the sensor. S When measuring, the sensor temperature must be the same as the ambient temperature.
HINT: As the temperature increases, the resistance decreases.
Page 2 of 12
TEMPERATURE °F (°C)
SPECIFICATION kΩ
50 (10)
3.00 to 3.73
Resistance kΩ 4.0
59 (15)
2.45 to 2.88
3.5
68 (20)
1.95 to 2.30
3.0
77 (25)
1.60 to 1.80
86 (30)
1.28 to 1.47
1.5
95 (35)
1.00 to 1.22
1.0
104 (40)
0.80 to 1.00
0.5
113 (45)
0.65 to 0.85
0.0
122 (50)
0.50 to 0.70
131 (55)
0.44 to 0.60
140 (60)
0.36 to 0.50
2.5 2.0
32 (0)
Max
Min 68 (20)
104 (40)
Temperature °F (°C)
140 (60)
SENSOR INSPECTION FOR AIR CONDITIONING SYSTEM – AC005-04 Inspection Procedure (Continued)
December 16, 2004
2. Inspect Ambient Temperature Sensor. A. Measure the sensor resistance according to the selected graph (specification). Resistance Value at 77°F (25°C)
1700 +/– 85Ω
NOTE: S Even slightly touching the sensor may change the resistance value. Be sure to hold the connector of the sensor. S When measuring, the sensor temperature must be the same as the ambient temperature.
HINT: As the temperature increases, the resistance decreases. TEMPERATURE °F (°C)
SPECIFICATION kΩ
50 (10)
3.00 to 3.73
Resistance kΩ 4.0
59 (15)
2.45 to 2.88
3.5
68 (20)
1.95 to 2.30
3.0
77 (25)
1.60 to 1.80
86 (30)
1.28 to 1.47
1.5
95 (35)
1.00 to 1.22
1.0
104 (40)
0.80 to 1.00
0.5
113 (45)
0.65 to 0.85
0.0
122 (50)
0.50 to 0.70
131 (55)
0.44 to 0.60
140 (60)
0.36 to 0.50
2.5 2.0 Max
Min 32 (0)
68 (20)
104 (40)
140 (60)
Temperature °F (°C)
Page 3 of 12
SENSOR INSPECTION FOR AIR CONDITIONING SYSTEM – AC005-04 Inspection Procedure (Continued)
December 16, 2004
3. Inspect Air Duct Sensor. A. Measure the sensor resistance according to the table and graph (specification). NOTE: S Even slightly touching the sensor may change the resistance value. Be sure to hold the connector of the sensor. S When measuring, the sensor temperature must be the same as the ambient temperature.
HINT: As the temperature increases, the resistance decreases.
Page 4 of 12
TEMPERATURE °F (°C)
SPECIFICATION kΩ
50 (10)
9.48 to 10.49
59 (15)
7.50 to 8.28
68 (20)
5.95 to 6.57
77 (25)
4.77 to 5.25
86 (30)
3.85 to 4.21
95 (35)
3.12 to 3.40
104 (40)
2.53 to 2.79
113 (45)
2.06 to 2.30
122 (50)
1.69 to 1.91
131 (55)
1.39 to 1.59
140 (60)
1.15 to 1.33
Resistance kΩ 15.0
10.0
5.0
Max
Min
0.0 32 (0)
68 (20)
104 (40)
140 (60)
Temperature °F (°C)
176 (80)
SENSOR INSPECTION FOR AIR CONDITIONING SYSTEM – AC005-04 Inspection Procedure (Continued)
December 16, 2004
4. Inspect Evaporator Temperature Sensor.
Select the appropriate graph (specification) using the following table. NOTE: Please inspect the sensors for model years not indicated by this bulletin, according to the instructions in the applicable repair manual. MODEL
MODEL YEAR
ES 300
PART NUMBER
GRAPH
1992 – 2001
88625–33070
2
2002 – 2003
88625–17130
2
2003
88625–33170
3
GS 300
1993 – 1997
88625–3A020
2
GS 300/400/430
1998 – 2002
88625–3A120
2
GX 470
2003 – 2005
Thermistor No. 1
88625–35050
3
Thermistor No. 2
88625–16210
2
IS 300
2000 – 2001
88625–48010
2
1990 – 1992
88625–32040
2
1993 – 1994
88625–50100
2
1995 – 2000
88625–50140
2
LS 430
2001 – 2005
88625–50160
2
LX 450
1996 – 1997
88625–60060
2
ES 300/330
LS 400
LX 470 RX 300
1998 – 2000
Thermistor No. 2
88625–60140
2
1998 – 2002
Thermistor No. 1
88625–60130
2
2003 – 2005
88625–47011
2
1998 – 2003
88625–48010
2
88625–48050
1
88625 48060 88625–48060
3
88625–32040
2
2004 RX 330 SC 300/400
COMMENTS
2004 – 2005 1991 – 2000
CBU CBU NAP
Page 5 of 12
SENSOR INSPECTION FOR AIR CONDITIONING SYSTEM – AC005-04 Inspection Procedure (Continued)
December 16, 2004
A. Measure the sensor resistance according to the selected graph (specification). NOTE: S Even slightly touching the sensor may change the resistance value. Be sure to hold the connector of the sensor. S When measuring, the sensor temperature must be the same as the ambient temperature.
HINT: As the temperature increases, the resistance decreases.
Graph 1: TEMPERATURE °F (°C)
SPECIFICATION kΩ
14 (–10)
7.30 to 9.10
23 (–5)
5.65 to 6.95
32 (0)
4.40 to 5.35
41 (5)
3.40 to 4.15
50 (10)
2.70 to 3.25
59 (15)
2.14 to 2.58
68 (20)
1.71 to 2.05
77 (25)
1.38 to 1.64
86 (30)
1.11 to 1.32
Resistance kΩ 12.0 11.0 10.0 9.0 8.0 7.0 6.0 5.0 4.0 3.0 2.0 1.0 0.0 –4 (–20)
Max Min 32 (0)
68 (20)
104 (40)
Temperature °F (°C)
Graph 2: TEMPERATURE °F (°C)
SPECIFICATION kΩ
14 (–10)
7.40 to 9.20
23 (–5)
5.65 to 7.00
32 (0)
4.35 to 5.40
41 (5)
3.40 to 4.20
50 (10)
2.68 to 3.30
59 (15)
2.10 to 2.60
68 (20)
1.66 to 2.10
77 (25)
1.32 to 1.66
86 (30)
1.05 to 1.35
Resistance kΩ 10.0 9.0 8.0 7.0 6.0 5.0 4.0 3.0 2.0 1.0 0.0 –4 (–20)
Max Min 32 (0)
68 (20)
Temperature °F (°C)
Page 6 of 12
104 (40)
SENSOR INSPECTION FOR AIR CONDITIONING SYSTEM – AC005-04 Inspection Procedure (Continued)
December 16, 2004
Graph 3: TEMPERATURE °F (°C)
SPECIFICATION kΩ
14 (–10)
8.00 to 10.00
23 (–5)
6.15 to 7.65
32 (0)
4.75 to 5.85
41 (5)
3.70 to 4.55
50 (10)
2.91 to 3.55
59 (15)
2.32 to 2.80
68 (20)
1.85 to 2.22
77 (25)
1.48 to 1.77
86 (30)
1.20 to 1.43
Resistance kΩ 12.0 11.0 10.0 9.0 8.0 7.0 6.0 5.0 4.0 3.0 2.0 1.0 0.0 –4 (–20)
Max Min 32 (0)
68 (20)
104 (40)
Temperature °F (°C)
Page 7 of 12
SENSOR INSPECTION FOR AIR CONDITIONING SYSTEM – AC005-04 Inspection Procedure (Continued)
December 16, 2004
5. Inspect Solar Sensor. Four types of solar sensors are used on Lexus vehicles depending on the vehicle specifications. The inspection procedure for each type of sensor differs from the others. Select the appropriate inspection procedure from the table below according to vehicle specifications and perform the inspection. EQUIPPED WITH AUTOMATIC LIGHT CONTROL SYSTEM
A/C SYSTEM WITH RIGHT/LEFT INDEPENDENT TEMPERATURE CONTROL
INSPECTION PROCEDURE
No
No
A
No
Yes
B
Yes
Yes
C
Yes
No
D
Procedure A: a. Disconnect the solar sensor connector.
Lock
b. Measure the resistance between terminals 1 and 2 of the solar sensor under the following conditions: S Cover the sensor with a cloth to avoid direct light. S Expose the sensor to light from a distance of 300 mm (11.81 in.) or less with an inspection light. NOTE: S Terminal 1 of the sensor is always on the right, when the lock is facing up. S When using an analog tester, connect the positive (+) lead to terminal 2 and negative (–) lead to terminal 1 of the solar sensor.
HINT: If the light is weak, the sensor may not react. Be sure to use an incandescent light for an inspection light.
Standard:
Page 8 of 12
CONDITION
SPECIFICATION
When the sensor is covered with a cloth (to avoid direct light)
Infinite ohms
When the sensor is exposed to light
Less than infinite resistance
SENSOR INSPECTION FOR AIR CONDITIONING SYSTEM – AC005-04 Inspection Procedure (Continued)
December 16, 2004
Procedure B: a. Disconnect the solar sensor connector.
Lock
b. Measure the resistance between terminals 2 and 3 of the solar sensor under the following conditions: S Cover the sensor with a cloth to avoid direct light. S Expose the sensor to light from a distance of 300 mm (11.81 in.) or less with an inspection light. NOTE: When using an analog tester, connect the positive (+) lead to terminal 3 and negative (–) lead to terminal 2 of the solar sensor.
HINT: If the light is weak, the sensor may not react. Be sure to use an incandescent light for an inspection light.
Standard: CONDITION
SPECIFICATION
When the sensor is covered with a cloth (to avoid direct light)
Infinite ohms
When the sensor is exposed to light
Less than infinite resistance
Page 9 of 12
SENSOR INSPECTION FOR AIR CONDITIONING SYSTEM – AC005-04 Inspection Procedure (Continued)
December 16, 2004
Procedure C: a. Turn the ignition switch ON. b. Measure the voltage between terminals TSR (+) and CLTE (–) of the connector under the following conditions:
TSR
S Cover the sensor with a cloth to avoid direct light.
CLTE
S Expose the sensor to light from a distance of 300 mm (11.81 in.) or less with an inspection light. HINT: S If the light is weak, the sensor may not react. Be sure to use an incandescent light for an inspection light. S Do not disconnect the solar sensor connector.
Standard: CONDITION
SPECIFICATION
When the sensor is covered with a cloth (to avoid direct light)
Below 0.8 V
When the sensor is exposed to light
4.3 +/– 0.3 V
c. Measure the voltage between terminals TSL (+) and CLTE (–) of the connector under the following conditions:
TSL
S Cover the sensor with a cloth to avoid direct light. S Expose the sensor to light from a distance of 300 mm (11.81 in.) or less with an inspection light.
CLTE
HINT: S If the light is weak, the sensor may not react. Be sure to use an incandescent light for an inspection light. S Do not disconnect the solar sensor connector.
Standard:
Page 10 of 12
CONDITION
SPECIFICATION
When the sensor is covered with a cloth (to avoid direct light)
Below 0.8 V
When the sensor is exposed to light
4.3 +/– 0.3 V
SENSOR INSPECTION FOR AIR CONDITIONING SYSTEM – AC005-04 Inspection Procedure (Continued)
December 16, 2004
Procedure D: a. Turn the ignition switch ON. b. Using the tester, measure the voltage between terminals TSD (+) and CLTE (–) of the connector under the following conditions: S Cover the sensor with a cloth to avoid direct light.
TSD
CLTE
S Expose the sensor to light from a distance of 300 mm (11.81 in.) or less with an inspection light. HINT: S If the light is weak, the sensor may not react. Be sure to use an incandescent light for an inspection light. S Do not disconnect the solar sensor connector.
Standard: CONDITION
SPECIFICATION
When the sensor is covered with a cloth (to avoid direct light)
Below 0.8 V
When the sensor is exposed to light
4.3 +/– 0.3 V
Page 11 of 12
SENSOR INSPECTION FOR AIR CONDITIONING SYSTEM – AC005-04 Inspection Procedure (Continued)
December 16, 2004
6. Inspect Room Humidity Sensor. Measure the humidity and output voltage of the humidity sensor when the sensor is installed on the vehicle and the temperature at the humidity sensor position (room temperature sensor position) is 77°F (25°C). If the output voltage is within the specifications according to the graph and table below, the sensor is normal.
VO
GND
HINT: For the inspection procedure of the room temperature sensor, refer to “Room Temperature Sensor Inspection Procedure” in this bulletin.
A. Turn the ignition switch to the ON position. B. Measure the voltage between terminal VO (3) and GND (2) of the room humidity sensor. C. Measure the humidity and voltage when the room temperature (humidity sensor position) is 77°F (25°C). According to the result, determine whether the sensor is normal or not. HUMIDITY (% RH)
OUTPUT VOLTAGE AT 77°F (25°C)
10
0.70 to 1.08 V
20
0.72 to 1.57 V
30
1.13 to 1.95 V
40
1.61 to 2.24 V
50
1.99 to 2.46 V
60
2.26 to 2.66 V
70
2.48 to 2.85 V
80
2.68 to 3.04 V
90
2.87 to 3.05 V
Resistance kΩ 3.50 3.00 2.50 2.00
Page 12 of 12
Max 1.50 1.00 Min 0.50 0.00 32 (0)
68 (20)
104 (40)
140 (60)
176 (80)
Temperature °F (°C)
212 (100)
Technical Service Information Bulletin July 13, 2005
Introduction
Applicable Vehicles
Warranty Information
Maintenance, Cleaning & Use
WINDSHIELD WIPER BLADE MAINTENANCE AND CLEANING Models:
’98 – ’06 All Models
The following procedures are recommended to maintain windshield wiper blade performance.
S 1998 – 2006 model year Lexus vehicles.
OP CODE
DESCRIPTION
TIME
OFP
T1
T2
N/A
Not Applicable to Warranty
–
–
–
–
Recommendations for Windshield Wiper Maintenance, Cleaning, and Use: 1. Scheduled Maintenance S Check wiper rubber blades every 4 – 6 months or 7,500 miles for wear, cracking, and contamination. S Clean glass and rubber wiper blades if blades are not clearing glass adequately. If this does not correct the problem, then replace the rubber elements. 2. Cleaning Procedure S Wiper Rubber: Bugs, dirt, sap, and road grime on blades will cause streaking. Clean wiper rubber of road and environmental debris using cloth or paper towel soaked with windshield washer fluid or mild detergent. S DO NOT USE fuel, kerosene, or petroleum based products to clean rubber wiper blades. S Windshield: Bugs, sap, road grime, and car wash wax treatments decrease wiper performance. S Rinse windshield with water and apply non–abrasive cleaner, such as Bon–Ami (www.faultless.com), with a sponge. NOTE: Make sure to use plenty of water with all powder based cleaners so the glass is not scratched.
Lexus s ASE Certification
Page 1 of 2
BODY
BO004-05
Title:
WINDSHIELD WIPER BLADE MAINTENANCE AND CLEANING – BO004-05 Maintenance, Cleaning & Use (Continued)
July 13, 2005
3. Contributors to Poor Performance/Decreased Rubber Blade Life (require rubber replacement) S Dusty areas cause the rubber edge to wear quickly. S Sand and salt used for road conditioning during winter causes the edge to wear quickly, so areas with significant snowfall require more frequent wiper replacement. S Heat and time cause the rubber to become excessively “permanent set,” so the rubber does not turn over, resulting in streaking and/or unwiped areas on the glass. S Rubber is easily cut or torn while using ice scrapers on the glass. S Rubber can be torn when pulling blades off a frozen windshield. S Using wipers instead of an ice scraper to remove frost and ice from the windshield during a car warm up can dull, nick, or tear the rubber. S Banging wiper on the glass to remove ice & snow can cause the blade to bend and rubber to come out of the blade providing the potential to scratch the glass. S Ice forms in wiper blade pin ts, which causes streaking and unwiped areas. To remove ice from pin ts, compress the blade and rubber with your hand to loosen the frozen ts. To prevent this condition, use winter blades with a rubber cover.
Page 2 of 2
Technical Service Information Bulletin
SEAT BELT EXTENDER Models:
’03 – ’05 Model Year
September 29, 2004
BODY
BO009-04
Title:
TSIB REVISION NOTICE: S December 9, 2005: The “Rear Seat Belt Extender Applications” section has been updated. In the Part Number Information table, the part numbers for series Q–6 have been updated. S June 28, 2005: In the “Rear Seat Belt Extender Applications” section, the series number for the ’05 ES 330 has been updated to R–7. Previous versions of this TSIB should be discarded. Introduction
Lexus customers who find it necessary to increase the length of their seat belts may obtain Seat Belt Extenders at no cost through their local Lexus dealer.
Seat Belt
S The extender is available in 6 inch, 9 inch, 12 inch, 15 inch, and 18 inch lengths. S The extender is available only in black. S Owners are informed of the Seat Belt Extender availability through the Lexus Owner’s Manual included in each vehicle.
Extender
The customer (individual requiring the extender) must visit a Lexus dealership to have the required measurements made and to complete the Seat Belt Extender Worksheet. The worksheet will allow the proper fitting and selection of a Seat Belt Extender for the customer. The dealership personnel should then determine the applicable part number and place an order through Dealer Daily. The dealership service department should complete the affixed Seat Belt Extender Customer Information Label on the part and review the “Owner Instruction Sheet” with the customer. The dealership should give a copy of the completed worksheet to the customer and keep the original in the customer’s file. To assure utmost owner satisfaction, it is recommended that a dealership designate one person to coordinate all activities related to the Seat Belt Extender issue. It is recommended that dealerships do NOT stock Seat Belt Extenders due to the need for proper fitting to individual customers. This bulletin contains the following information: Procedure and Sample Label . . . . . . . . . . Page Application Charts . . . . . . . . . . . . . . . . . . . . Page Part Number Information . . . . . . . . . . . . . . Page Owner Instructions . . . . . . . . . . . . . . . . . . . Page Seat Belt Extender Worksheet . . . . . . . . . Page Applicable Vehicles Warranty Information
2 3 4 5 6
S 2003 – 2005 model year Lexus vehicles. OP CODE
DESCRIPTION
TIME
OFP
T1
T2
N/A
Not Applicable to Warranty
–
–
–
–
Lexus s ASE Certification
Page 1 of 6
SEAT BELT EXTENDER: ’03–’05 MODEL YEAR – BO009-04 Revised
Procedure
September 29, 2004
1. Customer requests a Seat Belt Extender from dealer. 2. Dealer verifies the need for a Seat Belt Extender and obtains a current copy of this TSIB and copies the Worksheet. 3. Dealer measures the customer and completes the Worksheet. Dealer determines the correct part number and places an order for the part through Dealer Daily. 4. Dealer receives Seat Belt Extender and calls the customer to check the fit of the part. 5. If the Seat Belt Extender fit is good, dealership personnel completes the Customer Information Label on the part, explains usage of the part, and gives the customer a copy of the completed Worksheet. 6. Dealer places copy of the completed Worksheet in the customer’s records. DEALER
MEASURE CUSTOMER & COMPLETE WORKSHEET
PLACE ORDER THROUGH DEALER DAILY
PARTS SUPPLY SHIP SEAT BELT EXTENDER TO DEALER
DEALER
TEST FIT CUSTOMER WITH PART
COMPLETE LABEL AND ADVISE CUSTOMER
OWNER
RECEIVE COPY OF WORKSHEET & USE EXTENDER
FILE WORKSHEET IN CUSTOMER RECORDS
Sample Seat Belt Extender Customer Information Label
CAUTION THIS SEAT BELT EXTENDER IS TO BE USED ONLY BY: ON VEHICLE: VIN: SEATING POSITION: USE BY OTHERS, OR IN ANOTHER SEATING POSITION, OR IN ANOTHER VEHICLE COULD REDUCE SEAT BELT RESTRAINT IN AN ACCIDENT AND RESULT IN PERSONAL INJURY.
Page 2 of 6
September 29, 2004
SEAT BELT EXTENDER: ’03–’05 MODEL YEAR – BO009-04 Revised Front Seat Belt Extender Applications
FRONT SEAT – EXTENDER APPLICATION MODEL
’05
’04
’03
ES 300
–
–
R–5
ES 330
R–6
R–6
–
GS 300
R–3
R–3
R–3
GS 430
R–3
R–3
R–3
GX 470
K–6
K–6
K–6
K–6
K–6
K–6
LS 430
R–3
R–3
R–3
LX 470
K–6
K–6
K–6
RX 300
–
–
R–5
RX 330
R–7
R–7
–
SC 430
R–3
R–3
R–3
’05
’04
’03
ES 300
–
–
R–5
ES 330
R–7
R–5
–
K–5
K–5
K–5
K–5
K–5
K–5
GX 470
K–5
K–5
K–5
IS 300
R–5
R–5
R–5
R–3
R–3
R–3
K–5
K–5
K–5
–
–
R–5
R–6 or Q–5 R–5
R–6 or Q–5 R–5
IS 300
Rear Seat Belt Extender Applications
TYPE
All Models
REAR SEAT – EXTENDER APPLICATION MODEL
GS 300 GS 430
LS 430 LX 470 RX 300
TYPE
All Models
RH, LH All Models
RX 330
RH, LH
SC 430
All Models
– R–5
NOTE: The extender must NOT be used for the center rear seat belt.
Page 3 of 6
SEAT BELT EXTENDER: ’03–’05 MODEL YEAR – BO009-04 Revised Part Number Information
PART NUMBER PREFIX: 73399– SERIES
Page 4 of 6
September 29, 2004
LENGTH 6 INCH
9 INCH
12 INCH
15 INCH
18 INCH
R–3
–50010
–50020
–50030
–50040
–50050
R–5
–16060
–16070
–16080
–16090
–16100
R–6
–35110
–35120
–35130
–35140
–35150
R–7
–48010
–48020
–48030
–48040
–48050
N–6
–20160
–20170
–20180
–20190
–20200
K–5
–35010
–35020
–35030
–35040
–35050
K–6
–35060
–35070
–35080
–35090
–35100
Q–5
–AE010
–AE020
–AE030
–AE040
–AE050
Q–6
–AE061
–AE071
–AE081
–AE091
–AE101
SEAT BELT EXTENDER: ’03–’05 MODEL YEAR – BO009-04 Revised Owner Instructions
September 29, 2004
Failure to follow the recommendations indicated below could result in reduced effectiveness of the seat belt restraint system in case of vehicle collision, causing personal injury. If your seat belt cannot be fastened securely because it is not long enough, a personalized Seat Belt Extender is available from your Lexus dealer free of charge. Please visit your local Lexus dealer so that the dealer can order the proper required length extender. Bring the heaviest coat you expect to wear for proper measurement and selection of length. Additional ordering information is available at your Lexus dealer. When the Seat Belt Extender is provided for rear seat positions (with automatic locking retractor), make sure that the retractor is locked when in use. To connect the extender to the seat belt, insert the tab into the seat belt buckle so that the buckle-release buttons of the extender and the seat belt are both facing outward as shown. You will hear a click when the tab locks into the buckle. When not in use, remove the extender and store in the vehicle for future use.
Seat Belt Release
Seat Belt Extender
CAUTION: On vehicles equipped with SRS – Occupant Classification System (OCS)*, it is critical that the extender tab be buckled into the buckle AFTER the occupant sits down in the seat. Leaving extender installed in the buckle before sitting down will cause the OCS to be in the “airbag off” or disarmed state. *
OCS will enable or disable the enger front and side airbags based on enger weight and seat belt latch position classifying the enger as a child or adult.
CAUTION: When using the Seat Belt Extender, observe the following. Failure to follow these instructions could result in reduced effectiveness of the seat belt restraint system in case of vehicle accident, increasing the chance of personal injury. S Never use the Seat Belt Extender if you can COMFORTABLY fasten the seat belt without it. S The Seat Belt Extender must never be used with any child safety seats. S that the extender provided for you may not be safe when used on a different vehicle, for another person or for a different seating position than the one originally intended.
Page 5 of 6
SEAT BELT EXTENDER WORKSHEET PLEASE COPY THIS ORIGINAL WORKSHEET FOR EACH EXTENDER NEEDED CAUTIONS: S To minimize the chance and/or severity of injury in an accident, the Seat Belt Extender must only be used: 1 By the person for whom it was provided. 2 In the seat position for which it was provided. S The Seat Belt Extender must never be used with any child safety seats. S When the Seat Belt Extender is provided for rear seat positions (with automatic locking retractor), make sure the retractor is locked when extender belt is in use. DEALER DEALER CODE
SEAT BELT EXTENDER APPLICATION
DEALER NAME
APPLICANT
APPLICANT NAME
ADDRESS
ADDRESS
CITY & STATE EMPLOYEE NAME
MODEL YEAR
ZIP
CITY & STATE
BODY TYPE
SEATING POSITION
ZIP
PHONE
VEHICLE IDENTIFICATION NUMBER
DIRECTIONS FOR DETERMINING PROPER EXTENDER LENGTH 1. 2.
Place the seat in the position the applicant normally uses. With the applicant in the seat, wearing the thickest coat expected to be worn, pull belt all the way out and try to buckle belt. S If belt latches into buckle and feels comfortable against upper chest area, an extender is not needed. S If belt does not buckle, continue with Step 3. S If buckle latches but belt has no slack remaining, continue with Step 3. 3. Measure distance between applicant’s navel and seat belt buckle (Dimension A) and enter on Worksheet. 4. With belt all the way out, measure distance between latch tip and buckle tip (Dimension B) and enter on Worksheet. NOTE: If belt latches but there is no slack enter zero as Dimension B. 5. Subtract Dimension B from Dimension A and record number in Check Number box on Worksheet. 6. Seat Belt Extender length is Dimension B rounded up to next extender length (without exceeding Check Number). NOTE: If extender length exceeds Check Number, an extender cannot be provided to the customer.
CAUTION: On vehicles equipped with SRS — Occupant Classification System (OCS), it is critical that the extender tab be buckled into the buckle AFTER the occupant sits down in the seat. Leaving extender installed in the buckle before sitting down will cause the OCS to be in the “airbag off” or disarmed state. Dimension A: NAVEL TO BUCKLE
Buckle
Navel
Dimension B: LATCH TO BUCKLE
Latch
A
B
Buckle
SEAT BELT EXTENDER CALCULATION DIMENSION A:
DIMENSION B:
CHECK NUMBER:
SEAT BELT EXTENDER AUTHORIZATION S The same Seat Belt Extender can be used for right and left seating applications. Each Seat Belt Extender will have a label identifying the owner, VIN and seating position. S Applicant’s Signature: Date: (Actual of Seat Belt Extender) Page 6 of 6
Technical Service Information Bulletin November 9, 2005
REAR BUCKLE EASE OF USE IMPROVEMENT Models:
’05 ES 330
TSIB REVISION NOTICE: S November 10, 2005: The second Op Code has been updated in Warranty Information (Combo A for “Opposite Side”). Previous versions of this TSIB should be discarded. Introduction
Applicable Vehicles Production Change Information
The rear seat belt buckle tether strap has been modified to improve the ease of use for the customer. S 2005 model year ES 330 vehicles produced BEFORE the Production Change Effective VINs shown below. MODEL
PART NAME
Belt Assembly, RR Seat Inner w/ CTR, RH ES 330 Belt Assembly, RR Seat Inner w/ CTR, LH
Parts Information
PREVIOUS PART NUMBER
PART NUMBER
PRODUCTION CHANGE EFFECTIVE VIN
73470–33040–A0
JTHBA30G955128105
73470–33040–B0
JTHBA30G455128366
73470–33040–C0
JTHBA30G855128774
73480–33130–A0
JTHBA30G955128220
73480–33130–B0
JTHBA30G755128247
73480–33130–C0
JTHBA30G755128409
CURRENT PART NUMBER
PART NAME
QTY
B lt Assembly, Belt A bl RR Seat S t Inner I w// CTR RH CTR,
1
B lt A Belt Assembly, bl RR S Seatt IInner w// CTR LH CTR,
1
73470–33040–A0 73470–33040–B0 73470–33040–C0 73480–33130–A0
Same
73480–33130–B0 73480–33130–C0 Warranty Information
OP CODE
DESCRIPTION
TIME
711511
R & R Rear Seat Belt Buckle
0.4
Combo A
Opposite Side
0.2
OFP
T1
73470–33040–#0 73480–33130–#0
T2
9A 99
Applicable Warranty*: This repair is covered under the Lexus Powertrain Warranty. This warranty is in effect for 72 months or 70,000 miles, whichever occurs first, from the vehicle’s in-service date. * Warranty application is limited to correction of a problem based upon a customer’s specific complaint.
Lexus s ASE Certification
Page 1 of 9
BODY
BO011-05
Title:
REAR BUCKLE EASE OF USE IMPROVEMENT – BO011-05 Revised Parts Identification
Repair Procedure
Previous Part
November 9, 2005
New Part
HINT: Use the same procedure for the LH side and RH side.
NOTE: For removal of rear seat, refer to the Technical Information System (TIS), 2005 model year ES 330 Repair Manual: Seat: Rear Seat Assy: Overhaul.
1. Remove the rear seat cushion assembly. 2. Remove the rear seatback assembly. 3. Remove the rear door opening trim weatherstrip LH. 4. Remove the rear door opening trim weatherstrip RH. 5. Remove the roof side garnish inner LH. 6. Remove the roof side garnish inner RH. 7. Remove the center stop lamp assembly (without sun shade). 8. Remove the child restraint seat tether anchor cover.
Page 2 of 9
REAR BUCKLE EASE OF USE IMPROVEMENT – BO011-05 Revised Repair Procedure (Continued)
November 9, 2005
9. Remove the rear seat shoulder belt cover. Using a screwdriver, disengage the 12 claws and remove the 3 rear seat shoulder belt covers. HINT: Tape the screwdriver tip before use.
: Claw
10. Remove the package tray trim assembly. A. Remove the 2 bolts and release the floor anchors of the seat belts.
Page 3 of 9
REAR BUCKLE EASE OF USE IMPROVEMENT – BO011-05 Revised Repair Procedure (Continued)
November 9, 2005
B. Without Sun Shade: Disengage the 6 claws and 2 clips and remove the package tray trim assembly.
: Claw : Clip
C. With Sun Shade: Disengage the 2 clips and remove the package tray trim assembly.
: Clip
11. Remove the rear seat center belt assembly RH. Remove the bolt holding the retractor and disengage the claws of the stopper to remove the rear seat center belt assembly RH.
Page 4 of 9
REAR BUCKLE EASE OF USE IMPROVEMENT – BO011-05 Revised Repair Procedure (Continued)
November 9, 2005
12. Install the rear seat center belt assembly RH. A. Check the degree of tilt when the ELR begins to lock. Check that the belt does NOT lock at less then 15r of tilt in any direction but locks at over 45r of tilt when gently moving the installed retractor.
Unlock
45°
Lock
B. Install the retractor of the rear seat center belt assembly RH and torque the bolt. Torque: 42 NSm (420 kgfScm, 31 ftSlbf)
C. Check the ELR lock. Check that the belt locks when pulled out quickly. D. Check the fastening function for the child restraint system. NOTE: Check should be done with the assembly installed.
a. Check that the belt cannot be pulled out any more but can be rewound after being pulled out. b. Check that the belt can be pulled out and rewound after being fully rewound.
Page 5 of 9
REAR BUCKLE EASE OF USE IMPROVEMENT – BO011-05 Revised Repair Procedure (Continued)
November 9, 2005
E. Install the floor anchor of the rear seat center belt assembly RH with the bolt facing the arrow mark on the plate toward the front of the vehicle. Torque: 42 NSm (420 kgfScm, 31 ftSlbf) NOTE: Ensure that the anchor does NOT run into any protrusions on the floor .
Protrusion Front
Protrusion
F. Check the ELR lock. Check that the belt locks when pulled out quickly. 13. Remove the rear seat center belt assembly LH. Remove the bolt and remove the rear seat center belt assembly LH.
Page 6 of 9
REAR BUCKLE EASE OF USE IMPROVEMENT – BO011-05 Revised Repair Procedure (Continued)
November 9, 2005
14. Install the rear seat center belt assembly LH. A. Check the degree of tilt when the ELR begins to lock. Check that the belt does NOT lock at less then 15r of tilt in any direction but locks at over 45r of tilt when gently moving the installed retractor.
Unlock
45°
Lock
B. Install the retractor of the rear seat center belt assembly LH and torque the bolt. Torque: 42 NSm (420 kgfScm, 31 ftSlbf)
C. Check the ELR lock. Check that the belt locks when pulled out quickly. D. Check the fastening function for the child restraint system. NOTE: Check should be done with the assembly installed.
a. Check that the belt cannot be pulled out any more but can be rewound after being pulled out. b. Check that the belt can be pulled out and rewound after being fully rewound.
Page 7 of 9
REAR BUCKLE EASE OF USE IMPROVEMENT – BO011-05 Revised Repair Procedure (Continued)
November 9, 2005
E. Install the floor anchor of the rear seat center belt assembly LH with the bolt facing the arrow mark on the plate toward the front of the vehicle. Torque: 42 NSm (420 kgfScm, 31 ftSlbf) NOTE: Ensure that the anchor does NOT run into any protrusions on the floor .
Protrusion Front
Protrusion
F. Check the ELR lock. Check that the belt locks when pulled out quickly. 15. Install the package tray trim assembly. A. Without Sun Shade: Engage the 6 claws and 2 clips to install the package tray trim assembly.
: Claw : Clip
Page 8 of 9
REAR BUCKLE EASE OF USE IMPROVEMENT – BO011-05 Revised Repair Procedure (Continued)
November 9, 2005
B. With Sun Shade: Engage the 2 clips to install the package tray trim assembly.
: Clip
16. Reinstall the seat cushions in the reverse order of removal. 17. Dispose of the old seat belt appropriately. For proper disposal procedures, refer to TIS, 2005 model year ES 330 Repair Manual: Seat Belt: Rear Seat Belt: Disposal.
Page 9 of 9
CENTER CONSOLE LATCH IMPROVEMENT
Technical Service Information Bulletin
Models:
’02 – ’05 ES 300 & ES 330
December 22, 2004
Introduction
Applicable Vehicles
For improved durability, the center console door lock opener for ES 300 and ES 330 vehicles are now made from metal, instead of the previous plastic material. This improved lock is available as a service part and will not require replacement of the entire console lid.
S 2002 – 2005 model year ES 300 and ES 330 vehicles produced BEFORE the Production Change Effective VINs shown below.
Production Change Information
Parts Information
Warranty Information
BODY
BO012-04
Title:
PLANT
PRODUCTION CHANGE EFFECTIVE VIN
Tsutsumi
JTHBA30G#50024455
Kanto
JTHBA30G#55077938
PREVIOUS PART NUMBER
CURRENT PART NUMBER
PART NAME
QTY
58908–32050
58908–32020
Lock Assembly, Console Compartment Door
1
OP CODE
DESCRIPTION
TIME
OFP
BD4024
Replace Center Console Lock
0.2
58908–32050
T1
T2
62 12
Applicable Warranty*: This repair is covered under the Lexus Comprehensive Warranty. This warranty is in effect for 48 months or 50,000 miles, whichever occurs first, from the vehicle’s in-service date. * Warranty application is limited to correction of a problem based upon a customer’s specific complaint.
Lexus s ASE Certification
Page 1 of 1
Technical Service Information Bulletin November 10, 2005
SEAT COVER REPLACEMENT FOR SIDE AIRBAG EQUIPPED VEHICLES Models:
’97 – ’06 All Lexus Models
TSIB UPDATE NOTICE: The information contained in this TSIB supercedes TSIB No. BO004-98. TSIB No. BO004-98 is now obsolete and should be discarded. Introduction
Beginning in 1997, Lexus introduced side airbags for the LS 400. Starting with 1998, all Lexus vehicles are equipped with side airbags as standard equipment. Lexus does NOT recommend replacement of original seat covers* with non-Lexus leather or other seat cover materials due to the following: S Seat covers NOT recommended by Lexus may affect side airbag performance, in general or in part, during an accident. S Modifications that negatively affect side airbag performance can result in severe occupant injuries. S Seat covers are an integral part of this safety system. Replacing original seat covers* with non-Lexus leather or other seat cover materials may compromise the effectiveness of this safety system. S The design of the seat is complex, integrating safety and strength with comfort and luxury. *NOTE: Lexus original seat covers that were NOT designed for side airbag equipped seats cannot be used due to the effect on proper airbag performance.
Lexus strongly discourages modifying original equipment seats that have side airbags. Additionally, Lexus strongly advises against the installation or use of aftermarket seat covers, which could impair the performance of the side airbags in the event of an accident.
Applicable Vehicles
Warranty Information
S All 1997 – 2006 model year Lexus vehicles.
OP CODE
DESCRIPTION
TIME
OFP
T1
T2
N/A
Not Applicable to Warranty
–
–
–
–
Lexus s ASE Certification
Page 1 of 1
BODY
BO012-05
Title:
Technical Service Information Bulletin February 16, 2005
Introduction
M.I.L. ON" DTC P0031, P0051, P2238, AND/OR P2241 Models:
’04 – ’05 ES 330
Under certain driving conditions, some 2004 and 2005 model year ES 330 vehicles may exhibit a M.I.L. “ON” with at least one of the following DTCs: S P0031 (Oxygen Sensor Heater Control Circuit Low [Bank 1, Sensor 1]) S P0051 (Oxygen Sensor Heater Control Circuit Low [Bank 2, Sensor 1]) S P2238 (Oxygen Sensor Pumping Current Circuit Low (for A/F Sensor) [Bank 1, Sensor 1]) S P2241 (Oxygen Sensor Pumping Current Circuit Low (for A/F Sensor) [Bank 2, Sensor 1]) The A/F sensor manufacturing process and the Engine Control Module (ECM) (SAE term: Powertrain Control Module/PCM) logic have been modified to improve these conditions. NOTE: S Version 12.01a or later Diagnostic Tester software is required to perform this procedure. S Before proceeding, the ECM (PCM) calibration has NOT been updated by checking for the Authorized Modifications Label (shown in step 2 of the Repair Procedure).
Applicable Vehicles
Production Change Information
Warranty Information
S 2004 model year ES 330 vehicles. S 2005 model year ES 330 vehicles produced BEFORE the Production Change Effective VIN shown below.
MODEL
PRODUCTION CHANGE EFFECTIVE VIN
2005 ES 330
JTHBA30G*55086805
OP CODE
DESCRIPTION
TIME
OFP
EG4029
Recalibrate ECM (PCM) Engine, R & R Both A/F Sensors
1.6
89661–33A40 89661–33A41 89661–33B30
T1
T2
8A 99
Applicable Warranty*: This repair is covered under the Lexus Federal Emissions Warranty. This warranty is in effect for 96 months or 80,000 miles, whichever occurs first, from the vehicle’s in-service date. * Warranty application is limited to correction of a problem based upon a customer’s specific complaint.
Lexus s ASE Certification
Page 1 of 4
ENGINE
EG003-05
Title:
M.I.L. “ON” DTC P0031, P0051, P2238, AND/OR P2241 – EG003-05 Parts Information
February 16, 2005
PREVIOUS PART NUMBER
CURRENT PART NUMBER
PART NAME
QTY
89467–33110
Same
Sensor, Air Fuel Ratio, Rear (Bank 1)
1
89467–33100
Same
Sensor, Air Fuel Ratio, Front (Bank 2)
1
N/A
00451–00001–LBL
Authorized Modifications Label
1
NOTE: Authorized Modification Labels may be ordered in packages of 25 from the Materials Distribution Center (MDC) through Dealer Daily Dealer Materials System or by calling the MDC at 1–800–622–2033.
Required SSTs
SPECIAL SERVICE TOOLS (SSTs)
Lexus Diagnostic Tester Kit*
12 Megabyte Diagnostic Tester Program Card with version 12.01a Software (or later)* *
PART NUMBER
QUANTITY
01001270
1
01002593-005
1
Essential SSTs.
NOTE: Additional Diagnostic Tester Kits, Program Cards, or other SSTs may be ordered by calling SPX/OTC at 1-800-933-8335.
Calibration Identification Chart
ENGINE
3MZ–FE
ECM (U)
PREVIOUS CALIBRATION ID
NEW CALIBRATION ID
Main
33350000 33350100 33360000
33360100
Sub
53334000
53340000
NOTE: S Although the calibration description in the Calibration Update Wizard and on the Diagnostic Tester reads “04 ES 330,” these calibrations apply to 2004 and 2005 model year ES 330 vehicles produced before the Production Change Effective VIN shown on page 1 of this TSIB. S 2004 model year ES 330 vehicles, which have been flash reprogrammed using the procedures in this TSIB, will contain upgraded 2005 model year OBD II logic. Refer to the 2005 model year ES 330 Repair Manual information on the Technical Information System (TIS) when checking Powertrain Diagnostic Trouble Codes (DTCs) on 2004 model year vehicles that have been reprogrammed.
Page 2 of 4
M.I.L. “ON” DTC P0031, P0051, P2238, AND/OR P2241 – EG003-05 Repair Procedure
February 16, 2005
1. Replace both Bank 1, Sensor 1 and Bank 2, Sensor 1 air fuel ratio sensors. 2. Check for the Authorized Modifications Label affixed to the vehicle in the location shown in Figure 1. Confirm if ECM (PCM) calibration has been updated. If not the latest ECM (PCM) calibration — go to step 3.
Replacement ECM (PCM) Part Number THE FOLLOWING MODIFICATIONS HAVE BEEN MADE: Calibration ID(s)
89661–33A40 33360100, 53340000 THESE MODIFICATIONS HAVE BEEN APPROVED AS APPROPRIATE BY EPA AND CARB DEALER CODE: DATE: CHANGE AUTHORITY: TSIB EG003–05
Dealer Code
Date Completed
TSIB Number
Figure 1. Location of Authorized Modifications Label on 2004 ES 330
Page 3 of 4
M.I.L. “ON” DTC P0031, P0051, P2238, AND/OR P2241 – EG003-05 Repair Procedure (Continued)
February 16, 2005
3. Connect the Diagnostic Tester to the vehicle and select CURRENT ECU CAL from the ECU REPROGRAM MAIN MENU. Determine the vehicle’s current ECU calibration (see Figure 2). – The sample screen prints seen below are the 12.01a software version and may differ from subsequent software versions.
A
B
ECU REPROGRAM MAIN MENU
CURRENT ECU CAL
1: GET CAL FROM PC 2: CURRENT ECU CAL 3: UPDATE ECU CAL 4: CAL ON TESTER 5: CLEAR CAL DATA
CALIBRATION ID 33350000 53334000
Figure 2. Determining Current ECU Calibration
NOTE: S If Calibration ID matches “Previous Calibration ID” as shown in Calibration Identification Chart on page 2, proceed with flash reprogramming. S If Calibration ID matches “New Calibration ID” as shown in Calibration Identification Chart, this vehicle has already been programmed. Refer to TIS for diagnostic procedures applicable to any stored DTCs.
4. If ECU calibration ID is not the same as the “New Calibration ID” listed previously, proceed to Flash Reprogram ECM (PCM). 5. Flash Reprogram ECM (PCM) A. Follow the procedures outlined in TSIB No. SS001–01, “ECU Flash Reprogramming Process,” and flash the ECM (PCM) with the new calibration file update. B. Enter the required information on the Authorized Modifications Label and affix it to the vehicle at the location shown in Figure 1 (page 3). The Authorized Modifications Label is available through the MDC, P/N 00451–00001–LBL. 6. Follow the procedures outlined in TSIB No. EG012–04, “Entering VIN During ECM (PCM) Replacement and/or DTC P0630,” and write the VIN to the ECM (PCM). 7. The repair is complete. Test drive vehicle to confirm normal operation.
Page 4 of 4
Technical Service Information Bulletin
M.I.L. ON" DTC P0346 Models:
’04 – ’05 ES 330
March 15, 2005
Introduction
Under certain driving conditions, some 2004 and 2005 model year ES 330 vehicles may exhibit a M.I.L. “ON” with the following DTC: S P0346 (Camshaft Position Sensor “A” Circuit Range/Performance [Bank 2]) The Engine Control Module (ECM) (SAE term: Powertrain Control Module/PCM) logic have been modified to change this condition. NOTE: S Version 12.01a or later Diagnostic Tester software is required to perform this procedure. S Before proceeding, the ECM (PCM) calibration has NOT been updated by checking for the Authorized Modifications Label (shown in step 1 of the Repair Procedure).
Applicable Vehicles
Production Change Information
Warranty Information
S 2004 model year ES 330 vehicles. S 2005 model year ES 330 vehicles produced BEFORE the Production Change Effective VIN shown below.
MODEL
PRODUCTION CHANGE EFFECTIVE VIN
2005 ES 330
JTHBA30G*55086805
OP CODE
DESCRIPTION
TIME
OFP
EG5013
Recalibrate ECM (PCM) Engine
0.8
89661–33A40 89661–33A41 89661–33B30
T1
T2
8A 99
Applicable Warranty*: This repair is covered under the Lexus Federal Emissions Warranty. This warranty is in effect for 96 months or 80,000 miles, whichever occurs first, from the vehicle’s in-service date. * Warranty application is limited to correction of a problem based upon a customer’s specific complaint.
Lexus s ASE Certification
Page 1 of 4
ENGINE
EG006-05
Title:
M.I.L. “ON” DTC P0346 – EG006-05 Parts Information
March 15, 2005
PREVIOUS PART NUMBER
CURRENT PART NUMBER
PART NAME
QTY
N/A
00451–00001–LBL
Authorized Modifications Label
1
NOTE: Authorized Modification Labels may be ordered in packages of 25 from the Materials Distribution Center (MDC) through Dealer Daily Dealer Materials System or by calling the MDC at 1–800–622–2033.
Required SSTs
SPECIAL SERVICE TOOLS (SSTs)
Lexus Diagnostic Tester Kit*
12 Megabyte Diagnostic Tester Program Card with version 12.01a Software (or later)* *
PART NUMBER
QUANTITY
01001270
1
01002593-005
1
Essential SSTs.
NOTE: Additional Diagnostic Tester Kits, Program Cards, or other SSTs may be ordered by calling SPX/OTC at 1-800-933-8335.
Calibration Identification Chart
ENGINE
3MZ–FE
ECM (U)
PREVIOUS CALIBRATION ID
NEW CALIBRATION ID
Main
33350000 33350100 33360000
33360100
Sub
53334000
53340000
NOTE: S Although the calibration description in the Calibration Update Wizard and on the Diagnostic Tester reads “04 ES 330,” these calibrations apply to 2004 and 2005 model year ES 330 vehicles produced before the Production Change Effective VIN shown on page 1 of this TSIB. S 2004 model year ES 330 vehicles, which have been flash reprogrammed using the procedures in this TSIB, will contain upgraded 2005 model year OBD II logic. Refer to the 2005 model year ES 330 Repair Manual information on the Technical Information System (TIS) when checking Powertrain Diagnostic Trouble Codes (DTCs) on 2004 model year vehicles that have been reprogrammed.
Page 2 of 4
M.I.L. “ON” DTC P0346 – EG006-05 Repair Procedure
March 15, 2005
1. Check for the Authorized Modifications Label affixed to the vehicle in the location shown in Figure 1. Confirm if ECM (PCM) calibration has been updated. If not the latest ECM (PCM) calibration — go to step 2.
Replacement ECM (PCM) Part Number THE FOLLOWING MODIFICATIONS HAVE BEEN MADE: Calibration ID(s)
89661–33A40 33360100, 53340000 THESE MODIFICATIONS HAVE BEEN APPROVED AS APPROPRIATE BY EPA AND CARB DEALER CODE: DATE: CHANGE AUTHORITY: TSIB EG006–05
Dealer Code
Date Completed
TSIB Number
Figure 1. Location of Authorized Modifications Label on 2004 ES 330
Page 3 of 4
M.I.L. “ON” DTC P0346 – EG006-05 Repair Procedure (Continued)
March 15, 2005
2. Connect the Diagnostic Tester to the vehicle and select CURRENT ECU CAL from the ECU REPROGRAM MAIN MENU. Determine the vehicle’s current ECU calibration (see Figure 2). – The sample screen prints seen below are the 12.01a software version and may differ from subsequent software versions.
A
B
ECU REPROGRAM MAIN MENU
CURRENT ECU CAL
1: GET CAL FROM PC 2: CURRENT ECU CAL 3: UPDATE ECU CAL 4: CAL ON TESTER 5: CLEAR CAL DATA
CALIBRATION ID 33350000 53334000
Figure 2. Determining Current ECU Calibration
NOTE: S If Calibration ID matches “Previous Calibration ID” as shown in Calibration Identification Chart on page 2, proceed with flash reprogramming. S If Calibration ID matches “New Calibration ID” as shown in Calibration Identification Chart, this vehicle has already been programmed. Refer to TIS for diagnostic procedures applicable to any stored DTCs.
3. If ECU calibration ID is not the same as the “New Calibration ID” listed previously, proceed to Flash Reprogram ECM (PCM). 4. Flash Reprogram ECM (PCM) A. Follow the procedures outlined in TSIB No. SS001–01, “ECU Flash Reprogramming Process,” and flash the ECM (PCM) with the new calibration file update. B. Enter the required information on the Authorized Modifications Label and affix it to the vehicle at the location shown in Figure 1 (page 3). The Authorized Modifications Label is available through the MDC, P/N 00451–00001–LBL. 5. Follow the procedures outlined in TSIB No. EG012–04, “Entering VIN During ECM (PCM) Replacement and/or DTC P0630,” and write the VIN to the ECM (PCM). 6. The repair is complete. Test drive vehicle to confirm normal operation.
Page 4 of 4
Technical Service Information Bulletin
RADIATOR CAP INSPECTION Models:
All Models
March 28, 2005
Introduction
Applicable Vehicles
Required Equipment
The procedure for inspecting the radiator cap has been revised. Please refer to the following procedures when inspecting the radiator cap on all Lexus models.
S All Lexus models.
MANUFACTURER
Snap–On/Sun SVTS262A (or equivalent)
EQUIPMENT
QTY
Cooling System Tester (Radiator Cap Tester)
1
NOTE: Additional Lexus Approved Dealer Equipment may be ordered by calling Lexus Approved Dealer Equipment at 1–800–368–6787.
Warranty Information
OP CODE
DESCRIPTION
TIME
OFP
T1
T2
N/A
Not Applicable to Warranty
–
–
–
–
Lexus s ASE Certification
Page 1 of 7
ENGINE
EG007-05
Title:
RADIATOR CAP INSPECTION – EG007-05 Required SSTs
ITEM NO.
March 28, 2005
SPECIAL SERVICE TOOLS (SSTs)
PART NUMBER
QTY
DRW**
1
Radiator Cap Test Set*
09230–00030–02
1
7
2
Radiator Cap Test Set (Small)*
09230–00020–02
1
7
* Essential SSTs. ** Refers to drawer number in SST Storage System.
NOTE: Additional SSTs may be ordered by calling SPX/OTC at 1-800-933-8335.
Radiator Cap Identification Procedure
1. Use the illustration below to identify the vehicle’s radiator cap type and kPa rating. 2. Proceed to the required inspection procedure for the radiator cap and kPa rating. Radiator Cap Identification
kPa Rating
N–Cap
Page 2 of 7
Compact Cap
Plastic Cap
RADIATOR CAP INSPECTION – EG007-05 Radiator Cap Inspection Procedure
Type: N–cap, 88 kPa
March 28, 2005
N–Cap: 88 kPa
1. Remove coolant and any foreign material on rubber points “A,” “B,” and “C.” 2. Check that points “A,” “B,” and “C” are not deformed, cracked, or swollen.
A
3. Check that points “C” and “D” are not stuck together.
D
B C
4. Apply engine coolant to points “B” and “C” before using the radiator cap tester. S Radiator Cap Tester: Snap–On/Sun P/N SVTS262A (or equivalent) 5. Before installing the radiator cap tester, use the applicable radiator cap adaptor provided in the following SST kits in conjunction with the radiator cap tester: S SST P/N 09230–00030–02 (09231–10080–01) or 09230–00020–02 (09231–10060–01) 6. When using the radiator cap tester, tilt it more than 30 degrees.
Radiator Cap Tester
7. Pump the radiator cap tester several times, and check the maximum pressure. Pumping speed: 1 pump/second HINT: Stop pumping when the valve opens and read the gauge. The gauge must be within the standard values listed below when the pressure valve opens. The cap is considered OK when the pressure holds steady or falls very slowly, but holds within the standard values listed below for one minute.
30° or more Radiator Cap
Specification: VALVE OPENING PRESSURE
SPECIFIED CONDITION
Standard value (for brand–new cap)
74.0 to 103.0 kPa (0.75 to 1.05 kgf/cm2, 10.7 to 14.9 psi)
Minimum standard value (for in–service cap)
59 kPa (0.60 kgf/cm2, 8.53 psi)
If the maximum pressure is less than the minimum standard value, replace the radiator cap sub–assembly.
Page 3 of 7
RADIATOR CAP INSPECTION – EG007-05 Radiator Cap Inspection Procedure (Continued)
Type: N–cap, 108 kPa
March 28, 2005
N–Cap: 108 kPa
1. Remove coolant and any foreign material on rubber points “A,” “B,” and “C.” 2. Check that points “A,” “B,” and “C” are not deformed, cracked, or swollen.
A
3. Check that points “C” and “D” are not stuck together.
D
B C
4. Apply engine coolant to points “B” and “C” before using the radiator cap tester. S Radiator Cap Tester: Snap–On/Sun P/N SVTS262A (or equivalent) 5. Before installing the radiator cap tester, use the applicable radiator cap adaptor provided in the following SST kits in conjunction with the radiator cap tester: S SST P/N 09230–00030–02 (09231–10080–01) or 09230–00020–02 (09231–10060–01) 6. When using the radiator cap tester, tilt it more than 30 degrees.
Radiator Cap Tester
7. Pump the radiator cap tester several times, and check the maximum pressure. Pumping speed: 1 pump/second HINT: Stop pumping when the valve opens and read the gauge. The gauge must be within the standard values listed below when the pressure valve opens. The cap is considered OK when the pressure holds steady or falls very slowly, but holds within the standard values listed below for one minute.
30° or more Radiator Cap
Specification: VALVE OPENING PRESSURE
SPECIFIED CONDITION
Standard value (for brand–new cap)
93.3 to 122.7 kPa (0.95 to 1.25 kgf/cm2, 13.5 to 17.8 psi)
Minimum standard value (for in–service cap)
78.5 kPa (0.80 kgf/cm2, 11.38 psi)
If the maximum pressure is less than the minimum standard value, replace the radiator cap sub–assembly.
Page 4 of 7
RADIATOR CAP INSPECTION – EG007-05 Radiator Cap Inspection Procedure (Continued)
Type: Compact Cap, 88 kPa
March 28, 2005
Compact Cap: 88 kPa
1. Remove coolant and any foreign material on rubber points “A,” “B,” and “C.” 2. Check that points “A” and “B” are not deformed, cracked, or swollen. 3. Check that points “B” and “C” are not stuck together.
A
B C
4. Apply engine coolant to point “B” before using the radiator cap tester. S Radiator Cap Tester: Snap–On/Sun P/N SVTS262A (or equivalent) 5. Before installing the radiator cap tester, use the applicable radiator cap adaptor provided in the following SST kits in conjunction with the radiator cap tester: S SST P/N 09230–00030–02 (09231–10080–01) or 09230–00020–02 (09231–10060–01) 6. When using the radiator cap tester, tilt it more than 30 degrees.
Radiator Cap Tester
7. Pump the radiator cap tester several times, and check the maximum pressure. Pumping speed: 1 pump/second HINT: Stop pumping when the valve opens and read the gauge. The gauge must be within the standard values listed below when the pressure valve opens. The cap is considered OK when the pressure holds steady or falls very slowly, but holds within the standard values listed below for one minute.
30° or more Radiator Cap
Specification: VALVE OPENING PRESSURE
SPECIFIED CONDITION
Standard value (for brand–new cap)
74.0 to 103.0 kPa (0.75 to 1.05 kgf/cm2, 10.7 to 14.9 psi)
Minimum standard value (for in–service cap)
59 kPa (0.60 kgf/cm2, 8.53 psi)
If the maximum pressure is less than the minimum standard value, replace the radiator cap sub–assembly.
Page 5 of 7
RADIATOR CAP INSPECTION – EG007-05 Radiator Cap Inspection Procedure (Continued)
Type: Compact Cap, 108 kPa
March 28, 2005
Compact Cap: 108 kPa
1. Remove coolant and any foreign material on rubber points “A,” “B,” and “C.” 2. Check that points “A” and “B” are not deformed, cracked, or swollen. 3. Check that points “B” and “C” are not stuck together.
A
B C
4. Apply engine coolant to point “B” before using the radiator cap tester. S Radiator Cap Tester: Snap–On/Sun P/N SVTS262A (or equivalent) 5. Before installing the radiator cap tester, use the applicable radiator cap adaptor provided in the following SST kits in conjunction with the radiator cap tester: S SST P/N 09230–00030–02 (09231–10080–01) or 09230–00020–02 (09231–10060–01) 6. When using the radiator cap tester, tilt it more than 30 degrees.
Radiator Cap Tester
7. Pump the radiator cap tester several times, and check the maximum pressure. Pumping speed: 1 pump/second HINT: Stop pumping when the valve opens and read the gauge. The gauge must be within the standard values listed below when the pressure valve opens. The cap is considered OK when the pressure holds steady or falls very slowly, but holds within the standard values listed below for one minute.
30° or more Radiator Cap
Specification: VALVE OPENING PRESSURE
SPECIFIED CONDITION
Standard value (for brand–new cap)
93.3 to 122.7 kPa (0.95 to 1.25 kgf/cm2, 13.5 to 17.8 psi)
Minimum standard value (for in–service cap)
78.5 kPa (0.80 kgf/cm2, 11.38 psi)
If the maximum pressure is less than the minimum standard value, replace the radiator cap sub–assembly.
Page 6 of 7
RADIATOR CAP INSPECTION – EG007-05 Radiator Cap Inspection Procedure (Continued)
Type: Plastic Cap, 108 kPa
March 28, 2005
Plastic Cap: 108 kPa
1. Remove coolant and any foreign material on O–ring “A.” 2. Check that O–ring “A” is not deformed, cracked, or swollen. 3. Apply engine coolant to O–ring “A” and rubber point “B” before using the radiator cap tester.
B
S Radiator Cap Tester: Snap–On/Sun P/N SVTS262A (or equivalent)
A
4. Before installing the radiator cap tester, use the applicable radiator cap adaptor provided in the following SST kits in conjunction with the radiator cap tester: S SST P/N 09230–00030–02 (09231–10080–01) or 09230–00020–02 (09231–10060–01) 5. When using the radiator cap tester, tilt it more than 30 degrees.
Radiator Cap Tester
6. Pump the radiator cap tester several times, and check the maximum pressure. Pumping speed: 1 pump/second 30° or more
HINT: Stop pumping when the valve opens and read the gauge. The gauge must be within the standard values listed below when the pressure valve opens. The cap is considered OK when the pressure holds steady or falls very slowly, but holds within the standard values listed below for one minute.
Radiator Cap
Specification: VALVE OPENING PRESSURE
SPECIFIED CONDITION
Standard value (for brand–new cap)
93.3 to 122.7 kPa (0.95 to 1.25 kgf/cm2, 13.5 to 17.8 psi)
Minimum standard value (for in–service cap)
78.5 kPa (0.80 kgf/cm2, 11.38 psi)
If the maximum pressure is less than the minimum standard value, replace the radiator cap sub–assembly.
Page 7 of 7
Technical Service Information Bulletin October 14, 2004
Introduction
Applicable Vehicles
MAIN BEARING JOURNAL DIAMETER STAMPING LOCATION REVISION Models:
’04 – ’05 ES 330 & RX 330
The main bearing journal diameter stamp location has been changed on some 2004 and 2005 model year vehicles with 3MZ–FE engines. The stamping on the front of the block has been discontinued. Review this TSB for the stamping location.
S 2004 – 2005 model year ES 330 and RX 330 vehicles meeting the following specifications: S 3MZ–FE equipped vehicles with engine serial numbers starting after 0138096.
Warranty Information
OP CODE
DESCRIPTION
TIME
OFP
T1
T2
N/A
Not Applicable to Warranty
–
–
–
–
Lexus s ASE Certification
Page 1 of 2
ENGINE
EG011-04
Title:
MAIN BEARING JOURNAL DIAMETER STAMPING LOCATION REVISION – EG011-04 Main Bearing Location
October 14, 2004
Cylinder Block Main Journal Bearing Diameter Location Underside of Cylinder Block ( Surface with Oil Pan No. 1)
Front of Cylinder Block Previous Location (Discontinued)
Current Location
Front
HINT: If replacing a bearing, replace it with one that has the same number. If the number of the bearing cannot be determined, select the correct bearing by adding together the numbers imprinted on the cylinder block and crankshaft, then refer to the table on the bottom of this page for the appropriate bearing number. The No. 1 and No. 4 journal bearings have 5 standard bearing sizes, marked 3, 4, 5, 6, and 7 accordingly. The No. 2 and No. 3 journal bearings have 5 standard bearing sizes, marked 1, 2, 3, 4, and 5 accordingly.
No. 3
No. 4
No. 3 No. 4
No. 2 No. 2 No. 1
No. 1
Number Mark
Number Mark
Number Mark
Cylinder Block + Crankshaft =
0 to 5
6 to 11
12 to 17
18 to 23
24 to 28
Replacement Bearing
3
4
5
6
7
EXAMPLE: Cylinder block imprinted number mark is “06.” Crankshaft imprinted number mark is “08.” 6 + 8 = 14 Select the bearing marked “5.” Page 2 of 2
Technical Service Information Bulletin October 14, 2004
ENTERING VIN DURING ECM (PCM) REPLACEMENT AND/OR DTC P0630 Models:
All ’04 – ’06 Models
TSIB REVISION NOTICE: S June 3, 2005: Content has been updated to include 2004 and 2006 model year vehicles. Step 4 of the VIN Write Procedure (page 2) and step 3 of the VIN Read Procedure (page 3) have been clarified to include RX 400h vehicles. Previous versions of this TSB should be discarded. Introduction
All 2005 and subsequent model year Lexus vehicles have the VIN (Vehicle Identification Number) stored in the Electronic Control Module (ECM) (SAE term: Powertrain Control Module/PCM) non–volatile memory. The VIN is accessible on the data stream using the Lexus Diagnostic Tester and can also be written to a new ECM (PCM) using a “VIN Read/Write” utility. Service ECMs (supply parts) are shipped without the VIN; therefore, as part of the ECM (PCM) replacement procedure, the VIN must be written to the replacement ECM (PCM) using the Diagnostic Tester utility function. Failure to write the VIN to the ECM (PCM) will result in a M.I.L. “ON” condition and set DTC P0630: VIN Not Programmed or Mismatch – ECM (PCM). It is very important to to enter the VIN on these vehicles. Vehicles with missing VINs are subject to failing some state and local vehicle emissions Inspection and Maintenance programs. NOTE: 2004 model year vehicles which have been flash reprogrammed may contain updated 2005 model year OBD II logic. These vehicles will require VIN entry into the ECM (PCM) after reprogramming.
Applicable Vehicles
Warranty Information
S 2004 model year vehicles that have been flash reprogrammed. S All 2005 – 2006 model year vehicles.
OP CODE
DESCRIPTION
TIME
OFP
T1
T2
N/A
Not Applicable to Warranty
–
–
–
–
Lexus s ASE Certification
Page 1 of 3
ENGINE
EG012-04
Title:
ENTERING VIN DURING ECM REPLACEMENT AND/OR DTC P0630 – EG012-04 Revised Required SSTs
ITEM NO.
SPECIAL SERVICE TOOLS (SSTs)
October 14, 2004
PART NUMBER
QTY
DRW**
LEX220036
1
8
01002744
1
8
Lexus Diagnostic Tester Kit* 1
NOTE: S All components from this kit/set are required S 12 Megabyte Diagnostic Tester Program Card (P/N 01002593–005) with version 12.2a Software (or later) is required CAN Interface Module Kit*
2
NOTE: S All components from this kit/set are required
* Essential SSTs. ** Refers to drawer number in SST Storage System.
NOTE: Additional Diagnostic Tester Kits, CAN Interface Modules, Program Cards, or other SSTs may be ordered by calling SPX/OTC at 1-800-933-8335.
VIN Write Procedure
To write a VIN to a replacement ECM (PCM), use the following process: 1. Confirm the VIN. It is located on the front left of the instrument . 2. Connect the Diagnostic Tester to DLC3. 3. Turn the ignition switch and Diagnostic Tester switch ON. 4. All vehicles except RX 400h: Select from the Diagnostic Tester menus: DIAGNOSIS, ENHANCED OBDII, VIN, and VIN WRITE.
Input a new VIN
If you want to clear the VIN, press [NO] key.
PRESS [ENTER]
RX 400h vehicles: Select from the Diagnostic Tester menus: DIAGNOSIS, OBD/MOBD, HV ECU, VIN, and VIN WRITE. 5. Write the VIN in accordance with the Diagnostic Tester display. 6. Compare the VIN displayed on the Diagnostic Tester with the VIN on the instrument . If these are not the same, write the VIN again after turning the ignition switch OFF.
WRITING COMPLETE The following VIN has been written.
The DTCs have been erased correctly.
PRESS [ENTER]
Page 2 of 3
ENTERING VIN DURING ECM REPLACEMENT AND/OR DTC P0630 – EG012-04 Revised VIN Read Procedure
1. Connect the Diagnostic Tester to DLC3. 2. Turn the ignition switch and Diagnostic Tester switch ON. 3. All vehicles except RX 400h: Select from the Diagnostic Tester menus: DIAGNOSIS, ENHANCED OBDII, VIN, and VIN READ. RX 400h vehicles: Select from the Diagnostic Tester menus: DIAGNOSIS, OBD/MOBD, HV ECU, VIN, and VIN READ.
October 14, 2004
VIN Is Displayed
********************************* [ VIN ] *********************************
PRESS [EXIT]
4. Check the VIN displayed on the Diagnostic Tester. HINT: For further explanations, refer to the Technical Information System (TIS), appropriate model repair manual: Diagnostics: SFI System: Registration.
Page 3 of 3
M.I.L. ON" DTC P0171, P0174, P2195, OR P2197 Models:
’05 – ’06 ES 330
November 17, 2005 Introduction
Under certain driving conditions, some 2005 and 2006 model year ES 330 vehicles may exhibit a M.I.L. “ON” condition with at least one of the following DTCs: S S S S
P0171 P0174 P2195 P2197
(System Too Lean [Bank 1]) (System Too Lean [Bank 2]) (Oxygen [A/F] Sensor Signal Stuck Lean [Bank 1, Sensor 1]) (Oxygen [A/F] Sensor Signal Stuck Lean [Bank 2, Sensor 1])
The Air Fuel (A/F) sensor manufacturing process has been improved to correct this condition. The following repair procedures should be used to properly diagnose and repair the affected vehicles.
Applicable Vehicles
Production Change Information
Parts Information
S 2005 – 2006 model year ES 330 vehicles produced BEFORE the Production Change Effective VIN shown below.
MODEL
ENGINE
PRODUCTION CHANGE EFFECTIVE VIN
ES 330
3MZ–FE
JTHBA3#G#65148433
MODEL
ES 330
Warranty Information
ENGINE
PREVIOUS PART NUMBER
CURRENT PART NUMBER
PART NAME
QTY
89467–33100
Same
Sensor, Air Fuel Ratio (Bank 1)
1
89467–33110
Same
Sensor, Air Fuel Ratio (Bank 2)
1
3MZ FE 3MZ–FE
OP CODE
DESCRIPTION
TIME
OFP
895131
R & R A/F Sensor
0.6
89467–33100 89467–33110
T1
T2
8A 71
Applicable Warranty*: This repair is covered under the Lexus Comprehensive Warranty. This warranty is in effect for 48 months or 50,000 miles, whichever occurs first, from the vehicle’s in-service date. * Warranty application is limited to correction of a problem based upon a customer’s specific complaint.
Lexus s ASE Certification
Page 1 of 2
ENGINE
Technical Service Information Bulletin
EG019-05
Title:
M.I.L. “ON” DTC P0171, P0174, P2195, OR P2197 – EG019-05 Required SSTs
ITEM NO.
SPECIAL SERVICE TOOLS (SSTs)
November 17, 2005
PART NUMBER
QTY
DRW**
LEX220036
1
8
01002744
1
8
Lexus Diagnostic Tester Kit* 1
NOTE: S All components from this kit/set are required S 12 Megabyte Diagnostic Tester Program Card (P/N 01002593–005) with version 13.0a Software (or later) is required CAN Interface Module Kit*
2
NOTE: S All components from this kit/set are required
* Essential SSTs. ** Refers to drawer number in SST Storage System.
NOTE: Additional Diagnostic Tester Kits, CAN Interface Modules, Program Cards, or other SSTs may be ordered by calling SPX/OTC at 1-800-933-8335.
Repair Procedure
DTC P0171 or P0174 Refer to the Technical Information System (TIS), 2005 or 2006 model year ES 330 Repair Manual: Diagnostics: SFI System (3MZ–FE): P0171, P0174. NOTE: Only replace the A/F sensor indicated by the M.I.L. “ON” DTC(s).
DTC P2195 or P2197 Refer to TIS, 2005 or 2006 model year ES 330 Repair Manual: Diagnostics: SFI System (3MZ–FE): P2195, P2197. NOTE: Only replace the A/F sensor indicated by the M.I.L. “ON” DTC(s).
Page 2 of 2
Technical Service Information Bulletin
ENGER AIRBAG INDICATOR LAMP Models:
’04 – ’05 ES 330 & RX 330
February 22, 2005
Introduction
The enger airbag indicator lamp may switch from ON to OFF for front seat engers weighing approximately less than 100 pounds, depending on their seating position. It is important for the front seat engers to know that proper operation of the advanced frontal airbag system is highly dependent on the pressure placed on the seat bottom. Situations that add or subtract sensed weight can result in occupant misclassification. To minimize this situation: S Check seating posture. – engers should be seated upright with their back against the seatback and feet on the floor. S Check loading conditions. – Extra weight from items such as bags or groceries or toys hanging on the seatback can add to the sensed weight of the front seat enger. – A rear seat enger lifting the front seat with their legs, objects placed under the front seat, or the front seatback in with the rear seat can subtract from the sensed weight of the front seat enger. If the enger airbag indicator lamp continues to switch ON to OFF after checking the above conditions, perform the following repair procedure. NOTE: The safest place for children is in the rear seat. Please note that Lexus recommends that you NEVER install a rear–facing child restraint in the front enger seat, even if the enger “Airbag OFF” lamp is illuminated. Please refer to the Owner’s Manual for additional details.
Applicable Vehicles
Warranty Information
S 2004 – 2005 model year ES 330 and RX 330 vehicles produced BEFORE the Production Change Effective VINs shown on the following page.
OP CODE
DESCRIPTION
TIME
OFP
T1
T2
EL4014
R & R Occupant Detection ECU
0.7
89952–33010 89952–48010
8A
74
Applicable Warranty*: This repair is covered under the Lexus Comprehensive Warranty. This warranty is in effect for 48 months or 50,000 miles, whichever occurs first, from the vehicle’s in-service date. * Warranty application is limited to correction of a problem based upon a customer’s specific complaint.
Lexus s ASE Certification
Page 1 of 2
ELECTRICAL
EL002-05
Title:
ENGER AIRBAG INDICATOR LAMP – EL002-05 Production Change Information
MODEL
PLANT
DRIVETRAIN
Tsutsumi
ES 330
Kanto TMK
RX 330 TMMC
Parts Information
February 22, 2005
JTHBA30G#55068000
2WD
JTJGA3#U#50046500
4WD
JTJHA3#U#50076003
2WD
2T2GA3#U#5C021700
4WD
2T2HA3#U#5C046800
CURRENT PART NUMBER
89952–33010
89952–33011
Required SSTs
JTHBA30G#50024130
2WD
PREVIOUS PART NUMBER
89952–48010
PRODUCTION CHANGE EFFECTIVE VIN
89952–48011
PART NAME
QTY
1 Occupant Detection Computer
SPECIAL SERVICE TOOLS (SSTs)
Lexus Diagnostic Tester Kit*
12 Megabyte Diagnostic Tester Program Card with version 12.01a Software (or later)*
1
PART NUMBER
QUANTITY
01001270
1
01002593-005
1
00002–09077–01
1
Occupant Seat Weight Set*
*
Essential SSTs.
NOTE: Additional Diagnostic Tester Kits, Program Cards, or other SSTs may be ordered by calling SPX/OTC at 1-800-933-8335. Repair Procedure
1. Unfasten enger seat and rock the assembly back providing access to the underside of the seat. For information to unfasten the enger seat, refer to the Technical Information System (TIS): 2004 – 2005 model year ES 330 or RX 330 Repair Manual: Seat: Front Seat Assembly LH: Overhaul. 2. Disconnect the negative terminal of the vehicle battery. 3. Disconnect electrical connectors from Occupant Detection ECU. 4. Remove and replace the Occupant Detection ECU. 5. Reinstall the seat assembly. For more information, refer to TIS: 2004 – 2005 model year ES 330 or RX 330 Repair Manual: Seat: Front Seat Assembly LH: Overhaul. Torque: 36.8 NSm (375 kgfScm, 27 ftSlbf)
6. Reconnect the negative terminal of the vehicle battery. 7. Perform Zero Point Calibration and Sensitivity Check following prompts in the Diagnostic tool found under the Occupant Detect menu item (refer to TSIB No. EL007–03, “Occupancy Classification System Calibration (DTC B1150 & B1650).” 8. Reinitialize systems affected by the disconnection of the vehicle battery. Page 2 of 2
PAINT STAINS UNDER RAPGARD
Technical Service Information Bulletin
Models:
’02 – ’06 All Models
January 31, 2003
TSIB REVISION NOTICE: S May 11, 2005: Applicable Vehicles has been updated to include 2004 – 2006 model years. The previous TSB should be discarded. Introduction
On some vehicles, when Rapgardt is removed, the paint may have a stained appearance under the clear coat. These stains should not be considered a defect in the paint (clear coat or color coat). Wrinkles in the Rapgardt sometimes trap water and cause the paint to stain from the trapped moisture, especially on horizontal surfaces, such as the hood, roof, and trunk. Stains can be removed by heating the stained surface to remove the trapped moisture.
Stains
Applicable Vehicles
Warranty Information
S 2002 – 2006 model year vehicles, all models.
OP CODE
DESCRIPTION
TIME
OFP
BD1055
Remove Paint Stain Under Rapgardt
0.6
53301–#####
T1
T2
67 99
Applicable Warranty*: This repair is covered under the Lexus Comprehensive Warranty. This warranty is in effect for 48 months or 50,000 miles, whichever occurs first, from the vehicle’s in-service date. * Warranty application is limited to correction of a problem based upon a customer’s specific complaint.
Lexus s ASE Certification
Page 1 of 2
PAINT
PA001-03
Title:
PAINT STAINS UNDER RAPGARDt – PA001-03 Revised Required Tools & Material
Repair Procedure
January 31, 2003
TOOLS & MATERIALS
QUANTITY
Infrared Lamp or Heat Gun
1
Aluminum Foil or Damp Cloth
1
Thermometer
1
1. Use the aluminum foil or damp cloth to cover plastic/rubber parts that are near the stain. 2. Apply heat to the stain using an infrared lamp or heat gun. NOTE: Apply heat for 5 – 10 minutes at 158rF – 176rF (70rC – 80rC). Do NOT allow the surface to become hotter than 176rF (80rC). Measure the temperature with a thermometer.
3. After applying heat for 5 minutes, examine the area to determine if the stain has been removed. If the stain still exists, continue to apply heat and re–examine the stain 5 minutes later.
Page 2 of 2
Technical Service Information Bulletin January 12, 2005
Introduction
IRON PARTICLE RUST CONTAMINATION REPAIR Models:
’94 – Current
The purpose of this bulletin is to provide information regarding the proper procedures to clean vehicles that may have been subjected to contamination by airborne iron particles such as rail dust. S 1994 – Current model year Lexus vehicles.
Applicable Vehicles Required Tools & Materials
TOOLS & MATERIALS
QUANTITY
Auto Magicr Special Cleaner Concentratet #713*
1
Rubber Gloves, Aprons, Boots Eye Protection
As Needed
Sponges or Wash Mitts Pail or Bucket *
Condition
Inspection
the main office of Auto Wax Company Inc. (1–800–826–0828 or www.automagic.biz) to find a local source for Auto Magicr Special Cleaner Concentrate.t
During rail transportation or extended storage near industrial areas, vehicles may occasionally be subjected to contamination by airborne iron particles shed from railroad tracks, train wheels, exposure to heavy machinery facilities, grinding, welding, etc. This type of contamination can be identified by the presence of small red or brown particles on the paint surface. These particles are often difficult to see on dark color paints, but can be easily felt when brushing a hand across horizontal body surfaces such as hood, roof, or deck lid. CAUTION: Because of the abrasiveness of these small iron particles, polishing or buffing procedures should not be attempted to repair the paint surface of an affected vehicle. This will result in further paint damage and detract from vehicle appearance.
Repair
Warranty Information
Washing the affected paint surfaces with Auto Magicr Special Cleaner Concentratet is the recommended method to dislodge embedded iron particles and remove the surrounding rust stains. The correct usage of Auto Magicr Special Cleaner Concentratet is described in this bulletin.
OP CODE
DESCRIPTION
TIME
OFP
T1
T2
N/A
Not Applicable to Warranty
–
–
–
–
Lexus s ASE Certification
Page 1 of 2
PAINT
PA001-05
Title:
IRON PARTICLE RUST CONTAMINATION REPAIR – PA001-05 General Precautions
January 12, 2005
WARNING: Auto Magicr Special Cleaner Concentratet is a corrosive material. Appropriate personal protection equipment must be worn to protect persons performing the contamination removal procedure. Please refer to the precautions on the product prior to use.
CAUTION: Consult local or state regulations regarding the handling, use, and disposal of Auto Magicr Special Cleaner Concentratet prior to use. Under no circumstances should contamination removal be performed in direct sunlight or contamination removal solution be allowed to dry on vehicle surfaces, as staining of plastic, rubber, or painted parts may result.
Repair Procedure
1. Move vehicle out of direct sunlight. Initially rinse with cool water then wash with liquid car wash detergent. Rinse again thoroughly with fresh water. 2. Dilute the mixture to a 1:8 ratio for painted surfaces. Use the recommended dilution ratio when applying to any other surface. Apply the diluted cleaner concentrate so that it evenly covers the affected area. Use an appropriate mitt or sponge to agitate the surface. 3. Thoroughly rinse vehicle with fresh water. 4. Inspect vehicle carefully both visually and by feel to determine if all iron particles have been removed. Repeat the wash several times if necessary to achieve complete removal. 5. Dry vehicle with a soft terry cloth towel and apply a non–abrasive, non–silicone glaze to obtain a high–gloss finish.
Page 2 of 2
Technical Service Information Bulletin July 16, 2004
Introduction
WHEEL FILM FOR BRAKE ROTOR RUST PREVENTION Models:
All Models with Wheel Film
To prevent brake rotor rust from forming during transportation and storage, wheel film will be adopted instead of using a cardboard type anti–rust cover. The purpose of the wheel film is to protect the disc brake rotor from weather elements and initial rust before the vehicle is delivered to the customer. Consequently, the film should remain on the wheel as long as possible. NOTE: S Retain the wheel film on the disc wheel during vehicle display and storage. S Do not remove the wheel film right away at Pre–Delivery Service (PDS) if the vehicle will be stored after PDS. S Remove the wheel film just prior to delivery to customers.
Features of Wheel Film: Material: Polyethylene Color: Transparent
Wheel Film
Applicable Vehicles
Warranty Information
S All Models with wheel film.
OP CODE
DESCRIPTION
TIME
OFP
T1
T2
N/A
Not Applicable to Warranty
–
–
–
–
Lexus s ASE Certification
Page 1 of 2
PRE–DELIVERY SERVICE
PD001-04
Title:
WHEEL FILM FOR BRAKE ROTOR RUST PREVENTION – PD001-04 Removal Procedure
July 16, 2004
Firmly hold the outer end of the wheel film to pull it off.
NOTE: S If film adhesive residue is found on the disc wheel, remove it with a soft cloth dipped in ethyl alcohol (ethanol). Do not use thinner to remove the adhesive residue. S When the wheel film is removed below an ambient temperature of 0rC (32rF), it is possible that the film may tear. For ease of film removal in cold conditions, please warm the film above 0rC (32rF) using one of the following methods: – Splash (hot) water on the wheel film. – Warm wheel film with cotton cloth soaked in hot water. – Warm wheel film with heat gun. Be sure not to overheat the film and wheel. – Warm wheel film by infrared heater (lamp) for paint. Be sure not to overheat the film and wheel. – Warm wheel film by steam car wash. – Park vehicle indoors (e.g. garage, etc.) for an extended period of time.
Disposal Procedure
Introduction Schedule
Please follow local laws for disposal. Polyethylene film will not generate harmful gasses when it is burned.
MODEL (FRONT & REAR)
2003 1
GS 430/300 GX 470
SC 430
2
3
4
5
6
7
8
9
10
11
12
1
2
3
4
5
6
7
8
9
10
11
12
Beginning January 2005 JAPAN
LX 470 RX 330
2004
PLANT
Beginning January 2005 Beginning January 2005
TMMC JAPAN
This is a tentative schedule. There is a possibility that the introduction timing may be delayed on some models.
Page 2 of 2
Technical Service Information Bulletin August 26, 2003
Introduction
Applicable Vehicles
Contents
Warranty Information
PRE-DELIVERY SERVICE (PDS) INFORMATION FOR ES 330 Models:
’04 ES 330
The following items need to be performed during Pre–Delivery Service (PDS) on 2004 model year ES 330 vehicles.
S 2004 model year ES 330 vehicles.
ITEM NO.
SUBJECT
PAGE
1
D.C.C. Fuse Installation During PDS
2
2
Removal of Front Emergency Towing Eyelet and Installation of Towing Eyelet Hole Cover (Performed at Port)
3
3
Front License Plate Mounting Bracket Installation
4
4
Initialization of Moon Roof
5
5
Initial Calibration of Com
6
6
Installation of Rubber Body Plugs
9
OP CODE
DESCRIPTION
TIME
OFP
T1
T2
N/A
Not Applicable to Warranty
–
–
–
–
Lexus s ASE Certification
Page 1 of 9
PRE–DELIVERY SERVICE
PD002-03
Title:
PRE–DELIVERY SERVICE (PDS) INFORMATION FOR ES 330 – PD002-03
August 26, 2003
ITEM NO. 1:
D.C.C. FUSE INSTALLATION DURING PDS
Introduction
The D.C.C. fuse has been removed at the assembly plant to reduce parasitic current draw in transit and storage.
Installation Procedure
The removed D.C.C. fuse (30 A) is stored in the blank space of the Junction Block in the engine compartment. The D.C.C. fuse must be reinstalled during Pre–Delivery Service (PDS) in the dealership as shown below.
Junction Block
Remove This Fuse Install D.C.C. Fuse (30 A) Here (Original Location)
NOTE: S Removing the D.C.C. fuse cuts off power sources relating to the Dome, ECU–B and RAD No. 1 fuses. S If the vehicle is stored in the dealership for a long period of time after PDS, disconnect the negative battery terminal to prevent battery discharge. Refer to TSIB PG009–02 for battery maintenance information.
Page 2 of 9
PRE–DELIVERY SERVICE (PDS) INFORMATION FOR ES 330 – PD002-03
ITEM NO. 2: Installation Procedure
August 26, 2003
REMOVAL OF FRONT EMERGENCY TOWING EYELET AND INSTALLATION OF TOWING EYELET HOLE COVER (PERFORMED AT PORT) 1. Remove the emergency towing eyelet from the front bumper by turning counterclockwise. NOTE: If it is hard to loosen the emergency towing eyelet, use a steel bar.
Emergency Towing Eyelet
2. Place the removed emergency towing eyelet in the tool tray in the luggage compartment.
3. Install the front towing eyelet hole cover which is stored in the glove box onto the front bumper as shown in the diagram.
Page 3 of 9
PRE–DELIVERY SERVICE (PDS) INFORMATION FOR ES 330 – PD002-03
August 26, 2003
ITEM NO. 3:
FRONT LICENSE PLATE MOUNTING BRACKET INSTALLATION
Introduction
The front license plate bracket and two self tapping screws are included in the luggage compartment.
Installation Procedure
1. Aligning the holes “A” of the mounting bracket with the dimples on the front bumper cover, mark the location of the holes “B” on the front bumper cover. NOTE: S Holes “A” are used for installation of the mounting bracket to the bumper cover. S Holes “B” are used for installation of the front license plate to the mounting bracket.
Mark And Drill Holes
Dimples Mounting Bracket
A
B
2. Drill two relief holes with a diameter of 12 mm (0.47 in.) at the marks on the front bumper cover to prevent the license plate retaining bolt end from ing the cover. NOTE: Do not drill the dimples on the front bumper cover.
3. Install the mounting bracket to the front bumper cover using the two self tapping screws. Install the front license plate to the mounting bracket using bolts of the following dimensions: Length: less than 25 mm (0.98 in.) Diameter: 6.0 mm (0.24 in.) Pitch: 1.0 mm (0.04 in.)
Page 4 of 9
Tapping Screws
B
A
PRE–DELIVERY SERVICE (PDS) INFORMATION FOR ES 330 – PD002-03
August 26, 2003
ITEM NO. 4:
INITIALIZATION OF MOON ROOF
Introduction
The moon roof is controlled by the sliding roof ECU which detects and memorizes the moon roof position by counting pulses of its motor from the fully tilt–up position as the start position. Once the battery terminal has been disconnected and reconnected, the sliding roof ECU does not detect and memorize the moon roof position, resulting in no functions of the “one–touch tilt up and down,” “one–touch slide open and close” and “jam protection.” Please initialize the moon roof position after reconnecting the battery terminal as outlined below.
Initialization Procedure
1. Turn the ignition switch to the “ON” position. 2. Push and hold the moon roof switch to the “TILT– UP” side until the moon roof tilts all the way up and then tilts down slightly (approximately 10 mm at rear end). 3. Check for proper operation of the “One–touch slide open and close” and “One–touch tilt up and down” functions by pushing the switch briefly to the “SLIDE OPEN” and “TILT UP” positions.
Approx. 10 mm
NOTE: Jam protection function becomes effective through the above initialization procedure.
Page 5 of 9
PRE–DELIVERY SERVICE (PDS) INFORMATION FOR ES 330 – PD002-03
August 26, 2003
ITEM NO. 5:
INITIAL CALIBRATION OF COM
Introduction
The com indicates the direction that the vehicle is heading by detecting the direction and strength of the earth’s magnetic field and processing this data using the com sensor and microcomputer. Detection of the direction and strength of the earth’s magnetic field varies according to the area in which the vehicle is used and is affected by the residual magnetism of the vehicle. For this reason, the geographic direction displayed may also deviate from the direction determined by the earth’s magnetic field according to the area in which the vehicle is used. Therefore, please perform the initial calibration of the com in your dealership prior to delivery to customers.
Com
“COMP” Switch
Page 6 of 9
PRE–DELIVERY SERVICE (PDS) INFORMATION FOR ES 330 – PD002-03
ITEM NO. 5: Com Calibration Procedure
August 26, 2003
INITIAL CALIBRATION OF COM (Continued) 1. Turn the ignition switch to the “ON” position and check that the direction (N, NE, E, SE, S, SW, W, NW) appears on the com display. NOTE: Pushing the “COMP” switch turns on or off the com display.
2. Push the “COMP” switch for approximately 3 seconds until the zone number (1 – 15) appears on the display. Then push the switch to select the number of the zone where the vehicle is located. See the map below for zone reference.
North America
Hawaii: 5 Puerto Rico: 10 A. Samoa: 5 Guam: 8 Saipan: 8 Taiwan: 9 Korea: 10
Page 7 of 9
PRE–DELIVERY SERVICE (PDS) INFORMATION FOR ES 330 – PD002-03
ITEM NO. 5:
INITIAL CALIBRATION OF COM (Continued)
Com Calibration Procedure (Continued)
3. Check that the direction appears several seconds after adjustment.
August 26, 2003
4. Start the engine and push the switch for about 6 seconds until “C” appears on the display.
5. Drive the vehicle slowly at 5 mph, or less, in a circle until the direction is displayed. If there is not enough space to drive in a circle, drive around the block until the direction is displayed.
After driving in circles 1 to 3 times, calibration is complete with the direction shown on the display.
NOTE: S Do not perform calibration of the com in a place where the earth’s magnetic field is subject to interference by artificial magnetic fields (underground parking, under a steel tower, between buildings, roof parking, near a railroad crossing, near a large vehicle, etc.) S During calibration, do not operate electric systems (moon roof, power windows, etc.) as they may interfere with the calibration. Page 8 of 9
PRE–DELIVERY SERVICE (PDS) INFORMATION FOR ES 330 – PD002-03
August 26, 2003
ITEM NO. 6:
INSTALLATION OF RUBBER BODY PLUGS
Introduction
The ES 330 is provided with front and rear torque box holes to tie down the vehicle by wire or carrier truck transportation.
Installation Procedure
Four (4) rubber body plugs are included in the glove compartment at the assembly plant. Install them into the two (2) front and two (2) rear torque box holes during Pre–Delivery Service (PDS). NOTE: If the rubber body plugs are not securely installed, road (tire) noise will transfer to the vehicle interior through the torque box holes and rust could occur inside the torque boxes by water entry.
Front Torque Box Hole
Front
Rear Torque Box Hole
Front
Page 9 of 9
POWER SYSTEM INITIALIZATION DURING PDS Models:
’05 All Lexus Models
February 11, 2005
Introduction
The following is a list of the vehicle systems (Power Window, Sliding Roof, Tire Pressure Warning System, etc.) that need initialization during Pre–Delivery Service (PDS) and the TSIB numbers containing details on initializing each specific system. NOTE: Items in RED also need to be initialized any time the battery has been disconnected.
Applicable Vehicles
’05 MY Power System Initialization Table
Warranty Information
S All 2005 model year Lexus vehicles.
INTIALIZATION SYSTEM ITEMS MODEL NAME
COM
POWER WINDOW
POWER BACK DOOR
SLIDING ROOF
TIRE PRESSURE WARNING SYSTEM DIRECT
INDIRECT
VGRS
SEAT
ES 330
PD002-03
-
-
PD002-03
-
-
-
-
GS 430/300
PG007-00
-
-
-
-
-
-
-
GX 470
PG017-02
-
PG016-02
PD005-03
-
-
-
IS 300
PG022-01
-
-
-
-
-
-
-
LS 430
PG009-01
-
-
-
-
PD003-03
-
PG010-00
LX 470
PG007-00
-
-
-
-
-
PG011-02
-
RX 330
PD005-04
PD003-04
PD002-04
PD004-04
-
PD006-04
-
-
SC 430
PG010-01
-
-
-
PG006-01
-
-
PG005-03
OP CODE
DESCRIPTION
TIME
OFP
T1
T2
N/A
Not Applicable to Warranty
–
–
–
–
Lexus s ASE Certification
Page 1 of 1
PRE–DELIVERY SERVICE
Technical Service Information Bulletin
PD010-05
Title:
Technical Service Information Bulletin
DCC FUSE INSTALLATION DURING PDS Models:
’05 – ’06 ES 330
August 22, 2005
Introduction
Applicable Vehicles Installation Procedure
The DCC fuse has been removed at the assembly plant to reduce parasitic current draw in transit and storage. S 2005 – 2006 model year ES 330 vehicles. The removed DCC fuse (30A) is stored in the blank space of the Junction Block in the engine compartment. The DCC fuse must be reinstalled during Pre-Delivery Service (PDS) in the dealership as shown below.
Junction Block
Remove This Fuse Install DCC Fuse (30A) Here (Original Location)
NOTE: S Removing the DCC fuse cuts off power sources relating to the DOME, ECU–B, and RAD No. 1 fuses. S If the vehicle is stored in the dealership for a long period of time after PDS, disconnect the negative (–) battery terminal to prevent battery discharge. Refer to TSIB No. PG009–02, “Battery Maintenance for In-Stock Vehicles & Pre-Delivery,” for battery maintenance information.
Warranty Information
OP CODE
DESCRIPTION
TIME
OFP
T1
T2
N/A
Not Applicable to Warranty
–
–
–
–
Lexus s ASE Certification
Page 1 of 1
PRE-DELIVERY SERVICE
PD032-05
Title:
Technical Service Information Bulletin August 22, 2005
Introduction
INITIALIZATION OF MOON ROOF DURING PDS Models:
’05 – ’06 ES 330
The moon roof is controlled by the sliding roof ECU, which detects and memorizes the moon roof position by counting pulses of its motor from the fully “TILT-UP” position as the start position. Once the battery terminal has been disconnected and reconnected, the sliding roof ECU does not detect and memorize the moon roof position, resulting in no functions of the “one-touch tilt up and down,” “one-touch slide open and close,” and “jam protection.” Initialize the moon roof position after reconnecting the battery terminal as outlined below. NOTE: Any time the battery terminal has been disconnected, initialize the moon roof after reconnecting the battery terminal.
Applicable Vehicles Initialization Procedure
S 2005 – 2006 model year ES 330 vehicles.
1. Turn the ignition switch to the “ON” position. 2. Push and hold the moon roof switch to the “TILT-UP” side until the moon roof tilts all the way up and then tilts down slightly (approximately 10 mm [0.39 in.] at rear end). 3. Check for proper operation of the “one-touch slide open and close” and “one-touch tilt up and down” functions by pushing the switch briefly to the “SLIDE OPEN” and “TILT-UP” positions.
Approx. 10 mm
NOTE: Jam protection function becomes effective through the above initialization procedure.
Warranty Information
OP CODE
DESCRIPTION
TIME
OFP
T1
T2
N/A
Not Applicable to Warranty
–
–
–
–
Lexus s ASE Certification
Page 1 of 1
PRE-DELIVERY SERVICE
PD033-05
Title:
Technical Service Information Bulletin August 22, 2005
Introduction
INITIAL CALIBRATION OF COM DURING PDS Models:
’05 – ’06 ES 330
The com indicates the direction that the vehicle is heading by detecting the direction and strength of the Earth’s magnetic field and processing this data using the com sensor and microcomputer. Detection of the direction and strength of the Earth’s magnetic field varies according to the area in which the vehicle is used and is affected by the residual magnetism of the vehicle. For this reason, the geographic direction displayed may also deviate from the direction determined by the Earth’s magnetic field according to the area in which the vehicle is used. Perform the initial calibration of the com in your dealership prior to delivery to customers.
Com
“COMP” Switch
Applicable Vehicles
Warranty Information
S 2005 – 2006 model year ES 330 vehicles.
OP CODE
DESCRIPTION
TIME
OFP
T1
T2
N/A
Not Applicable to Warranty
–
–
–
–
Lexus s ASE Certification
Page 1 of 3
PRE-DELIVERY SERVICE
PD034-05
Title:
INITIAL CALIBRATION OF COM DURING PDS – PD034-05 Com Calibration Procedure
August 22, 2005
1. Turn the ignition switch to the “ON” position and check that the direction (N, NE, E, SE, S, SW, W, NW) appears on the com display. NOTE: Pushing the “COMP” switch turns the com display ON or OFF.
2. Push the “COMP” switch for approximately 3 seconds until the zone number (1 – 15) appears on the display. Then push the switch to select the number of the zone where the vehicle is located. See the map below for zone reference.
North America
Hawaii: 5 Puerto Rico: 10 A. Samoa: 5 Guam: 8 Saipan: 8 Taiwan: 9 Korea: 10
Page 2 of 3
INITIAL CALIBRATION OF COM DURING PDS – PD034-05 Com Calibration Procedure (Continued)
August 22, 2005
3. Check that the direction appears several seconds after adjustment. 4. Start the engine and push the switch for about 6 seconds until “C” appears on the display.
5. Drive the vehicle slowly at 5 mph (8 km/h), or less, in a circle until the direction is displayed. If there is not enough space to drive in a circle, drive around the block until the direction is displayed.
After driving in 1 to 3 circles, calibration is complete with the direction shown on the display.
NOTE: S Do NOT perform calibration of the com in a place where the Earth’s magnetic field is subject to interference by artificial magnetic fields (underground parking, under a steel tower, between buildings, roof parking, near a railroad crossing, near a large vehicle, etc.) S During calibration, do NOT operate electric systems (moon roof, power windows, etc.) as they may interfere with the calibration.
Page 3 of 3
Technical Service Information Bulletin August 25, 2005
Introduction
Applicable Vehicles
Installation Procedure
INSTALLATION OF RUBBER BODY PLUGS DURING PDS Models:
’05 – ’06 ES 330
The ES 330 is equipped with front and rear torque box holes to tie down the vehicle during transportation. Rubber body plugs need to be installed during Pre-Delivery Service (PDS).
S 2005 – 2006 model year ES 330 vehicles.
Four (4) rubber body plugs are included in the glove compartment at the assembly plant. Install them into the two (2) front and two (2) rear torque box holes located under the vehicle on both sides. NOTE: If the rubber body plugs are NOT securely installed, road (tire) noise will transfer to the vehicle interior through the torque box holes and rust could occur inside the torque boxes by water entry.
Front Torque Box Hole
Rear Torque Box Hole
Front
Front
Warranty Information
OP CODE
DESCRIPTION
TIME
OFP
T1
T2
N/A
Not Applicable to Warranty
–
–
–
–
Lexus s ASE Certification
Page 1 of 1
PRE-DELIVERY SERVICE
PD035-05
Title:
Technical Service Information Bulletin August 25, 2005
Introduction
Applicable Vehicles
Warranty Information
Installation Procedure
FRONT LICENSE PLATE MOUNTING BRACKET INSTALLATION Models:
’05 – ’06 ES 330
The ES 330 front license plate mounting bracket and two self-tapping screws are placed in the luggage compartment of the vehicle at the assembly plant. For states that require a front license plate, install the bracket and bolts on the bumper cover during Pre-Delivery Service (PDS) according to the following procedure.
S 2005 – 2006 model year ES 330 vehicles.
OP CODE
DESCRIPTION
TIME
OFP
T1
T2
N/A
Not Applicable to Warranty
–
–
–
–
1. Aligning the holes “A” of the mounting bracket with the dimples on the front bumper cover, mark the location of the holes “B” on the front bumper cover. NOTE: S Holes “A” are used for installation of the mounting bracket to the bumper cover. S Holes “B” are used for installation of the front license plate to the mounting bracket.
Mark and Drill Holes
Dimples Mounting Bracket
A
B
B
A
2. Drill two relief holes with a diameter of 12 mm (0.47 in.) at the marks on the front bumper cover to prevent the license plate retaining bolt end from ing the cover. NOTE: Do not drill the dimples on the front bumper cover.
Lexus s ASE Certification
Page 1 of 2
PRE-DELIVERY SERVICE
PD036-05
Title:
FRONT LICENSE PLATE MOUNTING BRACKET INSTALLATION – PD036-05 Installation Procedure (Continued)
3. Install the mounting bracket to the front bumper cover using the two self-tapping screws. 4. Install the front license plate to the mounting bracket using bolts of the following dimensions: Length: Less than 25 mm (0.98 in.) Diameter: 6.0 mm (0.24 in.) Pitch: 1.0 mm (0.04 in.)
Page 2 of 2
Tapping Screws
August 25, 2005
Technical Service Information Bulletin August 26, 2005
Introduction
Applicable Vehicles
Warranty Information
Installation Procedure
FRONT EMERGENCY TOWING EYELET & EYELET HOLE COVER Models:
’05 – ’06 ES 330
The 2005 – 2006 model year ES 330 is shipped with a front emergency towing eyelet. Follow the procedure below to remove the eyelet and save for customer use.
S 2005 – 2006 model year ES 330 vehicles.
OP CODE
DESCRIPTION
TIME
OFP
T1
T2
N/A
Not Applicable to Warranty
–
–
–
–
1. Remove the emergency towing eyelet from the front bumper by turning counterclockwise. NOTE: If it is hard to loosen the emergency towing eyelet, use a steel bar.
Emergency Towing Eyelet
Lexus s ASE Certification
Page 1 of 2
PRE-DELIVERY SERVICE
PD037-05
Title:
FRONT EMERGENCY TOWING EYELET & EYELET HOLE COVER – PD037-05 Installation Procedure (Continued)
2. Place the emergency towing eyelet in the tool tray in the luggage compartment.
3. Install the front towing eyelet hole cover, which is stored in the glove box, onto the front bumper as shown in the illustration.
Page 2 of 2
August 26, 2005
Technical Service Information Bulletin
VOLUME 4 INFORMATION Models:
All Models
January 1, 1999
Introduction
Lexus Technical Service Information Bulletins (TSIBs) continue to be one of the most current sources of technical information available. To ensure complete access to this reference source, use the following steps: S Volume Four will begin with 1999 Technical Service Information Bulletins. S Place this bulletin along with all 1999 TSIBs into the new binders received with this bulletin. S Label this new binder “Volume Four“ using the labels provided with the binder. S Additional copies of 1994 through 1999 TSIBs are available to all Lexus Dealerships through the Non–Parts System (MDC NPM System) by using the following Part Number designation:
TSB Part Number Prefix TSB Chapter Code Chapter Code Sequence Number Year 00216 Related TSIB Part Numbers
– EG 001 – 99
MATERIAL DESCRIPTION
PART NUMBER
1999 TSIB Binder complete with all bulletins issued to date
VOL4
New TSIB Binder and tabs only
00216–00001
Lexus s ASE Certification
Page 1 of 1
PRODUCT GENERAL INFORMATION
PG001–99
Title:
Technical Service Information Bulletin
REPLACEMENT CERTIFICATION LABELS Models:
All Models
January 18, 2002
TSB UPDATE NOTICE: The information contained in this TSIB updates PG015–01 dated May 4, 2001. Revised text is red and underlined. The changes will take place February 1, 2002. Introduction
Replacement Certification Labels (vinyl label affixed to driver’s door or door post) may be available from Lexus providing the request meets one of the criteria listed below. Certification Label Location MFD.BY:TOYOTA MOTOR CORPORATION DATE 10/01 GVWR: 2247KG (3040LB) GAWR: FRT 1379KG (3040LB) WITH P225/70R16 TIRES 16X6 1/2JJ RIMS AT 210 KPA (30PSI) COLD RR 1153KG (2540LB) WITH P225/70R16 TIRES. 16X6 1/2JJ RIMS AT 210 KPA (30PSI) COLD THIS VEHICLE CONFORMS TO ALL APPLICABLE FEDERAL MOTOR VEHICLE SAFETY, BUMPER, AND THEFT PREVENTION STANDARDS IN EFFECT ON THE DATE OF MANUFACTURE SHOWN ABOVE. JT0XX00X0X0000000 MPV MCU10L–AWPGKA C/TR 8P4/LB00 A/TM –01A/ U140E MADE IN JAPAN NO. 736
Applicable Vehicles Certification Label Criteria
S All Lexus vehicles. 1. The vehicle is in an accident and the label is damaged or is attached to a part that will be replaced during the repair. NOTE: S Processing a new label will be delayed significantly if the original certification label is not available. S A replacement label MAY NOT be available if the vehicle is more than 5 years old and the old label does not accompany this request.
2. The label is stolen. Procurement Procedure
To request a replacement label, complete a copy of the form on the back of this bulletin. Your dealer parts will be billed $25.00 for each replacement of a damaged or stolen label. NOTE: All replacement labels for damaged and/or stolen vehicles are subject to approval by the Technical Compliance Department. If you have any specific questions, (310) 468–3390.
Warranty Information
OP CODE
DESCRIPTION
TIME
OPN
T1
T2
N/A
Not Applicable to Warranty
–
–
–
–
Lexus s ASE Certification
Page 1 of 2
PRODUCT GENERAL INFORMATION
PG002-02
Title:
APPLICATION FOR REPLACEMENT CERTIFICATION LABEL
REASON FOR REPLACEMENT ACCIDENT DAMAGE STOLEN OTHER
MFD.BY:TOYOT AMOTOR CORPORATION DATE10/01 GVWR:2247KG(3040LB) GAWR:FRT1379KG(3040LB)WITHP225/70R16TIRES 16X6 1/2JJ RIMS AT 210 KPA(30PSI)COLD RR 1153KG(2540LB)WITHP225/70R16TIRES. 16X6 1/2JJ RIMS AT 210 KPA(30PSI)COLD THISVEHICLECONFORMSTOALLAPPLICABLE FEDERALMOTORVEHICLESAFETY, BUMPER, AND THEFTPREVENTIONSTANDARDS IN EFFECT ON THE DATEOFMANUFACTURESHOWNABOVE. JT0XX00X0X0000000 MPV MCU10L–AWPGKA C/TR8P4/LB00 A/TM–01A/ U140E MADE IN JAPAN NO.736
REASON/EXPLANATION
ATTACH ORIGINAL LABEL HERE
PLEASE PROVIDE CORRECT VIN
NOTE: Original label MUST accompany this application or order will be significantly delayed.
DEALER INFORMATION DEALER CODE: DEALER NAME: ADDRESS: STREET ADDRESS
CITY, STATE, ZIP CODE
TELEPHONE:
(
)
AREA CODE, TELEPHONE NUMBER
: FIRST NAME, LAST NAME
MAIL (DO NOT FAX) THE COMPLETED REQUEST FORM WITH THE OLD LABEL TO: TOYOTA MOTOR SALES, U.S.A. INC. TECHNICAL COMPLIANCE DEPARTMENT, S207 19001 S. WESTERN AVENUE TORRANCE, CA 90509–2991
Technical Service Information Bulletin March 2, 2005
Introduction
TIRE POSITIONING BEFORE NEW VEHICLE DELIVERY Models:
’05 – ’06 All Lexus
During the manufacturing process, tire characteristics are measured. Tires are then mounted on the vehicle as matched sets to help reduce conditions such as pulling or drifting. If the wheels are replaced or refinished before vehicle delivery, it is important that the tires remain on the vehicle in the same location and in the same direction of rotation. Please refer to the following procedure to ensure that the original tires stay in the same location on the vehicle.
Applicable Vehicles
Installation Procedure
S All 2005 – 2006 model year Lexus vehicles.
1. Mark the tire installation position on the inward facing tire sidewall. Example: Front Right = FR, Front Left = FL, Rear Right = RR, Rear Left = RL 2. Install the original tires on the new or refinished wheels with the marked side facing inwards. 3. Place the tire/wheel assemblies on the vehicle in the marked positions. NOTE: Torque the wheel nuts to the proper torque value in sequence.
Warranty Information
OP CODE
DESCRIPTION
TIME
OFP
T1
T2
N/A
Not Applicable to Warranty
–
–
–
–
Lexus s ASE Certification
Page 1 of 1
PRODUCT GENERAL INFORMATION
PG002-05
Title:
Technical Service Information Bulletin
REPLACEMENT VIN PLATES Models:
All Models
January 18, 2002
TSB UPDATE NOTICE: The information contained in this TSIB updates PG016–01 dated May 4, 2001. Revised text is red and underlined. The changes will take place February 1, 2002. Introduction
Replacement VIN plates (metal plates riveted to dashboard) may be available from Lexus providing the request meets the criteria listed below.
VIN Plate Location
Applicable Vehicles Replacement VIN Plate Criteria
S All Lexus vehicles. S The vehicle is in an accident and the plate is damaged. NOTE:
The original plate to be replaced MUST accompany the request. NOTE: If a plate is stolen, be sure to the State Police or your State’s Department of Motor Vehicles (DMV). In most cases the State DMV will issue a unique number so that the original number can be included on stolen vehicle listings. If this is the case, a replacement plate is NOT available from Lexus. However, the original VIN, NOT the state issued VIN, must be used on all warranty claims. Procurement Procedure
To request a replacement plate, complete a copy of the form on the back of this page. Note that the damaged VIN plate MUST accompany the request form. Your dealer parts will be billed $25.00 for each replacement of a damaged plate. NOTE: All replacement plates for damaged and/or stolen vehicles are subject to approval by the Technical Compliance Department. If you have any specific questions, (310) 468–3390.
Warranty Information
OP CODE
DESCRIPTION
TIME
OPN
T1
T2
N/A
Not Applicable to Warranty
–
–
–
–
Lexus s ASE Certification
Page 1 of 2
PRODUCT GENERAL INFORMATION
PG003-02
Title:
APPLICATION FOR REPLACEMENT VIN PLATE
REASON FOR REPLACEMENT ACCIDENT DAMAGE OTHER REASON/EXPLANATION
PLEASE PROVIDE CORRECT VIN
ATTACH DAMAGED PLATE HERE
DEALER INFORMATION DEALER CODE: DEALER NAME: ADDRESS: STREET ADDRESS
CITY, STATE, ZIP CODE
TELEPHONE:
(
)
AREA CODE, TELEPHONE NUMBER
: FIRST NAME, LAST NAME
MAIL (DO NOT FAX) THE COMPLETED REQUEST FORM WITH THE OLD PLATE TO: TOYOTA MOTOR SALES, U.S.A. INC. TECHNICAL COMPLIANCE DEPARTMENT, S207 19001 S. WESTERN AVENUE TORRANCE, CA. 90509–2991
Technical Service Information Bulletin September 12, 2002 Introduction
BATTERY MAINTENANCE FOR IN-STOCK VEHICLES & PRE-DELIVERY Models:
All Models & Model Years Through Current
A battery in a stored vehicle is subject to conditions that can reduce its performance and life. These conditions include storage period, temperature, parasitic drain, and battery load. Because of these factors, battery inspection and maintenance are required in order to ensure proper operation and optimal battery life. As a matter of policy, Lexus does not provide battery warranty coverage for discharged and/or failed batteries due to lack of maintenance; it is the dealer’s responsibility to maintain the specified state of charge of the vehicle’s battery while in stock and assure proper state of charge at delivery. To eliminate customer service concerns due to an undercharged battery during the first few weeks of ownership, all dealers should check battery state of charge and recharge, if necessary, just prior to delivery (i.e., within 48 hours of delivery). This new procedure will improve the new vehicle ownership experience by greatly reducing the risk of having a low performance battery concern due to extended storage periods and/or short engine run times prior to the vehicle sale.
S All models and model years through current.
Applicable Vehicles
Required Tools & Material
SPECIAL SERVICE TOOLS (SSTs)
MICROPRO 815 Digital Battery Analyzer (Essential SST)*
*
MANUFACTURER
PART NUMBER
Midtronics
00002–MP815–T
This SST can be ordered through SPX/OTC by calling 1–800–933–8335.
NOTE: MICROPRO 815 Digital Battery Analyzer should be periodically updated through the Technical Information System (TIS) for new vehicle models. For detailed information, please see TSIB SS002–02, “Midtronics Battery Tester Software Update.”
Warranty Information
OP CODE
DESCRIPTION
TIME
OFP
T1
T2
N/A
Not Applicable to Warranty
–
–
–
–
Lexus s ASE Certification
Page 1 of 4
PRODUCT GENERAL INFORMATION
PG009-02
Title:
BATTERY MAINTENANCE FOR IN–STOCK VEHICLES & PRE–DELIVERY – PG009-02 Recommended Equipment
TOOLS & EQUIPMENT
September 12, 2002
MANUFACTURER
PART NUMBER
Fast Battery Charger**
Associated
ASE6003
Fast Battery Charger**
Christie
CAPPDQ
** These tools can be ordered through the Lexus Approved Dealer Equipment program by calling 1–800–368–6787.
NOTE: The “Fast Battery Chargers” listed above have been tested and approved by Lexus. These state–of–the–art “smart” chargers were designed to charge batteries at an accelerated rate, without the possibility of damage. Using non–microprocessor controlled battery chargers for fast charging purposes can damage the battery. Inspection Procedure
All vehicles are to be inspected according to the procedures listed below using the MICROPRO 815 battery tester no more than 48 hours prior to customer vehicle delivery. PRIOR TO TESTING: If necessary, remove battery surface charge by turning on high beam headlights for 60 seconds, then let battery voltage recover for one minute.
1. Connect test clamps to battery. (Display will show four zeros indicating a good connection). 2. For cold battery (<32rF) or after charge test, press TEST MODE key until appropriate test is selected. 3. Input battery stock number. NOTE: Stock number must be used for warranty cases because you cannot read the warranty code if CCA/CA rating is input.
4. Press STK#/Code key to start test. NOTE: Stock numbers are listed on the reference card located in the tester’s cover. Stock numbers can also be referenced on TIS. The TIS listings will always have up–to–date information. Stock number location in TIS: 1. Go to TIS Home Page. 2. Click on “Diagnostics.” 3. Click on “Midtronics Battery Tester Software.” 4. Click on “Stock Number Chart.”
Page 2 of 4
BATTERY MAINTENANCE FOR IN–STOCK VEHICLES & PRE–DELIVERY – PG009-02 Inspection Procedure (Continued)
September 12, 2002
5. Read STATE OF CHARGE and BATTERY CONDITION. a. If battery is at 75% STATE OF CHARGE or greater, release vehicle to new owner. b. If battery is less than 75% STATE OF CHARGE proceed to Battery Service Procedure.
Battery Service Procedure
Follow the procedures below according to the BATTERY CONDITION results. BATTERY CONDITION: “Good return to service” (less than 75% State of Charge) Charge battery using one of the recommended chargers indicated above (or equivalent) following the Quick Charge instructions accompanying that machine. BATTERY CONDITION: “Charge and return to service” Charge battery using one of the recommended chargers indicated above (or equivalent) following the Quick Charge instructions accompanying that machine. BATTERY CONDITION: “Charge and retest” The battery must be Quick Charged and retested using the After charge test mode. Carry out the service according to the result of the retest. BATTERY CONDITION: “Replace” The battery must be replaced. Press the STK#/CODE key to show the warranty code for the repair order and for the Warranty Battery Label.
Battery Replacement
If a vehicle battery needs to be replaced for a warrantable condition, make sure to complete a Warranty Battery Label and affix it to the failed battery for proper warranty parts and claim processing. Please include the Vehicle Identification Number and warranty code on the Warranty Battery Label.
WARRANTY BATTERY LABEL ETIQUETA PARA BATERIA DE GARANTIA (Please Print / Llénese con Letra de Molde Por Favor)
Dealer Code Código de Agencia
Vehicle Identification Number (VIN) Número de Identificación de Vehículo (NIV)
Repair Order No. No. de Orden de Reparación
Veh. Date of First Use Fecha de Primer Uso del Veh.
08/02
Repair Date Fecha de Reparación
Failure Code Código de Falla
Original Install Date Fecha de Instalación Original (Svc. part replacement only/ solamente para el reemplazo de partes de servicio)
Battery Mos. In Svc. Número de meses que Batería está en servicio
00404–BTTRY–LABEL
Page 3 of 4
BATTERY MAINTENANCE FOR IN–STOCK VEHICLES & PRE–DELIVERY – PG009-02 Recommended Battery Maintenance
September 12, 2002
In addition to this new pre–delivery battery test, a monthly battery inspection is still required for stored vehicles. If your dealership is located in an area subject to extreme temperatures (hot or cold), periodic maintenance may need to be performed more frequently. To reduce parasitic battery drain for vehicles in storage for one week or more, the negative battery cable should always be disconnected to reduce battery discharge. When the negative battery cable is reconnected, please check and reset electrical components such as the clock, radio, etc. NOTE: For your reference, the electrical system is made inoperative by removing the appropriate fuse indicated in the Electrical Wiring Diagram.
Page 4 of 4
Technical Service Information Bulletin March 11, 2005
FAILURE TO INITIALIZE CAN INTERFACE MODULE Models:
’04 – ’05 Applicable Models
TSIB REVISION NOTICE: S June 23, 2005: The “Required SSTs” section has been updated. The previous TSIB should be discarded. Introduction
If the Diagnostic Tester fails to initialize CAN–based communication with on–board vehicle controllers, a damaged cable or inoperative CAN Interface Module may be at fault. This bulletin provides test procedures to check the integrity of the Diagnostic Tester cables and the CAN Interface Module.
Applicable Vehicles
S 2004 – 2005 model year CAN–equipped vehicles including 2004 model year LS 430 and 2005 model year GX 470 and LS 430.
Warranty Information
OP CODE
DESCRIPTION
TIME
OFP
T1
T2
N/A
Not Applicable to Warranty
–
–
–
–
Lexus s ASE Certification
Page 1 of 6
SPECIAL SERVICE TOOLS
SS001-05
Title:
FAILURE TO INITIALIZE CAN INTERFACE MODULE – SS001-05 Revised Required SSTs
ITEM NO.
1
SPECIAL SERVICE TOOLS (SSTs)
Diagnostic Tool Set*
March 11, 2005
PART NUMBER
QTY
DRW**
LEX220036
1
8
01002744
1
8
Four (4) components from this kit/set are required: COMPONENT(S) OF KIT/SET
S Tester (P/N 02002019) S 12 Megabyte Program Card Kit (P/N 01002593–005) with version 12.2a Software (or later) S 14/26 Pin DLC Cable (P/N 02001637) S 14 Pin DLC Self Test Adapter (P/N 02001607)
2
CAN Module Kit*
COMPONENT(S) OF KIT/SET
NOTE: S All components from this kit/set are required S Module box cannot be ordered separately S J1962 OBD2–II (CAN DLC) (P/N 02003180)
* Essential SSTs. ** Refers to drawer number in SST Storage System.
NOTE: Additional Diagnostic Tool Sets, CAN Module Kits, Program Cards, or other SSTs may be ordered by calling SPX/OTC at 1-800-933-8335.
Page 2 of 6
FAILURE TO INITIALIZE CAN INTERFACE MODULE – SS001-05 Revised Diagnostic Procedure
March 11, 2005
Failure to initialize CAN–based communications between the Diagnostic Tester and on–board vehicle controllers can be caused by the following issues: S The 14/26 Pin DLC cable is damaged, causing an open communication circuit. S The DLC cable is damaged, causing an open communication circuit. S The CAN Interface Module is damaged. S The vehicle’s CAN Communication System has a fault, requiring further vehicle diagnostics. NOTE: The Diagnostic Tester may operate properly in other modes such as OBD/MOBD and CARB OBDII with a damaged cable or CAN module.
Figure 1
14/26 Pin DLC Cable (P/N 02001637)
CAN Interface Module Only
J1962 OBD2–II Cable (CAN DLC) Only (P/N 02003180)
J1962 OBD2–II Cable & CAN Interface Module (P/N 01002744) NOTE: To lengthen the Diagnostic Tester cable life, do not wrap the cable around the tester, or hold the tester only by the cable.
Page 3 of 6
FAILURE TO INITIALIZE CAN INTERFACE MODULE – SS001-05 Revised Diagnostic Procedure (Continued)
March 11, 2005
To determine the cause of communication error, perform the following steps: 1. Using the Diagnostic Tester, perform the CAN MODULE VERSION self test. Select DIAGNOSIS/SETUP/SELF TEST and perform the following screen flow. NOTE: Before performing test, confirm that the Diagnostic Tester, 14/26 Pin DLC cable, and CAN Interface Module are all securely connected.
Figure 2
SELF TEST MENU 1: DISPLAY/LEDs 2: KEYBOARD 3: SOUND 4: MEMORY 5: DATA LINK 6: AUTOPROBE 7: RS232 8: INST PORT 9: SYSTEM INFO 0: CAN MODULE VER
INITIALIZING CAN INTERFACE PLEASE WAIT.
OK
NG
Toyota CAN VIM 1.0
CAN VIM did not respond
PRESS [EXIT]
Press [ENTER]
SELF TEST Result:
OK
NG
SELF TEST FAILED: CAN VIM did not respond. Go to step 2.
SELF TEST ED: Go to step 3. This response verifies the CAN module and the 14/26 Pin DLC cable are OK.
Page 4 of 6
FAILURE TO INITIALIZE CAN INTERFACE MODULE – SS001-05 Revised Diagnostic Procedure (Continued)
March 11, 2005
2. Perform the Data Link Self Test (Figure 3). Figure 3
SELF TEST MENU 1: DISPLAY/LEDs 2: KEYBOARD 3: SOUND 4: MEMORY 5: DATA LINK 6: AUTOPROBE 7: RS232 8: INST PORT 9: SYSTEM INFO
The Data Link Self Test Adapter (P/N 02001607) is included in the Lexus Diagnostic Tool Set (P/N LEX220036)
DATA LINK SELF–TEST
Install Data Link Self–Test Adapter to the end of the Data Link Cable
Press [ENTER]
DATA LINK SELF–TEST Now testing the data link. To test cable integrity, please flex cable repeatedly. (15–20 seconds) Press [EXIT] to QUIT
OK
NG
DATA LINK SELF–TEST
DATA LINK SELF–TEST **FAILED** FAILED SDL 1
ED
Check Self–Test Adapter Installation Press [EXIT]
PRESS [EXIT]
DATA LINK SELF TEST Result:
OK
DATA LINK TEST FAILED: NG
Replace 14/26 Pin DLC cable (P/N 02001637).
DATA LINK TEST ED: Replace CAN Interface Module (P/N 01002744).
Page 5 of 6
FAILURE TO INITIALIZE CAN INTERFACE MODULE – SS001-05 Revised Diagnostic Procedure (Continued)
March 11, 2005
3. Inspect the J1962 OBD2–II cable (CAN DLC). A. Disconnect the CAN Interface Module from the J1962 OBD2–II cable (CAN DLC). A small Phillips screwdriver is required to separate the CAN Interface Module from the J1962 OBD2–II cable. B. Test the J1962 OBD2–II cable (CAN DLC) for continuity. Figure 4 CABLE TEST J1962 OBD2–II Cable (P/N 02003180)
Pin 5 to Pin 15
Pin 15 to Pin 22
J1962 OBD2–II Cable (CAN DLC) Test Result:
OK
NG
(More than 6 Ω) Replace the J1962 OBD2–II cable (CAN DLC, P/N 02003180).
Suspect vehicle side problem. Refer to the Technical Information System (TIS): applicable model year Repair Manual: Diagnostics: CAN Communication System: Problem Symptoms Table: Check CAN Bus Line. NOTE: If the Diagnostic Tester successfully communicates with another CAN–equipped vehicle, suspect vehicle side problem.
Page 6 of 6
Technical Service Information Bulletin August 26, 2002
IMMOBILIZER KEY CODE RESET Models:
Applicable ES 300, GS 430, GS 300, IS 300, & LX 470
TSIB REVISION NOTICE: S August 26, 2005: The model years for each model have been specifically defined in the “Applicable Vehicles” section. The “Required SSTs” section has been updated. S February 11, 2003: Model years for LX 470 revised to apply to 2001 and 2002 only. S August 26, 2002: ES 300, GS 300, and IS 300 models added. Model years for GS 430 and LX 470 vehicles expanded to include 2002 and later. Diagnostic Tester software in Required Tools & Material updated to version 9.01a (or later). Previous versions of this TSIB should be discarded. Introduction
Immobilizer Reset is a new feature that allows the registration of a new Master Key even if all original Master Keys are lost. Once the Immobilizer system is reset, all previously ed keys will be erased.
Applicable Vehicles
*
MODEL YEAR
MODEL
ENGINE MODEL
2001 – 2005*
GS 430
3UZ–FE
2001 – 2002*
LX 470
2UZ–FE
2002 – 2003*
ES 300
1MZ–FE
2002 – 2005*
GS 300
2JZ–GE
2002 & Later*
IS 300
2JZ–GE
Immobilizer Key Code Reset procedure is not available for prior model years.
NOTE: Refer to TIS (Technical Information System) for the most current applicable vehicle information.
Parts Information
Warranty Information
PREVIOUS PART NUMBER
CURRENT PART NUMBER
PART NAME
N/A
Model Specific
Replacement Key (Master or Sub)
OP CODE
DESCRIPTION
TIME
OFP
T1
T2
N/A
Not Applicable to Warranty
–
–
–
–
Lexus s ASE Certification
Page 1 of 6
SPECIAL SERVICE TOOLS
SS002-01
Title:
IMMOBILIZER KEY CODE RESET – SS002-01 Revised Required SSTs
ITEM NO.
SPECIAL SERVICE TOOLS (SSTs)
August 26, 2002
PART NUMBER
QTY
DRW**
LEX220036
1
8
01002744
1
8
Lexus Diagnostic Tester Kit* 1
NOTE: S All components from this kit/set are required S 12 Megabyte Diagnostic Tester Program Card (P/N 01002593–005) with version 13.0a Software (or later) is required CAN Interface Module Kit*
2
NOTE: S All components from this kit/set are required
* Essential SSTs. ** Refers to drawer number in SST Storage System.
NOTE: Additional Diagnostic Tester Kits, CAN Interface Modules, Program Cards, or other SSTs may be ordered by calling SPX/OTC at 1-800-933-8335.
Function Description
The Immobilizer Reset function is a 5-step process: 1. Using the Diagnostic Tester, retrieve a “Seed Number” through the OBD/MOBD Immobilizer function. S A “Seed Number” is a unique number provided by the Diagnostic Tester and validated by TIS (Technical Information System) in order to return a code. 2. Using TIS, select Immobilizer Reset, and complete the request form to retrieve a “code Number.” S A “code Number” is a unique number required by the Diagnostic Tester to reset the ECU allowing it to accept a new Master Key. 3. Enter the “code Number” received from TIS into the Diagnostic Tester. 4. Confirm successful Immobilizer reset and new Master Key registration. 5. any additional customer keys.
Page 2 of 6
IMMOBILIZER KEY CODE RESET – SS002-01 Revised Key Code Reset Procedure
August 26, 2002
NOTE: Ensure that the Diagnostic Tester is equipped with the latest version of software (13.0a or later).
Connect the Diagnostic Tester to DLC3 and turn ignition ON. 1. Using the Diagnostic Tester, follow the screen flows below to retrieve the “Seed Number.” (DO NOT DISCONNECT the Diagnostic Tester from the vehicle during this process.) FIGURE 2. DIAGNOSTIC TESTER SCREEN FLOW
A
B
C
*APPLICATION SELECT*
FUNCTION SELECT FOR NORTH AMERICA
OBD/MOBD MENU
1: DIAGNOSIS 2: CUSTOMIZE 3: ECU REPROGRAM
1: 2: 3: 4: 5: 6: 7: 8: 9: 0:
OBD/MOBD ENHANCED OBD II CARB OBD II BREAK-OUT BOX NVH AUTOPROBE O2 RPM CHECK SNAPSHOT REVIEW SETUP GAS ANALYSIS
1: 2: 3: 4: 5: 6:
CODES (ALL) ENGINE AND ECT ABS / VSC CCS IMMOBILIZER SRS AIRBAG
D
E
F
DIAGNOSTIC MENU IMMOBILIZER
KEY CODE UTILITY
KEY CODE RESET
1: CURRENT DATA 2: TROUBLE DATA
1: KEY REGISTRATION 2: KEY CODE ERASURE 3: AUTO REG CLOSURE
4: KEY CODE UTILITY
CONFIRM – Master Key is in ignition. – ignition is ON. NOTE: If ignition is OFF, then EXIT to OBD/MOBD Menu.
9: KEY CODE RESET *
G
H
KEY CODE RESET
KEY CODE RESET
This Function will RESET the ed Key Code.
SEED NUMBER
999999
DO YOU WISH TO CONTINUE RESETTING?
Please input SEED NUMBER into TIS
PRESS [YES] OR [NO]
PRESS [ENTER]
PRESS [ENTER]
NOTICE: S Do NOT turn the ignition OFF. S Do NOT disconnect the Diagnostic Tester.
* Option “9: KEY CODE RESET” will not appear if your present vehicle does not the key code reset functions.
Page 3 of 6
IMMOBILIZER KEY CODE RESET – SS002-01 Revised Key Code Reset Procedure (Continued)
August 26, 2002
2. Using TIS, select Immobilizer Reset, and complete the request form to retrieve a “code Number.” A. Click on Diagnostics. B. Click on Immobilizer Reset. FIGURE 3. SELECTING IMMOBILIZER RESET ON TIS
A B
C. Read the instructions on the screen and click on Continue. (See Figure 4 below.) FIGURE 4. IMMOBILIZER RESET INSTRUCTIONS ON TIS
C
Page 4 of 6
IMMOBILIZER KEY CODE RESET – SS002-01 Revised Key Code Reset Procedure (Continued)
August 26, 2002
D. Complete the request form and enter the “Seed Number” from the Diagnostic Tester. Click on Submit (Figure 5). NOTE: All fields must be completed. FIGURE 5. REQUEST FORM ON TIS
D E. TIS will now return the code that needs to be entered into the Diagnostic Tester. NOTE: The code given by TIS is only valid for one Immobilizer Reset Event.
FIGURE 8. RECEIVING CODE FOR DIAGNOSTIC TESTER
E
Page 5 of 6
IMMOBILIZER KEY CODE RESET – SS002-01 Revised Key Code Reset Procedure (Continued)
August 26, 2002
3. Using the numbered keys (0–9) on the Diagnostic Tester, enter the “code Number” received from TIS. (See Figure 7 below.) Press ENTER to clear all ed key codes. NOTE: Key Code Reset takes approximately 16 minutes.
FIGURE 7. CODE ENTRY SCREEN FLOW
A
B
C
KEY CODE RESET
KEY CODE RESET
KEY CODE RESET
Please insert CODE NUMBER from TIS
**NOW RESETTING** If the key was in the IG cylinder, do not remove it.
RESET COMPLETE
CODE NUMBER
000414
If the engine starts, this key code is ed correctly.
Remaining Time <16> Min.
PRESS [ENTER]
PRESS [ENTER]
4. Confirm successful Immobilizer reset and new Master Key registration by starting the vehicle. NOTE: If the vehicle starts, the new Master Key code is ed correctly. If the vehicle does not start, perform the Immobilizer Reset function again.
5. All previously ed key codes have been erased except the Master Key used during “Key Code Reset.” any additional customer keys by using “Key Registration.” Each key will start the engine if ed correctly. S Please refer to TSIB No. SS006–99, “Scantool Immobilizer Key Code Utility,” for additional detail on this procedure. FIGURE 8. KEY REGISTRATION
A KEY CODE UTILITY 1: KEY REGISTRATION 2: KEY CODE ERASURE 3: AUTO REG CLOSURE
9: KEY CODE RESET
Page 6 of 6
(See TSIB No. SS006–99)
Technical Service Information Bulletin November 28, 2005
Introduction
Applicable Vehicles
Test Disc Specifications
Warranty Information
CD SKIP VERIFICATION USING LEXUS MASTER CD Models:
’01 – ’06 All Models
Lexus has developed a master CD to be used for customer complaints of the CD player skipping or CD player cannot read disc. This disc has been specially manufactured to test the performance of the Lexus CD players. Using this master CD will confirm that the radio exceeds Lexus’ specification for CD player performance.
S 2001 – 2006 model year Lexus vehicles.
TRACKS
DEFECT
MUSIC
TRACK TIME
1
None
Minuetto
3:15
2
0.8 mm Black Dot
2ème Gymnopédie
2:32
3
0.6 mm Black Dot
Overture Minature
3:02
4
None
Marche
2:36
5
None
Claire de Lune
3:09
6
None
Nocturne
3:12
7
0.4 mm Scratch
Danse de la Fée Dragée
2:28
8
0.6 mm Scratch
Danse Arabe
2:29
9
0.8 mm Scratch
Fantanisie-Improptu
2:51
10
1.0 mm Scratch
Hungarian Dance No. 5
2:02
11
None
Prelude
3:38
12
None
Maiden’s Prayer
3:15
13
Fingerprint 65 um
Valse des Fleurs
3:08
14
None
1ère Gymnopedie
2:54
15
Fingerprint 75 um
Danse Des Mirlitons
2:06
OP CODE
DESCRIPTION
TIME
OFP
T1
T2
N/A
Not Applicable to Warranty
–
–
–
–
Lexus s ASE Certification
Page 1 of 2
SPECIAL SERVICE TOOLS
SS003-05
Title:
CD SKIP VERIFICATION USING LEXUS MASTER CD – SS003-05 Required SSTs
ITEM NO.
SPECIAL SERVICE TOOLS (SSTs)
November 28, 2005
PART NUMBER
QTY
DRW**
00002–07130–SCD
1
22
Lexus Master CD* 1
NOTE: S All components from this kit/set are required
* Essential SSTs. ** Refers to drawer number in SST Storage System.
NOTE: Additional SSTs may be ordered by calling SPX/OTC at 1-800-933-8335.
Repair Procedure
1. Make sure the vehicle is stationary during the test. 2. Insert a compact disc (NOT the Lexus Master CD) to make sure the radio can accept and eject the disc without damaging it. 3. Check the Lexus Master CD for any unintended scratches or dirt. Wipe away dirt using a glass cleaning cloth. If the disc is damaged, order a replacement master CD. 4. Insert the Lexus Master CD and change to track number 9. 5. Play the track for one minute. A. If skips are heard, replace the CD player. B. If NO skips are heard, the CD player is working normally. Check the customer’s CDs for scratches or other damage to the discs. Confirm that the customer is using a pre-recorded CD, NOT CD-Rs or CD-RWs as they may NOT have been burned properly. NOTE: S Tracks 1 – 8 and 11 – 14 are reference tracks. They can be used, but the conditions are less severe than track 9. Do NOT use tracks 10 and 15. S Track 9 (0.8 mm scratch) is much more severe than the Lexus engineering specification in order to ensure customer satisfaction. If the customer’s radio es this test, a replacement radio will NOT improve the performance. S This disc has been specially manufactured with a physical defect for the purposes of testing the CD player’s performance. It is NOT possible to make copies of this disc that can be used to test the CD player’s performance.
Page 2 of 2
July 6, 2001
DIAGNOSTIC TESTER IMMOBILIZER FUNCTIONS Models:
Applicable ES 330, GS 300, GS 430, GX 470, LS 430, LX 470, RX 330, & SC 430
TSIB REVISION NOTICE: S August 26, 2005: The model years for each model have been specifically defined in the “Applicable Vehicles” section. The following vehicles have been added to the “Applicable Vehicles” section: ES 330, GS 300, GS 430, and RX 330. The “Required SSTs” section has been updated. S January 9, 2003: GX 470 and LX 470 have been added to Applicable Vehicles. The “Required SSTs” section has been updated to the current version software. Screen flows revised (screen C and D) in Figures 1 (screen C and D), 2 (screen C), 3 (screen C), 4 (screen C and G), and 9 (screen A). S The information contained in this TSIB supercedes the original SS005–01. Previous versions of this TSIB should be discarded. Introduction
The Diagnostic Tester incorporates for Immobilizer system service. This bulletin covers the following Immobilizer functions available using the Diagnostic Tester: S Transponder Key Type S Transponder Code Registration S Transponder Code Erasure S Transponder ECU Reset S Transponder ECU Replacement S Engine ECU Replacement NOTE: The available functions and procedures for the models listed in this TSIB differ slightly from previous models and other Immobilizer systems currently in use on Lexus vehicles.
Warranty Information
OP CODE
DESCRIPTION
TIME
OFP
T1
T2
N/A
Not Applicable to Warranty
–
–
–
–
Lexus s ASE Certification
Page 1 of 14
SPECIAL SERVICE TOOLS
Technical Service Information Bulletin
SS005-01
Title:
DIAGNOSTIC TESTER IMMOBILIZER FUNCTIONS – SS005-01 Revised Applicable Vehicles
July 6, 2001
MODEL YEAR
MODEL
ENGINE MODEL
2001 & Later
LS 430
3UZ–FE
2002 & Later
SC 430
3UZ–FE
GX 470
2003 & Later
2UZ–FE
LX 470 ES 330
2004 & Later
3MZ–FE
RX 330
2006
GS 300 (w/o Smart Key)
3GR–FSE
GS 430 (w/o Smart Key)
3UZ–FE
NOTE: Refer to TIS (Technical Information System) for the most current applicable vehicle information.
Parts Information
Required SSTs
PREVIOUS PART NUMBER
CURRENT PART NUMBER
PART NAME
N/A
Model Specific
Replacement Transponder Key (Master or Sub)
ITEM NO.
SPECIAL SERVICE TOOLS (SSTs)
PART NUMBER
QTY
DRW**
LEX220036
1
8
01002744
1
8
Lexus Diagnostic Tester Kit* 1
NOTE: S All components from this kit/set are required S 12 Megabyte Diagnostic Tester Program Card (P/N 01002593–005) with version 13.0a Software (or later) is required CAN Interface Module Kit*
2
NOTE: S All components from this kit/set are required
* Essential SSTs. ** Refers to drawer number in SST Storage System.
NOTE: Additional Diagnostic Tester Kits, CAN Interface Modules, Program Cards, or other SSTs may be ordered by calling SPX/OTC at 1-800-933-8335.
Page 2 of 14
DIAGNOSTIC TESTER IMMOBILIZER FUNCTIONS – SS005-01 Revised Function Description
July 6, 2001
1. Transponder Key Type Before any Immobilizer functions are performed, the type of transponder key that you are attempting to use for the service operation. Some functions may only be performed with a ed Master Key. 2. Transponder Code Registration This function allows the registration of additional transponder keys (Master or Sub) using a ed Master Key. 3. Transponder Code Erasure This function allows the to erase all the transponder keys except the ed Master Key used during this function. 4. Transponder ECU Reset This function allows the registration of a new Master Key even if all original Master Keys are lost. Once the Immobilizer system is reset, all previous ed keys will be erased. 5. Transponder ECU Replacement When the Transponder ECU is replaced, the transponder keys must be ed to the new ECU, auto registration closed, and ECU communication completed. 6. Engine ECU Replacement When the Engine ECU is replaced, ECU communication must be completed to synchronize an encrypted security code between the engine and Transponder ECUs.
Page 3 of 14
DIAGNOSTIC TESTER IMMOBILIZER FUNCTIONS – SS005-01 Revised Operation Procedure TRANSPONDER KEY TYPE
July 6, 2001
1. Transponder Key Type Before any Immobilizer functions are performed, the type of transponder key that you are attempting to use for the service operation. Some functions may only be performed with a ed Master Key. A. Insert the current key into the ignition cylinder and turn to the ON position. HINT: The Immobilizer key blanks are preconfigured as Master or Sub Keys. Master Key blanks cannot be ed as Sub Keys nor can Sub Key blanks be ed as Master Keys. Also, the flat key is now enabled as a full function Master Key that must be ed.
B. Follow the screen flow in Figure 1 to determine the key type. C. Key type and registration status will be indicated on the Immobilizer data list (Figure 1, screen E). S “MATCH” = The key in the ignition cylinder matches this key type. S “NOMATCH” = The key in the ignition cylinder does NOT match this key type. FIGURE 1. TRANSPONDER KEY IDENTIFICATION
A
B
C
FUNCTION SELECT
OBD/MOBD MENU
DIAGNOSTIC MENU IMMOBILIZER
1: 2: 3: 4: 5: 6: 7: 8: 9: 0:
OBD/MOBD ENHANCED OBD II CARB OBD II BREAK OUT BOX NVH AUTOPROBE O2 RPM CHECK SNAPSHOT REVIEW SETUP GAS ANALYSIS
D SELECT DATA ALL DATA
Page 4 of 14
1: 2: 3: 4: 5: 6: 7: 8: 9:
CODES (ALL) ENGINE AND ECT TIRE PRES WARN ABS / VSC CCS AIR CONDITIONER IMMOBILIZER SRS AIRBAG GATEWAY
E KEY SW . . . . . . . . . . . . . . . . . ON IG SW . . . . . . . . . . . . . . . . . . . ON IMMOBILIZER . . . . . . . . UNSET PERMIT (START) . . . . . . . . . . OK RESPONSE . . . . . . . . . . . . . . OK FRAME . . . . . . . . . . . . . . . . . . OK SERIAL NUMBER . . . . . . . . . OK ENCRYPT CODE . . . . . . . . . . OK STATUS . . . . . . . . . . . . . . . . . . OK BCC . . . . . . . . . . . . . . . . . . . . . OK SUB KEY . . . . . . . . . NOMATCH MASTER KEY . . . . . . . . MATCH REGIST SUB CODE . . . . . . . . 1 REGIST MAS CODE . . . . . . . . 2 REG CODE SPACE . . NOT FUL
1: 2: 3: 4: 5:
DATA LIST DTC INFO ACTIVE TEST SNAPSHOT ID UTILITY
DIAGNOSTIC TESTER IMMOBILIZER FUNCTIONS – SS005-01 Revised Operation Procedure (Continued) TRANSPONDER CODE REGISTRATION
July 6, 2001
2. Transponder Code Registration This function allows the normal registration of additional transponder keys (Master or Sub) using a ed Master Key. NOTE: This function requires the use of one ed Master Key. The use of a Sub Key will NOT complete Transponder Code Registration. Attempting registration of additional keys with only a Sub Key will result in errors and incomplete registration.
HINT: The Immobilizer key blanks are preconfigured as Master or Sub Keys. Master Key blanks cannot be ed as Sub Keys nor can Sub Key blanks be ed as Master Keys. Also, the flat key is now enabled as a full function Master Key that must be ed.
A. Insert a ed Master Key into the ignition cylinder and turn to the ON position. B. Follow the screen flow in Figure 2 to new Master or Sub keys. It is possible to up to 5 Master Keys and 3 Sub Keys. C. Be sure to follow the instructions on key insertion, ignition ON/OFF and key removal exactly as described on the Diagnostic Tester. HINT: The security indicator light reveals the following information: S Always ON and NO key in IG* = Transponder ECU in Auto Registration mode S Blinking and NO key in IG = Normal operation S Blinking Code 21 = Transponder Code Registration failed S Blinking Code 22 = Attempt was made to an already ed Transponder Code Blinks 1.8 sec
0.2 sec
Code 2–1 0.25 sec
0.25 sec
0.5 sec
1 sec
Code 2–2 0.25 sec
0.25 sec
1 sec
0.5 sec
* Immediately after the transponder ECU is installed, the security indicator will blink.
Page 5 of 14
DIAGNOSTIC TESTER IMMOBILIZER FUNCTIONS – SS005-01 Revised Operation Procedure (Continued) TRANSPONDER CODE REGISTRATION
FIGURE 2. REGISTRATION OF ADDITIONAL TRANSPONDER KEY
B
C
OBD/MOBD MENU
DIAGNOSTIC MENU IMMOBILIZER
A FUNCTION SELECT 1: 2: 3: 4: 5: 6: 7: 8: 9: 0:
OBD/MOBD ENHANCED OBD II CARB OBD II BREAK OUT BOX NVH AUTOPROBE O2 RPM CHECK SNAPSHOT REVIEW SETUP GAS ANALYSIS
1: 2: 3: 4: 5: 6: 7: 8: 9:
CODES (ALL) ENGINE AND ECT TIRE PRES WARN ABS / VSC CCS AIR CONDITIONER IMMOBILIZER SRS AIRBAG GATEWAY
1: 2: 3: 4: 5:
DATA LIST DTC INFO ACTIVE TEST SNAPSHOT ID UTILITY
F
D
E
ID UTILITY IMMOBILIZER
THIS FUNCTION WILL THE TRANSPONDER CODE.
1: TRANSP CODE REG 2: TRANSP CODE ERS
Do you wish to continue the registration?
9: TRANSP CODE RESET
PRESS [YES] OR [NO]
Remaining Time: [120] Seconds
G
H
I
Please remove the Master Key from the IG cylinder within 20 seconds. Then press [ENTER]
Please insert the New Key into the IG cylinder within 10 seconds. DO NOT TURN IG ON
Remaining Time: [20] Seconds
J THE TRANSPONDER CODE WAS ED CORRECTLY.
Remaining Time: [10] Seconds
K Please insert a Master Key and turn the IG to ON. If the ignition is already ON, please turn it OFF and back to ON.
PRESS [ENTER]
Page 6 of 14
July 6, 2001
PRESS [ENTER]
Please remove the Master Key from the IG cylinder, insert it again, and turn the IG ON within 120 seconds. Then press [ENTER]
**NOW ING** Please wait.
[60] Seconds
DIAGNOSTIC TESTER IMMOBILIZER FUNCTIONS – SS005-01 Revised Operation Procedure (Continued) TRANSPONDER CODE ERASURE
July 6, 2001
3. Transponder Code Erasure This function allows the to erase all the transponder keys except the ed Master Key used during this function. NOTE: This function requires the use of one ed Master Key. The use of a Sub Key will NOT complete Transponder Code Erasure.
A. Insert a ed Master Key into the ignition cylinder and turn to the ON position. B. Follow the screen flow in Figure 3 below to erase all Master or Sub keys, except the ed Master Key used for this procedure. FIGURE 3. ERASING TRANSPONDER CODES
A
B
C
FUNCTION SELECT
OBD/MOBD MENU
DIAGNOSTIC MENU IMMOBILIZER
1: 2: 3: 4: 5: 6: 7: 8: 9: 0:
OBD/MOBD ENHANCED OBD II CARB OBD II BREAK OUT BOX NVH AUTOPROBE O2 RPM CHECK SNAPSHOT REVIEW SETUP GAS ANALYSIS
1: 2: 3: 4: 5: 6: 7: 8: 9:
CODES (ALL) ENGINE AND ECT TIRE PRES WARN ABS / VSC CCS AIR CONDITIONER IMMOBILIZER SRS AIRBAG GATEWAY
1: 2: 3: 4: 5:
DATA LIST DTC INFO ACTIVE TEST SNAPSHOT ID UTILITY
D
E
F
ID UTILITY IMMOBILIZER
This function will ERASE ALL TRANSPONDER CODES except the Master key in the IG cylinder.
Please remove the Master Key from the IG cylinder, insert it again, and turn the IG ON within 120 seconds. Then press [ENTER]
1: TRANSP CODE REG 2: TRANSP CODE ERS
DO YOU WISH TO CONTINUE ERASING? 9: TRANSP CODE RESET
PRESS [YES] OR [NO]
G
H
***NOW ERASING*** WARNING: Master Key must be removed from IG cylinder within 10 seconds or erasure will not complete. Remaining Time: [10] Seconds
Remaining Time: [120] Seconds
ALL TRANSPONDER CODES EXCEPT THE INSERTED MASTER KEY’S TRANSPONDER CODE WERE ERASED.
PRESS [ENTER]
Page 7 of 14
DIAGNOSTIC TESTER IMMOBILIZER FUNCTIONS – SS005-01 Revised Operation Procedure (Continued) TRANSPONDER ECU RESET
July 6, 2001
4. Transponder ECU Reset This function allows the registration of a new Master Key even if all original Master Keys are lost. Once the Immobilizer system is reset, all previous ed keys will be erased. Use a new transponder Master Key to complete Transponder ECU Reset.
Immobilizer Reset The Immobilizer Reset function is a 4-step process: A. Using the Diagnostic Tester, retrieve a “Seed Number” through the OBD/MOBD Immobilizer function. S A “Seed Number” is a unique number provided by the Diagnostic Tester and validated at TMS in order to return a code. B. Using the TIS (Technical Information System) workstation, select Immobilizer Reset, and complete the request form to retrieve a “code Number.” S A “code Number” is a unique number required by the Diagnostic Tester to reset the ECU allowing it to accept a new Master Key. C. Enter the “code Number” received from TIS into the Diagnostic Tester, any additional customer keys, and close auto registration mode. D. Confirm successful Immobilizer reset and new Master Key registration.
Page 8 of 14
DIAGNOSTIC TESTER IMMOBILIZER FUNCTIONS – SS005-01 Revised Operation Procedure (Continued) TRANSPONDER ECU RESET
July 6, 2001
A. Connect the Diagnostic Tester to DLC3 and turn ignition ON. a. Using the Diagnostic Tester, retrieve a “Seed Number” through the OBD/MOBD Immobilizer function. b. Follow each step outlined in Figure 4. FIGURE 4. RETRIEVING A SEED NUMBER
A
B
C
FUNCTION SELECT
OBD/MOBD MENU
DIAGNOSTIC MENU IMMOBILIZER
1: 2: 3: 4: 5: 6: 7: 8: 9: 0:
OBD/MOBD ENHANCED OBD II CARB OBD II BREAK OUT BOX NVH AUTOPROBE O2 RPM CHECK SNAPSHOT REVIEW SETUP GAS ANALYSIS
D
1: 2: 3: 4: 5: 6: 7: 8: 9:
CODES (ALL) ENGINE AND ECT TIRE PRES WARN ABS / VSC CCS AIR CONDITIONER IMMOBILIZER SRS AIRBAG GATEWAY
E
ID UTILITY IMMOBILIZER 1: TRANSP CODE REG 2: TRANSP CODE ERS
Please open the Driver’s Door.
1: 2: 3: 4: 5:
DATA LIST DTC INFO ACTIVE TEST SNAPSHOT ID UTILITY
F This function will RESET the TRANSPONDER CODE. DO YOU WISH TO CONTINUE RESETTING?
9: TRANSP CODE RESET
PRESS [ENTER]
PRESS [YES] [YES] OR [NO]
G SEED NUMBER
999999
NOTICE: S Do NOT turn the ignition OFF S Do NOT disconnect the Diagnostic Tester from the vehicle.
Please insert SEED NUMBER into TIS PRESS [ENTER]
Page 9 of 14
DIAGNOSTIC TESTER IMMOBILIZER FUNCTIONS – SS005-01 Revised Operation Procedure (Continued) TRANSPONDER ECU RESET
B. Using the TIS workstation, select Immobilizer Reset, and complete the request form to retrieve a “code Number.” a. Click on Diagnostics. b. Click on Immobilizer Reset. FIGURE 5. SELECTING IMMOBILIZER RESET ON TIS
a b
c. Read the instructions on the screen and click on Continue. (See Figure 6 below.) FIGURE 6. IMMOBILIZER RESET INSTRUCTIONS ON TIS
c
Page 10 of 14
July 6, 2001
DIAGNOSTIC TESTER IMMOBILIZER FUNCTIONS – SS005-01 Revised Operation Procedure (Continued) TRANSPONDER ECU RESET
July 6, 2001
d. Complete the request form and enter the “Seed Number” from the Diagnostic Tester. Click on Submit (Figure 7). NOTE: All fields must be completed. FIGURE 7. REQUEST FORM ON TIS
d e. TIS will now return the code that needs to be entered into the Diagnostic Tester. NOTE: The code given by TIS is only valid for one Immobilizer Reset Event.
FIGURE 8. RECEIVING CODE FOR DIAGNOSTIC TESTER
e
Page 11 of 14
DIAGNOSTIC TESTER IMMOBILIZER FUNCTIONS – SS005-01 Revised Operation Procedure (Continued) TRANSPONDER ECU RESET
July 6, 2001
C. Using the numbered keys (0–9) on the Diagnostic Tester, enter the “code Number” received from TIS into the Diagnostic Tester (see Figure 9 below). Press ENTER to clear all ed transponder codes except the Master key in the ignition cylinder. NOTE: S During the reset process do not remove the key from the ignition. S This step takes approximately 16 minutes.
FIGURE 9. CODE ENTRY
A
B
C
Please insert CODE NUMBER from TIS
**NOW RESETTING**
RESETTING SUCCEEDED
If the key was in the IG cylinder, do not remove it.
All TRANSPONDER CODES were successfully reset.
Remaining Time <16> Min.
If a key remains in the IG cylinder, please remove it.
CODE NUMBER
000414
PRESS [ENTER]
D Master Keys and Sub key may be ed by inserting keys into IG. *INSERT KEYS NOW*
PRESS [ENTER]
PRESS [ENTER]
E To turn off auto– matic registration, insert a Master key and cycle IG 5 times within 10 seconds. [HINT] On automatic registration mode, the security indicator remains on unless a key is in the IG cylinder.
PRESS [ENTER]
S Following a reset, the Transponder ECU is in auto registration mode. S Auto registration mode allows 3 Master Keys and one Sub Key to automatically. S To additional keys, remove the Master Key currently in the ignition. Insert keys (Master or Sub) into the ignition cylinder without turning the ignition on or off – simply insert and remove. (See Figure 9, screen D.) NOTE: S If 4 keys are ed at this time, auto registration mode is automatically closed. S If less than 4 keys are ed at this time, auto registration mode must be closed manually by cycling the ignition ON/OFF more than 5 times in 10 seconds. (See Figure 9, screen E.) S If more than 4 keys need to be ed, use Transponder Code Registration.
Page 12 of 14
DIAGNOSTIC TESTER IMMOBILIZER FUNCTIONS – SS005-01 Revised Operation Procedure (Continued) TRANSPONDER ECU RESET
TRANSPONDER ECU REPLACEMENT
July 6, 2001
D. that keys are ed correctly by starting the engine with each newly ed key. NOTE: S If the vehicle starts, the new key code was ed correctly. S If the vehicle does not start with any key, perform the Immobilizer Reset function again. S If only one of the ed keys will not start the vehicle, attempt to the key again following the Transponder Code Registration procedure (page 5 of this bulletin).
5. Transponder ECU Replacement When the Transponder ECU is replaced, the transponder keys must be ed, auto registration closed, and ECU communication completed. A. Replacement transponder ECUs are in auto registration mode. This allows transponder keys to automatically as they are inserted into the ignition cylinder. It is possible to automatically 3 Master Keys, and 1 Sub Key. NOTE: S If 4 keys are ed at this time, auto registration mode is closed. S If less than 4 keys are ed at this time, auto registration mode must be closed manually by cycling the ignition ON/OFF more than 5 times in 10 seconds. S If more than 4 keys need to be ed, use Transponder Code Registration procedure (page 5 of this bulletin).
B. Once auto registration mode is closed, ECU Communication must be performed between the transponder ECU and the Engine ECU. Complete ECU communication using the following steps: a. Insert ed Master Key into the ignition cylinder. b. Turn ignition ON (engine OFF). c. Short Tc and CG terminals of DLC3 using Diagnosis Check Wire (SST 09843–18040 or equivalent) and leave for 30 minutes. (See Figure 10.) FIGURE 10. DLC3 SST 09843–18040 Tc = Pin 13 CG = Pin 4
16
15
14
13
12
11
10
9
8
7
6
5
4
3
2
1
View of Connector Is From enger Compartment
d. After 30 minutes, turn ignition OFF and remove check wire from DLC3 e. Start the vehicle to confirm successful ECU communication. NOTE: If ECU communication is not completed correctly, the engine will not start and DTC B2799 will be set. DTC B2799 will be cleared after engine starts correctly.
Page 13 of 14
DIAGNOSTIC TESTER IMMOBILIZER FUNCTIONS – SS005-01 Revised Operation Procedure (Continued) TRANSPONDER ECU REPLACEMENT
July 6, 2001
HINT: The security indicator light reveals the following information: S Always ON and NO key in IG* = Transponder ECU in Auto Registration mode S Blinking and NO key in IG = Normal operation S Blinking Code 21 = Transponder Code Registration failed S Blinking Code 22 = Attempt was made to an already ed Transponder Code Blinks 1.8 sec
0.2 sec
Code 2–1 0.25 sec
0.25 sec
Code 2–2
1 sec
0.25 sec
0.5 sec
0.25 sec
1 sec
0.5 sec
* Immediately after the transponder ECU is installed, the security indicator will blink.
ENGINE ECU REPLACEMENT
6. Engine ECU Replacement When the Engine ECU is replaced, ECU communication must be completed. ECU Communication must be performed between the transponder ECU and the Engine ECU. Complete ECU communication using the following steps: A. Insert ed Master Key into the ignition cylinder. B. Turn ignition ON (engine OFF). C. Short Tc and CG terminals of DLC3 using Diagnosis Check Wire (SST 09843–18040 or equivalent) and leave for 30 minutes. (See Figure 11.) FIGURE 11. DLC3 SST 09843–18040 Tc = Pin 13 CG = Pin 4
16
15
14
13
12
11
10
9
8
7
6
5
4
3
2
1
View of Connector Is From enger Compartment
D. After 30 minutes, turn ignition OFF and remove check wire from DLC3 E. Start the vehicle to confirm successful ECU communication. NOTE: If ECU communication is not completed correctly, the engine will not start and DTC B2799 will be set. DTC B2799 will be cleared after engine starts correctly.
Page 14 of 14
STEERING INTERMEDIATE SHAFT NOISE Models:
’03 ES 300, ’04 – ’05 ES 330
April 29, 2005
Introduction
Some customers may hear and feel a clunk, pop, or knock type noise when turning the steering wheel left or right. A new intermediate shaft has been developed to address this concern.
Steering Column Intermediate Shaft
Applicable Vehicles
S 2003 model year ES 300 vehicles. S 2004 model year ES 330 vehicles. S 2005 model year ES 330 vehicles produced BEFORE the Production Change Effective VINs shown below.
Production Change Information
Warranty Information
MODEL
PRODUCTION CHANGE EFFECTIVE VIN
ES 330
JTHBA30G#55098506
OP CODE
DESCRIPTION
TIME
OFP
T1
T2
ST4008
R & R Steering Intermediate Shaft
0.9
45220–33200
91
19
Applicable Warranty*: This repair is covered under the Lexus Comprehensive Warranty. This warranty is in effect for 48 months or 50,000 miles, whichever occurs first, from the vehicle’s in-service date. * Warranty application is limited to correction of a problem based upon a customer’s specific complaint.
Lexus s ASE Certification
Page 1 of 2
STEERING
Technical Service Information Bulletin
ST001-05
Title:
STEERING INTERMEDIATE SHAFT NOISE – ST001-05 Parts Information
Repair Procedure
April 29, 2005
PREVIOUS PART NUMBER
CURRENT PART NUMBER
PART NAME
QTY
45220–33200
45220–33240
Intermediate Shaft Assembly
1
Prior to removing the steering intermediate shaft, make sure the steering wheel and front wheels remain stationary. Once the intermediate shaft is removed, do NOT allow the steering wheel to spin freely. For information on replacing the steering intermediate shaft assembly, refer to the Technical Information System (TIS): 2003 – 2004 model year ES 330 Repair Manual: Steering Column: Steering Column Assy: Overhaul.
Page 2 of 2
Technical Service Information Bulletin December 21, 2001
REPAIR MANUAL SUPPLEMENT: VEHICLE PULLING TO ONE SIDE Models:
All ’02 – ’06 Model
TSIB REVISION NOTICE: S October 5, 2005: 2003 – 2006 model years have been added to Applicable Vehicles. A note has been added to the illustration in step 3. S March 1, 2002: OP Codes updated in Warranty Information. All previous versions of this TSIB should be discarded. Introduction
This bulletin contains general vehicle pulling diagnosis and repair procedures along with specific information to help correct pulling complaints. This information supplements Repair Manual procedures when the symptoms are: S The driver holds the steering wheel without exerting steering effort while driving straight ahead, and the vehicle drifts to the right or the left. S While driving straight ahead, the driver has to steer either to the right or the left to maintain straight driving.
Applicable Vehicles
Warranty Information
S 2002 – 2006 model year Lexus vehicles.
OP CODE
DESCRIPTION
TIME
ST1004
Preliminary Check & Road Test
0.6
Combo A
Switch Front Tire/Wheel & Road Test
0.5
Combo B
Reverse the Front One Side Tire
0.7
Combo C
Check Front Wheel Alignment
1.2
Combo D
Adjust Front Wheel Alignment
0.7
Combo E
Adjust Camber Setting
0.7
420091
Dismount and Mount Tire and Balance Wheel and Tire Assembly
0.5
Combo A
Each additional Wheel
0.3
OPN
T1
T2
45046 09020 45046–09020 31 99
42611–48030 42611 48030
NOTE: Above combination codes A, B, D and E include road test time. Applicable Warranty*: This repair is covered under the Lexus Comprehensive Warranty. This warranty is in effect for 12 months or 20,000 miles, whichever occurs first, from the vehicle’s in-service date. * Warranty application is limited to correction of a problem based upon a customer’s specific complaint.
Lexus s ASE Certification
Page 1 of 11
STEERING
ST004-01
Title:
REPAIR MANUAL SUPPLEMENT: VEHICLE PULLING TO ONE SIDE – ST004-01 Revised Contents
December 21, 2001
This bulletin is divided into the following sections: Wheel Alignment and Tire Characteristics . . . . . . . . . . . . . . . . . . . . . . . . . . . . Pages 2–3 Repair Procedure Flow Chart . . . . . . . . . . . . . . . . . . . . . . . . . . . . . . . . . . . . . . . . Page 4 Repair Procedures 1. Important Notice . . . . . . . . . . . . . . . . . . . . . . . . . . . . . . . . . . . . . . . . . . . . . Page 5 2. Troubleshooting . . . . . . . . . . . . . . . . . . . . . . . . . . . . . . . . . . . . . . . . . . . . . Pages 5–6 3. Vehicle Pulling Caused by Wheel Alignment . . . . . . . . . . . . . . . . . . . Pages 6–7 4. Vehicle Pulling Caused by Tire Conicity . . . . . . . . . . . . . . . . . . . . . . . Pages 7–9 5. Camber Adjustment Method . . . . . . . . . . . . . . . . . . . . . . . . . . . . . . . . . . Pages 9–10
Page 2 of 11
REPAIR MANUAL SUPPLEMENT: VEHICLE PULLING TO ONE SIDE – ST004-01 Revised Wheel Alignment & Tire Characteristics
December 21, 2001
1. Relationship Between Wheel Alignment and Vehicle Pulling to One Side When the cross camber or caster of the front wheel alignment is large, it can cause vehicle pulling.
WHEEL ALIGNMENT
DIRECTION OF VEHICLE PULLING
Camber
Vehicle pulls in direction of wheel with large camber value
Caster
Vehicle pulls in direction of wheel with small caster value
CAMBER
Straight–Ahead Driving
CASTER
Direction of Pull
Front P’
T’
P
T
a’ a Caster Trail (Large)
Caster Trail (Small) O
F
O’
F’
P, P’: Driving Force a, a’: Steering Axes O, O’: Center of Tire–Road Area F, F’: Reactive Force
If the cross camber or caster is within the specified range (30’ or less), noticeable vehicle pulling will not occur due to side-to-side differences in camber or caster. NOTE: On a flat road, if the cross camber or caster is 30’ or less and the steering wheel is held without exerting steering effort for 100 m (109 yards) when driving at 100 km/h (62 mph), the alignment–induced drift distance is approximately 0.5 m (1.64 ft).
Page 3 of 11
REPAIR MANUAL SUPPLEMENT: VEHICLE PULLING TO ONE SIDE – ST004-01 Revised Wheel Alignment & Tire Characteristics (Continued)
December 21, 2001
2. Relationship Between Tire Characteristics and Vehicle Pulling to One Side When radial tires are rotating, they have the characteristic of generating force in the lateral direction between the tire and the road surface. This lateral force is comprised of two factors: S Ply–steer, which changes direction according to the rotation direction of the tires. S Conicity, which is generated in a fixed direction regardless of the tire rotation direction. If these lateral forces are too strong, vehicle pulling will occur. A. Ply–Steer Lateral force due to ply-steer is produced by the construction of the belts inside the tire tread. With radial tires, the wire of the belt is slanted as shown in the illustration below. Thus, it is in the lateral direction that tire tread easily changes shape (stretches), and lateral force is generated between the tire and the road surface in the lateral direction. Rotation Direction
Easily–Stretched Direction
Wire Ply–Steer (Direction of Force Generation Varies According to Tire Rotation)
Belt
NOTE: Lateral force from ply-steer prevents vehicle drift caused by road slant, so in many cases lateral force to the right is provided for left-handed steering vehicles.
B. Conicity Conicity is lateral force resulting from uneven formation of the left and right sides of the tire. The direction the lateral force is exerted depends on the hardness of the side walls and the difference in height between the left/right sides of the tire.
Hard Part
Conicity (Direction Is Fixed Regardless of Direction of Tire Rotation)
NOTE: S In the case of vehicle pulling caused by tires, the lateral force which is exerted as a result of conicity has the greatest effect. On a flat road, if the steering wheel is held without exerting steering effort for 100 m (109 yards) when travelling at 100 km/h (62 mph), the vehicle may drift as much as 1.5 m (5 ft). S When vehicle pulling is due to conicity, the amount of drift can be reduced and the direction of drift can be changed by changing the location of the tire or reversing the tire when installing it on the wheel. Page 4 of 11
REPAIR MANUAL SUPPLEMENT: VEHICLE PULLING TO ONE SIDE – ST004-01 Revised Repair Procedure Flow Chart
December 21, 2001
START
Preliminary Check S Tire Pressure S Vehicle height S Brake Dragging
NO Is there steering off center?
*ROAD TEST Does the vehicle lead/pull? YES
NO COMPLETE
YES Adjust front tie rods. See TSIB ST002–01
YES
Are the tires uni–directional type? NO
NO ROAD TEST Does the vehicle still lead/pull?
Cross switch front tire and wheel assemblies (left & right)
YES
Choose the position of front tire & wheel assemblies where there is least amount of pull.
YES
Does the vehicle lead/pull in the same direction as before? NO
YES
Check front wheel alignment. Is it within specification?
NO
Is the lead/pull stronger than before?
NO
YES
Reverse the front left side tire and rebalance it.
Adjust front wheel alignment.
ROAD TEST Does the vehicle still lead/pull? NO
ROAD TEST Does the vehicle still lead/pull? YES
YES
Does the vehicle lead/pull to the left?
COMPLETE
YES
NO
Increase right front camber and decrease left front camber until lead/pull is eliminated.
NO
NO
NOTE: Do not exceed 1r of cross camber. Do not exceed adjustment range.
Increase left front camber and decrease right front camber until lead/pull is eliminated.
ROAD TEST Does the vehicle still lead/pull?
YES
your regional office.
* Select a flat road where the vehicle can be driven in a straight line for 100 meters at a constant speed of 35 mph. Please confirm safety and set the steering wheel to its straight position. Drive the vehicle in a straight line for 100 meters at a constant speed of 35 mph without exerting steering effort on the steering wheel. (1) The vehicle goes straight but the steering wheel has some angle. (2) The vehicle doesn’t go straight.
STEERING OFF CENTER
STEERING PULL
Page 5 of 11
REPAIR MANUAL SUPPLEMENT: VEHICLE PULLING TO ONE SIDE – ST004-01 Revised Repair Procedures
December 21, 2001
1. IMPORTANT NOTICE Before repairing vehicle pulling to one side, it is necessary to clearly identify the cause of the pulling condition. Frequently, the cause of the vehicle pulling to one side is diagnosed as wheel alignment. However, the actual cause may be lateral force generated by the tires. Performing wheel alignment when tire force is the cause could result in the wheel alignment being set at a value outside of specifications. This would then cause other problems such as uneven tire wear, etc. 2. Troubleshooting First determine whether vehicle pulling to one side is caused by a wheel alignment problem or tire characteristics, then decide which repairs to make. A. Perform the following checks and correct as necessary. a. Check tires for size, wear and for proper inflation pressure. b. Check whether the vehicle is noticeably tilted backward/forward or left/right. NOTE: Tilting of the vehicle produces a left–right difference in the camber and caster and can cause vehicle pulling to one side.
c. Check brakes for dragging. B. Confirm problem symptoms. With the customer accompanying you, drive the vehicle to confirm if the customer’s complaint involves vehicle pulling to one side or steering wheel off center. If the problem is steering wheel off center, adjust the front tie rods on the vehicle. Refer to Lexus TSIB ST002–01. Also check the direction of vehicle pulling and the extent of the pulling. C. Decide if vehicle pulling is due to wheel alignment or tires. a. Switch the left and right front tires (If the tires are non–unidirectional). b. Conduct a drive test to check whether the direction that the vehicle pulls has changed.
Page 6 of 11
SYMPTOM
PROBABLE CAUSE
CORRECTIVE ACTION
No change in vehicle pulling condition
Front wheel alignment
Proceed to Repair Procedure 3. Vehicle pulling caused by Wheel Alignment (Page 6)
Vehicle pulling eliminated
Tire conicity
Repair complete. Vehicle Pulling Caused by Tire Conicity (Page 3 and 6)
Vehicle pulling direction is reversed
Tire conicity
Proceed to Repair Procedure 4. Vehicle Pulling Caused by Tire Conicity (Page 7)
REPAIR MANUAL SUPPLEMENT: VEHICLE PULLING TO ONE SIDE – ST004-01 Revised Repair Procedures (Continued)
December 21, 2001
Helpful hints to determine cause of vehicle pulling: S The direction of lateral force from tire conicity becomes reversed when the left and right tires are switched. Therefore, if the pulling direction changes when the tires are switched, it can be concluded that vehicle pulling is caused by tire conicity. ORIGINAL TIRE POSITIONS Vehicle Pulling Direction (Right)
TIRES SWITCHED
Lateral Force by Conicity
The Vehicle is Pulled to the Right by the Lateral Force Exerted to the Right.
Vehicle Pulling Direction (Left)
Lateral Force by Conicity
The Direction of the Tires Which Exerted Lateral Force to the Right has Been Changed, so the Tires Now Exert Lateral Force to the Left and the Vehicle Now Pulls to the Left.
S If the pulling direction does not change after the front tires are switched, the cause of vehicle pulling is not tire conicity. In this case, the likely cause is a front wheel alignment condition. 3. Vehicle Pulling Caused by Wheel Alignment When it is determined by troubleshooting that the vehicle pulling to one side is caused by wheel alignment, perform repairs according to the following procedure. Vehicle Pulling to One Side
Check Front Wheel Alignment
Not Within Specification
Within Specification
Adjust Front Wheel Alignment
Road Test
OK
Within Specification But Vehicle Pulls
Vehicle Still Pulls
Adjust Cross Camber to Eliminate Vehicle Pulling NOTE: Do not exceed 1r of cross camber.
Page 7 of 11
REPAIR MANUAL SUPPLEMENT: VEHICLE PULLING TO ONE SIDE – ST004-01 Revised Repair Procedures (Continued)
December 21, 2001
WHEN VEHICLE PULLS TO LEFT
WHEN VEHICLE PULLS TO RIGHT
Increase right front camber and decrease left front camber until vehicle pulling is eliminated
Increase left front camber and decrease right front camber until vehicle pulling is eliminated
NOTE: S Keep the cross camber within 1r or less. S Keep the camber of each wheel within specifications (+/–45’ of center value). S If adjustment exceeds the specifications, uneven tire wear will result.
4. Vehicle Pulling Caused by Tire Conicity When it is determined by troubleshooting that the vehicle pulling to one side is caused by tire conicity, perform repairs according to the following procedures. Indication of Tire Conicity as a Cause: When the front tires are switched, the pulling direction changes. Proceed to STEP 1.
STEP 1: Remove the front left tire from the wheel and reverse the tire. Then perform a road test and check for change in the pulling direction. HINT: By performing this operation, it can be checked whether the left or right tire exerts a stronger lateral force. Either tire can be reversed. Shown here is an example of the left tire reversed.
If Vehicle Pulls in the Same Direction: Go to STEP 2. The lateral force generated by the right front tire is greater than the left tire, so the vehicle is pulling due to the lateral force of the right tire. ORIGINAL TIRE POSITIONS Vehicle Pulling Direction
LEFT TIRE REVERSE INSTALLATION Vehicle Pulling Direction (Same Direction)
Reversed
Lateral Force by Conicity (Smaller)
Page 8 of 11
Lateral Force by Conicity (Larger)
Lateral Force by Conicity (Smaller)
Lateral Force by Conicity (Larger)
REPAIR MANUAL SUPPLEMENT: VEHICLE PULLING TO ONE SIDE – ST004-01 Revised Repair Procedures (Continued)
December 21, 2001
If Vehicle Pulls in the Opposite Direction: Go to STEP 2. The lateral force generated by the left front tire is greater than the right tire, so the vehicle is pulling due to the lateral force of the left tire. ORIGINAL TIRE POSITIONS
LEFT TIRE REVERSE INSTALLATION
Vehicle Pulling Direction
Vehicle Pulling Direction (Opposite Direction) Reversed
Lateral Force by Conicity (Larger)
Lateral Force by Conicity (Smaller)
Lateral Force by Conicity (Larger)
Lateral Force by Conicity (Smaller)
If Vehicle Pull Is Eliminated: Repair Is Now Complete.
The lateral force generated by the left and right front tires is virtually the same, so the lateral force is neutralized and the vehicle travels straight ahead. The repair operation is now completed. STEP 2: Rotate the larger lateral force front tire with the rear tire and check the change in the vehicle pulling.
NOTE: By shifting the front tire with the larger lateral force to the rear, the vehicle pulling level is usually reduced.
If Vehicle Is Still Pulling: Go to STEP 3.
If Vehicle Pull Is Eliminated: Repair Is Now Complete.
Page 9 of 11
REPAIR MANUAL SUPPLEMENT: VEHICLE PULLING TO ONE SIDE – ST004-01 Revised Repair Procedures (Continued)
December 21, 2001
STEP 3: Adjust cross camber to eliminate vehicle pulling. HINT: If the tires are placed in the positions they were in during tire rotation when the least amount of vehicle pulling occurred, wheel alignment can be performed with a minimal amount of adjustment. WHEN VEHICLE PULLS TO LEFT
WHEN VEHICLE PULLS TO RIGHT
Increase right front camber and decrease left front camber until vehicle pulling is eliminated
Increase left front camber and decrease right front camber until vehicle pulling is eliminated
NOTE: S Keep the cross camber within 1r or less. S Keep the camber of each wheel within specifications (+/–45’ of center value). S If adjustment exceeds the specifications, uneven tire wear will result.
5. Camber Adjustment Method NOTE: After the camber has been adjusted, inspect the toe–in. NOTE: The method of camber adjustment differs for different models, so please refer to the repair manual of the vehicle involved. (This is a sample from the RX 300 Repair Manual).
A. Remove the front wheels and ABS speed sensor clamp. B. Remove the two nuts on the lower side of the shock absorber. C. Coat the threads of the nuts with engine oil. D. Temporarily install the two nuts. E. Adjust the camber by pushing or pulling the lower side of the shock absorber in the direction in which the camber adjustment is required. F. Tighten the nuts. Torque: 210 NSm (2,150 kgfScm, 155 ftSlbf)
Page 10 of 11
1 2
REPAIR MANUAL SUPPLEMENT: VEHICLE PULLING TO ONE SIDE – ST004-01 Revised Repair Procedures (Continued)
December 21, 2001
G. Install the front wheels. Torque: 103 NSm (1,050 kgfScm, 76 ftSlbf) H. Check the camber. NOTE: Adjusting value for the set bolts is 6’ – 30’ (0.1r – 0.5r). When making an adjustment of more than 45’, replace the upper and lower steering knuckle set bolts with the adjusting bolts. If the camber is not within the specification, use the table shown to estimate how much additional camber adjustment will be required, and select the appropriate camber adjusting bolt.
I.
Follow steps 5–a through 5–h again. Between steps 5–b and 5–c, exchange one or two selected bolts.
HINT: When exchanging the two bolts, exchange one bolt each time.
If Vehicle Pull Is Eliminated: Repair Is Now Complete.
If Vehicle Is Still Pulling: Your Regional Office For Further Assistance.
Page 11 of 11
Technical Service Information Bulletin
ECM RESET MEMORY FUNCTION Models:
’98 – ’05 Applicable Models
May 5, 2003
TSIB REVISION NOTICE: December 20, 2004: Applicable Vehicles section has been updated and modified, 2004 and 2005 model years added; and Reset Procedure 2 has been revised. Previous versions of this TSIB should be discarded. Introduction
Whenever an automatic transmission is replaced, overhauled or individual components are replaced, use this procedure to erase Engine Control Module (ECM, SAE term: Powertrain Control Module, PCM) “Learned Values” and minimize subsequent performance concerns. CAUTION: Failure to follow the following procedure may lengthen the time to readjust the “Learned Values,” potentially resulting in performance concerns.
Applicable Vehicles
Refer to Reset Procedure 1 for the following vehicles with Electronically Controlled Automatic Transmissions: S 1999 – 2003 model year ES 300 and RX 300 vehicles. S 2003 – 2005 model year GX 470 vehicles. S 2004 – 2005 model year RX 330 vehicles. Refer to Reset Procedure 2 for the following vehicles with Electronically Controlled Automatic Transmissions: S 1998 – 2005 model year GS 430/400/300, LS 430/400, LX 470, and SC 430/400/300 vehicles. S 2001 – 2005 model year IS 300 vehicles.
Warranty Information
OP CODE
DESCRIPTION
TIME
OFP
T1
T2
N/A
Not Applicable to Warranty
–
–
–
–
Lexus s ASE Certification
Page 1 of 3
TRANSMISSION & CLUTCH
TC002-03
Title:
RESET MEMORY FUNCTION – TC002-03 Revised Required SSTs
May 5, 2003
SPECIAL SERVICE TOOLS (SSTs)
PART NUMBER
QUANTITY
Lexus Diagnostic Tester Kit*
01001270
1
CAN Interface Module Kit*
01002744
1
01002593-005
1
12 Megabyte Diagnostic Tester Program Card with version 12.01a Software (or later)* *
Essential SSTs.
NOTE: Additional Diagnostic Tester Kits, CAN Interface Modules, Program Cards or other SSTs may be ordered by calling SPX/OTC at 1-800-933-8335.
Reset Procedure 1
1. Connect the Lexus Diagnostic Tester to the vehicle. 2. Reset the ECM (PCM). Refer to the procedures below.
A
B
*APPLICATION SELECT*
FUNCTION SELECT FOR NORTH AMERICA 1: OBD/MOBD 2: ENHANCED OBD II 3: CARB OBD II 4: BREAK–OUT BOX 5: NVH 6: AUTOPROBE 7: 02 RPM CHECK 8: SNAPSHOT REVIEW 9: SETUP 0: GAS ANALYSIS
1: DIAGNOSIS 2: CUSTOMIZE 3: ECU REPROGRAM
D RESET MEMORY NOTICE DO NOT USE THIS FUNCTION UNLESS INSTRUCTED BY REPAIR MANUAL. ONLY USE AFTER REPLACING THE ENGINE, AUTO TRANS, OR ECM ON CERTAIN VEHICLES.
E RESET MEMORY EXECUTING THIS FUNCTION WILL RESET THE LEARNED VALUES IN THE ECM. DO YOU WISH TO RESET THE ECM? [YES] to CONTINUE [YES] [NO] to EXIT
C DIAGNOSTIC MENU ENGINE 1: DATA LIST 2: DTC INFO 3: ACTIVE TEST 4: SNAPSHOT 5: SYSTEM CHECK 6: 6: RESET RESET MEMORY MEMORY 7: MONITOR STATUS 8: CHECK MODE
F RESET MEMORY RESETTING COMPLETE
PRESS [ENTER]
3. Start the engine and warm it up to normal operating temperatures before test–driving. 4. Perform a thorough test drive with several accelerations from a stop with “light throttle” application until proper transmission shifting is verified.
Page 2 of 3
RESET MEMORY FUNCTION – TC002-03 Revised Reset Procedure 2
May 5, 2003
1. Disconnect the negative battery cable for 5 minutes. 2. Reconnect battery cable. 3. Start the engine and warm it up to normal operating temperatures before test–driving. 4. Perform a thorough test drive with several accelerations from a stop with “light throttle” application until proper transmission shifting is verified.
Page 3 of 3
Technical Service Information Bulletin August 4, 2003
ECM CALIBRATION: SHIFT FEELING ENHANCEMENT Models:
’02 – ’03 ES 300 & ’04 – ’05 ES 330
REVISION NOTICE: S April 1, 2005: 2004 – 2005 model year ES 330 vehicles have been added to Applicable Vehicles. Introduction and Note have been updated on page 1. Calibration Identification Chart has been updated to include ES 330 calibration IDs. S August 6, 2003: There has been a change in Warranty Time. Previous versions of this TSIB should be discarded. Introduction
To improve the transmission shift feeling during specific operating modes, the Engine Control Module (SAE term: Powertrain Control Module/PCM) calibration has been revised. These improvements include: S Reduced downshift lag when accelerating at speeds from 10 to 20 mph. S Less gear hunting when driving on/off accelerator pedal at 20 to 30 mph (for example: during heavy rush–hour traffic). S Improved response rate during heavy acceleration from a stop. NOTE: S Version 12.01a or later Diagnostic Tester software is required to perform this procedure. S Before proceeding, the ECM (PCM) calibration has NOT been updated by checking for the Authorized Modifications Label (shown in step 1 of the Repair Procedure). S Harsh ATM shifting may result if any Repair Procedure steps are omitted (specifically steps 2 and 4 of “Flash Reprogram ECM” on page 6).
Applicable Vehicles
Warranty Information
S 2002 – 2003 model year ES 300 vehicles. S 2004 – 2005 model year ES 330 vehicles.
OP CODE
EG5017
DESCRIPTION
Recalibrate ECM Engine & Transmission
TIME
OFP
0.9
89666–3325# 89666–3344# 89661–33B3# 89661–33A4#
T1
T2
26 99
Applicable Warranty*: This repair is covered under the Lexus Federal Emissions Warranty. This warranty is in effect for 96 months or 80,000 miles, whichever occurs first, from the vehicle’s in-service date. * Warranty application is limited to correction of a problem based upon a customer’s specific complaint.
Lexus s ASE Certification
Page 1 of 6
TRANSMISSION & CLUTCH
TC004-03
Title:
ECM CALIBRATION: SHIFTING ENHANCEMENT – TC004-03 Revised Parts Information
August 4, 2003
PREVIOUS PART NUMBER
CURRENT PART NUMBER
PART NAME
QTY
N/A
00451–00001–LBL
Authorized Modifications Label
1
NOTE: Authorized Modification Labels may be ordered in packages of 25 from the Materials Distribution Center (MDC) through Dealer Daily Dealer Materials System or by calling the MDC at 1–800–622–2033.
Required SSTs
SPECIAL SERVICE TOOLS (SSTs)
PART NUMBER
QTY
DRW**
CAN Interface Module Kit*
01002744
1
8
Lexus Diagnostic Tester Kit*
01001270
1
8
01002593-005 (Component of 01001270)
1
12 Megabyte Diagnostic Tester Program Card with version 12.01a Software (or later)* * Essential SSTs. ** Refers to drawer number in SST Storage System.
NOTE: Additional Diagnostic Tester Kits, CAN Interface Modules, Program Cards, or other SSTs may be ordered by calling SPX/OTC at 1-800-933-8335.
Page 2 of 6
ECM CALIBRATION: SHIFTING ENHANCEMENT – TC004-03 Revised Calibration Identification Chart
MODEL
ECM (U)
PREVIOUS CALIBRATION ID
NEW CALIBRATION ID
Main
33323000 33323100 33323200 33341000 33341100 33341200 33341300 33341400
33387000
Sub
53314000 53314100 53314200 53328000 53328100 53328200 53328300 53328400
53343000
Main
33350000 33350100 33360000 33360100
33360200
Sub
53334000 53340000
53340100
2002 – 2003 ES 300
2004 – 2005 ES 330
August 4, 2003
NOTE: S 2004 model year ES 330 vehicles, which have been flash reprogrammed using the procedures in this TSIB, will contain upgraded 2005 model year OBD II logic and will require VIN input. Refer to the 2005 model year ES 330 Repair Manual information on the Technical Information System (TIS) when checking Powertrain Diagnostic Trouble Codes (DTCs) on 2004 model year ES 330 vehicles that have been reprogrammed. S 2002 model year ES 300 vehicles, which have been flash reprogrammed using the procedures in this TSIB, will contain upgraded 2003 model year OBD II logic. Refer to the 2003 model year ES 300 Repair Manual information on the Technical Information System (TIS) when checking Powertrain Diagnostic Trouble Codes (DTCs) on 2002 model year ES 300 vehicles that have been reprogrammed.
Page 3 of 6
ECM CALIBRATION: SHIFTING ENHANCEMENT – TC004-03 Revised Repair Procedure
August 4, 2003
1. Check for the Authorized Modifications Label affixed to the vehicle in the location shown in Figure 1. Confirm if ECM (PCM) calibration has been updated. If not the latest ECM (PCM) calibration — go to step 2.
Replacement ECM (PCM) Part Number THE FOLLOWING MODIFICATIONS HAVE BEEN MADE: Calibration ID(s)
89666–33441 33387000, 53343000 THESE MODIFICATIONS HAVE BEEN APPROVED AS APPROPRIATE BY EPA AND CARB DEALER CODE: CHANGE AUTHORITY:
Dealer Code
DATE:
TSIB TC004–03
TSIB Number
Figure 1. Location of Authorized Modifications Label on 2002 and 2003 ES 300
Page 4 of 6
Date Completed
ECM CALIBRATION: SHIFTING ENHANCEMENT – TC004-03 Revised Repair Procedure (Continued)
August 4, 2003
2. Connect the Diagnostic Tester to the vehicle and select CURRENT ECU CAL from the ECU REPROGRAM MAIN MENU. Determine the vehicle’s current ECU calibration (see Figure 2). – The sample screen prints seen below are the 12.01a software version and may differ from subsequent software versions.
A
B
ECU REPROGRAM MAIN MENU
CURRENT ECU CAL
1: GET CAL FROM PC 2: CURRENT ECU CAL 3: UPDATE ECU CAL 4: CAL ON TESTER 5: CLEAR CAL DATA
CALIBRATION ID 33341300 53328300
Figure 2. Determining Current ECU Calibration
NOTE: S If Calibration ID matches “Previous Calibration ID” as shown in Calibration Identification Chart on page 3, proceed with flash reprogramming. S If Calibration ID matches “New Calibration ID” as shown in Calibration Identification Chart, this vehicle has already been programmed. Refer to TIS for diagnostic procedures applicable to any stored DTCs.
3. If ECU calibration ID is not the same as the “New Calibration ID” listed previously, proceed to Flash Reprogram ECM (PCM). 4. Flash Reprogram ECM (PCM) Follow the procedures outlined in Lexus TSIB No. SS001–01, “ECU Flash Reprogramming Process,” and flash the ECM (PCM) with the new calibration file update. NOTE: If the “Check Engine” light is ON when the ignition is turned back on to begin the reprogramming process, a scan tool cable problem exists. Refer to TSIB No. SS001–01, “ECU Flash Reprogramming Process.”
Page 5 of 6
ECM CALIBRATION: SHIFTING ENHANCEMENT – TC004-03 Revised Repair Procedure (Continued)
August 4, 2003
5. Reset the ECM (PCM) learned values using the diagnostic tester. Refer to the procedures below. – The sample screen prints seen below are the 12.01a software version and may differ from subsequent software versions. NOTE: Failure to reset the ECM (PCM) memory will result in continued ATM shifting complaints.
A
B
*APPLICATION SELECT*
FUNCTION SELECT FOR NORTH AMERICA 1: OBD/MOBD 2: ENHANCED OBD II 3: CARB OBD II 4: BREAK–OUT BOX 5: NVH 6: AUTOPROBE 7: 02 RPM CHECK 8: SNAPSHOT REVIEW 9: SETUP 0: GAS ANALYSIS
1: DIAGNOSIS 2: CUSTOMIZE 3: ECU REPROGRAM
D RESET MEMORY NOTICE DO NOT USE THIS FUNCTION UNLESS INSTRUCTED BY REPAIR MANUAL. ONLY USE AFTER REPLACING THE ENGINE, AUTO TRANS, OR ECM ON CERTAIN VEHICLES.
E RESET MEMORY EXECUTING THIS FUNCTION WILL RESET THE LEARNED VALUES IN THE ECM. DO YOU WISH TO RESET THE ECM? [YES] to CONTINUE [YES] [NO] to EXIT
C DIAGNOSTIC MENU ENGINE 1: DATA LIST 2: DTC INFO 3: ACTIVE TEST 4: SNAPSHOT 5: SYSTEM CHECK 6: 6: RESET RESET MEMORY MEMORY 7: MONITOR STATUS 8: CHECK MODE
F RESET MEMORY RESETTING COMPLETE
PRESS [ENTER]
Figure 3. ECM (PCM) Learned Values Reset
6. Follow the procedures outlined in TSIB No. EG012–04, “Entering VIN During ECM (PCM) Replacement and/or DTC P0630,” and write the VIN to the ECM (PCM). 7. Start the engine and warm it up to normal operating temperature before test–driving. 8. Test drive vehicle to confirm proper vehicle operation. 9. Enter the required information on the Authorized Modifications Label and affix it to the vehicle at the location shown in Figure 1 (page 4). The Authorized Modifications Label is available through the MDC, P/N 00451–00001–LBL. 10. Calibration update is complete. NOTE: S Select unleaded gasoline with an Octane Rating of 91 (Research Octane Number 96) or higher for optimum engine performance. S The effect of the new calibration may become more apparent after several days of driving as the ECM (PCM) ”learned values” are re–established from the customer’s driving.
Page 6 of 6
Related Documents 3m3m1z
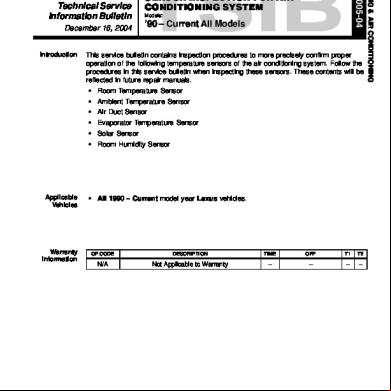
Technical Service Information Bulletin.pdf 371y14
December 2019 63
Zf 5hp19 Technical Service Information 144s6h
October 2019 306
Global Service Way - Technical Information 2h6c38
April 2023 0
Technical Information 3r203o
November 2021 0
Consilium-vdr Technical Information 57k4i
February 2022 0