Preview Elegant Hardanger Embroidery By Yvette Stanton 4b2f3d
This document was ed by and they confirmed that they have the permission to share it. If you are author or own the copyright of this book, please report to us by using this report form. Report 3b7i
Overview 3e4r5l
& View Preview Elegant Hardanger Embroidery By Yvette Stanton as PDF for free.
More details w3441
- Words: 4,437
- Pages: 11
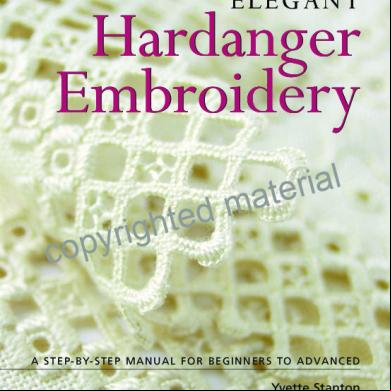
ELEGANT
Hardanger Embroidery l a i r e t a
m d hte
g i r y p o c
A S T E P - B Y- S T E P M A N U A L F O R B E G I N N E R S T O A D VA N C E D
Yvette Stanton
You can find the instructions for these projects on the pages listed. Clockwise from top left:
Waterlily cushion, pages 56–7; Karen doily, pages 46–7; Scissors case, pages 39–40; Handtowel, page 38; Patchwork cushion, pages 33–5; Star cushion, pages 44–5; Claire doily, pages 52–3; Genevieve framed doily, page 58.
l a i r e t a
More projects shown inside back cover.
g i r y p o c
m d hte
Contents Introduction ................................................................4
Spider’s web .........................................................24 Knotted picot .......................................................25 Looped picot ........................................................26 Lacy buttonhole edge ...........................................27
Before you begin.........................................................5
Triangular webs with buttonhole bars ...................28
Fabric for Hardanger...............................................6
Twisted Y with looped picots ................................29
Thread ....................................................................6
Spider’s web in eyelets..........................................29
Other equipment ....................................................7
Cable stitch ..........................................................30
Preparing fabric for stitching...................................7
Beading ................................................................30
Reading a Hardanger chart .....................................8
Cutting Hardanger from the fabric........................31
Stitching order ........................................................8 Caring for embroidery ............................................9 Hardanger discussion forum .................................10 Hardanger projects ....................................................32 Patchwork cushion ...............................................33 Hardanger box......................................................36 Stitch instructions and techniques .............................11
Hand towel...........................................................38
Notes....................................................................12
Scissors case .........................................................39
Starting with a waste knot....................................12
Christmas stocking ...............................................41
Starting a new thread ...........................................12
Square sampler .....................................................43
Kloster blocks .......................................................13
Star cushion..........................................................44
Satin stitch............................................................14
Karen doily ...........................................................46
Buttonhole edge...................................................14
Gift cards..............................................................48
Eyelets ..................................................................16
Honeysuckle tablecloth .........................................50
Algerian eyelet stitch ............................................16
Claire doily............................................................52
l a i r e t a
m d hte
Four-sided stitch ...................................................17
Trish runner ..........................................................54
Faggot stitch.........................................................17
Waterlily cushion ..................................................56
Cutting and removing threads for needleweaving...18
Genevieve doily ....................................................58
Needleweaving .....................................................19
Organza bolster ....................................................59
Wrapped bars .......................................................22
Appendix – names, symbols and stitches...................62
Dove’s eye stitch ...................................................22
Acknowledgments ....................................................63
Greek cross...........................................................23
Index ........................................................................64
g i r y p o c
3
Fabric for Hardanger Hardanger embroidery is a counted thread embroidery requiring even-weave fabric. Even-weave fabric has the same number of threads across the warp and weft, over the same distance. To check whether a fabric is even-weave, insert a pin in the fabric. From the pin, measure 5cm (2in) along both the warp and weft, marking the end of each distance with another pin. Count the number of threads between the pins. If the fabric is even-weave, the number of threads will be the same over both distances. The most commonly used fabrics are even-weave linens, cottons and cotton/viscose blends. Aida cloth is not suitable for Hardanger embroidery. Even-weave linen and many other even-weaves have a weave of single threads. Hardanger fabric, so called because it is used most often for Hardanger embroidery, is made of a weave of double threads.
Hardanger fabric (cotton)
Even-weave linen
Thread Hardanger embroidery uses two weights of thread. The heavier weight is used for satin stitching, and the lighter weight is used for all other stitching, including needleweaving and eyelets. Occasionally a third, even lighter weight may be used for pulled thread work. Pearl cotton (or perle coton) is the thread most often used for Hardanger. It is made of two strands twisted together and is indivisible (it cannot be split as it will fall apart). Pearl cotton comes in four different weights: Numbers 3, 5, 8 and 12. No.3 is the thickest, and used only for very low counts of fabric. No.12 is the thinnest, used for much finer work on higher counts of fabric. Some of these weights are available in skeins, some as balls and some are available in both. Generally, the colour range is larger in skeins. The weight of the threads to be used is dependent on the count of the fabric. The heavier weight of thread must be able to provide good coverage of the fabric when sewn as satin stitch. Choose a weight that is similar to the thickness of the fabric’s threads. The lighter thread to use in combination with the thicker thread would be the next weight down. For example, on 28 count fabric, use pearl cotton No.5 for the satin stitching, and pearl cotton No.8 for all other stitching. Stranded embroidery cotton can also be used for Hardanger. Having a much wider range of colours available than pearl cottons, stranded cotton can be very useful. To create the two weights of thread needed, different numbers of strands are used. For very fine needleweaving, a single thread of stranded cotton can produce very lacy results. Before use, stranded cotton must always be “stripped”: all the threads must be separated from each other and recombined. For two stranded work, remove one thread from the length to be used, by pulling it from the end of the six, and then another thread. The two threads are then put back together
l a i r e t a
m d hte
g i r y p o c
Lugana (cotton/viscose
Aida (not suitable
blend)
because of its weave)
Traditionally, Hardanger is stitched in white thread on white cloth, but many designs are now made with either coloured cloth or thread, or both.
FABRIC COUNT The “count” of an even-weave fabric refers to the number of threads per inch. Inches are used as the unit of measurement for the count of fabric, even in countries where metric measurements are standard. A 25 count fabric (i.e. 25ct) has 25 threads per inch, a 36 count fabric has 36 threads per inch, etc. Count can also be referred to as TPI or “threads per inch”. The lower the count of the fabric, the larger the embroidery stitches will be. To work out how large an embroidery will be on a specific count of fabric, you will need to know how many threads the embroidery will cover. If the
6
embroidery is 100 threads square, on a 25 count fabric it will measure 4 inches or approximately 10cm. On a 20 count fabric, the same design will measure 5 inches or approximately 12.5cm. To work out the size of the embroidery in inches, divide the number of threads covered, by the count of the fabric. To work out the number of centimetres, multiply the number of inches by 2.54.
and used together. For six stranded work, all threads should still be separated. Stripping threads ensures that the strands lie flat when used and are less likely to twist around each other, producing a more pleasing result. Embroidery threads come in a wide range of colours and are also available in metallics and hand dyed variegated colour schemes. They are most often 100 per cent cotton, but some varieties are silk, linen, wool, or rayon, or a blend of fibres.
LENGTH OF THREAD When stitching, I use approximately 80cm (32in) of thread. This length is easily measured out from skeins of pearl cotton by using the length of the skein as a guide. Take off the two paper bands and untwist the skein. Find an end and pull away a piece twice the length of the skein. Cut the piece off. It should be approximately 80cm (32in). When you are sure that this length suits you, you can cut all the loops of one end of the untwisted skein so that all pieces are the same length. You might not want to do this for a variegated thread, so that you can have more control over the placement of the colour variations. If the length of thread you are using consistently becomes dull and furry before you have finished with it, it is too long and you should use a shorter piece. Never re-use thread that you have unpicked. It will be noticeably less shiny than a fresh piece of thread and create an uneven visual effect in your work.
SCISSORS A pair of sharp, fine pointed embroidery scissors are essential equipment for Hardanger. They must be very sharp and fine to allow for the careful cutting of the fabric’s threads very close to the embroidery, without cutting through the embroidered threads. A pair of scissors that are not sharp or fine enough, or used incorrectly, can really make the difference between Hardanger embroidery that is executed to a high standard and Hardanger embroidery that is only average. It is worth investing in a quality pair.
EMBROIDERY HOOP Some Hardanger embroiderers prefer to use an embroidery hoop while stitching as they find this gives them a better result. As a matter of personal preference, I choose not to use a hoop for Hardanger embroidery, although I use one for most other embroidery. Experiment with and without a hoop to see what you prefer for your work.
Preparing fabric for stitching
l a i r e t a
Before you begin, it is important to finish the edge of the fabric so that it doesn’t fray as you stitch. To do this, either overlock the edge with a sewing machine or overlocker, or hand stitch with blanket stitch.
m d hte
g i r y p o c
Other equipment NEEDLES
The needles used for Hardanger embroidery are tapestry needles. Tapestry needles have a round point which makes them less likely to split the fabric threads. Because Hardanger is a counted embroidery, it is important that the stitches are worked in the spaces between the threads, and that the threads aren’t split. Some Hardanger embroiderers prefer to use two sizes of needle for their embroidery – a larger one for the thicker thread and a smaller one for the thinner thread. However, all the embroideries in this book have been done with the one size: a No.24 tapestry needle. The eye size of needles varies between brands. If you find it difficult to fit the thread through the eye, change to the next larger size of needle. If you find that your thread is difficult to pull through the fabric, change to a larger size needle.
COUNTED TACKING
Because Hardanger is worked on the basis of a four thread block, counted tacking carefully stitched over and under groups of four threads will help in the correct positioning of the stitching. Use pale coloured machine sewing thread, so that when it is removed it will not leave any dark fibres in the fabric. To begin tacking, find the centre of the fabric by folding it in half both ways. Mark the centre with a pin. Enter the needle at the centre. Leave a tail of thread long enough to tack to the other edge. Bring the needle back up again after two threads. Weave over and under groups of four threads across to the edge of the fabric and secure the end of the thread.
7
Notes
METHOD 2
The difficulty rating of each stitch or stitch combination is indicated by a cotton reel symbol next to the heading for each stitch. A stitch or technique suitable for beginners. A stitch or technique suitable for intermediate embroiderers. A stitch or technique suitable for advanced Hardanger embroiderers. Stitches may have variations with differing levels of difficulty. In these cases, the difficulty rating is shown beside the heading for each variation. Fundamental techniques and information which are for all stitchers do not show a rating. The stitch instructions are ordered within the book following the steps outlined in ‘Stitching order’ on page 9. The stitch diagrams in this book use the following convention: the heavier weight threads are shown as striped, and the lighter weight threads are plain. Practise each of the stitches before working on a project. This will mean that by the time you come to do your project you will feel much more confident with the stitches. You can use the sample pieces to build up a record of your stitching experience by assembling them in a scrapbook or folder.
A waste knot is used to secure a thread in an area where there is no previous stitching.
METHOD 1 1 Work out where the new stitching needs to begin and where the stitching line will continue. Tie a knot in the end of the thread, large enough not to slip through the holes in the fabric. 2 From the front of the fabric enter the needle about 10cm (4in) from where the stitching needs to begin. The waste knot should sit loosely on the front of the fabric. Make sure it is well away from any subsequent stitching. Begin stitching. 3 When a reasonable amount of stitching has been completed, cut off the knot and ease the end through to the back. Thread the needle onto this end and work it into the back of the stitching to secure it.
12
stitching.
1 Work out where the new stitching needs to begin and where the stitching line will continue. Tie a knot in the end of the thread, large enough not to slip through the holes in the fabric. 2 From the front of the fabric enter the needle about 5cm (2in) away from the beginning point, where it will be covered by the subsequent line of stitching. Bring the needle back through to the front at the beginning point of the stitching. The waste knot should sit loosely on the front of the fabric. 3 Begin stitching, checking that the waste knot thread is caught into the back of the stitches. When the stitching es the waste knot, carefully cut off the knot without damaging any of the stitches. Ease the end of the thread through to the back of the fabric.
l a i r e t a
Starting a new thread
m d hte
g i r y p o c
Starting with a waste knot
This method works well for long straight lines of
1 Thread the needle with the new thread. With the back of the fabric facing you, take the thread through the back of about 5cm (2in) of stitches closest to where you need to continue stitching. If the previous thread was secured under the same threads to finish, make sure the new thread does not pull it back out again by holding its end as you begin the new one. 2 Give the thread a very light tug to check that it is reasonably secure. If not, work through the back of a few more stitches or take a small backstitch through the back of the stitches. When working pulled thread stitches, make sure the new thread is well secured. Because of the tension needed to work the stitch, if the new thread is not well secured it will slip out again as you begin stitching. If there is no previous stitching adjacent to where you need to stitch, use the waste knot method.
Finishing a thread To finish off a thread, turn the fabric over so the back is facing. Slide the needle under the back of the last few stitches. With kloster blocks I usually take the thread
through the back of at least five blocks. For other stitches take the needle through a similar distance. Always make sure you leave enough thread to enable you to secure it well. If you don’t have enough thread to end off, undo a few stitches to give you more length to work with. Never finish a thread halfway through a kloster block or any other stitch combination. Doing so can cause the stitch to sit incorrectly, and could cause your
out again one thread to the left of the base of the previous stitch. 4 Continue working left, with each stitch one thread to the left of the previous one until there are five parallel stitches. This completes the second kloster block. 5 To begin the third kloster block, count four stitches to the left of the end of the last stitch and bring the needle up as before. Repeat the instructions to build up a line of kloster blocks.
stitch tension to go awry. If the thread you are using
The back of the work
has become slightly worn, the new thread will look
should look like the line
considerably different next to it, making the thread
of stitching on the left.
change very obvious. This effect will be lessened if
If it looks like the line
the thread is changed at the end of a kloster block.
on the right, the direc-
BACK
✓
RIGHT
✗
WRONG
tion has been reversed
in error (two errors shown). Such errors can cause the
Kloster blocks
stitching to unravel when the fabric threads are cut.
Kloster blocks are the basic building blocks of all Hardanger designs. They are made up of five satin stitches over a square of four threads. Kloster blocks are the first stitches worked in a Hardanger design, with the heavier of the two weights of cotton being used. Kloster blocks are most commonly stitched in diagonal lines. Less commonly, they are stitched in line with the fabric’s grain. When stitching kloster blocks it is important to count carefully. As they are the foundation for all other parts of Hardanger designs, care should be taken to make sure all elements are in the correct place from the outset.
STRAIGHT LINES Work the first kloster block. Leave a space of four threads and work another block. Continue in the same way, building up a straight line of spaced kloster blocks in which all blocks face the same direction.
l a i r e t a
m d hte
g i r y p
co
The back of the work
BACK
✓ ✗
should look like the top
RIGHT
line of stitching. In the bottom line, the direc-
WRONG
tion has been reversed in
DIAGONAL LINES
error (two errors shown). Such errors can cause the
1 Bring the needle out from the back to the front of the fabric. Insert the needle four threads to the right. Bring the needle out again, one thread up from the beginning of the first stitch. 2 Continue, making each stitch one thread higher than the previous one, until there are five parallel stitches. 3 Bring the needle out again through the same hole as for the beginning of the last stitch. Count four threads up and enter the needle. Bring it
stitching to unravel when the fabric threads are cut.
MISTAKES TO WATCH OUT FOR It is very easy to make mistakes while stitching kloster blocks. As they are the first elements of the design to be stitched, there is often only the counted tacking to cross check against. As you stitch check, check and recheck that all your stitching is in the correct place! When stitching in diagonal lines the corners of kloster blocks touch.
✓
RIGHT
✗
WRONG
✓
RIGHT
Make sure that tension is constant throughout. Tension that is too tight will cause the fabric’s threads to bunch up. Tension that is too loose will mean
13
Patchwork cushion
■
This cushion beautifully combines patchwork and Hardanger. The outer Hardanger designs feature surface stitchery and are highlighted in green to match the patchwork. The centre design features elegant cream on cream.
■ ■
1 skein No.5 DMC pearl cotton, to match green fabric 1 ball No.8 DMC pearl cotton, colour 712 (cream) No.24 tapestry needle
l a i r e t a
m d hte
g i r y p o c
DIFFICULTY Beginner FINISHED SIZE 40 x 40cm (16 x 16in) STITCHES USED Kloster blocks, satin stitch, eye-
lets, needleweaving bars, four-sided stitch, Algerian eyelet stitch.
MATERIALS ■
■ ■
■
■ ■ ■ ■ ■
■
5 pieces 11 x 11cm (43/8 x 43/8in) cream Hardanger fabric, 22 count 4 pieces 11 x 11cm (43/8 x 43/8in) cream cotton fabric 75cm (30in) green floral cotton fabric, 120cm (47in) wide 15cm (6in) pink floral cotton fabric, 120cm (47in) wide 10cm (4in) medium-weight fusible interfacing 3.6m (4yds) cotton edging lace 2 x 18mm (13/4in) buttons 35cm (14in) cushion insert machine sewing thread, one to match green fabric and one to match lace 1 skein No.5 DMC pearl cotton, colour 712 (cream)
EMBROIDERY
You must be accurate when positioning the embroidery in the centre of each patch.
Design A Work satin stitch ships in green pearl cotton. Stitch kloster blocks in corners with No.5 pearl cotton, colour 712. Work eyelets in No.8 pearl cotton, colour 712. Design B Work the satin stitch star in green pearl cotton. Sew eyelets and four-sided stitch with No.8 pearl cotton, colour 712. The four-sided stitch should be worked as a surface stitch with regular tension. Design C Work kloster blocks in green pearl cotton. Sew the eyelets, four-sided stitch (as a surface stitch), and all half Algerian eyelets in No.8 pearl cotton, colour 712. Design D Work kloster blocks and ships in green pearl cotton. Work eyelets and four-sided stitch (as a surface stitch) in No.8 pearl cotton, colour 712. Design E Work all satin stitch in No.5 pearl cotton, colour 712. Work Algerian eyelets in No.8 pearl cotton, colour 712. Stitch needleweaving in No.8 pearl cotton, colour 712.
33
Index acetate, photocopier 8 advanced projects 52–61 Algerian eyelet stitch 16–17 aida 6 backing out of a corner 21 beading 9, 31 beginner projects 35–42 bolster 59–61 box 36–7 buttonhole bars 28 buttonhole edge 9, 14–16 cutting from fabric 31 lacy 27–8 cable stitch 30 cards 48–9 caring for embroidery 9–10 chart creating a full chart 8 reading 8 Christmas stocking 41–2 Claire doily 52–3 count, of fabric 6 counted tacking 7 cushion patchwork 33–5 star 44–5 waterlily 56–7 cutting 9 threads 18–19 fixing mistakes 19, 31 from the fabric 31 where to cut 18–19, 31 diagonal lines 13 difficulty rating 12 discussion forum 10 doily Claire 52–3 Genevieve 58 Karen 46–7 double cable stitch 30 dove’s eye stitch 22 in a wrapped circle 22–3 drawn thread work 9 edging, buttonhole 9, 27–8 embroidery hoop 7 even-weave 6
eyelets 9, 16 Algerian eyelet stitch 16–17 spider’s web in 29–30 fabric 6 count 6 preparing for stitching 7 cutting embroidery from 31 faggot stitch 17–18 filling stitches 20, 22–7, 28–30 finishing a thread 12–13, 19, 20–1, 27, 31 four-sided stitch 17 forum, Hardanger discussion 10 Genevieve framed doily 58 gift cards 48–9 Greek cross 23–4 border 23–4 reverse 24 hand towel 38 hardanger box 36–7 hardanger fabric 6 hem 9 honeysuckle tablecloth 50–1 ironing 10 inside corner buttonhole edge 15 greek cross border 24 intermediate projects 43–51 Karen doily 46–7 kloster blocks 9, 13–14 substitutes 14 knotted picot 25–6 lacing thread across the back 21, 27 lacy buttonhole edge 27–8 left-handed Hardanger 9 linen, even-weave 6 looped picot 26–7, 29 Lugana 6 mistakes 8, 13–14, 18, 19, 31 needle 7, 16, 31 needleweaving 9, 19–21 backing out of a corner 21 lacing thread across the back 21 starting and finishing a thread 19, 20–1 straight lines 20 zigzags 20 organza bolster 59–61
64
l a i r e t a
m d hte
g i r y p o c
outside corner buttonhole edge 15 greek cross border 24 patchwork cushion 33–5 pearl cotton 6 photocopier acetate 8 picots 25–7, 29 pulled thread work 9 stitches 16–18 quarter cross foundation stitch 23 reverse Greek cross 24 runner 54–5 sampler 43 satin stitch 9, 14, 19 scissors 7 case 39–40 correct use of 18, 31 ships, satin stitch 14 spider’s web 25–6 in eyelets 29–30 square sampler 43 star cushion 44–5 stars, satin stitch 14 starting a thread 12,19, 20–1, 27, 31 stitching order 9 stocking 41–2 straight lines kloster blocks 13 needleweaving 20 stranded cotton 6 stripping threads 6 surface stitchery 9, 16–17, 30 tablecloth 50–1 tacking, counted 7 tapestry needle 7 thread 6 finishing 12–13, 19, 20–1, 27, 31 length to use 7 starting 12,19, 20–1, 27, 31 triangular webs with buttonhole bars 28–9 Trish runner 54–5 twisted Y with looped picots 29 washing 10 waste knot 12 waterlily cushion 56–7 wrapped bars 22 zigzags 20
You can find the instructions for these projects on the pages listed. Clockwise from top left:
Trish runner, pages 54–5; Hardanger box, pages 36–7; Square sampler, page 43; Honeysuckle tablecloth, pages 50–1; Organza bolster, pages 59–61; Christmas stocking, pages 41–2; Gift cards, pages 48–9.
l a i r e t a
More projects shown inside front cover.
g i r y p o c
m d hte
You can do Hardanger embroidery! Do you want to try Hardanger embroidery but think it looks too difficult? Have you mastered the basics and want new challenges? This manual will take you step by step from novice to advanced stitcher, with helpful diagrams and hints and tips at every stage. Stunning Hardanger projects, graded beginner, intermediate and advanced, will guide you to your next level of expertise. You will refer to this manual again and again. You will discover: ü how to create the stitches of Hardanger embroidery ü how to work those harder stitches that you don’t get in beginners books ü hints and tips that you normally only learn in classes ü that you don’t need to be afraid of cutting the fabric threads ü how to fix mistakes ü how to use your skills to work elegant Hardanger projects ‘I got your books: fantastically good! The Hardanger one is the best book on that topic that I've ever seen. The instructions are not only clear, with excellent graphics, but you also give a good view of how the stitches should look on the back, and shouldn’t look! You also give an idea of how to tuck in ends, and move from one bit to the other. That’s precisely what the student needs, and doesn’t get in the other books. That chapter of instructions is really something special.’ —J.O’L. Queensland, Australia
l a i r e t a
m d hte
‘I really wish I’d found this book at the beginning of my hardanger learning curve. I taught myself Hardanger from magazine instructions and didn’t realize I’d also taught myself some bad habits. This book is really outstanding and I would recommend it to anyone interested in Hardanger – from beginner to experienced!’ —R.R. California, USA
g i r y p o c
Yvette Stanton is a respected embroidery teacher and awardwinning needlewoman. In 2000 she won the Nordic Needle Annual Hardanger Design Contest. Yvette is also the author of ‘Ukrainian Drawn Thread Embroidery: Merezhka Poltavska’ and with co-author Prue Scott ‘Mountmellick Embroidery: Inspired by Nature’. Yvette regularly contributes articles on the history of needlework and embroidery projects to leading Australian and international embroidery magazines. www.vettycreations.com.au
This manual has taught thousands of stitchers how to create elegant Hardanger embroidery, and it will teach you too.
Related Documents 3m3m1z
Preview Elegant Hardanger Embroidery By Yvette Stanton 4b2f3d
November 2019 73
Preview The Left-handed Embroiderer's Companion: A Step-by-step Stitch Dictionary By Yvette Stanton 1t431g
November 2019 26
Embroidery 2m123q
November 2021 0Elegant Brochure 47486a
December 2019 30
Bordado Hardanger 612pn
December 2019 66
Elegant People 563t4v
December 2019 30More Documents from "Vetty Creations" 6y401a
Preview The Left-handed Embroiderer's Companion: A Step-by-step Stitch Dictionary By Yvette Stanton 1t431g
November 2019 26
Preview Elegant Hardanger Embroidery By Yvette Stanton 4b2f3d
November 2019 73
Ep 8.4.4.2 Sop Penilaian Kelengkapan 3k3e59
April 2020 23
Sop Penggunaan Alat Pelindung Diri Petugas Laboratorium 3a3ft
August 2020 0
Skeleton Keys And Crossroads Folk Magic Meetup 485qy
December 2019 37